

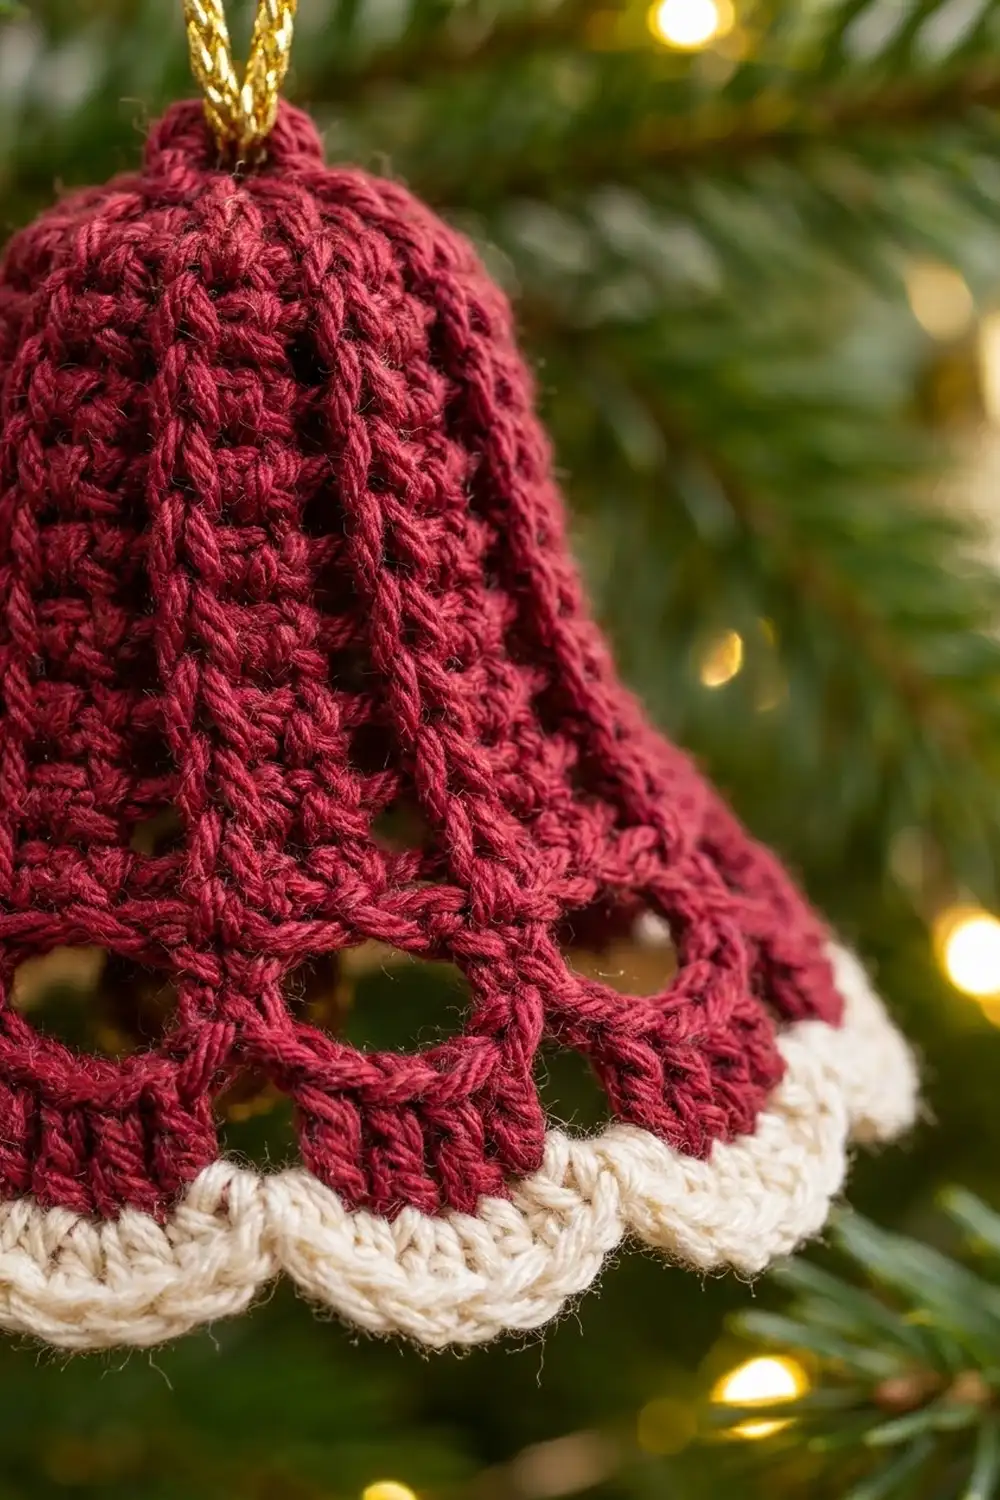
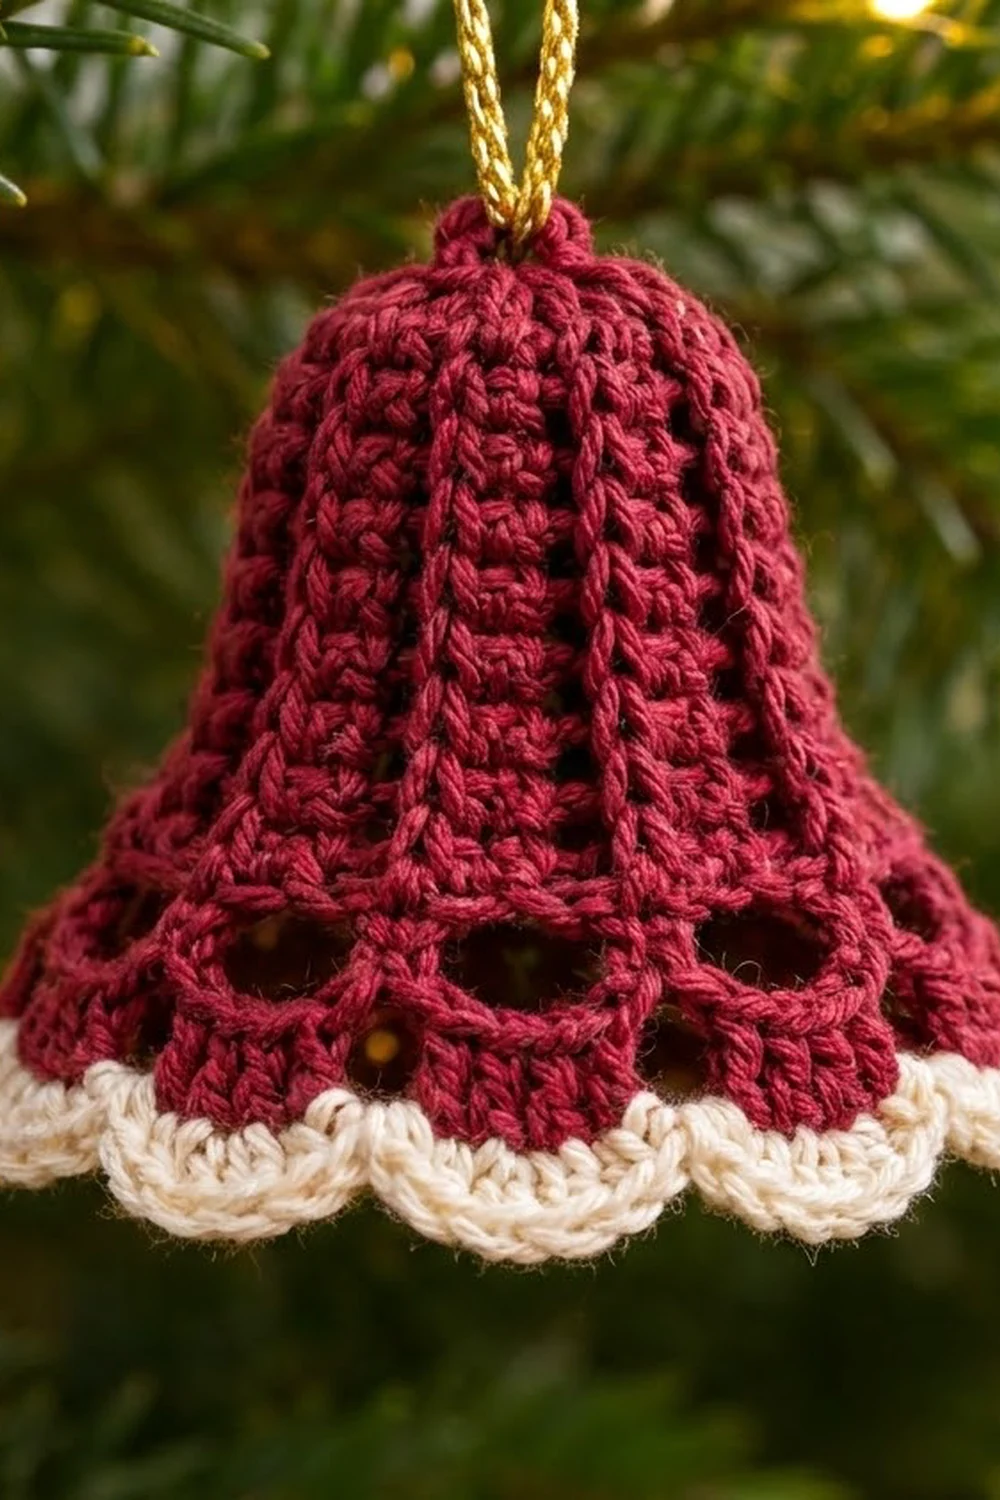
The Cranberry Chime Bell is a small, classic Christmas ornament with a soft vintage look. It is worked in a rich cranberry red. Raised ribs run from the crown down to the flared hem, and a ring of round eyelets sits just above a cream scalloped edge. A gold cord loop finishes the top so the bell hangs straight on the tree.
The design uses two colors: cranberry for the body and cream for the scalloped edging. The ribs are front post double crochets stacked in columns. They give the bell structure and help it keep its shape after blocking. The eyelets come from a single round of chain arches.
This pattern uses US crochet terms. The finished bell measures about 3.5 in (8.9 cm) tall and 3.75 in (9.5 cm) across the hem.
The bell is worked in one piece, top-down, in joined rounds. You start with a magic ring at the crown and set up 12 rib columns. You then increase between the ribs every other round to create the flare. The eyelet round, the red band, and the cream scallop edging follow. The hanging cord is threaded through the crown at the end.
Finished Size and Construction
- Finished size: 3.5 in (8.9 cm) tall x 3.75 in (9.5 cm) hem diameter
- Skill level: Easy-intermediate
- Terminology: US crochet terms
- Yarn weight: Sport weight (#2) mercerized cotton
- Hook: 2.5 mm (US B/1 or C/2)
- Number of pieces: 1 (a single bell, no joining)
- Layout: Worked in the round, top-down, 3D bell shape
- Bell size before border: 3.25 in (8.3 cm) tall x 3.5 in (8.9 cm) hem diameter
- Border depth: 3/8 in (1.0 cm) cream scallops
Materials
Choose a smooth mercerized cotton in sport weight. Cotton gives crisp stitch definition, holds the bell shape well, and keeps the ribs sharp. Acrylic will work, but the bell will be softer and may need more starch.
- Color A, Cranberry Red: 10 g / 30 m
- Color B, Cream: 3 g / 10 m
- Gold metallic cord: 8 in (20.3 cm) for the hanging loop
Tools:
– 2.5 mm crochet hook
– Tapestry needle
– Scissors
– Stitch marker
– Spray starch or a 1:1 mix of white glue and water (optional)
– A small cone, shot glass, or plastic wrap ball for shaping
The yarn quantities include a margin of about 20% for gauge differences and swatching.
Abbreviations (US Terms)
- ch – chain
- sl st – slip stitch
- sc – single crochet
- dc – double crochet
- FPdc – front post double crochet
- MR – magic ring
- st(s) – stitch(es)
- sp – space
- [ ] – repeat the instructions inside the brackets as directed
Special stitch – Front Post Double Crochet (FPdc): Yarn over. Insert the hook from front to back around the post of the indicated stitch, then back to the front. Yarn over and pull up a loop. Then (yarn over, pull through 2 loops) twice. The stitch sits raised on the right side and forms the vertical ribs.
Gauge and Checkpoints
Gauge: 22 dc and 12 rounds = 4 in (10.2 cm) in standard dc.
Because the bell is small, the bell itself is your gauge test. Work Rounds 1–6 and measure before going further. If the measurements match, keep going. If not, rip back and change hooks.
Measurement checkpoints (taken with the bell held in its natural shape):
- After Round 4: about 1.4 in (3.6 cm) diameter, 1 in (2.5 cm) tall
- After Round 6: about 2.1 in (5.3 cm) diameter, 1.75 in (4.4 cm) tall
- After Round 8: about 2.8 in (7.1 cm) diameter, 2.25 in (5.7 cm) tall
- After Round 10: about 3.5 in (8.9 cm) diameter, 2.75 in (7.0 cm) tall
- After Round 12: about 3.5 in (8.9 cm) diameter, 3.25 in (8.3 cm) tall
- After the border: about 3.75 in (9.5 cm) diameter, 3.5 in (8.9 cm) tall
If your bell is too big: go down to a 2.25 mm hook. If your bell is too small: go up to a 2.75 mm hook. Don’t change the stitch counts. The rib and scallop math depends on them.
Bell Body
Use Color A. Work with the right side facing you throughout and do not turn. Unless stated otherwise, the ch 2 at the start of a round does not count as a stitch. Join each round with a sl st to the first stitch made, not the ch 2.
Round 1: MR, ch 1, 12 sc in ring. Pull the ring tight. Join with sl st to first sc. (12 sts)
Round 2: Ch 1, 2 sc in each st around. Join. (24 sts)
This forms the closed, rounded crown.
Round 3: Ch 2, [FPdc around next st, dc in next st] 12 times. Join. (24 sts: 12 FPdc + 12 dc)
This round sets up the 12 rib columns. From now on, every FPdc is worked around the FPdc directly below it.
Round 4: Ch 2, [FPdc around next FPdc, dc in next dc] 12 times. Join. (24 sts)
Round 4 adds no stitches, so the top of the bell stays narrow and rounded like the photo.
Round 5 (increase): Ch 2, [FPdc around next FPdc, 2 dc in next dc] 12 times. Join. (36 sts: 12 FPdc + 24 dc)
Round 6: Ch 2, [FPdc around next FPdc, dc in next 2 dc] 12 times. Join. (36 sts)
Checkpoint: about 2.1 in (5.3 cm) across and 1.75 in (4.4 cm) tall.
Round 7 (increase): Ch 2, [FPdc around next FPdc, dc in next dc, 2 dc in next dc] 12 times. Join. (48 sts: 12 FPdc + 36 dc)
Round 8: Ch 2, [FPdc around next FPdc, dc in next 3 dc] 12 times. Join. (48 sts)
Round 9 (increase): Ch 2, [FPdc around next FPdc, dc in next dc, 2 dc in next dc, dc in next dc] 12 times. Join. (60 sts: 12 FPdc + 48 dc)
Round 10: Ch 2, [FPdc around next FPdc, dc in next 4 dc] 12 times. Join. (60 sts)
Checkpoint: about 3.5 in (8.9 cm) across and 2.75 in (7.0 cm) tall.
Because each panel between ribs grows by 1 dc every other round, the bell flares gently instead of ruffling. You will have 12 even panels of 4 dc each.
Eyelet Round and Red Band
Round 11 (eyelet arches): Ch 1, [sc in next FPdc, ch 5, skip next 4 dc] 12 times. Join with sl st to first sc. (12 sc + 12 ch-5 sps)
Each ch-5 spans one 4-dc panel, and each sc sits on top of a rib. This leaves 12 round openings, one under each panel.
Round 12 (conversion round): Ch 1, [sc in next sc, 5 sc in next ch-5 sp] 12 times. Join. Fasten off Color A.
Count: (12 sc worked 1-per-existing sc) + (12 x 5 sc worked into the spaces) = 12 + 60 = 72 sts
Packing 5 sc into each ch-5 space closes the bottom of every arch into a solid red band. The round eyelets stay open just above it, as in the photo.
Checkpoint: about 3.5 in (8.9 cm) across and 3.25 in (8.3 cm) tall.
Border: Cream Scallop Edging
Border gauge: each scallop covers 6 sts of Round 12 and measures about 0.9 in (2.3 cm) wide by 3/8 in (1.0 cm) deep.
Round 13: With right side facing, join Color B with a sl st in any sc worked into a Round 11 sc (the stitch sitting directly below a rib). Ch 1, sc in same st, [skip next 2 sts, 5 dc in next st, skip next 2 sts, sc in next st] 11 times. Then skip next 2 sts, 5 dc in next st, skip last 2 sts. Join with sl st to first sc. Fasten off. (12 scallops; 72 sts: 12 sc + 60 dc)
Why the math works: Round 12 has 72 sts arranged as 12 repeats of 6 (1 sc over a rib + 5 sc in the arch). Each scallop repeat uses exactly 6 sts: 1 sc + 2 skipped + 1 shell base + 2 skipped. That means 72 ÷ 6 = 12 scallops with nothing left over. Each 5-dc shell lands in the 3rd of the 5 sc under an arch, which is the exact center. Every cream scallop therefore hangs directly below an eyelet, and every sc anchors under a rib.
Finishing the Hanger
- Weave in all ends on the inside of the bell.
- Fold the 8 in (20.3 cm) gold cord in half and tie an overhand knot in the cut ends.
- Thread the folded end from inside the bell up through the center of the magic ring, so the knot rests inside the crown.
- Adjust so about 3 in (7.6 cm) of loop shows above the bell. If the knot slips through, tie a second knot on top of the first.
Final Blocking
- Lightly dampen the bell with water or spray starch.
- Set it over a small cone, a shot glass, or a ball of plastic wrap shaped like a bell, about 3.5 in (8.9 cm) across at the base.
- Gently straighten each rib so it runs evenly from crown to hem.
- Open each eyelet with a fingertip so all 12 openings look round and even.
- Pin or press each cream scallop outward so they fan evenly at 3.75 in (9.5 cm) diameter.
- For a firmer bell, brush on the glue-water mix, then blot off the excess.
- Let it dry completely for 12–24 hours before taking it off the form.
Final Quality-Control Checklist
- 12 ribs, evenly spaced and running straight from crown to hem
- 4 dc between ribs in the last body round
- 12 round eyelets, all the same size
- A solid red band beneath the eyelets, with no gaps
- 12 cream scallops, each centered below an eyelet
- Height about 3.5 in (8.9 cm); hem diameter about 3.75 in (9.5 cm)
- The crown is closed with no hole showing around the cord
- All ends woven in invisibly on the inside
- The bell hangs straight and level from the cord
Troubleshooting
Ribs spiral or lean: You probably worked an FPdc around a dc instead of the rib below. Each FPdc must go around the previous round’s FPdc. Also make sure each join goes into the first FPdc, not the ch 2.
Bell ruffles at the hem: Your tension is too loose or an increase was doubled. Recount Round 10 (60 sts), or go down one hook size.
Bell looks narrow and cup-shaped: You missed an increase round. Check that Rounds 5, 7, and 9 each add 12 sts.
Eyelets are puckered: Your ch-5 chains are too tight. Chain loosely, or go up a hook size for Round 11 only.
Scallops don’t line up under the eyelets: Color B was joined in the wrong stitch. Rejoin it in a sc that sits directly above a Round 11 sc.
Hole at the crown: Pull the magic ring tighter before weaving the tail in, or close it with a few stitches from inside.
Bell collapses after blocking: Use stronger starch or the glue mix, and let it dry fully on the form.
Care
Spot clean with a damp cloth. If the bell is starched, hand wash gently in cool water, then reshape and re-starch it on a form while damp.
Final Notes
The Cranberry Chime Bell comes down to one clear measurement chain:
- 12 sts at the crown grow to 24, 36, 48, and then 60 sts, adding 12 sts every other round.
- That reaches 3.5 in (8.9 cm) across and 2.75 in (7.0 cm) tall after Round 10.
- Round 11 turns those 60 sts into 12 eyelet arches.
- Round 12 closes them into a 72-st band at 3.25 in (8.3 cm) tall.
- The cream border divides those 72 sts into 12 perfect scallops, for a finished bell 3.5 in (8.9 cm) tall and 3.75 in (9.5 cm) across.
Check your gauge at Round 6 and keep the ribs stacked. Once the first bell matches, you can make a whole set for the tree with confidence.
Happy crocheting!