

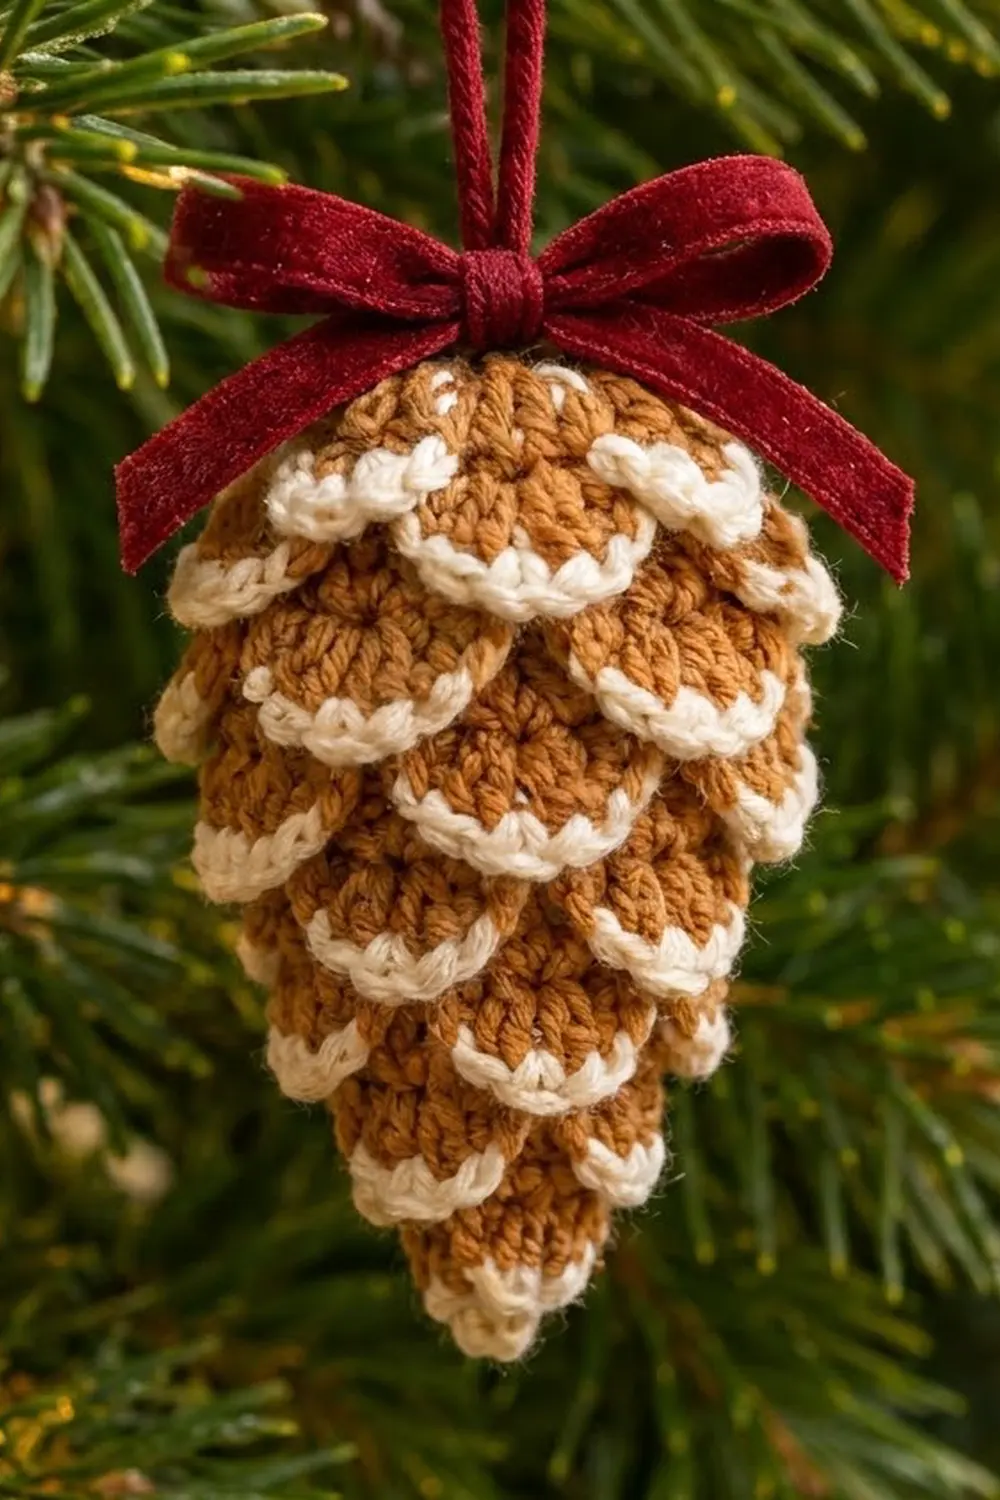
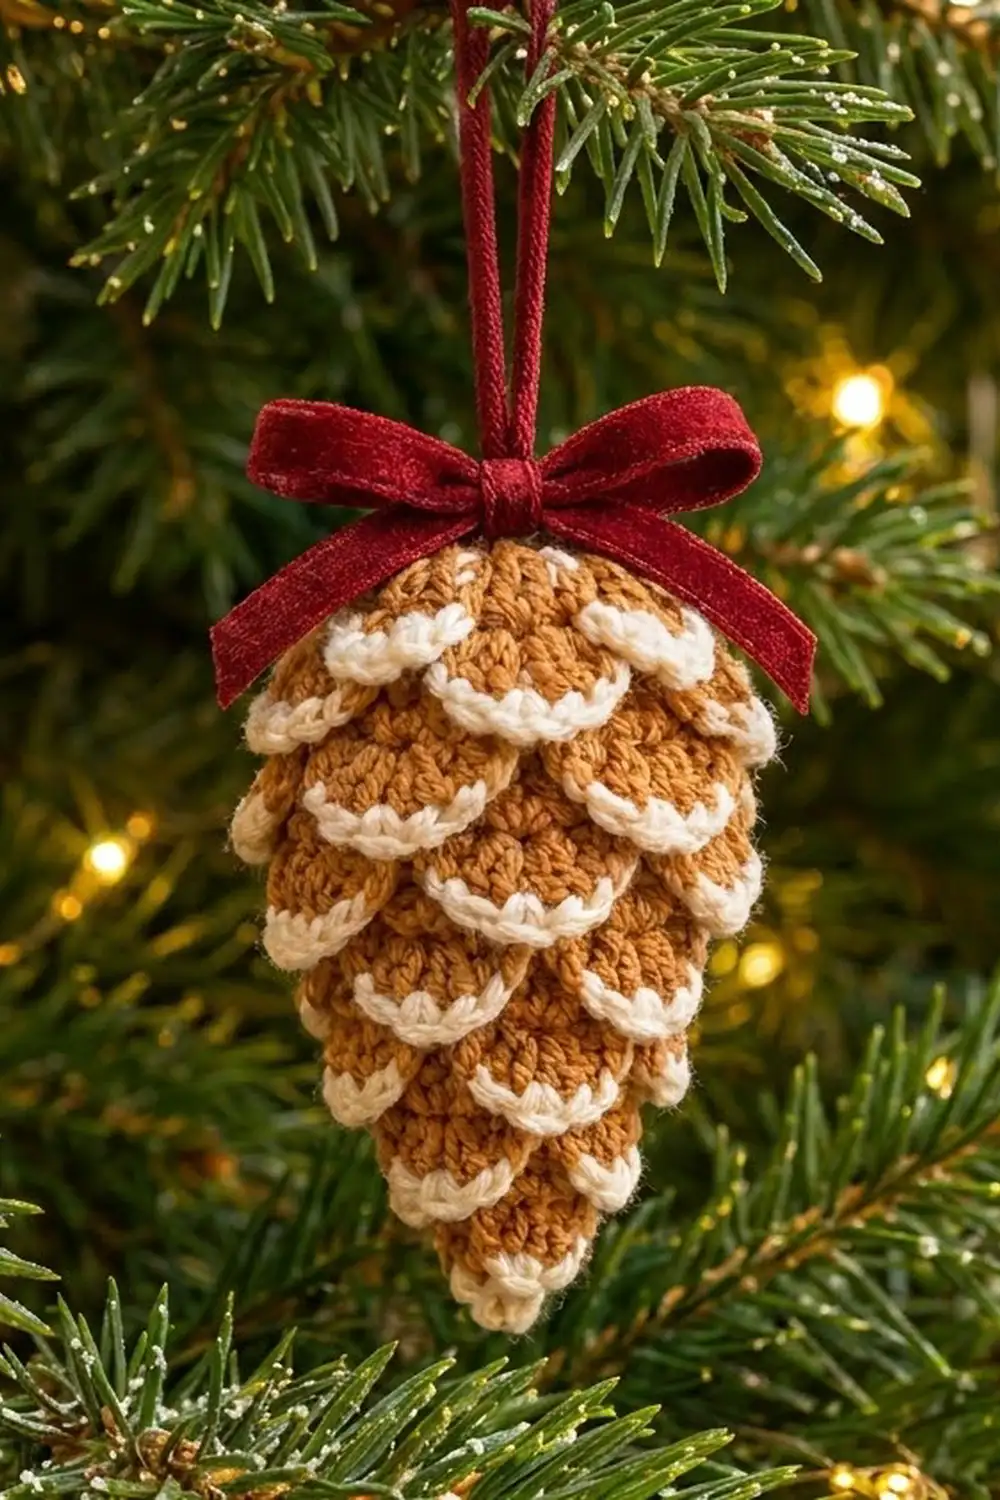
This little pinecone looks like a gingerbread cookie with a drizzle of icing. A firm caramel-tan body is covered in overlapping shell scales, and every scale has a crisp cream edge, like a dusting of frost. A cranberry-red hanging loop and ribbon bow finish the top.
The palette is warm and traditional: golden tan, cream, and deep red. It suits a natural or rustic tree and makes a lovely gift-tag ornament. The pattern uses US crochet terms throughout.
The finished ornament is about 3.4 in (8.6 cm) tall and 2 in (5.1 cm) wide, plus a 2.5 in (6.4 cm) hanging loop.
You work the body in one piece from the bottom tip upward, in continuous rounds. Every second round goes into back loops only, which leaves free front loops behind. You then work eight tiers of tan shell scales into those front loops and outline each tier in cream. Finally you stuff and close the body, add the loop, and tie on the bow.
Finished Size and Construction
- Finished size: 3.4 in (8.6 cm) tall × 2 in (5.1 cm) wide, without the loop
- Skill level: Intermediate
- Terminology: US
- Yarn weight: DK (#3)
- Hook: 3.0 mm (C/D)
- Number of pieces: 1 (the crocheted ornament), plus a ribbon bow
- Layout: a single 3D ornament that hangs vertically
- Body size (before the scales): about 3 in (7.6 cm) tall × 1.6 in (4.1 cm) across
- Size before the cream edging: about 3.25 in (8.3 cm) × 1.75 in (4.4 cm)
- Edging (“border”) depth: about 1/8 in (0.3 cm)
Materials
Use a smooth DK yarn. Cotton or a cotton blend gives the clearest scale edges. Pick a tan with a golden or caramel tone, a warm cream (not stark white), and a deep red.
- Color A, caramel tan: 12 g / 29 m
- Color B, cream: 4 g / 10 m
- Color C, cranberry red: 2 g / 5 m
Quantities include a margin of about 20%.
Tools:
– 3.0 mm (C/D) crochet hook
– Fiberfill stuffing, about 5 g
– Red velvet ribbon, 3/8 in (1.0 cm) wide × 10 in (25.4 cm) long
– Locking stitch markers (3)
– Tapestry needle
– Scissors
– Matching sewing thread and needle (optional, for the bow)
Abbreviations (US Terms)
- ch: chain
- sl st: slip stitch
- sc: single crochet
- hdc: half double crochet
- dc: double crochet
- inc: 2 sc in the same stitch
- dec: sc2tog (invisible decrease recommended)
- MR: magic ring
- BLO: back loop only
- FL: front loop
- st(s): stitch(es)
Special stitches:
– Small petal: sl st in next FL, (hdc, dc, hdc) in next FL, sl st in next FL. Uses 3 FLs and makes 5 sts.
– Large petal: sl st in next FL, 5 dc in next FL, sl st in next FL. Uses 3 FLs and makes 7 sts.
Gauge and Checkpoints
Gauge: 12 sc and 12 rounds = 2 in (5.1 cm) in sc, using the 3.0 mm hook. The fabric should be firm enough that stuffing won’t show through.
The ornament is a single piece, so treat the first 12 rounds of the body as your test.
- Checkpoint 1: After Round 12, flatten the tube. It should measure 2.5 in (6.4 cm) across, which means a circumference of 5 in (12.7 cm). The cone should be about 2 in (5.1 cm) tall.
- Checkpoint 2: After Round 18, the unstuffed body should be about 3 in (7.6 cm) tall.
- Checkpoint 3: After stuffing and closing, the body should be about 1.6 in (4.1 cm) across at its widest point.
If your piece is too big, go down to a 2.75 mm hook. If it’s too small or stiff, go up to a 3.25 mm hook. Change hooks before you start the scales, because the petal counts depend on the body’s front loops.
Body
Work in continuous spiral rounds with Color A. Place a marker in the first stitch of each round. Work the “BLO” rounds into back loops only. This leaves the front loops of the round below free for the scales.
- Rnd 1: 6 sc in MR. (6)
- Rnd 2: sc in each st around. (6)
- Rnd 3: (sc, inc) 3 times. (9)
- Rnd 4 (BLO): sc in each st around. (9) FLs of Rnd 3 are now free (Tier 1).
- Rnd 5: (2 sc, inc) 3 times. (12)
- Rnd 6 (BLO): sc in each st around. (12) Tier 2 FLs are free.
- Rnd 7: (sc, inc) 6 times. (18)
- Rnd 8 (BLO): sc in each st around. (18) Tier 3 FLs are free.
- Rnd 9: (2 sc, inc) 6 times. (24)
- Rnd 10 (BLO): sc in each st around. (24) Tier 4 FLs are free.
- Rnd 11: sc in each st around. (24)
- Rnd 12 (BLO): (3 sc, inc) 6 times. (30) Tier 5 FLs are free (24).
- Rnd 13: sc in each st around. (30)
- Rnd 14 (BLO): sc in each st around. (30) Tier 6 FLs are free.
- Rnd 15: sc in each st around. (30)
- Rnd 16 (BLO): sc in each st around. (30) Tier 7 FLs are free.
- Rnd 17: (3 sc, dec) 6 times. (24)
- Rnd 18 (BLO): (2 sc, dec) 6 times. (18) Tier 8 FLs are free (24).
Don’t fasten off. Pull the working loop up and put a locking marker in it so it can’t unravel. The top stays open for now, so you can pull yarn tails inside before stuffing.
Free front-loop tiers:
| Tier | Free FLs on | Number of FLs |
|---|---|---|
| 1 | Rnd 3 | 9 |
| 2 | Rnd 5 | 12 |
| 3 | Rnd 7 | 18 |
| 4 | Rnd 9 | 24 |
| 5 | Rnd 11 | 24 |
| 6 | Rnd 13 | 30 |
| 7 | Rnd 15 | 30 |
| 8 | Rnd 17 | 24 |
Tan Scale Tiers
Hold the body with the tip pointing down. Work the tiers from the bottom up (Tier 1 first), so each new tier lies over the top of the one below.
Each tier is one closed round:
1. Join Color A with a sl st in the starting FL. This sl st counts as the first sl st of the first petal.
2. Work the petals around.
3. Sl st to the joining sl st and fasten off.
4. Pull both tails to the inside through the open top.
Staggering: From Tier 2 onward, start in the FL that sits directly above the center (shell) stitch of a petal in the tier below. The scales will then interlock like bricks.
- Tier 1 (Rnd 3 FLs): 3 small petals. (15 sts: 6 sl st + 9 shell sts)
- Tier 2 (Rnd 5 FLs): 4 small petals. (20 sts: 8 sl st + 12 shell sts)
- Tier 3 (Rnd 7 FLs): 6 large petals. (42 sts: 12 sl st + 30 dc)
- Tier 4 (Rnd 9 FLs): 8 large petals. (56 sts: 16 sl st + 40 dc)
- Tier 5 (Rnd 11 FLs): 8 large petals. (56 sts: 16 sl st + 40 dc)
- Tier 6 (Rnd 13 FLs): 10 large petals. (70 sts: 20 sl st + 50 dc)
- Tier 7 (Rnd 15 FLs): 10 large petals. (70 sts: 20 sl st + 50 dc)
- Tier 8 (Rnd 17 FLs): 8 small petals. (40 sts: 16 sl st + 24 shell sts)
Check: Each petal uses exactly 3 FLs, so FLs ÷ 3 = petals. That gives 9÷3 = 3, 12÷3 = 4, 18÷3 = 6, 24÷3 = 8, 30÷3 = 10, and 24÷3 = 8 for the top tier. The ornament has 57 petals in total: 15 small and 42 large.
The small petals keep the narrow tip and rounded crown neat. The large petals give the wide middle its full, layered look.
Cream Scale Edging (Border)
The cream edging is this ornament’s border. You work it once per tier, right after that tier’s tan petals. You can also finish all eight tan tiers first and then edge them from the bottom up.
Border gauge: 6 sc along a large petal’s curve measures about 0.6 in (1.5 cm). The edging adds about 1/8 in (0.3 cm) beyond each tan scale edge.
Join Color B with a sl st in the first sl st of the tier. Work into the tops of the tier’s stitches:
- Small petal edging: sl st in the sl st, sc in the hdc, 2 sc in the dc, sc in the hdc, sl st in the sl st.
- Count: (3 sc, one per shell st) + (1 extra sc at the center) = 4 sc, plus 2 sl st.
- Large petal edging: sl st in the sl st, sc in each of the first 2 dc, 2 sc in the center dc, sc in each of the last 2 dc, sl st in the sl st.
- Count: (5 sc, one per dc) + (1 extra sc at the center) = 6 sc, plus 2 sl st.
At the end of the tier, sl st to the first sl st and fasten off. Pull the tails inside.
Edging counts per tier:
– Tier 1: 12 sc + 6 sl st (18)
– Tier 2: 16 sc + 8 sl st (24)
– Tier 3: 36 sc + 12 sl st (48)
– Tier 4: 48 sc + 16 sl st (64)
– Tier 5: 48 sc + 16 sl st (64)
– Tier 6: 60 sc + 20 sl st (80)
– Tier 7: 60 sc + 20 sl st (80)
– Tier 8: 32 sc + 16 sl st (48)
Why the math works: The outside of a curve is longer than its base. Working one sc per stitch alone would pull the scale flat and cupped. One extra sc at the center stitch of each petal adds just enough length for the cream line to follow the curve, without ruffling. The sl sts sit on the body’s front loops, so they add no width and keep the gaps between scales tight.
Finishing the Body
- Check that every yarn tail from the tiers is inside the body. Knot each pair loosely and trim the tails to 1/2 in (1.3 cm).
- Put the live Color A loop back on your hook.
- Stuff the body firmly through the opening. Push extra stuffing into the tip so it doesn’t collapse.
- Rnd 19: (sc, dec) 6 times. (12)
- Rnd 20: dec 6 times. (6)
Add a little more stuffing if needed. Fasten off, leaving an 8 in (20.3 cm) tail. Weave the tail through the front loops of the last 6 sts, pull tight, and hide the end inside.
Hanging Loop and Bow
With Color C, join with a sl st at the closed top center. Ch 36, which is about 5 in (12.7 cm). Sl st into the same spot to make a loop about 2.5 in (6.4 cm) tall. Fasten off, knot the two tails together, and hide them inside the body.
Tie the ribbon into a bow about 2 in (5.1 cm) wide, around the base of the loop. Trim the ribbon ends at an angle. Sew a couple of stitches through the knot into the crown to keep it centered.
Final Blocking
- Hold the ornament over a steaming kettle or iron. Don’t let the iron touch the yarn, especially if it’s acrylic.
- Gently push each scale down and slightly outward with your fingertip so it curves over the tier below.
- Roll the body between your palms to even out the egg shape.
- Pinch the bottom tip into a soft point.
- Hang the ornament to dry and cool for 15 minutes.
- Check the size: 3.4 in (8.6 cm) tall × 2 in (5.1 cm) wide.
Final Quality-Control Checklist
- 8 tiers and 57 scales, with no skipped front loops
- Each tier is offset from the tier below in a brick pattern
- Every scale has a cream edge with an extra center stitch
- No stuffing shows between stitches
- All tails are hidden inside
- The loop is centered and the ornament hangs straight
- The bow is secure and its ends are trimmed
- Size: about 3.4 in (8.6 cm) × 2 in (5.1 cm)
Troubleshooting
- Petal count doesn’t divide evenly: You may have worked a BLO round in both loops, so there are no front loops for that tier. Check the table and count the free FLs before you start the tier.
- Scales stand straight out: Your dc tension is too tight. Steam them and press them down, or redo the tier with a looser shell.
- The cream edge ruffles: You’ve added more than one extra sc per petal. Keep it to exactly one, in the center stitch.
- The cream edge cups inward: You forgot the center increase. Add it.
- The ornament leans: Stuffing is uneven, or the loop is off center. Add stuffing on the low side.
- The tip is floppy: Push stuffing into the bottom with a chopstick.
Care
Spot clean with cool water and mild soap, then reshape the scales and let it air dry. Store it flat in tissue paper, with the bow fluffed, so the scales don’t get crushed.
Final Notes
Here’s the measurement chain. Gauge is 12 sc × 12 rounds = 2 in (5.1 cm). At Round 12 the body is 5 in (12.7 cm) around. The finished body is 3 in (7.6 cm) tall × 1.6 in (4.1 cm) across. The tan scales bring it to 3.25 in (8.3 cm) × 1.75 in (4.4 cm). The 1/8 in (0.3 cm) cream edging gives the final 3.4 in (8.6 cm) × 2 in (5.1 cm). Check each stage, and your pinecone will come out evenly frosted from tip to crown.
Happy crocheting!