

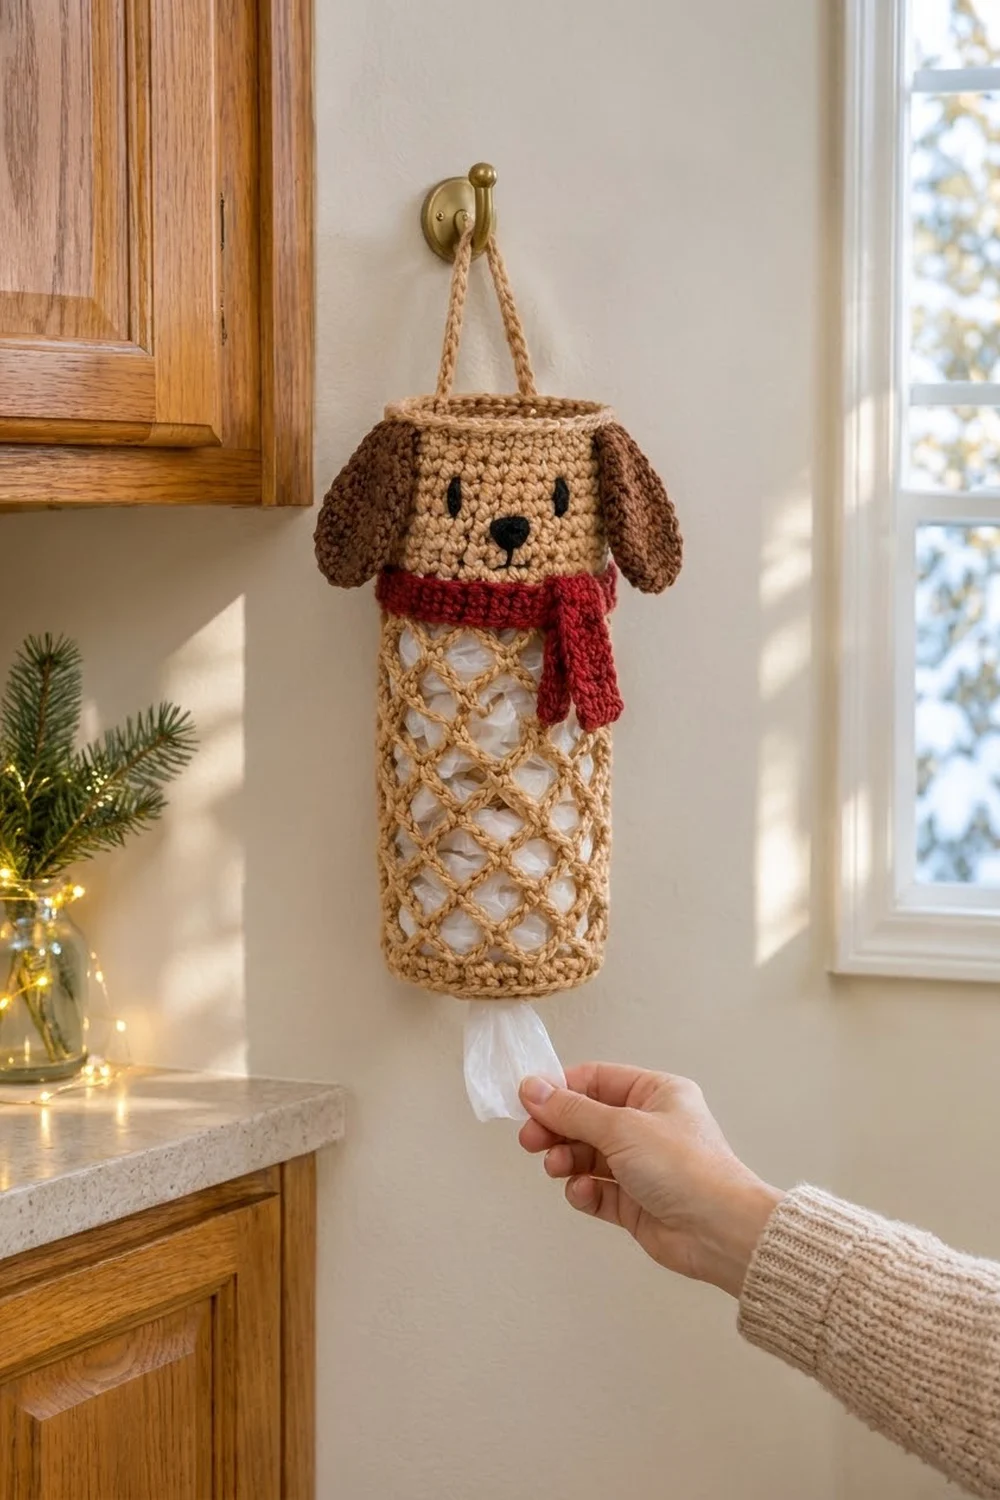
Meet the Cozy Pup, a crochet plastic bag holder that keeps grocery bags tidy and friendly-looking. You push bags in at the top and pull them out one at a time through the smaller opening at the bottom. A diamond lattice middle lets you see how many bags are left.
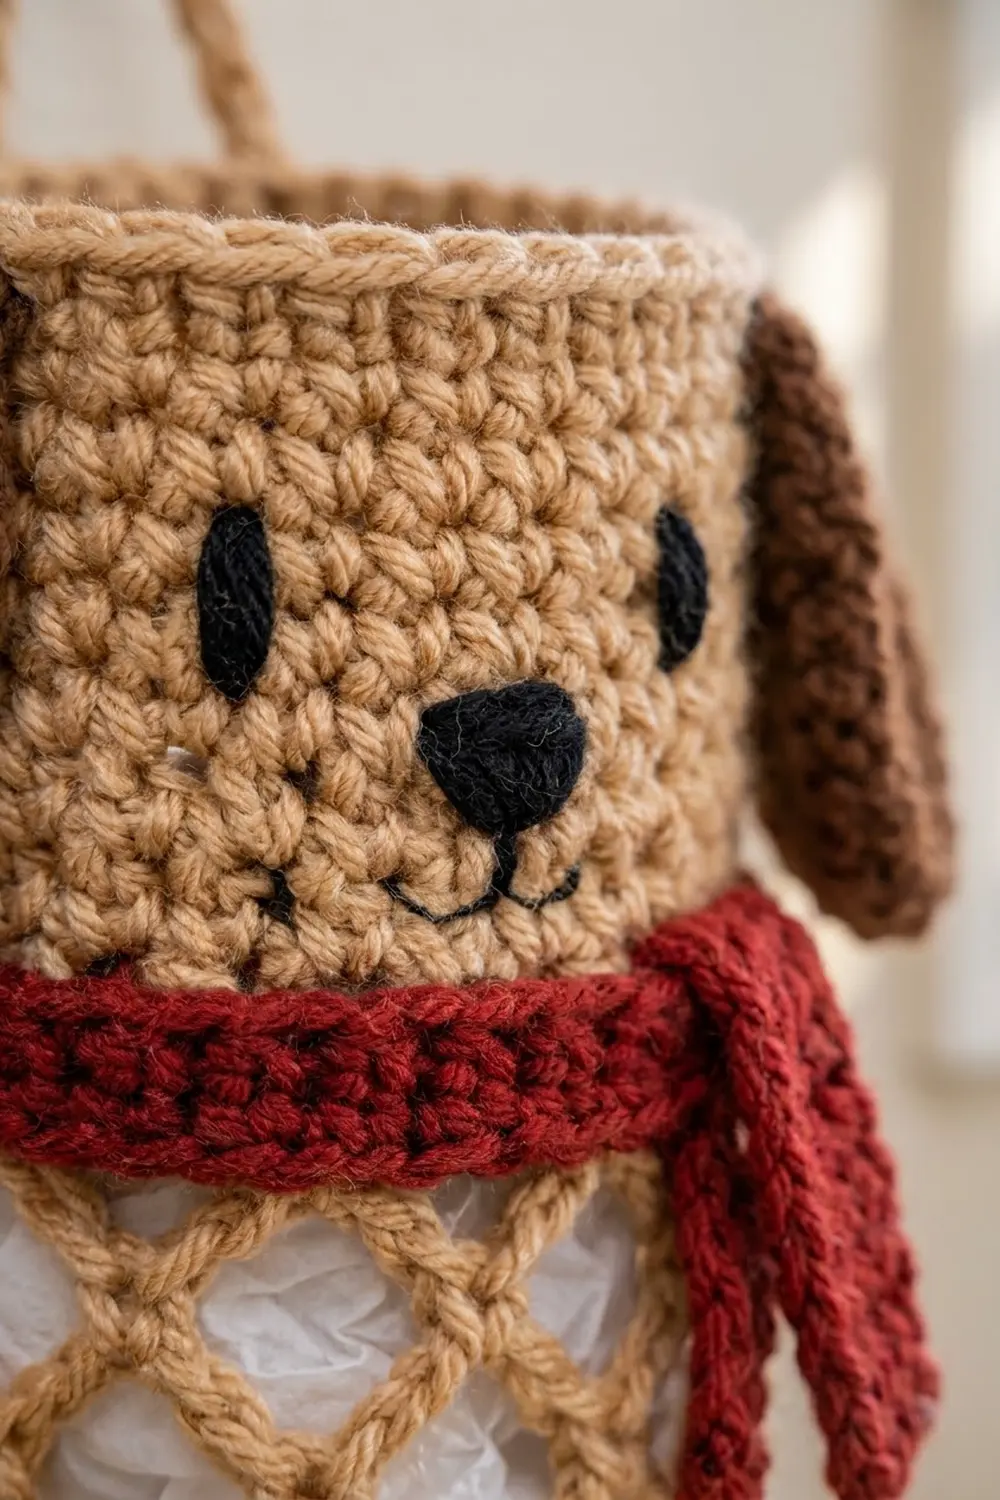
The holder uses three main colors. Warm tan makes the body, chocolate brown makes the floppy ears, and cranberry red makes the scarf. Black yarn is used for the embroidered face. The overall style is cozy farmhouse, and it fits a kitchen year-round, especially in winter.
This pattern uses US crochet terms. The finished holder measures 14.5 in (36.8 cm) tall and 7 in (17.8 cm) wide laid flat, which is 14 in (35.6 cm) around. The hanging loop adds about 4 in (10.2 cm) above the rim.
You work the body as one seamless tube from the bottom up: a solid bottom band, a chain-loop lattice, then a solid head. After that, you add a crab-stitch edging to both openings, sew on the ears and scarf, embroider the face, and attach the hanging cord.
Finished Size and Construction
- Finished size: 14.5 in (36.8 cm) tall × 7 in (17.8 cm) flat width
- Skill level: Intermediate (easy for confident beginners)
- Terminology: US
- Yarn weight: Worsted (#4)
- Hook: 5.0 mm (H-8)
- Number of pieces: 1 body tube, plus 2 ears, 1 scarf band, 2 scarf tails, 1 knot and 1 hanging cord
- Layout: Single vertical cylinder. Ears sit at the sides, the scarf at the neck, and the cord at the back.
- Body circumference: 56 sts = 14 in (35.6 cm)
- Size before border: 14 in (35.6 cm) tall
- Border depth: 0.25 in (0.6 cm) at the top and 0.25 in (0.6 cm) at the bottom
Materials
Choose a smooth worsted-weight acrylic or cotton-acrylic blend. Acrylic holds the tube shape well and survives frequent handling. Pure cotton also works but may stretch over time.
- Tan (main color): 85 g, about 170 m
- Chocolate brown (ears): 10 g, about 20 m
- Cranberry red (scarf): 20 g, about 40 m
- Black (face): 2 g, about 3 m
All quantities include a margin of roughly 15% for swatching and finishing.
Tools:
– 5.0 mm (H-8) crochet hook
– Tapestry needle
– 4 locking stitch markers
– Scissors
– Measuring tape
– Pins and a spray bottle for blocking
Abbreviations (US Terms)
- ch: chain
- sl st: slip stitch
- sc: single crochet
- sk: skip
- st(s): stitch(es)
- sp: space
- rnd: round
- rev sc: reverse single crochet (crab stitch)
Special stitch: Reverse single crochet (rev sc). Work from left to right (right-handers). Insert the hook into the next stitch to the right, yarn over, and pull up a loop. Yarn over again and draw through both loops. This makes a firm, rope-like edge.
Gauge and Checkpoints
Gauge: 16 sc and 18 rnds = 4 in (10.2 cm) in sc worked in the round. In the lattice, 3 mesh rounds = 2 in (5.1 cm) tall.
The body is the test piece, so start it and measure after Rnd 3 before you go further:
- After Rnd 3: circumference 14 in (35.6 cm), flat width 7 in (17.8 cm)
- After Rnd 9: height 2 in (5.1 cm)
- After Rnd 21: height 10 in (25.4 cm)
- After Rnd 39: height 14 in (35.6 cm)
- After the border: height 14.5 in (36.8 cm)
If the tube is too big, go down to a 4.5 mm hook. If it is too small, go up to a 5.5 mm hook. Change the hook rather than the stitch counts, because the lattice needs a multiple of 4 stitches.
Body (Worked in One Piece)
Work in joined rounds with the right side facing. Do not turn. The ch 1 at the start of a round does not count as a stitch.
Bottom Band
With tan, ch 44 and join with a sl st to the first ch to form a ring. Be careful not to twist the chain.
Rnd 1: Ch 1, sc in each ch around, then join with a sl st to the first sc. (44 sts)
This ring is the dispensing opening. It is 11 in (27.9 cm) around, or about 3.5 in (8.9 cm) across.
Rnd 2: Ch 1, sc in next 10 sts, 2 sc in next st, repeat from * 4 times in total, then join. (48 sts)
Rnd 3: Ch 1, sc in next 5 sts, 2 sc in next st, repeat from * 8 times in total, then join. (56 sts)
Checkpoint: the piece is 14 in (35.6 cm) around and 7 in (17.8 cm) flat.
Rnds 4–9: Ch 1, sc in each st around, then join. (56 sts)
The two increase rounds make the bottom curve inward, and the 6 even rounds give a solid band 2 in (5.1 cm) tall.
Lattice Mesh
Rnd 10 (setup): Ch 1, sc in the first st, ch 5, sk 3 sts, sc in next st. Repeat from * around, ending with ch 5, sk the last 3 sts, and sl st to the first sc. (14 sc, 14 ch-5 loops)
Check: each repeat uses 4 stitches, and 14 × 4 = 56.
Rnd 11: Sl st in the next 3 ch, which puts you at the center of the first loop. Ch 1, sc in the same ch-5 sp, ch 5, sc in next ch-5 sp. Repeat from * 13 times, then ch 5 and sl st to the first sc. (14 loops)
Rnds 12–21: Repeat Rnd 11. (14 loops each round)
That makes 12 mesh rounds in total, including the setup round. Each new sc sits at the center of a loop below it, which creates the diamond lattice. Checkpoint: the body is 10 in (25.4 cm) tall.
Head Band (Conversion Round)
Rnd 22 (conversion): Ch 1, sc in the same sc as the join, then 3 sc in the next ch-5 sp. Sc in next sc, 3 sc in next ch-5 sp. Repeat from * 13 times, then join.
Count: (14 sc worked one into each existing sc) + (14 loops × 3 sc added = 42) = 56 sts.
The round start shifts slightly while you work the mesh. Place a marker in the first st of Rnd 22 and call it st 1. This marks the back of the holder, so the center front is st 29.
Rnds 23–39: Ch 1, sc in each st around, then join. (56 sts)
The head is 18 rounds tall (Rnds 22–39), which is 4 in (10.2 cm). Checkpoint: the body is 14 in (35.6 cm) tall. Do not fasten off yet; continue to the border.
Ears (Make 2)
With brown, ch 7.
Rnd 1: Sc in 2nd ch from hook, then sc in next 4 ch. Work 3 sc in the last ch. Working along the other side of the chain, sc in next 4 ch, then 2 sc in the same ch as the first sc. Join. (14 sts)
Rnd 2: Ch 1, 2 sc in the first st, sc in next 4 sts, 2 sc in each of next 3 sts, sc in next 4 sts, 2 sc in each of next 2 sts. Join. (20 sts)
Rnd 3: Ch 1, sc in next 6 sts, 2 sc in each of next 6 sts, sc in next 8 sts. Join. (26 sts)
Fasten off and leave a 12 in (30.5 cm) tail for sewing. All the increases at the tip make the ear wider at the bottom, which gives the floppy dog-ear shape. Each ear is 2.75 in (7.0 cm) long and 1.75 in (4.4 cm) wide. Leave the ears flat and unstuffed.
Scarf
Band: With red, ch 57.
– Row 1: Sc in 2nd ch from hook and in each ch across. (56 sts)
– Rows 2–4: Ch 1, turn, sc in each st across through the back loop only to make ribbing. (56 sts)
Fasten off. The band is 14 in (35.6 cm) long and about 1 in (2.5 cm) wide.
Long tail: With red, ch 5.
– Row 1: Sc in 2nd ch from hook and across. (4 sts)
– Rows 2–18: Ch 1, turn, sc through the back loop only across. (4 sts)
The long tail is 4 in (10.2 cm) long and 1 in (2.5 cm) wide.
Short tail: Work as for the long tail, but stop after Row 14. It measures about 3.1 in (7.9 cm).
Knot: With red, ch 5.
– Row 1: Sc in 2nd ch from hook and across. (4 sts)
– Rows 2–5: Ch 1, turn, sc across. (4 sts)
The knot is about 1 × 1.1 in (2.5 × 2.8 cm).
Hanging Cord
With tan, ch 41. Sl st in the back bump of the 2nd ch from hook and in each ch across. (40 sl sts)
The cord is about 10 in (25.4 cm) long. Leave 8 in (20.3 cm) tails at both ends.
Border
The border is a single round of rev sc on each opening, worked one stitch into each existing stitch. Border gauge matches the body at 4 sts per inch, so the edge stays the same width as the body. It won’t ruffle or pull in.
Top rim (Rnd 40): Without fastening off after Rnd 39, ch 1 and rev sc in each st around. Join and fasten off. (56 sts, which is 28 per flat side)
Bottom opening: Turn the body upside down. Join tan to any free loop of the foundation chain, ch 1, and rev sc in each ch around. Join and fasten off. (44 sts, which is 22 per flat side)
Why the math works: The top has 56 sts, which is 14 in (35.6 cm) at gauge. The bottom has 44 sts, which is 11 in (27.9 cm) at gauge. Since the border adds no stitches, both openings keep their designed size. The rolled crab stitch firms the opening, so bags slide out without stretching the ring. Each border adds 0.25 in (0.6 cm), so the total height is 14 + 0.25 + 0.25 = 14.5 in (36.8 cm).
Assembly
- Face: With black, embroider two satin-stitch oval eyes on Rnds 32–33, at sts 25 and 33. Embroider a rounded triangle nose over sts 28–30 on Rnds 29–30. Then backstitch a small “w” mouth just below the nose on Rnds 27–28.
- Ears: Flatten each ear. Sew the narrow chain end across 6 sts on Rnds 36–39, using sts 13–18 for one ear and sts 40–45 for the other. Let the wide tips hang down beside the face.
- Scarf band: Sew the short ends of the band together to form a ring. Slide it over the bottom of the body and up to Rnds 22–25, with the seam at the back. Tack the top and bottom edges in place every 1 in (2.5 cm).
- Tails and knot: Sew the tops of both tails under the band at the front right, around sts 36–40, with the long tail in front. Wrap the knot piece around the tail tops and band, then sew it closed at the back.
- Hanging cord: On the inside, sew one cord end over Rnds 36–39 at st 53 and the other at st 5, overlapping each by 1 in (2.5 cm). The free 8 in (20.3 cm) forms a loop about 4 in (10.2 cm) high.
Final Blocking
- Weave in all ends on the inside of the tube.
- Stuff the tube firmly with a rolled towel so it forms a straight 7 in (17.8 cm) flat width.
- Mist the lattice and the head band until they are damp, but not wet.
- Gently pull the mesh lengthwise until the body measures 14 in (35.6 cm) before the borders.
- Pin the ears flat and pointing down, and lay the scarf tails straight.
- Let everything dry completely before removing the towel.
Final Quality-Control Checklist
- The body is 56 sts around, measures 7 in (17.8 cm) flat, and has 14 even mesh loops in every round.
- The bottom opening is 44 sts, about 3.5 in (8.9 cm) across.
- The finished height is 14.5 in (36.8 cm).
- The face is centered on st 29 and the eyes are level.
- The ears are symmetrical and the scarf seam faces the back.
- The cord ends are secure and the holder hangs straight.
Troubleshooting
- Lattice sags or looks too open: Use ch 4 loops instead of ch 5, or go down a hook size for the mesh only.
- Tube flares at the head: Your conversion round is too loose. Work 3 sc per loop firmly, or go down a hook size.
- Bags fall out of the bottom: Add one round of sc 40 after Rnd 1 to narrow the opening: (sc 9, sc2tog) × 4. Then work the rest as written and add 4 sts back in Rnd 2.
- Ears curl: Steam-block them flat and tack the tip edges lightly.
- Lattice twists: Always start each round at the center of the first loop.
Care
Spot clean, or hand wash in cool water and lay flat with a towel inside to dry. Do not tumble dry, because heat can stretch the lattice.
Final Notes
The measurement chain is simple. A 44-st ring increases to 56 sts, or 14 in (35.6 cm) around. The 2 in (5.1 cm) bottom band, 8 in (20.3 cm) lattice and 4 in (10.2 cm) head add up to 14 in (35.6 cm). The two 0.25 in (0.6 cm) borders bring the finished holder to 14.5 in (36.8 cm). If you check your gauge after Rnd 3, everything that follows will match.
Happy crocheting!