

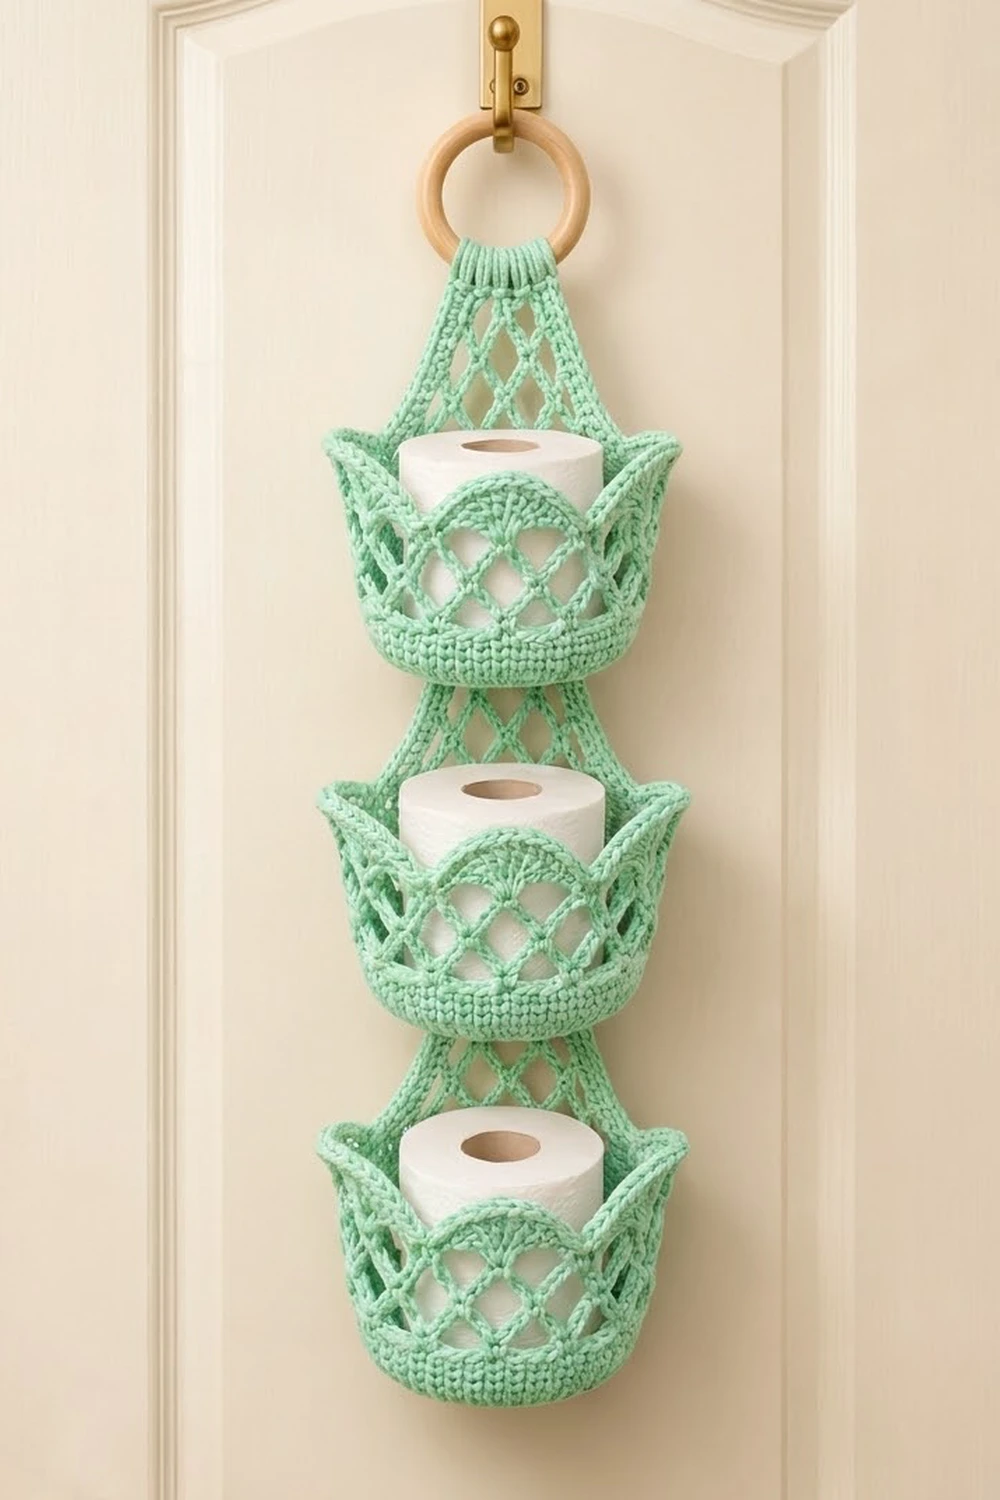
This hanging holder stores three spare toilet rolls in a narrow strip of wall or door space. It has three oval baskets stitched one above the other onto a long, tapered lattice panel. A plain wooden ring at the top lets it hang from a hook.
Everything is worked in one soft mint green cotton. Each basket has a firm single crochet base, a short solid wall band and an open diamond mesh. The rim has four fan petals with a raised corded edge. The front and back petals are rounded arches with radiating spokes. The end petals flare outward, so from the front they look like pointed tulip tips.
The pattern uses US crochet terms. Each basket measures about 7.3 in (18.5 cm) long, 5.3 in (13.5 cm) wide and 4.75 in (12.1 cm) tall. The bordered back panel is 28.3 in (71.9 cm) long and 7.8 in (19.8 cm) wide at the bottom, narrowing to about 3 in (7.6 cm) at the top. Hung from the ring, the holder is about 31.3 in (79.5 cm) long.
You will make the three baskets from the bottom up: an oval base, then the wall, mesh and petal rim. The back panel is worked flat in mesh rows that slowly get narrower. It gets a two-round border and is gathered onto the ring. Then the baskets are whipstitched to the panel.
Finished Size and Construction
- Finished size: 31.3 in (79.5 cm) hanging length; panel 7.8 in (19.8 cm) wide at the bottom
- Skill level: Intermediate
- Terminology: US crochet terms
- Yarn weight: Worsted (#4) cotton
- Hook: 5 mm (H-8)
- Number of pieces: 4 crocheted pieces (3 baskets, 1 back panel) plus 1 wooden ring
- Layout: 3 baskets stacked vertically on one tapered panel
- Basket size: 7.3 in (18.5 cm) x 5.3 in (13.5 cm) base, 4.75 in (12.1 cm) tall
- Panel size before border: 27.5 in (69.9 cm) long; 7 in (17.8 cm) wide at the bottom, 2.25 in (5.7 cm) at the top
- Border depth: 0.4 in (1.0 cm)
Materials
Use a smooth, firm worsted-weight cotton or cotton blend, about 85 m per 50 g. Cotton holds the basket shape better than acrylic, shows the lattice crisply and stands up to washing.
- Mint green: 150 g (about 255 m)
Each basket uses about 31 g, and the panel with its border uses about 27 g. The amount listed includes a margin of roughly 25 g for gauge differences and swatching.
Tools:
- 5 mm (H-8) crochet hook
- 3 in (7.6 cm) wooden ring
- 6 locking stitch markers
- Tapestry needle
- Scissors
- Rust-proof pins, blocking mat and spray bottle
- Measuring tape
Abbreviations (US Terms)
- ch – chain
- sl st – slip stitch
- sc – single crochet
- hdc – half double crochet
- dc – double crochet
- tr – treble crochet
- sk – skip
- st(s) – stitch(es)
- sp – space
- BLO – back loop only
- rev sc – reverse single crochet
- RS – right side
Reverse single crochet (rev sc): Work from left to right (if you are right-handed). Insert the hook into the next stitch to the right, yarn over and pull up a loop, then yarn over and pull through both loops. This makes the raised, corded edge on the petals and panel.
Gauge and Checkpoints
Solid gauge: 16 sc x 18 rounds = 4 in (10.2 cm).
Mesh gauge: one ch-4 loop repeat is 0.75 in (1.9 cm) wide; 8 mesh rows = 4 in (10.2 cm) tall.
Make one complete basket first. It is your real gauge test.
- Base after Round 6: about 4.7 in (11.9 cm) x 2.7 in (6.9 cm)
- Base after Round 12: 7.3 in (18.5 cm) x 5.3 in (13.5 cm), lying flat
- Wall after Round 17: circumference about 21 in (53.3 cm)
- Finished basket: 4.75 in (12.1 cm) tall at the arches
- Panel after Row 6: 2.75 in (7.0 cm) long, 7 in (17.8 cm) wide
- Panel after Row 28: 13.75 in (34.9 cm) long, about 4 in (10.2 cm) wide
- Panel after Row 56: 27.5 in (69.9 cm) long
If your base is too big or ruffles, switch to a 4.5 mm hook. If it is too small or cups before Round 13, switch to a 5.5 mm hook. Test the basket with a standard 4.5 in (11.4 cm) roll. The roll should drop in easily with a little room around it.
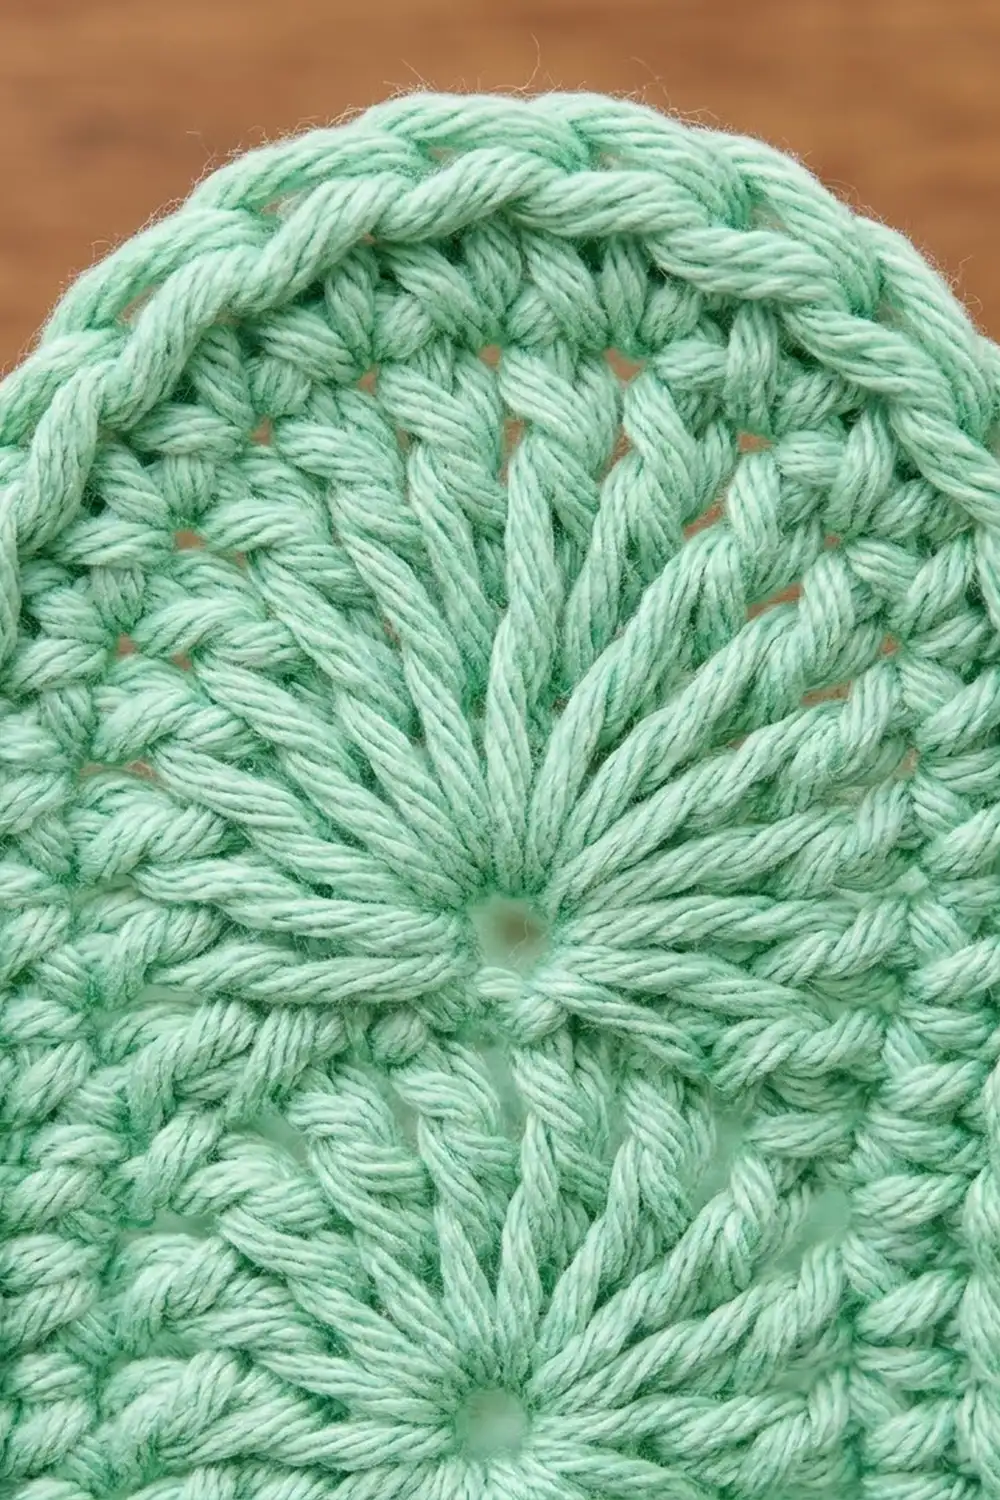
Basket (Make 3)
Oval Base
Ch 9.
Round 1: Sc in 2nd ch from hook, sc in next 6 ch, 3 sc in last ch. Rotate and work along the underside of the chain: sc in next 6 ch, 2 sc in the same ch as the first sc. Join with sl st to first sc. (18 sts)
The oval now has two straight sides of 6 sts and two curved ends. Each round adds 3 sts at each end, so every round grows by 6.
Rounds 2–12: Ch 1. Let n be the round number.
2 sc in first st, sc in next (n − 2) sts; sc in next 6 sts; [2 sc in next st, sc in next (n − 2) sts] 3 times; sc in next 6 sts; [2 sc in next st, sc in next (n − 2) sts] 2 times. Join. (In Round 2, “sc in next 0 sts” means you skip that part.)
Round totals: Round 2 = 24 sts; Round 3 = 30; Round 4 = 36; Round 5 = 42; Round 6 = 48; Round 7 = 54; Round 8 = 60; Round 9 = 66; Round 10 = 72; Round 11 = 78; Round 12 = 84.
Check: each round totals n + 6 + 3n + 6 + 2n = 6n + 12, so Round 12 gives 84.
Wall
Round 13: Ch 1, sc in BLO of each st around. Join. (84 sts) The unused front loops make a crisp fold line, so the wall turns up sharply.
Rounds 14–17: Ch 1, sc in each st around. Join. (84 sts) This solid band is about 1.1 in (2.8 cm) tall.
Diamond Mesh
Round 18: Ch 1, sc in first st, ch 4, sk 2 sts, sc in next st; repeat from * 26 more times, ch 4, sk 2 sts, join with sl st to first sc. (28 ch-4 loops) Check: 28 loops x 3 sts = 84.
Round 19: Sl st in next 2 ch, ch 1, sc in same loop, ch 4, sc in next loop; repeat from * 26 more times, ch 4, join to first sc. (28 loops)
Round 20: Repeat Round 19. (28 loops) The mesh is about 1.5 in (3.8 cm) tall.
Set the petals: Flatten the basket so the long sides face front and back. Put a marker in the loop at the center front, the center back and the tip of each end. Adjust the markers until there are 6 unmarked loops between neighboring markers. Each section is now 7 loops, with the marked loop in the middle (loop 4).
Petal Rim
Round 21 (conversion round): Sl st across to loop 1 of any section (the third loop before a marked loop). Ch 1. In each section, work 4 sc in loop 1 and 3 sc in each of loops 2–7. Join. (84 + 4 = 88 sts; 22 per section) That is 84 sts from 3 sc per loop, plus 1 extra sc in the first loop of each of the 4 sections.
In each section, sts 11–13 sit in the marked loop, and st 12 is its center.
Round 22 (spokes): Ch 1. Sc in st 1 (dip), ch 4, sk 4 sts, sc in st 6 (anchor), ch 4, sk 5 sts, in st 12 work [tr, ch 2] 4 times, then 1 more tr (fan), ch 4, sk 5 sts, sc in st 18 (anchor), ch 4, sk 4 sts; repeat from * 3 more times. Join to first sc.
Sts used per section: 1 + 4 + 1 + 5 + 1 + 5 + 1 + 4 = 22. Each section has 5 tr spokes, four ch-2 sps and four ch-4 loops.
Round 23 (arches): Ch 1. Sc in dip sc; (hdc, dc) in next ch-4 loop; dc in anchor sc; 2 tr in next ch-4 loop; sc in first tr of fan, [2 sc in next ch-2 sp, sc in next tr] 4 times; 2 tr in next ch-4 loop; dc in anchor sc; (dc, hdc) in next ch-4 loop; repeat from * 3 more times. Join.
Per section: 1 + 2 + 1 + 2 + 13 + 2 + 1 + 2 = 24 sts. (96 sts)
The stitches get taller from the low dip up to the fan top, then shorter again. This makes the rounded arch.
Round 24 (corded edge): Ch 1, rev sc in each st around. Join and fasten off. (96 sts)
Weave in the ends. Push the end petals outward with your fingers so they flare into tulip points.
Back Panel (Make 1)
Row 1: Ch 29, sc in 2nd ch from hook and in each ch across. Turn. (28 sc)
Row 2 (set-up): Ch 1, sc in first sc, ch 4, sk 2 sts, sc in next st; repeat from * 8 more times. Turn. (9 loops) Check: 1 + 9 x 3 = 28.
The rest of the panel uses three row types. N is the number of loops in the row you are working into.
- Row B: Ch 5 (counts as dc + ch 2), sc in first loop, [ch 4, sc in next loop] N − 1 times, ch 2, dc in last sc. Turn. (N − 1 full loops + 2 half loops)
- Row A: Ch 1, sc in dc, [ch 4, sc in next full loop] N − 1 times, ch 4, sc in 3rd ch of turning ch. Turn. (Back to N loops)
- Dec Row: Sl st in first sc and next 2 ch, ch 1, sc in same loop, [ch 4, sc in next loop] N − 1 times. Turn. (N − 1 loops)
A plain pair is Row B followed by Row A. It keeps the loop count the same.
Rows 3–6: Work 2 plain pairs. (9 loops)
Rows 7–55: Work [1 Dec Row, then 3 plain pairs] 7 times. Loop counts after each Dec Row: Row 7 = 8 loops; Row 14 = 7; Row 21 = 6; Row 28 = 5; Row 35 = 4; Row 42 = 3; Row 49 = 2. Row 55 ends with 2 loops and an sc at each edge.
Row 56: Ch 1, sc in first sc, 3 sc in next loop, sc in next sc, 3 sc in next loop, sc in last sc. (9 sc) Do not fasten off.
Make All Pieces
All pieces are mint green:
- Baskets: 3, about 31 g each (93 g total)
- Back panel with border: 1, about 27 g
- Wooden ring: 1
Layout, seen from the front (top to bottom):
        [ ring ]
       /  mesh  \
      [ basket 3 ]   fold line at 17 in (43.2 cm)
      |  mesh    |
      [ basket 2 ]   fold line at 8.5 in (21.6 cm)
      |  mesh    |
      [ basket 1 ]   fold line at 0 in (panel bottom)
All heights are measured from the bottom edge of the bordered panel.
Border
Add the border to the panel before joining anything. The border uses the solid gauge: 4 sc = 1 in (2.5 cm). Each mesh row is 0.5 in (1.3 cm) tall, so 2 sc fit along each mesh row-end.
Round 1: Ch 1, turn so the RS faces you.
- Top: 3 sc in first st, sc in next 7 sts, 3 sc in last st. (13 sts)
- Side 1: 1 sc in the end of Row 56, 2 sc in each row-end of Rows 55–2, 1 sc in the end of Row 1. (1 + 108 + 1 = 110 sts)
- Bottom: 3 sc in first foundation ch, sc in next 26 ch, 3 sc in last ch. (32 sts)
- Side 2: Work as for side 1. (110 sts)
Join. Total: 265 sts = 9 (top, 1 per st) + 28 (bottom, 1 per ch) + 220 (row-ends) + 8 extra corner sts.
Round 2: Ch 1, rev sc in each st around. Join. (265 sts: top 13, sides 110 each, bottom 32)
Why the math works: Each sc is 0.25 in (0.6 cm) wide. Two sc per 0.5 in (1.3 cm) mesh row match the row height exactly, so the sides stay flat. The 3-sc corners turn without cupping. Rev sc adds no stitches. The two rounds add 0.4 in (1.0 cm) to every edge, so the panel becomes 28.3 in (71.9 cm) by 7.8 in (19.8 cm).
Ring: Hold the ring just above the top edge. Join yarn in the first top st of Round 2. Work 1 sc through each of the 13 top sts and around the ring, gathering the top edge onto the lower part of the ring. Fasten off.
Joining
Method: Whipstitch with mint yarn and a tapestry needle.
Placement: Lay the panel flat, RS up. Center each basket side to side, with its back arch (the center-back section) against the panel. Line up each basket’s Round 13 fold line with the heights in the layout.
Stitch-to-stitch logic:
- Sew across Round 17 of the basket back with 1 whipstitch per stitch, catching the nearest sc node or chain on the panel each time.
- Bottom basket: 24 sts, 6 in (15.2 cm)
- Middle basket: 20 sts, 5 in (12.7 cm)
- Top basket: 16 sts, 4 in (10.2 cm)
These widths fit inside the panel at each height.
2. Sew the same number of Round 13 stitches along the fold line.
3. Tack the top center of the back arch (Round 24) to the panel at 3 points so the rim does not tip forward.
Tension: Pull each stitch snug but not tight. The mesh behind the basket should not pucker or pull narrower.
Checkpoint: Lay the joined holder flat. The panel should still measure 28.3 in (71.9 cm). The baskets should sit level, with about 3.75 in (9.5 cm) of mesh showing between them.
Final Blocking
- Spray the whole piece until it is evenly damp.
- Pin the panel flat to 28.3 in (71.9 cm) long and 7.8 in (19.8 cm) wide at the bottom, keeping the side edges straight.
- Open each mesh diamond with your fingers.
- Fill each basket with a towel-wrapped roll so the wall dries upright.
- Round out the front arch and curl the two end petals outward into points.
- Let it dry completely before hanging.
Final Quality-Control Checklist
- Each base lies flat at 7.3 in (18.5 cm) x 5.3 in (13.5 cm)
- All three baskets have 84 wall sts, 28 mesh loops and 96 rim sts
- Each basket has four petals, with fans centered at the front, the back and both ends
- The panel has 9 loops at the bottom and 2 at the top, with straight edges
- Border counts are 13 / 110 / 32 / 110
- Baskets are level at 0, 8.5 in (21.6 cm) and 17 in (43.2 cm)
- The ring is secure and all ends are woven in
Troubleshooting
- Base ruffles: Your tension is loose. Use a smaller hook, or check that you work only 6 increases per round.
- Base cups: Your stitches are tight. Use a larger hook for Rounds 1–12.
- Fan off-center: Recount the markers so each section has 7 loops, then redo Round 21.
- Arches flop: Work the rev sc more snugly, use a firmer cotton or lightly starch the rim.
- Panel edges wave: Check that you worked 2 sc per mesh row-end, not 3.
- Baskets tilt forward: Add a second line of whipstitches through Round 15.
Care
Hand wash in cool water and dry flat, reshaping the baskets over rolls. Do not tumble dry.
Final Notes
Here is the full measurement chain. Each oval base grows by 6 sts a round to 84 sts, measuring 7.3 in (18.5 cm) x 5.3 in (13.5 cm). The 84 wall stitches become 28 mesh loops, then 88 rim stitches, then four arches of 24 sts each. The panel narrows from 9 loops to 2 over 56 rows and measures 27.5 in (69.9 cm). The 0.4 in (1.0 cm) border brings it to 28.3 in (71.9 cm). With the baskets at 0, 8.5 in (21.6 cm) and 17 in (43.2 cm) and the 3 in (7.6 cm) ring on top, the holder hangs about 31.3 in (79.5 cm).
Happy crocheting!