
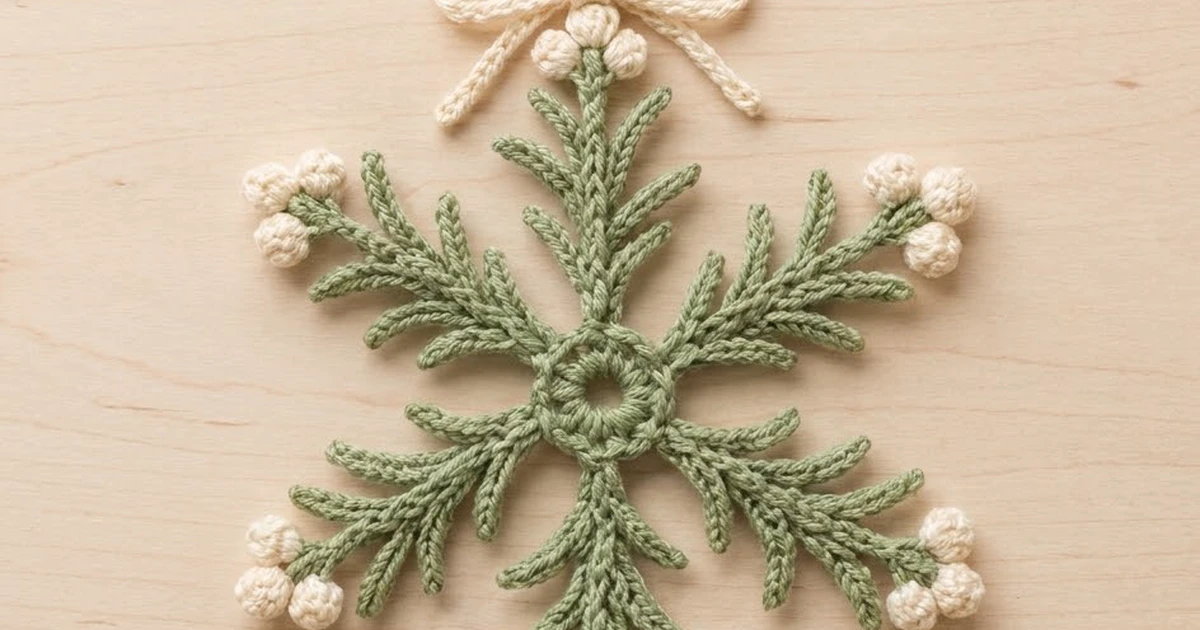
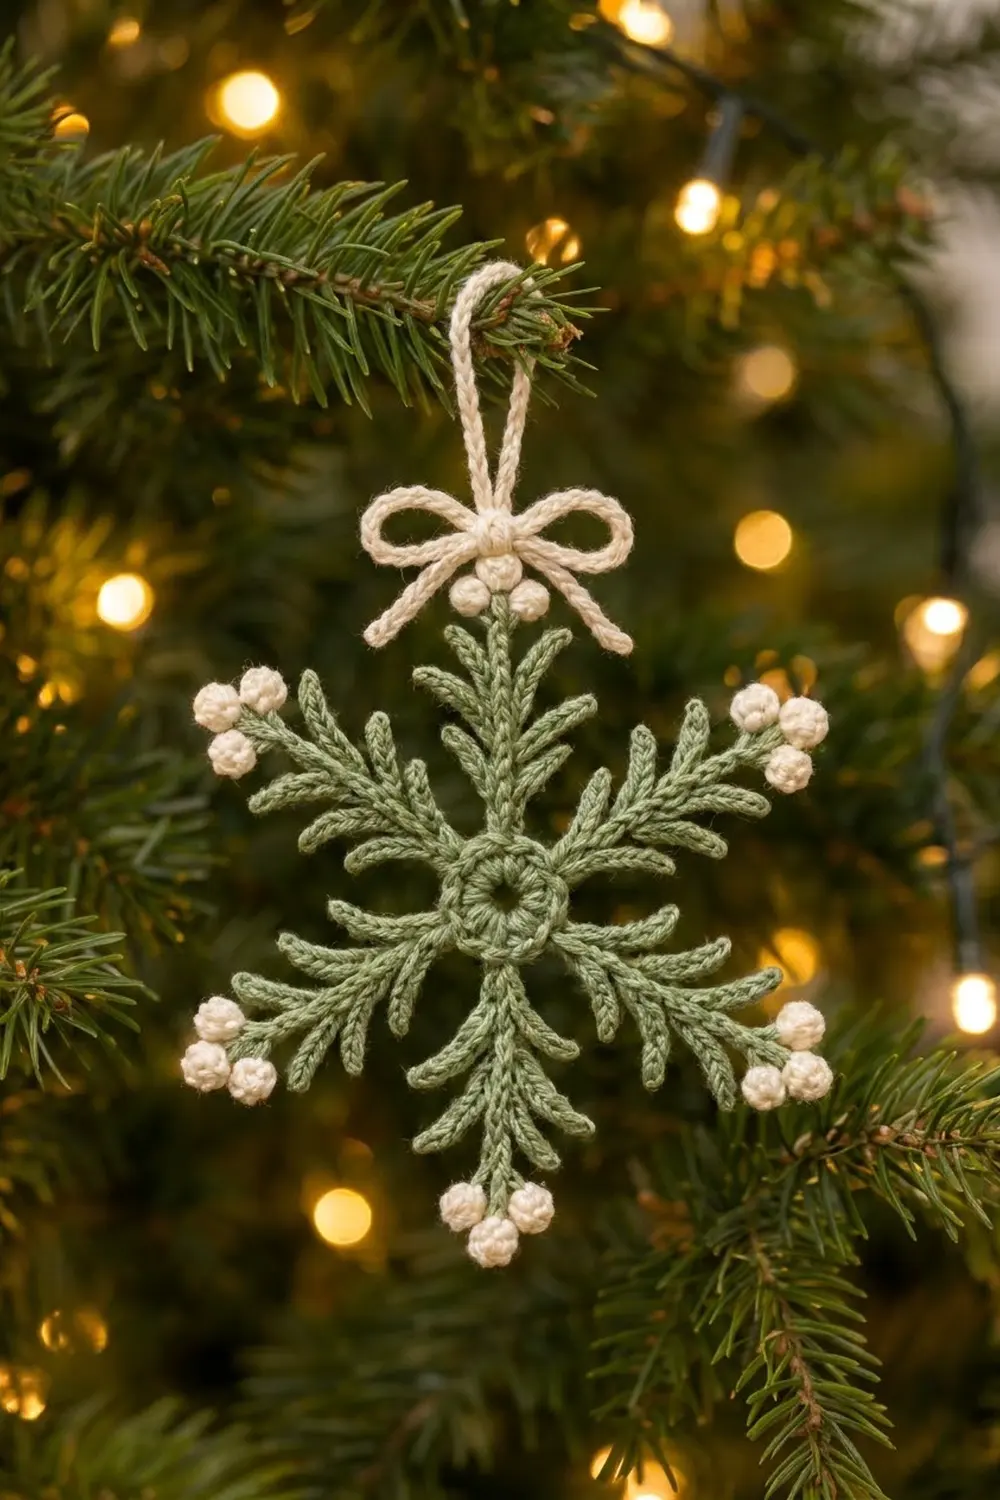
This snowflake looks like six little pine sprigs tipped with snowberries. A small sage green ring sits at the center, and six slip-stitched arms branch out from it. Each arm has fine “needles” on both sides of its stem and ends in three cream bobble berries. A cream hanging loop and a small bow finish the top.
The palette is calm and natural: soft sage green with warm cream accents. It suits a woodland or Scandinavian-style tree and looks just as good as a gift-wrap topper.
This pattern uses US crochet terms. The finished ornament is 7.25 in (18.4 cm) across from berry tip to opposite berry tip, and 9.25 in (23.5 cm) tall with the hanging loop.
How it’s made: you crochet one center ring and six separate arms. Next you add the berries to each arm tip, sew the arms evenly around the ring, then add the hanging loop and bow. Blocking with light starch keeps the needles crisp.
Finished Size and Construction
- Finished size: 7.25 in (18.4 cm) tip to tip; 9.25 in (23.5 cm) tall with loop
- Skill level: Intermediate (lots of slip stitches and a bobble)
- Terminology: US
- Yarn weight: Sport (#2), smooth cotton or cotton blend
- Hook: 3.0 mm (US C/2 or D/3)
- Number of pieces: 1 finished ornament (made from 1 ring, 6 arms, 1 loop and 1 bow cord)
- Layout: 6 arms spaced evenly around a center ring
- Ring size: 1.25 in (3.2 cm) across; center hole 0.4 in (1.0 cm)
- Arm stem length (before berries): 2.5 in (6.4 cm)
- Size before berry tips: 6.25 in (15.9 cm) tip to tip
- Berry tip depth: 0.5 in (1.3 cm) per arm
Materials
Yarn: use a smooth, tightly plied sport-weight cotton. Mercerized cotton shows the slip-stitch needles clearly and holds its shape after blocking. Fuzzy or loosely spun yarn hides the needle detail.
- Color A – Sage Green: 6 g / about 18 m (ring and arms)
- Color B – Cream: 4 g / about 12 m (berries, loop and bow)
These quantities include a margin of about 25% for gauge swatching and sewing tails.
Tools:
– 3.0 mm crochet hook
– Tapestry needle
– Scissors
– Blocking mat or foam board and rustproof pins
– Spray starch or a 1:1 mix of white glue and water (optional, for stiffening)
– Ruler or tape measure
Abbreviations (US Terms)
- ch – chain
- sl st – slip stitch
- sc – single crochet
- dc – double crochet
- st(s) – stitch(es)
- rnd – round
- yo – yarn over
Special stitches:
- 4-dc bobble: [yo, insert hook in the indicated st, yo and pull up a loop, yo and pull through 2 loops] 4 times (5 loops on hook), then yo and pull through all 5 loops.
- Berry (B): ch 3, work a 4-dc bobble in the 3rd ch from the hook, then sl st into the arm’s tip stitch. Each berry is 0.25 in (0.6 cm) across.
- Needle (N3 / N4 / N5): a side needle 3, 4 or 5 sts long.
- N3: ch 4, sl st in the 2nd ch from the hook and in the next 2 ch.
- N4: ch 5, sl st in the 2nd ch from the hook and in the next 3 ch.
- N5: ch 6, sl st in the 2nd ch from the hook and in the next 4 ch.
Gauge and Checkpoints
Gauge: 6 ch = 1 in (2.5 cm) using sport yarn and a 3.0 mm hook.
Before you make the whole set, test one arm first. Chain 16 and lay it flat. The 15 chains after the first one should measure 2.5 in (6.4 cm).
Checkpoints:
1. Ring after Rnd 2: 1.25 in (3.2 cm) across.
2. Arm stem: 2.5 in (6.4 cm) from base to tip, without berries.
3. Arm with berries: 3 in (7.6 cm).
4. Assembled ornament: 7.25 in (18.4 cm) tip to tip.
If your pieces are too big: go down 0.25 mm in hook size, or chain more tightly. Slip-stitch work gets longer quickly when it’s loose.
If your pieces are too small: go up 0.25 mm in hook size. Keep your slip stitches relaxed enough that you can find the chain loops on the second side of the arm.
Center Ring
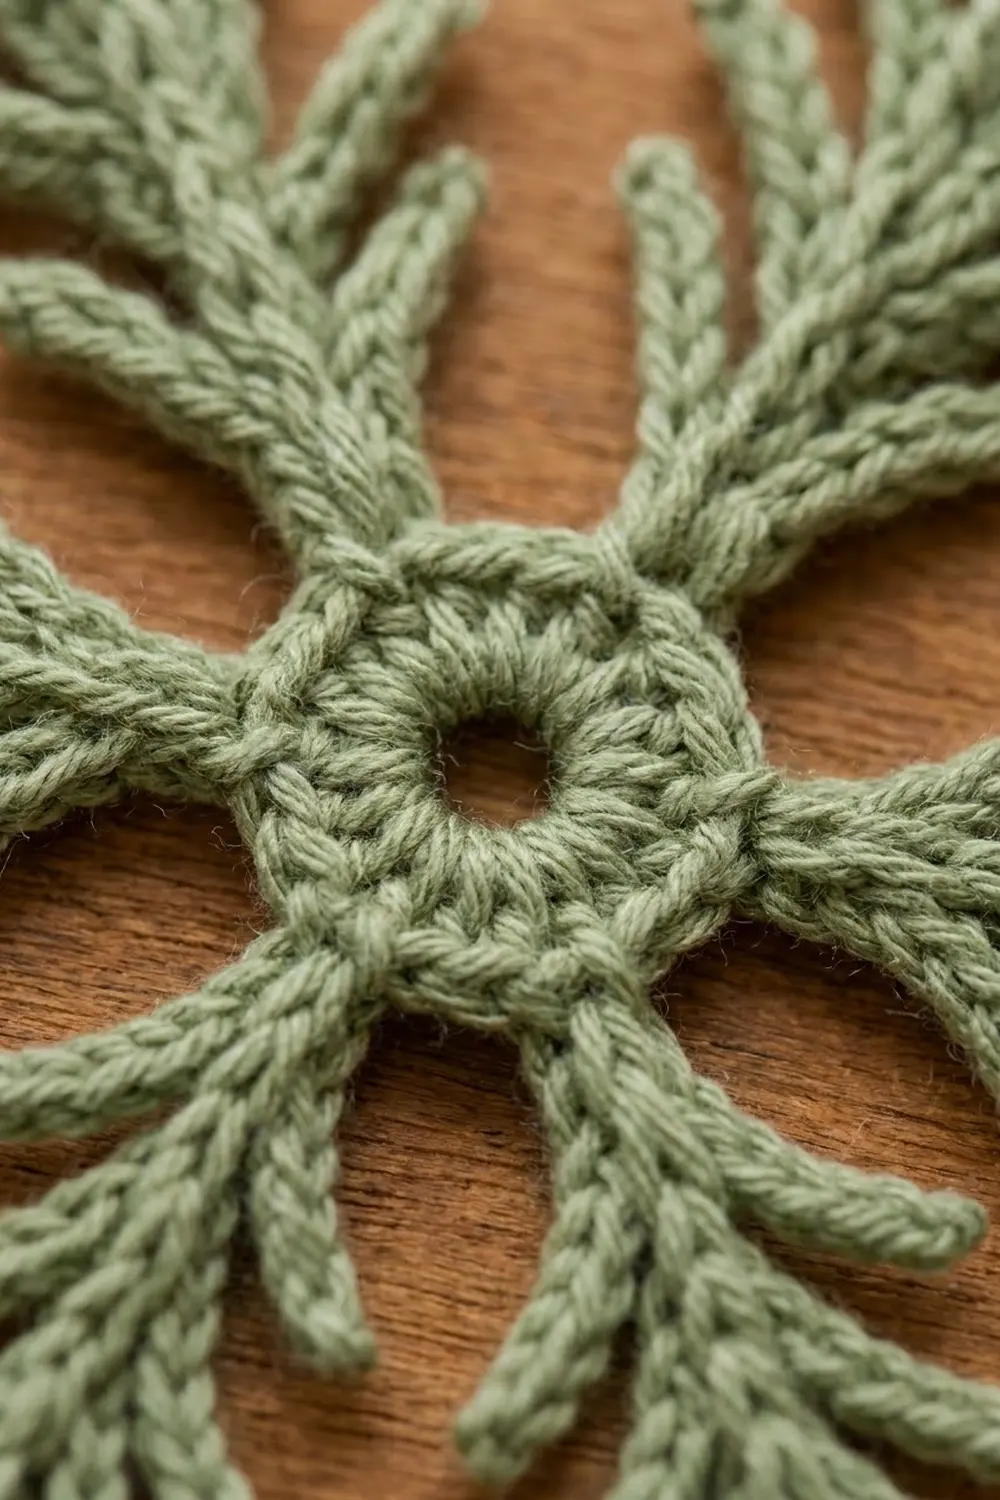
With Color A, ch 6 and sl st in the first ch to form a ring.
Rnd 1: ch 3 (counts as dc), 17 dc in the ring, sl st in the top of the beginning ch-3. (18 dc)
Rnd 2: ch 1, sc in the same st and in each st around, sl st in the first sc. (18 sc)
Fasten off and weave in the ends.
Checkpoint: the ring is 1.25 in (3.2 cm) across with a 0.4 in (1.0 cm) hole. Rnd 1 has 18 sts and so does Rnd 2, so the ring stays flat. With 18 sts and 6 arms, each arm gets exactly 3 sts.
Arms (Make 6)
You build each arm on a foundation chain. The first chain is the base, which gets sewn to the ring. The last chain is the tip, where the berries go. Start with a long tail, because you’ll use it to sew the arm on.
With Color A, leave an 8 in (20.3 cm) tail and ch 16.
Side A (working from the tip down to the base)
Work into the back bumps of the chain.
- Sl st in the 2nd ch from the hook. (1 stem sl st)
- N3, then sl st in the next 2 ch of the stem.
- N4, then sl st in the next 2 ch of the stem.
- N4, then sl st in the next 2 ch of the stem.
- N5, then sl st in the next 2 ch of the stem.
- N5, then sl st in the next 2 ch of the stem.
- Sl st in each of the last 4 ch (the bare stem at the base).
Stem count, Side A: 1 + (5 × 2) + 4 = 15 stem sl sts. That matches the 15 chains after the skipped one.
Needles, Side A: 5 (N3, N4, N4, N5, N5).
Side B (working from the base back up to the tip)
Rotate the work. Now work into the unused front loops on the other side of the foundation chain.
- Sl st in each of the first 4 ch (the bare stem at the base).
- N5, then sl st in the next 2 ch.
- N5, then sl st in the next 2 ch.
- N4, then sl st in the next 2 ch.
- N4, then sl st in the next 2 ch.
- N3, then sl st in the last ch (the tip).
Stem count, Side B: 4 + (4 × 2) + 2 + 1 = 15 stem sl sts. Step 6 places the N3 in the 14th stem chain and then works the 15th.
Needles, Side B: 5 (N5, N5, N4, N4, N3).
Each arm has 10 needles in total, 5 per side. They’re short at the tip and long at the base, which gives the tapered pine-sprig shape. Fasten off Color A at the tip and weave in only this end. Keep the base tail for sewing.
Checkpoint: the stem is 2.5 in (6.4 cm) long. At the base, the arm is about 1.75 in (4.4 cm) wide from the end of one N5 to the end of the opposite N5.
Berry Tips (Border)
This ornament has no traditional border. Its finishing edge is the berry cluster at each arm tip, so the berries are worked here as the border round.
Berry gauge: one berry is 0.25 in (0.6 cm) across. A finished cluster sticks out 0.5 in (1.3 cm) past the end of the stem.
For each arm:
With Color B, join with a sl st in the tip stitch of the arm.
- B (the left berry). Angle it slightly to the left.
- B (the center berry). Let it point straight out from the stem.
- B (the right berry). Angle it slightly to the right.
Fasten off and weave the ends into the back of the berries.
Count per arm: 3 berries = 12 dc worked as 3 bobbles, plus 3 sl sts into the tip.
Count for the whole ornament: 6 arms × 3 berries = 18 berries.
Why the math works: each berry adds 0.5 in (1.3 cm) of reach to its arm. A stem is 2.5 in (6.4 cm), so an arm with berries is 2.5 + 0.5 = 3 in (7.6 cm). Across the ornament, you have two arms plus the ring: 3 + 1.25 + 3 = 7.25 in (18.4 cm). Without berries, the same measurement is 2.5 + 1.25 + 2.5 = 6.25 in (15.9 cm).
Assembly
Placing the arms: count the 18 sc of Rnd 2 on the ring. Mark sts 1, 4, 7, 10, 13 and 16. Each mark leaves 2 sts between arms, so the arms sit 60 degrees apart.
Sewing:
1. Lay the ring right side up. Put the base of one arm against a marked st.
2. Thread the base tail onto the tapestry needle. Sew through the marked sc and through the 4 bare-stem sl sts on both sides of the arm base. Make 3 small passes.
3. Keep your tension firm but not tight. The arm should lie flat and should not pucker the ring.
4. Weave the tail through the back of Rnd 2 to the next marker, then fasten off. Use a new arm’s tail for each arm.
5. Repeat for all 6 arms.
Checkpoint: opposite berry tips measure 7.25 in (18.4 cm) apart. Check all three pairs of opposite arms. They should match to within 0.25 in (0.6 cm).
Hanging Loop and Bow
Hanging loop: with Color B, ch 25 and sl st in the first ch to form a loop. Fasten off and leave a 6 in (15.2 cm) tail. Sew the joined end to the back of the top arm’s tip, just behind the berries. The loop stands 2 in (5.1 cm) above the ornament.
Bow cord: with Color B, ch 60. Sl st in the back bump of the 2nd ch from the hook and in each ch across. (59 sl sts) Fasten off. The cord is about 10 in (25.4 cm) long.
Wrap the cord around the base of the hanging loop, just above the top berries. Tie it in a bow with two loops of about 1 in (2.5 cm) each. The finished bow is 2.75 in (7.0 cm) wide. Trim the tails to 0.75 in (1.9 cm) and put a small dot of glue on the knot, or tack it down with a stitch.
Final Blocking
- Spritz the ornament lightly with water until it’s damp. It shouldn’t be soaked.
- Pin it flat on a blocking mat with the right side up.
- Pin the center ring into a round shape, with the hole open.
- Pin each arm straight, checking that the arms sit 60 degrees apart.
- Fan the needles out from each stem at an even angle, pointing slightly toward the tip. Pin the long N5 needles first.
- Pin each berry cluster into a neat triangle.
- Measure: tip to tip should be 7.25 in (18.4 cm).
- Spray with starch, or brush on the glue-and-water mix for a firmer ornament.
- Let it dry completely, usually 12 to 24 hours.
- Remove the pins and fluff the bow loops.
Final Quality-Control Checklist
- Ring has 18 sc and lies flat
- 6 arms, each with 15 stem sl sts on both sides
- 10 needles per arm, short at the tip and long at the base
- 3 berries per arm, 18 berries in total
- Arms are spaced every 3 sts around the ring
- Tip to tip measures 7.25 in (18.4 cm) on all three axes
- Loop stands 2 in (5.1 cm) high and is firmly anchored
- Bow is centered and its knot is secured
- All tails are woven in on the back
Troubleshooting
Arms curl or twist: slip stitches pull tight on one side. Block with starch, or loosen your Side A tension so it matches Side B.
Can’t find the chain loops for Side B: work Side A into the back bumps only. That leaves a clean V of loops free for Side B.
Needles droop: the yarn may be too soft. Starch more heavily, or switch to mercerized cotton.
Berries look flat: pull the final loop of the bobble snug, and make sure you work all 4 dc into the same chain.
Arms are uneven around the ring: recount your markers. There should be exactly 2 unused sc between arms.
Ornament is too large: your chains are loose. Remake one arm with a smaller hook and check that 15 ch measure 2.5 in (6.4 cm).
Care
Spot clean with a damp cloth and lay the ornament flat to dry. If the starch softens after storage, re-block and starch it again before hanging. Store it flat between tissue paper.
Final Notes
Everything rests on one measurement chain. At 6 ch per inch, each 15-st stem is 2.5 in (6.4 cm). The 18-st ring is 1.25 in (3.2 cm). The berries add 0.5 in (1.3 cm) to each tip. That gives 6.25 in (15.9 cm) across before the berries and 7.25 in (18.4 cm) after. The 2 in (5.1 cm) loop brings the total height to 9.25 in (23.5 cm). If you check your gauge on the first arm, the rest of the ornament will come out to these sizes.
Happy crocheting!