
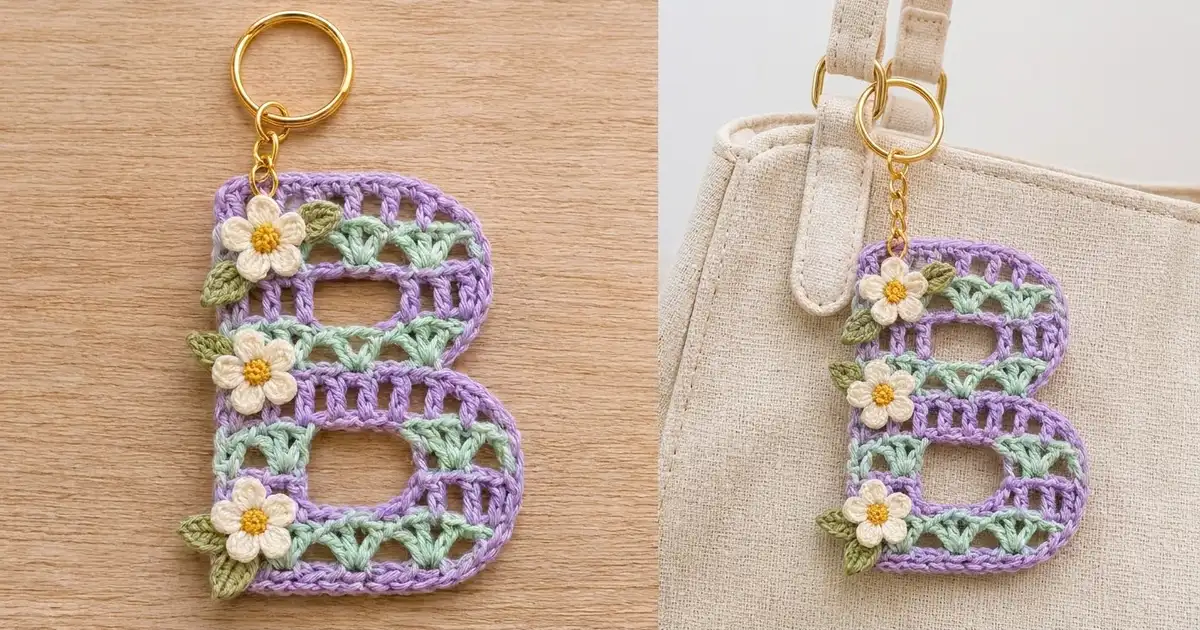
This little letter B is a lacy, two-tone keychain worked flat in rows. Lavender ladder rows alternate with mint fan rows, so you get soft stripes with an open, airy look. A neat lavender single crochet border runs around the whole outline, and the two small oval counters (the holes of the B) are traced in lavender slip stitches.
Three cream flowers with yellow centers and small green leaves are sewn down the straight stem of the letter. A gold split ring on a short chain hangs from the top corner, so the finished B clips onto a tote handle, backpack zipper, or key set.
The pattern uses US crochet terms. The finished letter measures 2.75 in wide x 3.75 in tall (7.0 x 9.5 cm), not counting the keyring hardware.
Construction is simple. You work 11 rows back and forth across 17 stitches, cutting the yarn at each color change. The counters are made with a chain bridge in two of the mint rows. Small changes in stitch height round the bowl and form the waist notch. A one-round border finishes the outline, and then you sew on the flowers and add the ring.
Finished Size and Construction
- Finished size: 2.75 in x 3.75 in (7.0 x 9.5 cm)
- Skill level: Easy-intermediate
- Terminology: US crochet terms
- Yarn weight: #1 super fine (fingering / 4-ply) cotton
- Hook: 2.5 mm
- Number of pieces: 1 letter body, plus 3 flowers and 5 leaves sewn on as appliqués
- Layout: Single letter, no joining
- Piece size before border: 2.5 in x 3.5 in (6.4 x 8.9 cm)
- Border depth: 1/8 in (0.3 cm) on every side
Materials
Use a smooth mercerized cotton in fingering weight. It shows the ladder and fan stitches clearly, holds its shape on a keychain, and stands up to handling. Cotton blends also work, but fuzzy yarns will hide the lace.
- Lavender (A): 8 g / 27 m (letter rows, border, counter outlines)
- Mint (B): 5 g / 17 m (fan rows)
- Cream (C): 3 g / 10 m (flower petals)
- Yellow (D): 1 g / 3 m (flower centers)
- Green (E): 2 g / 7 m (leaves)
Tools:
- 2.5 mm crochet hook
- Tapestry needle
- Scissors
- 2 locking stitch markers
- Gold split keyring, 1 in (2.5 cm) across, with a short chain
- 2 gold jump rings and flat-nose pliers
- Pins, blocking mat, spray bottle
- Optional: light fabric stiffener
All quantities include a margin for swatching and tails.
Abbreviations (US Terms)
- ch – chain
- sl st – slip stitch
- sc – single crochet
- hdc – half double crochet
- dc – double crochet
- sk – skip
- st(s) – stitch(es)
- ch-sp – chain space
- tch – turning chain
- MR – magic ring
- RS / WS – right side / wrong side
Special note – Positions: Every row covers 17 positions. In lavender rows, the odd positions are dc and the even positions are ch-1 spaces. Count each ch-1 space as a stitch when you check your count, and count each chain of a chain bridge as one stitch.
Gauge and Checkpoints
Gauge in pattern: 17 sts = 2.5 in (6.4 cm) wide, and 11 rows = 3.5 in (8.9 cm) tall, after light blocking.
Work Rows 1–3 first as a test piece. It should measure 2.5 in (6.4 cm) wide x about 0.95 in (2.4 cm) tall. If it does, keep it as the start of your letter.
Checkpoints:
- After Row 1: 2.5 in (6.4 cm) wide
- After Row 3: about 0.95 in (2.4 cm) tall
- After Row 6: about 1.9 in (4.8 cm) tall
- After Row 9: about 2.85 in (7.2 cm) tall
- After Row 11: 2.5 in x 3.5 in (6.4 x 8.9 cm)
- After the border: 2.75 in x 3.75 in (7.0 x 9.5 cm)
Too big? Go down to a 2.25 mm hook. Too small? Go up to a 2.75 mm hook. If Row 1 is off by more than 0.25 in (0.6 cm), change hooks before you go on.
Letter Body
Direction: Odd rows (WS) begin at the stem edge (position 1) and end at the bowl edge (position 17). Even rows (RS) begin at the bowl edge and end at the stem. With the RS facing, the stem is on the left.
Color changes: Cut the yarn at the end of every row, leaving 4 in (10.2 cm) tails. Join the new color in the last stitch of the previous row. Lay the tails along the side edges so you can crochet over them in the border.
Row 1 (Lavender, WS)
With A, ch 19.
Dc in 5th ch from hook (the skipped 4 ch count as dc + ch-1), [ch 1, sk next ch, dc in next ch] 7 times. Fasten off.
Count: 9 dc + 8 ch-1 sps = 17 sts.
Row 2 (Mint fan row, RS)
Turn. Join B with sl st in the last dc of Row 1.
Ch 3 (counts as dc), dc in next ch-sp, dc in next dc, dc in next ch-sp, [sc in next dc, dc in next ch-sp, dc in next dc, dc in next ch-sp] 3 times, dc in 3rd ch of tch. Fasten off.
Count: 14 dc + 3 sc = 17 sts. The three sc pull the dc into four small fans.
Row 3 (Lavender ladder, WS)
Turn. Join A with sl st in the last st of Row 2.
Ch 4 (counts as dc + ch-1), sk next st, dc in next st, [ch 1, sk next st, dc in next st] 7 times, working the last dc in the top of the beginning ch-3. Fasten off.
Count: 9 dc + 8 ch-1 sps = 17 sts.
Row 4 (Mint, lower counter, RS)
Turn. Join B in the last dc of Row 3.
Ch 3 (counts as dc), dc in next ch-sp, dc in next dc, dc in next ch-sp, sc in next dc, dc in next ch-sp, ch 5, sk next 5 sts, dc in next ch-sp, sc in next dc, dc in next ch-sp, dc in next dc, dc in next ch-sp, dc in 3rd ch of tch. Fasten off.
Count: 10 dc + 2 sc + 5 ch = 17 sts. The ch-5 bridge spans positions 7–11 and forms the top of the lower counter.
Row 5 (Lavender ladder, WS)
Work as Row 3. When you reach the ch-5 bridge, treat each chain as a stitch: dc in 1st ch, ch 1, sk next ch, dc in next ch, ch 1, sk next ch, dc in 5th ch.
Count: 9 dc + 8 ch-1 sps = 17 sts.
Row 6 (Mint, waist notch, RS)
Turn. Join B in the last dc of Row 5.
Ch 1, sc in same st, hdc in next ch-sp, dc in next dc, dc in next ch-sp, [sc in next dc, dc in next ch-sp, dc in next dc, dc in next ch-sp] 3 times, dc in 3rd ch of tch. Fasten off.
Count: 12 dc + 4 sc + 1 hdc = 17 sts. The sc–hdc start makes the row lower at the bowl edge, which forms the waist notch of the B.
Row 7 (Lavender ladder, WS)
Work as Row 3, working the last dc into the sc at the start of Row 6.
Count: 17 sts.
Row 8 (Mint, upper counter, RS)
Work as Row 4.
Count: 10 dc + 2 sc + 5 ch = 17 sts.
Row 9 (Lavender ladder, WS)
Work as Row 5.
Count: 17 sts.
Row 10 (Mint fan row, RS)
Work as Row 2.
Count: 14 dc + 3 sc = 17 sts.
Row 11 (Lavender, top shaping, WS)
Turn. Join A in the last st of Row 10.
Ch 4 (counts as dc + ch-1), sk next st, dc in next st, [ch 1, sk next st, dc in next st] 5 times, ch 1, sk next st, hdc in next st, ch 1, sk next st, sc in top of beginning ch-3. Do not fasten off.
Count: 7 dc + 1 hdc + 1 sc + 8 ch-1 sps = 17 sts. The hdc and sc step the top edge down to round the upper bowl.
Border
Border gauge: 1 sc per position along the top and bottom, and 2 sc per row end along the sides, except where noted.
Round 1 (continuing from Row 11 with A): Ch 1, turn so the RS faces you.
- Top edge: Sc in the first sc, then sc in each ch-sp and st across to the tch (16 sc), 3 sc in the 3rd ch of the tch for the top-left corner. Top: 19 sc.
- Left side: Work 2 sc in each row end down to Row 1. Left: 22 sc.
- Bottom edge: Work 3 sc at the base of the first column for the bottom-left corner. Then work 1 sc in the free loop under each remaining dc and skipped chain (16 sc). Bottom: 19 sc.
- Right side: Work 2 sc in each row end of Rows 1–5 (10 sc), 1 sc in the end of Row 6 (the notch), 2 sc in each row end of Rows 7–10 (8 sc), and 1 sc in the side of the last sc of Row 11. Right: 20 sc.
Join with a sl st to the first sc. Total: 19 + 22 + 19 + 20 = 80 sc. Fasten off and weave in all ends.
Why the math works: The body is 17 positions wide, so the top and bottom each take 17 stitches, one per position. Each left corner adds 2 extra sc, which gives 19 per edge. The right corners stay at 1 sc each so they curve instead of forming a point. Each dc-height row end takes 2 sc: 11 rows x 2 = 22 on the straight left side. The right side drops 1 sc at the notch and 1 at the shortened top corner, so 22 – 2 = 20. This keeps the edges flat at 2.75 in x 3.75 in (7.0 x 9.5 cm).
Counter Outlines
With the RS facing, join A with a sl st at the lower edge of one counter. Loosely work 5 sl sts along the bottom (the tops of positions 7–11 of the row below), 2 sl sts up the side, 5 sl sts under the ch-5 bridge, and 2 sl sts down the other side, then join. Count: 14 sl sts. Repeat for the second counter.
Each finished counter measures about 0.75 in x 0.3 in (1.9 x 0.8 cm).
Flowers and Leaves
Flower (make 3)
Rnd 1: With D, MR, 5 sc in ring, sl st to the first sc. Fasten off. (5 sts)
Rnd 2: Join C with a sl st in any sc. [Ch 2, 2 dc, ch 2, sl st] in the same sc, sl st in next sc, [ch 2, 2 dc, ch 2, sl st] in the same sc 4 times. Join. (5 petals)
Fasten off, leaving an 8 in (20.3 cm) tail. Each flower is about 0.75 in (1.9 cm) across.
Leaf (make 5)
With E, ch 5. Sl st in 2nd ch from hook, sc in next ch, hdc in next ch, sc in last ch, ch 1. Working along the other side of the chain: sc in the same ch, hdc in next ch, sc in next ch, sl st in the tip.
Fasten off, leaving a 6 in (15.2 cm) tail. Each leaf is about 0.5 in (1.3 cm) long.
Placement (after blocking)
With the RS facing, stack the flowers down the stem:
- Top flower: over Rows 10–11, with one leaf to the right and one to the lower left
- Middle flower: over Rows 5–7, with one leaf to the left
- Bottom flower: over Rows 1–2, with one leaf to the left and one below
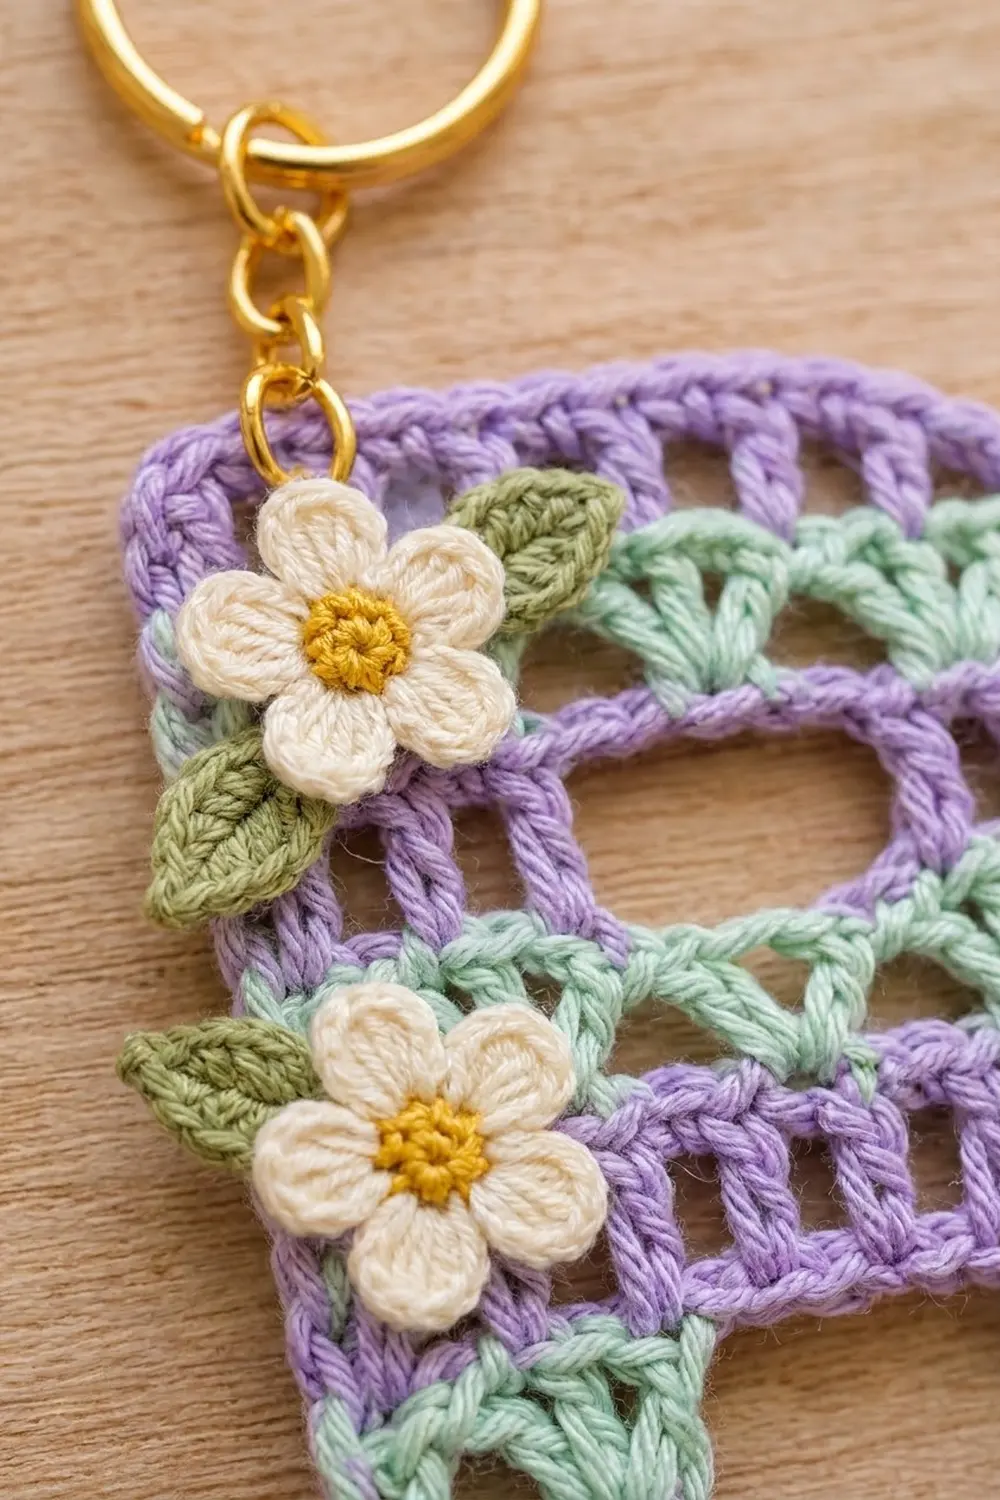
Let the flowers overlap the left border slightly. Tuck the leaves under the petals, then whipstitch each piece in place through its back loops only, so the stitches don’t show on the front.
Final Blocking
- Mist the letter until it’s damp, before you add any appliqués.
- Pin it RS up to 2.75 in x 3.75 in (7.0 x 9.5 cm).
- Keep the left side straight and the left corners square.
- Pin the right side into two smooth curves, pressing the waist notch in about 0.25 in (0.6 cm).
- Gently pull each counter into an oval.
- If you like, brush on a light coat of stiffener.
- Let it dry completely, then sew on the flowers and leaves.
- Use pliers to open a jump ring. Pass it through the border about 0.4 in (1.0 cm) from the top-left corner, then attach the chain and split ring and close the jump ring fully.
Final Quality-Control Checklist
- Every row counts 17 sts.
- Rows 2, 6, and 10 show four fans each. Rows 4 and 8 show fans on both sides of the bridge.
- The counters sit at Rows 4 and 8 and are fully outlined.
- The border totals 80 sc, with square corners on the left and rounded ones on the right.
- Size is 2.75 in x 3.75 in (7.0 x 9.5 cm).
- All tails are hidden, and the flowers and leaves are secure.
- The jump ring is completely closed.
Troubleshooting
- Letter is too wide: Your foundation chain is probably tight. Remake it with a hook one size larger.
- Edges are wavy: You have too many border sc. Use 2 per row end, never 3.
- Edges cup: You have too few border sc, or your tension is tight. Loosen up, or change hooks for the border only.
- Counter has closed up: The slip stitches are too tight. Work them loosely, or reblock with a drinking straw inside the counter.
- Notch is barely visible: Pin it deeper while blocking, or snug the border sc at Row 6.
- Flowers flop forward: Add a tacking stitch through the center of each flower.
Care
Hand wash in cool water and lay flat to dry. Wipe the hardware dry so the gold finish lasts.

Final Notes
Row 1 sets the width at 2.5 in (6.4 cm), and 11 rows set the height at 3.5 in (8.9 cm). One border round adds 1/8 in (0.3 cm) on every side, for a finished size of 2.75 in x 3.75 in (7.0 x 9.5 cm). Check for 17 stitches in every row and 80 in the border, and your B will come out right every time.
Happy crocheting!