
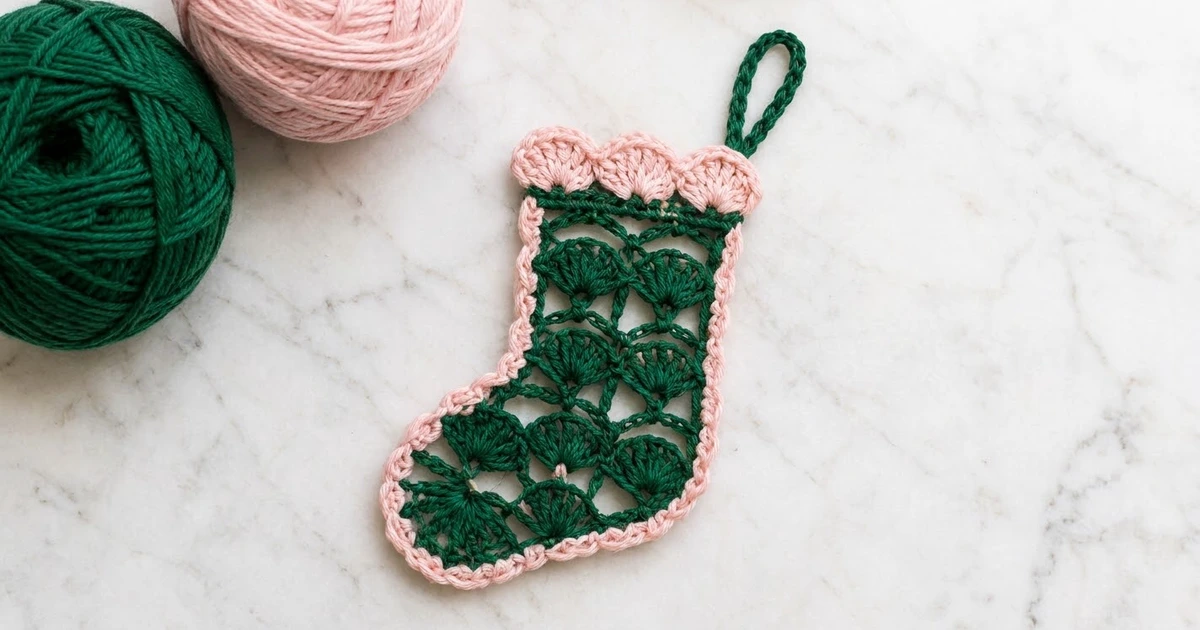
This little stocking is pure Christmas lace. Deep forest green fans stack in neat columns from the sole to the cuff, and a soft pink outline turns the open mesh into a crisp stocking shape you can hang on the tree, tie onto a gift or tuck into a card.
The palette is just two colors: dark green for the lace body and the hanging loop, and pastel pink for the edging and the three-shell scalloped cuff. The style is vintage-inspired but quick to work, and the finished piece lies flat like a doily.
The pattern is written in US crochet terms. The finished ornament measures about 3.5 in (8.9 cm) wide at the foot, 2.5 in (6.4 cm) wide at the leg and 5 in (12.7 cm) tall, not counting the hanging loop.
Construction is simple. You work the green body back and forth in rows, alternating fan rows and chain-arch rows: four rows across the full foot, then six rows over the heel side only to form the leg. One pink round of single crochet outlines the shape, a single row of pink shells makes the cuff, and a green chain loop finishes it.
Finished Size and Construction
- Finished size: 3.5 in (8.9 cm) wide at foot x 5 in (12.7 cm) tall; leg 2.5 in (6.4 cm) wide
- Skill level: Easy-intermediate
- Terminology: US crochet terms
- Yarn weight: DK / light worsted (#3), cotton or cotton blend
- Hook: 3.5 mm (E-4)
- Number of pieces: 1 (single flat piece)
- Layout: stocking silhouette, toe pointing left, heel and loop on the right
- Piece size (green body): foot 3 in (7.6 cm) wide, leg 2 in (5.1 cm) wide, 4 in (10.2 cm) tall
- Size before border: 3 x 4 in (7.6 x 10.2 cm)
- Border depth: 0.25 in (0.6 cm) of pink sc on every edge; cuff shells add 0.5 in (1.3 cm) at the top
- Hanging loop: about 1.5 in (3.8 cm)
Materials
Choose a smooth, mercerized DK cotton. The fans show up best in a yarn with good stitch definition, and cotton blocks flat and holds its shape on the tree. Acrylic works too, but it will look softer and slightly fuzzier.
- Dark green (body, loop): about 12 g / 28 m
- Pastel pink (edging, cuff): about 5 g / 12 m
These quantities are based on a yarn of roughly 230 m per 100 g and include a margin for your gauge swatch and weaving in. If you plan a whole set of ornaments, one 50 g ball of each color makes several.
Tools:
- 3.5 mm (E-4) crochet hook
- Tapestry needle
- Scissors
- Stitch marker
- Ruler or tape measure
- Blocking mat and rust-proof pins
- Spray bottle with water
Abbreviations (US Terms)
- ch – chain
- sl st – slip stitch
- sc – single crochet
- dc – double crochet
- st(s) – stitch(es)
- sp – space
- rep – repeat
- RS – right side
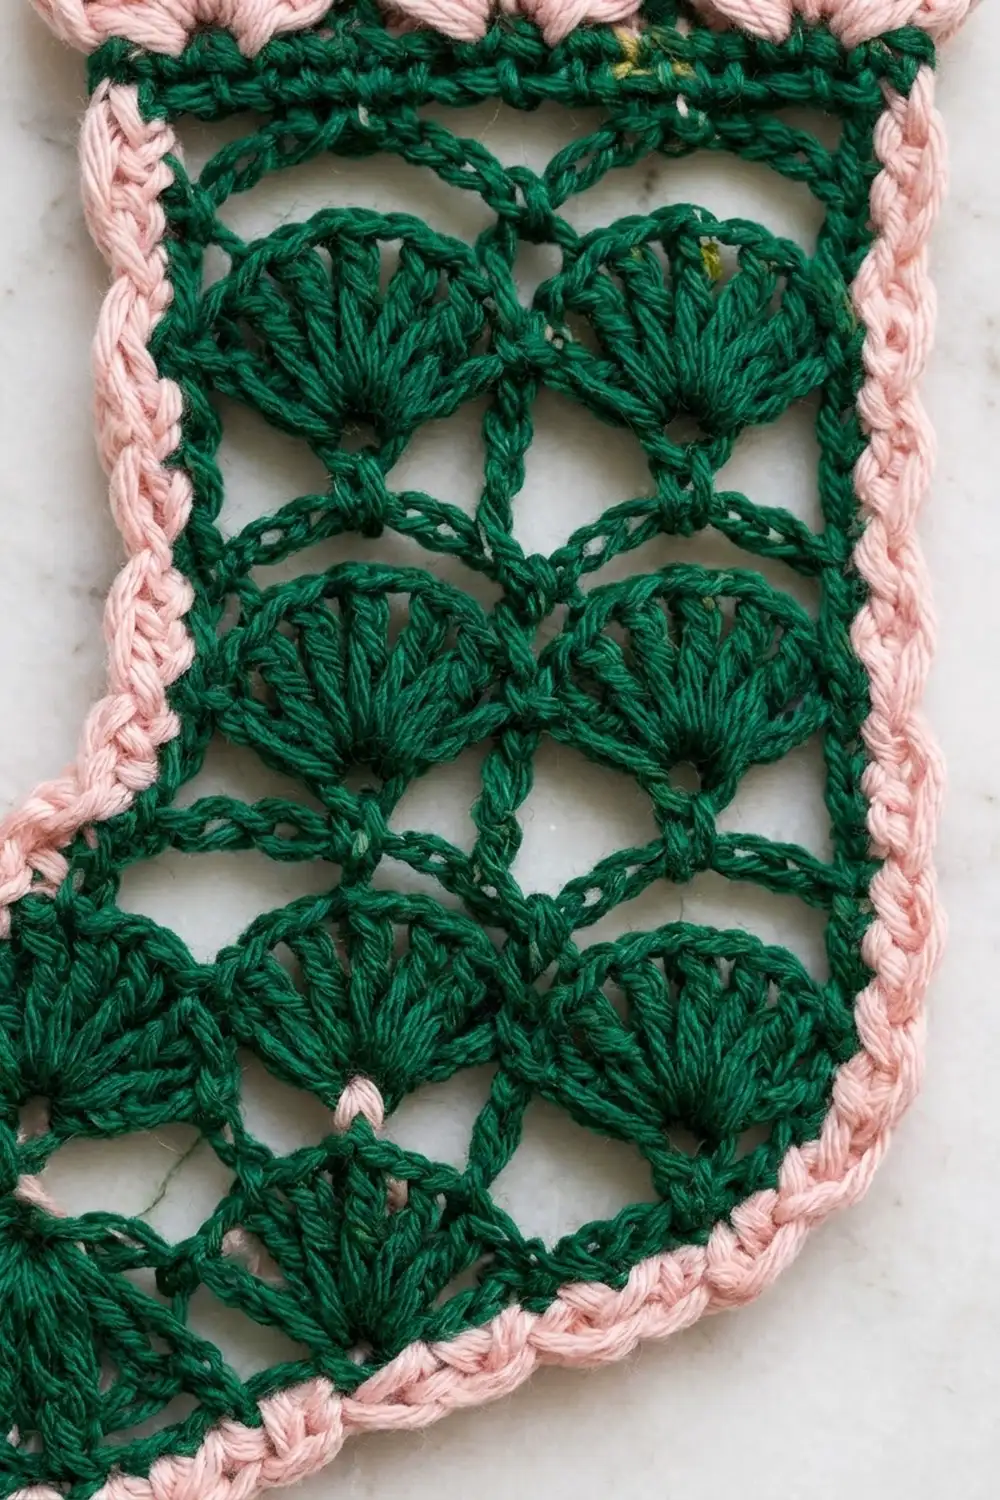
Special stitch – Fan: 7 dc worked into the same stitch.
Arch: ch 3. Arches always travel from the edge of a fan to its center (4th) dc and back down.
Gauge and Checkpoints
Gauge: one fan repeat (8 sts: sc plus fan) = 1 in (2.5 cm) wide. Two rows (one fan row plus one arch row) = 0.8 in (2.0 cm) tall.
Since this ornament is only one piece, the piece itself is your gauge swatch. Work Rows 1–2 and measure before you go on.
Checkpoints:
- After Row 1: foot width 3 in (7.6 cm).
- After Row 4: foot height 1.6 in (4.1 cm).
- After Row 10: total height 4 in (10.2 cm); leg width 2 in (5.1 cm).
- After Border Round 1: 3.5 in (8.9 cm) wide at the foot x 4.5 in (11.4 cm) tall.
- After the cuff: 5 in (12.7 cm) tall.
Too big? Go down to a 3.25 mm (D-3) hook. Too small? Go up to a 3.75 mm (F-5) hook. If only the height is off, check that your dc are a consistent height and your ch-3 arches aren’t pulled tight. Arches that are too tight make the leg pucker, and arches that are too loose make it sag.
Body (Green)
The end where you begin Row 1 is the heel/back edge (right side of the finished stocking). The other end of the foot is the toe.
With green, ch 26.
Row 1 (fan row, 3 fans): Sc in 2nd ch from hook, skip 3 ch, 7 dc in next ch, skip 3 ch, sc in next ch; rep from * 2 more times, turn. (25 sts: 4 sc + 21 dc; 3 fans)*
Checkpoint: 3 in (7.6 cm) wide.
Row 2 (arch row): Ch 6 (counts as dc + ch 3), sc in 4th dc of next fan, ch 3, dc in next sc; ch 3, sc in 4th dc of next fan, ch 3, dc in next sc; rep from * once more, turn. (4 dc, 3 sc, 6 ch-3 sps)*
Row 3 (fan row): Ch 1, sc in first dc, 7 dc in next sc, sc in next dc; rep from * 2 more times, working the last sc in the 3rd ch of the turning ch-6, turn. (25 sts: 4 sc + 21 dc; 3 fans)*
Each new fan sits directly above the fan below, so the fans form neat vertical columns.
Row 4 (arch row): Rep Row 2. You finish at the heel edge, turn. (4 dc, 3 sc, 6 ch-3 sps)
Checkpoint: foot is 1.6 in (4.1 cm) tall.
Leg
From here on you work over the two heel-side fans only. The toe-side fan of Row 4 stays unworked and becomes the top of the foot (the instep).
Row 5 (fan row, 2 fans): Ch 1, sc in first dc, 7 dc in next sc, sc in next dc; rep from * once more, turn, leaving the remaining sts unworked. (17 sts: 3 sc + 14 dc; 2 fans)*
The unworked part of Row 4 is: ch-3 sp, sc, ch-3 sp, and the turning ch at the toe.
Row 6 (arch row): Ch 6 (counts as dc + ch 3), sc in 4th dc of next fan, ch 3, dc in next sc, ch 3, sc in 4th dc of next fan, ch 3, dc in last sc, turn. (3 dc, 2 sc, 4 ch-3 sps)
Row 7: Ch 1, sc in first dc, 7 dc in next sc, sc in next dc, 7 dc in next sc, sc in 3rd ch of turning ch-6, turn. (17 sts; 2 fans)
Row 8: Rep Row 6. (3 dc, 2 sc, 4 ch-3 sps)
Row 9: Rep Row 7. (17 sts; 2 fans)
Row 10: Rep Row 6. Do not turn. Fasten off green. (3 dc, 2 sc, 4 ch-3 sps)
Row 10 is an arch row, so the top edge is flat and ready for the cuff.
Checkpoint: 4 in (10.2 cm) tall, leg 2 in (5.1 cm) wide, foot 3 in (7.6 cm) wide. Lightly steam or pin the body flat now if the fans curl. It makes the edging much easier to work evenly.
Border
The border has three parts: one pink sc outline round, the pink shell cuff across the top, and the green hanging loop.
Border gauge: about 8 sc = 1 in (2.5 cm) along the edges, and 3 sc per row-end.
The lace is reversible. Pick the side you like best as the RS and keep it facing you.
Round 1 (Pink Outline)
In this round, each corner group is 3 sc in one stitch, and corner groups are counted separately from the side counts below.
Join pink with a sl st in the top of the turning ch at the top front corner of the leg (the end of Row 10 opposite the heel). Ch 1.
- Top-front corner: 3 sc in same st. (3)
- Top edge: 3 sc in ch-3 sp, sc in sc, 3 sc in ch-3 sp, sc in dc, 3 sc in ch-3 sp, sc in sc, 3 sc in ch-3 sp. (15)
- Top-back corner: 3 sc in last dc. (3)
- Back (heel) edge: 3 sc in each row-end down Rows 10 to 1. (30)
- Heel corner: 3 sc in first foundation ch. (3)
- Sole: Sc in each of next 23 foundation ch. (23)
- Toe corner: 3 sc in last foundation ch. (3)
- Toe edge: 3 sc in each row-end up Rows 1 to 4. (12)
- Toe-top corner: 3 sc in 3rd ch of turning ch-6 of Row 4. (3)
- Instep: 3 sc in ch-3 sp, sc in sc, 3 sc in ch-3 sp. (7) Skip the dc covered by the end of Row 5 so the inner ankle corner stays sharp.
- Front leg edge: 3 sc in each row-end up Rows 5 to 10. (18)
Join with a sl st to the first sc. (120 sc)
Why the math works: The sole has 25 foundation ch. The two end ch carry the heel and toe corner groups, and the 23 ch between them get 1 sc each. The top edge has 4 arches (12 sc) plus 3 sts (3 sc) between the corners, which is 15 sc over 2 in (5.1 cm), or about 7.5 per inch. Every row is about 0.4 in (1.0 cm) tall, so 3 sc per row-end is also about 7.5 sc per inch. Since the edge gauge is the same on every side, the outline lies flat. Total: 5 corner groups (15) + 15 + 30 + 23 + 12 + 7 + 18 = 120.
The 3-sc corner groups at the heel and toe ease the corners around the fan points so they block into soft curves.
Checkpoint: 3.5 in (8.9 cm) wide at the foot x 4.5 in (11.4 cm) tall.
Cuff (Pink Shells)
The cuff is worked across 19 sts: the middle sc of the top-front corner group, the last sc of that group, the 15 top-edge sc, the first sc of the top-back group, and the middle sc of the top-back group.
Do not fasten off after Round 1. Sl st into the next sc (the middle sc of the top-front corner group).
Cuff row: Ch 1, sc in same st, skip 2 sts, 7 dc in next st, skip 2 sts, sc in next st; rep from * 2 more times. The final sc lands in the middle sc of the top-back corner group. (25 sts: 4 sc + 21 dc; 3 shells)*
Math check: 1 + (6 x 3) = 19 sts used. Fasten off pink, leaving a 4 in (10.2 cm) tail.
The three shells form plump half-circles that sit just above the green leg and add 0.5 in (1.3 cm) of height.
Checkpoint: 5 in (12.7 cm) tall.
Hanging Loop (Green)
Join green with a sl st in the last sc of the cuff (top-back corner, heel side). Ch 20, then sl st in the same st. Fasten off and weave the tail into the cuff.
This makes a loop about 1.5 in (3.8 cm) tall.
Final Blocking
- Weave in all ends along the pink sc so they stay hidden. Don’t trim them yet.
- Lightly mist the ornament with water until it is damp but not wet.
- Lay it on the blocking mat with the toe pointing left.
- Pin the back edge straight and 4.5 in (11.4 cm) tall below the cuff.
- Pin the sole straight and 3.5 in (8.9 cm) wide.
- Shape the heel and toe corners into smooth curves with one pin each.
- Pin the center of each green fan, so it opens fully, and the top of each cuff shell.
- Make sure the leg is 2.5 in (6.4 cm) wide and the total height is 5 in (12.7 cm).
- Let it dry completely, then unpin and trim the woven ends.
For a firmer ornament, mist with a light fabric stiffener before pinning.
Final Quality-Control Checklist
- Body: 3 fans in Rows 1 and 3, 2 fans in Rows 5, 7 and 9
- Fans stack in straight vertical columns
- Every arch reaches the center (4th) dc of its fan
- Round 1 totals 120 sc with 5 corner groups
- Cuff: 3 shells, 25 sts, centered across the top
- Inner ankle corner is sharp, not rounded or gapped
- Hanging loop sits at the top-back (heel-side) corner
- Measures 3.5 x 5 in (8.9 x 12.7 cm)
- All ends hidden and secure
Troubleshooting
Fans lean or drift sideways. You probably worked an arch sc into the 3rd or 5th dc. Count to the 4th dc every time.
Leg is narrower than 2 in (5.1 cm). Your arches are tight. Loosen the ch-3 or go up a hook size for the green.
Edges ruffle. You worked too many sc per row-end. Stick to 3, worked around the post, not into the stitch.
Edges pull in or cup. Your sc tension is tight. Use a hook 0.25 mm larger for the pink only.
Cuff shells don’t fit evenly. Your top edge isn’t 19 sts from corner middle to corner middle. Recount Round 1’s top edge (15) and corner groups.
Hole at the ankle corner. Close it with the pink tail when weaving in.
Care
Hand wash in cool water, press out excess water in a towel, and dry flat, pinned to shape. Store flat or hanging, away from heavy ornaments that could crush the cuff.
Final Notes
The measurement chain is short and easy to check. Each fan repeat is 1 in (2.5 cm), so three fans make a 3 in (7.6 cm) foot and two fans make a 2 in (5.1 cm) leg. Ten rows at 0.4 in (1.0 cm) each give a 4 in (10.2 cm) body. The pink outline adds 0.25 in (0.6 cm) all around for 3.5 x 4.5 in (8.9 x 11.4 cm), and the shell cuff brings the height to 5 in (12.7 cm).
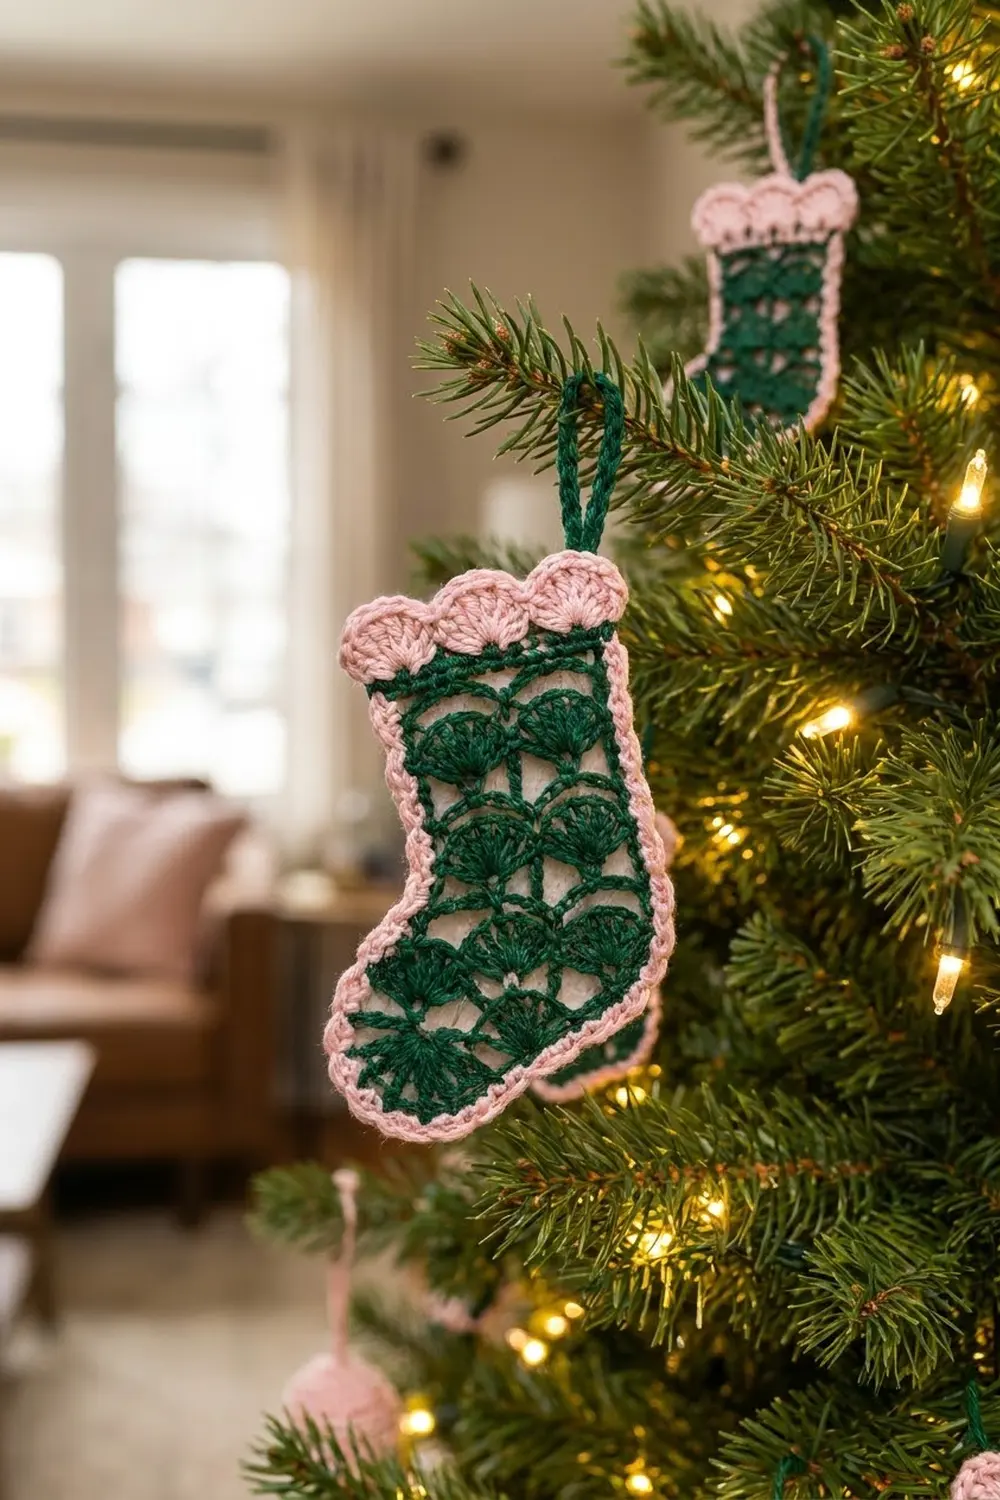
Make one in the classic green and pink, then try a whole tree’s worth in other color pairs. Happy crocheting!