

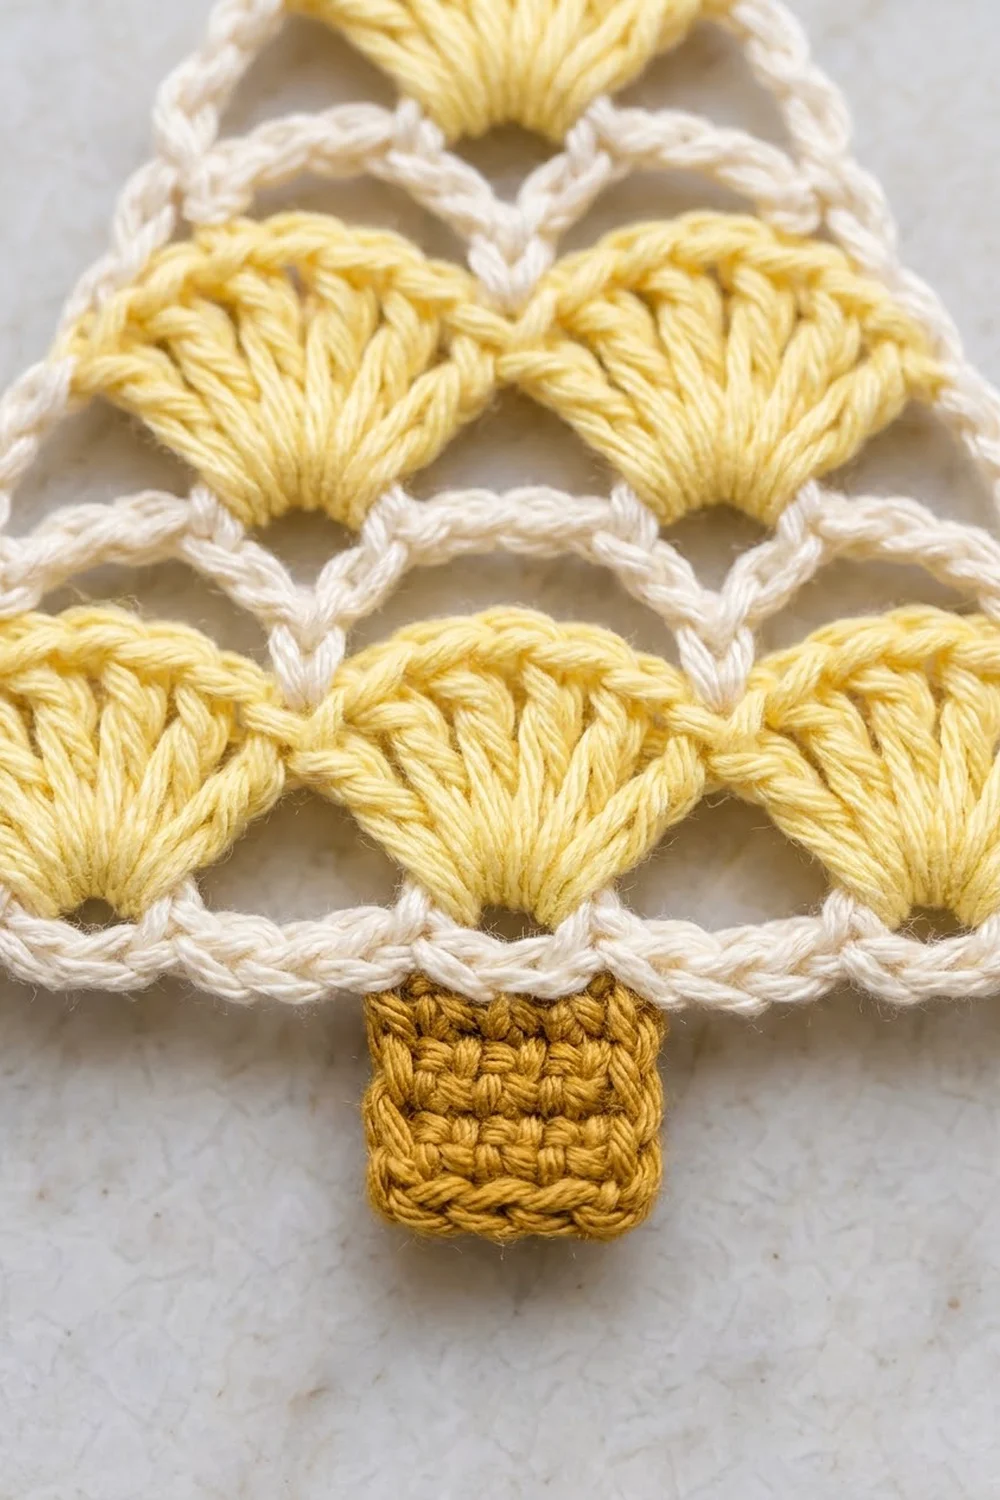
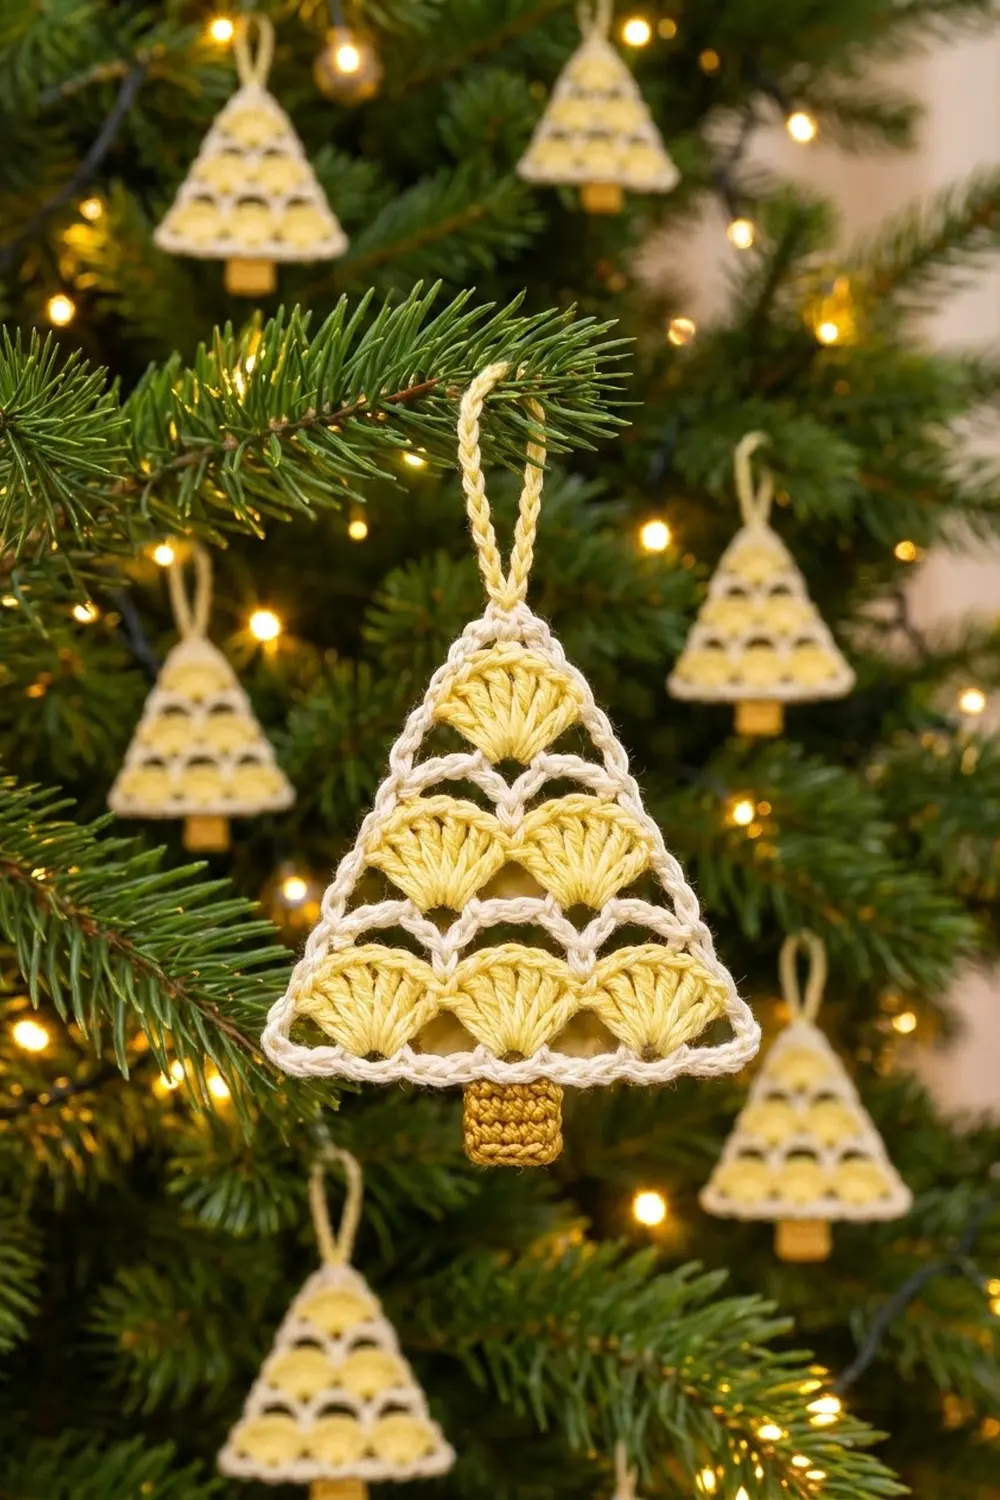
This small tree ornament is built from fan-shaped shells stacked in a pyramid: three pale yellow shells across the bottom, two in the middle and one at the top. A cream chain framework runs around every tier and outlines the tree. A small mustard trunk sits under the bottom edge, and a pale yellow chain loop at the top is ready for hanging.
The colors are soft and warm: buttery pale yellow, cream and golden mustard. The ornament looks lacy and light. It works on a tree, a gift bag or a window hook. Make one as a quick gift topper, or make several for a matching set.
This pattern uses US crochet terms. The finished triangle is 4 3/4 in (12.1 cm) wide and 3 1/8 in (7.9 cm) tall. With the trunk, the ornament is 3 5/8 in (9.2 cm) tall. With the hanging loop, it is about 5 1/8 in (13.0 cm) tall overall.
You work the triangle from the bottom up in six short rows and change color every row. Yellow shell rows alternate with cream chain rows, and each tier sits over the gaps between the shells of the tier below. One cream border round finishes the outline. Last, you add a separate trunk and a slip-stitch hanging loop.
Finished Size and Construction
- Finished size (triangle): 4 3/4 in (12.1 cm) wide x 3 1/8 in (7.9 cm) tall
- Overall with trunk: 3 5/8 in (9.2 cm) tall
- Overall with loop: about 5 1/8 in (13.0 cm) tall
- Skill level: Easy
- Terminology: US crochet terms
- Yarn weight: Sport weight (#2), mercerized cotton
- Hook: 3.25 mm (US D/3)
- Number of pieces: 1 ornament (a triangle body, a small trunk sewn on, and a loop worked directly onto the top)
- Layout: Single piece, with no motifs to join
- Piece size before border: 4 3/8 in (11.1 cm) wide x 2 5/8 in (6.7 cm) tall
- Border depth: about 1/4 in (0.6 cm) on each edge
Materials
Choose a smooth, mercerized sport-weight cotton. It shows shell stitches clearly, holds its shape after blocking and won’t shed on a tree. A cotton blend also works if it has a firm twist. Avoid fuzzy yarns, because they blur the open chain spaces.
- Pale yellow (shells and hanging loop): 5 g, about 16 m
- Cream (foundation, chain rows, border): 4 g, about 12 m
- Mustard (trunk): 2 g, about 6 m
These amounts include a margin for testing gauge and weaving in ends. One ornament uses far less than a full ball of any color.
Tools
- 3.25 mm (US D/3) crochet hook
- Tapestry needle
- Scissors
- Rust-proof pins and a foam blocking board
- Spray bottle with water
- Optional: light spray starch
Abbreviations (US Terms)
- ch – chain
- sc – single crochet
- tr – treble crochet
- sl st – slip stitch
- sk – skip
- sp – space
- st(s) – stitch(es)
- RS – right side
Special stitch – Shell: Work 9 tr in the same stitch. The center stitch of a shell is the 5th tr.
Gauge and Checkpoints
Gauge: 14 sc and 16 rows = 2 in (5.1 cm) in single crochet.
The ornament is small, so you can use the triangle itself as your test piece instead of a separate swatch. Work Rows 1 and 2, then measure before you go on.
Checkpoints
- After Row 1: 31 sc measure 4 3/8 in (11.1 cm) wide.
- After Row 2: The piece is 4 3/8 in (11.1 cm) wide and about 7/8 in (2.2 cm) tall.
- After Row 4: About 1 3/4 in (4.4 cm) tall.
- After Row 6: About 2 5/8 in (6.7 cm) tall.
- After the border: 4 3/4 in (12.1 cm) wide x 3 1/8 in (7.9 cm) tall.
If your piece is too big, switch to a 3.0 mm hook. If it is too small, switch to a 3.5 mm hook. If you don’t need to match the size exactly, you can also change yarn weight. The stitch counts stay the same, so the shape stays the same at any size.
Triangle Body
Work every row with the RS facing you. Fasten off at the end of each row and join the new color at the right-hand end of the next row. Leave 4 in (10.2 cm) tails and weave them in as you go so finishing is quick.
Keep your tension relaxed and even. The cream chain rows carry the shells above them, so they need to be neither tight nor loose.
Row 1 (cream): Ch 32. Sc in 2nd ch from hook and in each ch across. Fasten off. (31 sc)
This row is the base of the tree. Do not turn. The side facing you is the RS.
Row 2 (pale yellow): Join pale yellow with sc in first sc. Sk 4 sc, Shell in next sc, sk 4 sc, sc in next sc; repeat from * 2 more times. Fasten off. (3 shells and 4 sc = 31 sts)*
The sc fall on sts 1, 11, 21 and 31, and the shells fall on sts 6, 16 and 26. Each shell repeat uses exactly 10 sts, so 1 + (3 x 10) = 31.
Row 3 (cream): Join cream with sc in the 5th tr of the first shell. Ch 9, sc in the 5th tr of the next shell; repeat from * once more. Fasten off. (3 sc and 18 ch = 21 sts)*
The two ch-9 lengths rest on the shoulders of the shells and cross the dips between them. They make the first cream line between tiers.
Row 4 (pale yellow): Join pale yellow with sc in first sc. Sk 4 ch, Shell in next ch, sk 4 ch, sc in next sc; repeat from * once more. Fasten off. (2 shells and 3 sc = 21 sts)*
Work each shell into the 5th (center) ch of the ch-9, going under the top loop and the back bump. Each new shell then sits right over the dip between two shells below, which creates the stacked, offset look.
Row 5 (cream): Join cream with sc in the 5th tr of the first shell. Ch 9, sc in the 5th tr of the next shell. Fasten off. (2 sc and 9 ch = 11 sts)
Row 6 (pale yellow): Join pale yellow with sc in first sc. Sk 4 ch, Shell in next ch, sk 4 ch, sc in last sc. Fasten off. (1 shell and 2 sc = 11 sts)
The body is now a stepped triangle of 3, 2 and 1 shells. Every row uses the same 10-st repeat (sc, sk 4, Shell, sk 4) plus one closing sc, which is why the counts go 31, 21, 11.
Border
Border gauge: Each ch-7 arch should lie flat along one outer half-shell without pulling or rippling. Along the bottom, each ch-2 + sc unit covers 3 foundation loops, about 3/8 in (1.0 cm).
The border is one cream round that outlines the whole tree. Each anchor point on the sides is the end sc of a yellow row.
Border Round (cream): With RS facing, join cream with sc in the 5th tr of the Row 6 shell, ch 3, sc in same st (top point).
- First side: Ch 7, sc in end sc of Row 6. Ch 7, sc in end sc of Row 4. Ch 7, sc in end sc of Row 2. (3 ch-7 arches)
- First bottom corner: Ch 2, sc in the free loop of the foundation ch at this corner.
- Bottom edge: Ch 2, sk 2 free loops, sc in next free loop; repeat from * 9 more times, ending in the last free loop at the opposite corner. (11 sc and 10 ch-2 sps along the bottom)*
- Second bottom corner: Ch 2, sc in end sc of Row 2 on this side.
- Second side: Ch 7, sc in end sc of Row 4. Ch 7, sc in end sc of Row 6. Ch 7, sl st in first sc to join. (3 ch-7 arches)
Fasten off. Round total: 19 sc and 19 sps (1 ch-3 sp, 6 ch-7 arches and 12 ch-2 sps).
Why the math works:
- Sides: Each side of the triangle climbs three tiers. Each step runs from the center of one shell to the center of the shell above it, so each side needs exactly 3 arches. A ch-7 matches one outer half-shell, which is about 5 sts across and one tier up.
- Bottom: The foundation has 31 free loops. One sc in the first loop plus 10 repeats of 3 loops each gives 1 + (10 x 3) = 31, so the last sc lands exactly in the last loop.
- Closed round: In a closed round, every sc is followed by one space, so 19 sc should give 19 spaces. They do.
Trunk
Row 1 (mustard): Ch 6. Sc in 2nd ch from hook and in each ch across, turn. (5 sc)
Rows 2–5: Ch 1, sc in each sc across, turn. (5 sc)
Fasten off, leaving a 10 in (25.4 cm) tail. The trunk measures about 3/4 in (1.9 cm) wide x 5/8 in (1.6 cm) tall.
Attach: Find the 6th of the 11 bottom-border sc. It sits in foundation loop 16, the exact center of the base. Center the trunk under it. Tuck the top 1/8 in (0.3 cm) of the trunk behind the bottom border and whipstitch it in place from the wrong side. About 1/2 in (1.3 cm) of trunk shows below the tree.
Hanging Loop
Join pale yellow with sl st in the top ch-3 sp. Ch 24, then sl st in the same ch-3 sp to form a loop. Sl st in the back bump of each of the 24 ch around the loop, then sl st in the ch-3 sp again. Fasten off and weave in the end. (24 sl st)
The slip stitches make a firm cord that won’t stretch on a branch. The loop stands about 1 1/2 in (3.8 cm) above the top point.
Final Blocking
- Weave in any remaining tails through stitches of the same color so they stay hidden.
- Mist the ornament evenly with water until it is damp but not dripping.
- Draw a triangle 4 3/4 in (12.1 cm) wide and 3 1/8 in (7.9 cm) tall, and put it under clear plastic on your blocking board.
- Pin the top point and the two bottom corners first.
- Pin each side arch point (the end sc of Rows 2, 4 and 6) so the sides form straight lines.
- Fan each shell open with your fingertips so the 9 tr spread evenly. Pin the cream ch-9 lines so they sit just above the shells.
- Straighten the trunk into a neat rectangle and lay the loop flat above the top point.
- For a crisper ornament, add a light mist of spray starch.
- Let it dry completely before unpinning, usually 4 to 6 hours.
Final Quality-Control Checklist
- Row counts are 31, 31, 21, 21, 11 and 11 sts.
- There are 6 shells in total (3, 2, 1), each with 9 tr.
- Each upper shell is centered over the dip between two lower shells.
- The border has 3 ch-7 arches on each side and 10 ch-2 sps along the bottom.
- The triangle measures 4 3/4 in (12.1 cm) x 3 1/8 in (7.9 cm).
- The trunk is centered on the 6th bottom-border sc.
- The loop is firm and centered on the top point.
- All tails are woven in and trimmed close.
Troubleshooting
Shells cup or curl. Your tr are too tight for the space. Go up one hook size for the shells only, or pull up each loop a little taller.
The ch-9 lines sag between shells. Your chains are loose. Work the chain rows with a hook one size smaller.
The ch-9 lines pull the shells together. Your chains are tight. Work the chain rows with a hook one size larger, or chain more loosely.
The sides ripple. The ch-7 arches are too long for your tension. Work ch 6 on every arch so both sides still match.
The sides pull inward. The arches are too short. Work ch 8 on every arch.
The bottom edge flares. Your bottom ch-2 sps are loose. Work them with a smaller hook, and make sure you skip exactly 2 loops each time.
The trunk is off-center. Count the bottom border sc again. Center the trunk on the 6th sc, not on a ch-2 sp.
Care
Hand wash in cool water with mild soap, press the water out in a towel and dry flat, reshaping as you go. Store the ornament flat or hanging, away from direct sunlight, so the yellow doesn’t fade.
Final Notes
The measurement chain is short and easy to check. A gauge of 14 sc = 2 in (5.1 cm) makes the 31-st base 4 3/8 in (11.1 cm) wide. The 10-st shell repeat takes the rows from 31 to 21 to 11 sts and brings the body to 2 5/8 in (6.7 cm) tall. The border adds about 1/4 in (0.6 cm) on each edge, for a triangle of 4 3/4 in (12.1 cm) x 3 1/8 in (7.9 cm). The trunk and loop bring the ornament to about 5 1/8 in (13.0 cm) overall.
Check the size after Row 2, keep your chain tension even and block carefully, and your tree will come out crisp and symmetrical.
Happy crocheting!