
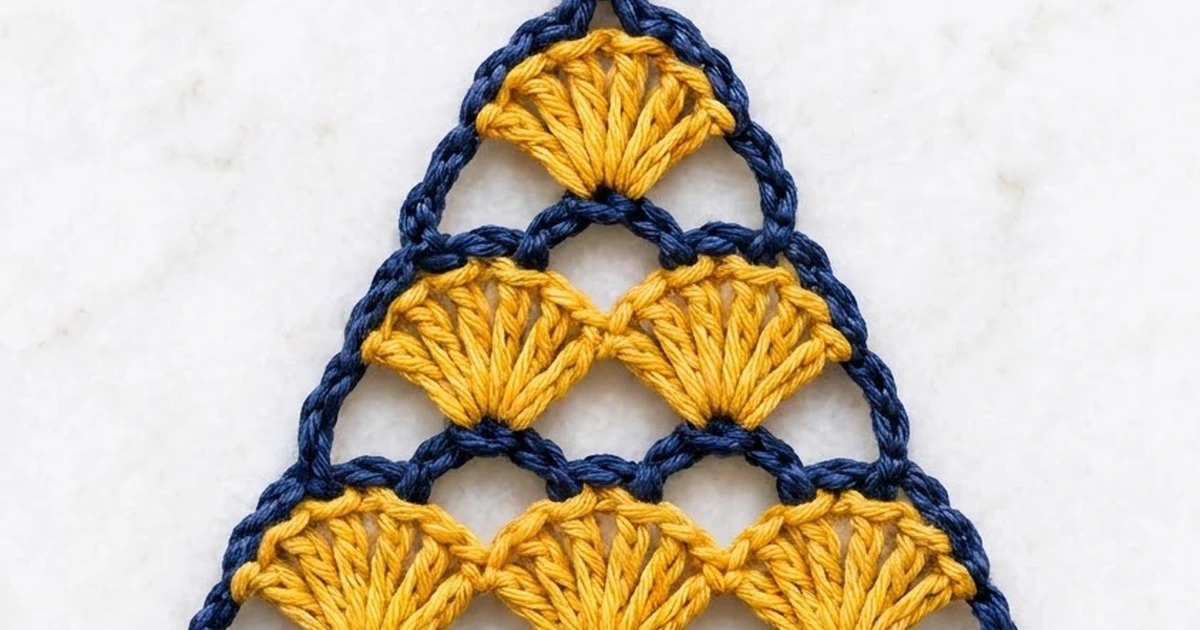
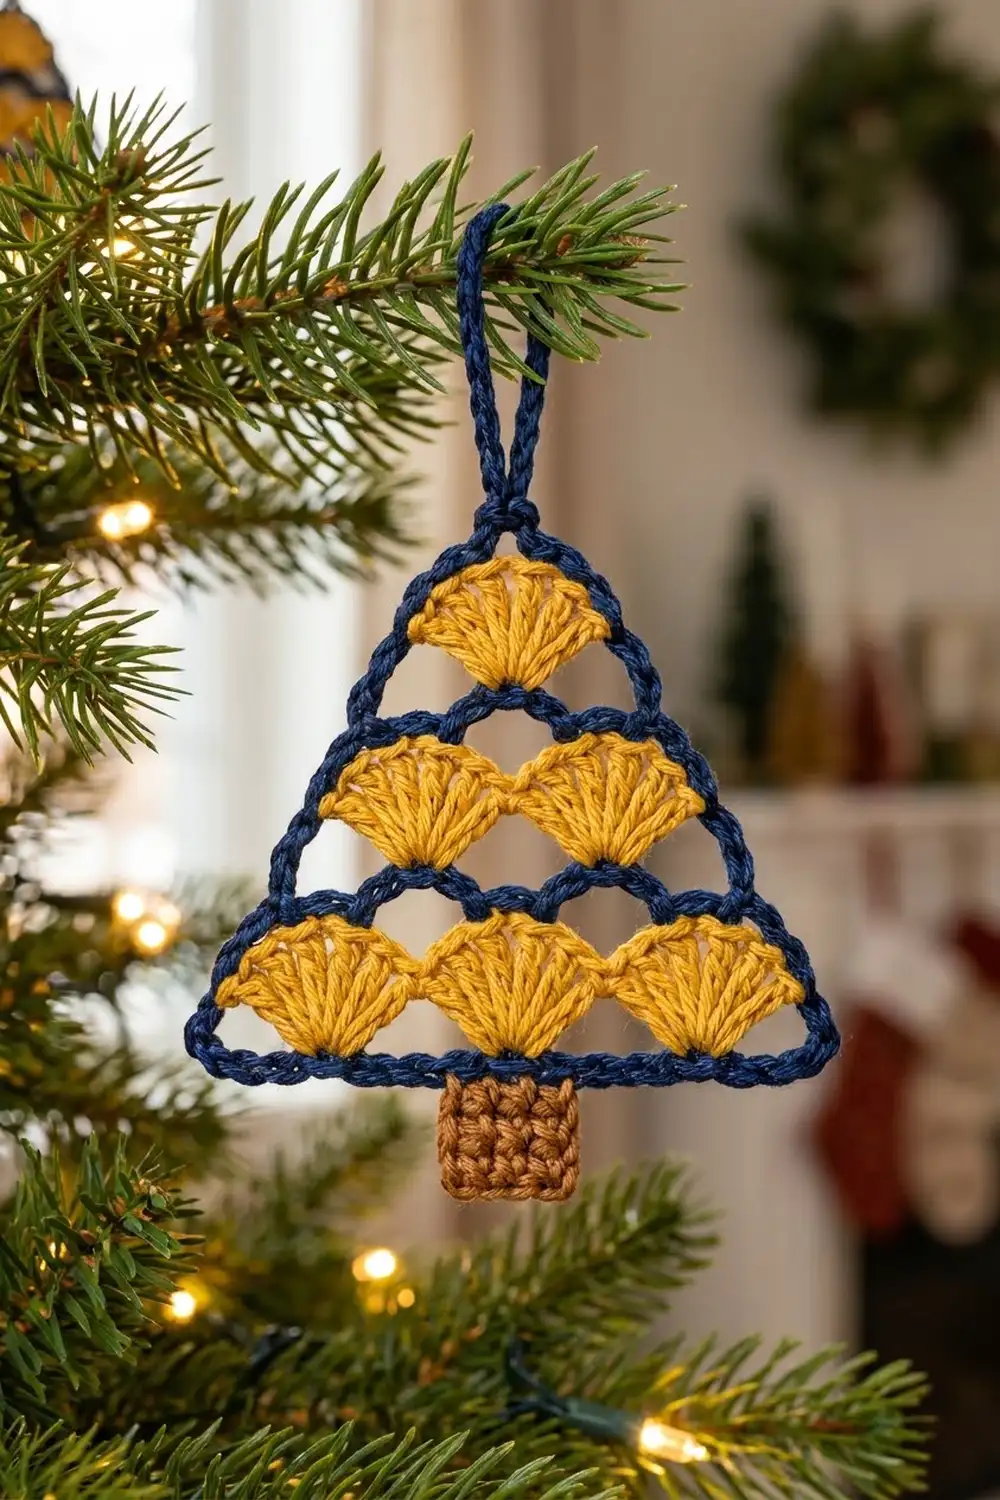
The Midnight Fan Tree is a flat Christmas tree ornament built from tiers of golden shells. Each tier sits on a fine navy line, and a crisp navy outline frames the whole tree. A small caramel trunk anchors the bottom, and a slim chain loop at the top lets it hang straight on a branch.
The palette is mustard, navy and caramel brown. It reads as cozy and slightly vintage, and it shows up well against green branches and warm lights. The shells give the tree texture, and the navy lines keep the tiers neat and graphic.
This pattern uses US crochet terms. The finished ornament measures about 4.5 in (11.4 cm) wide and 5 in (12.7 cm) tall, including the trunk and hanging loop.
You work the tree from the bottom up in short rows and change color on every row: navy single crochet rows alternate with mustard shell rows. The shells shrink naturally from three to two to one, so there is no decreasing to track. One navy border round outlines the tree and makes the hanging loop. Then you work a brown trunk down from the center of the base.
Finished Size and Construction
- Finished size: 4.5 in (11.4 cm) wide x 5 in (12.7 cm) tall overall
- Tree body with border: 4.5 in (11.4 cm) wide x 2.5 in (6.4 cm) tall
- Size before border: 4.25 in (10.8 cm) wide x 2.25 in (5.7 cm) tall
- Border depth: about 0.125 in (0.3 cm), one round of sc
- Trunk: about 0.85 in (2.2 cm) square
- Skill level: Easy / advanced beginner
- Terminology: US
- Yarn weight: Sport / light DK (#2) cotton
- Hook: 3.0 mm (US C/2 or D/3)
- Number of pieces: 1 (single ornament, no joining)
- Layout: Triangle of shells in a 3 / 2 / 1 arrangement, with trunk and loop
Materials
A smooth mercerized or matte cotton works best. It shows the shell texture clearly and blocks flat and crisp. Avoid fuzzy yarns because they blur the navy lines.
- Mustard yellow: 5 g, about 16 m (17.5 yd)
- Navy blue: 5 g, about 16 m (17.5 yd)
- Caramel brown: 2 g, about 6 m (6.6 yd)
These quantities include a margin for swatching and weaving in ends. Leftover yarn from other projects is ideal.
Tools:
– 3.0 mm crochet hook
– Tapestry needle
– Scissors
– Stitch markers (2)
– Rust-proof pins and a foam blocking mat
– Spray bottle with water
– Ruler or measuring tape
Abbreviations (US Terms)
- ch – chain
- sl st – slip stitch
- sc – single crochet
- dc – double crochet
- st(s) – stitch(es)
- sk – skip
- RS – right side
Special stitches:
– Shell: 7 dc in the same stitch.
– Standing sc: Start with a slip knot on the hook. Insert the hook into the stitch, yarn over and pull up a loop, then yarn over and pull through both loops. This joins new yarn without a sl st and ch 1.
Gauge and Checkpoints
Gauge: 24 sc and 28 rows = 4 in (10.2 cm) in single crochet, using a 3.0 mm hook.
This ornament is small, so the first tree is your real gauge test. Check these points as you go:
- After Row 1: the strip of 25 sc measures 4.25 in (10.8 cm).
- After Row 2: each shell is about 1.4 in (3.6 cm) wide and 0.6 in (1.5 cm) tall.
- After Row 4: the two-shell tier spans about 2.75 in (7.0 cm).
- After Row 6: the triangle measures 4.25 in (10.8 cm) wide x 2.25 in (5.7 cm) tall.
- After the border: 4.5 in (11.4 cm) wide x 2.5 in (6.4 cm) tall.
If your tree is too big, go down 0.25 mm in hook size. If it is too small or stiff, go up 0.25 mm. Shell rows that come out too tall can be fixed with a slightly tighter dc tension instead of a hook change.
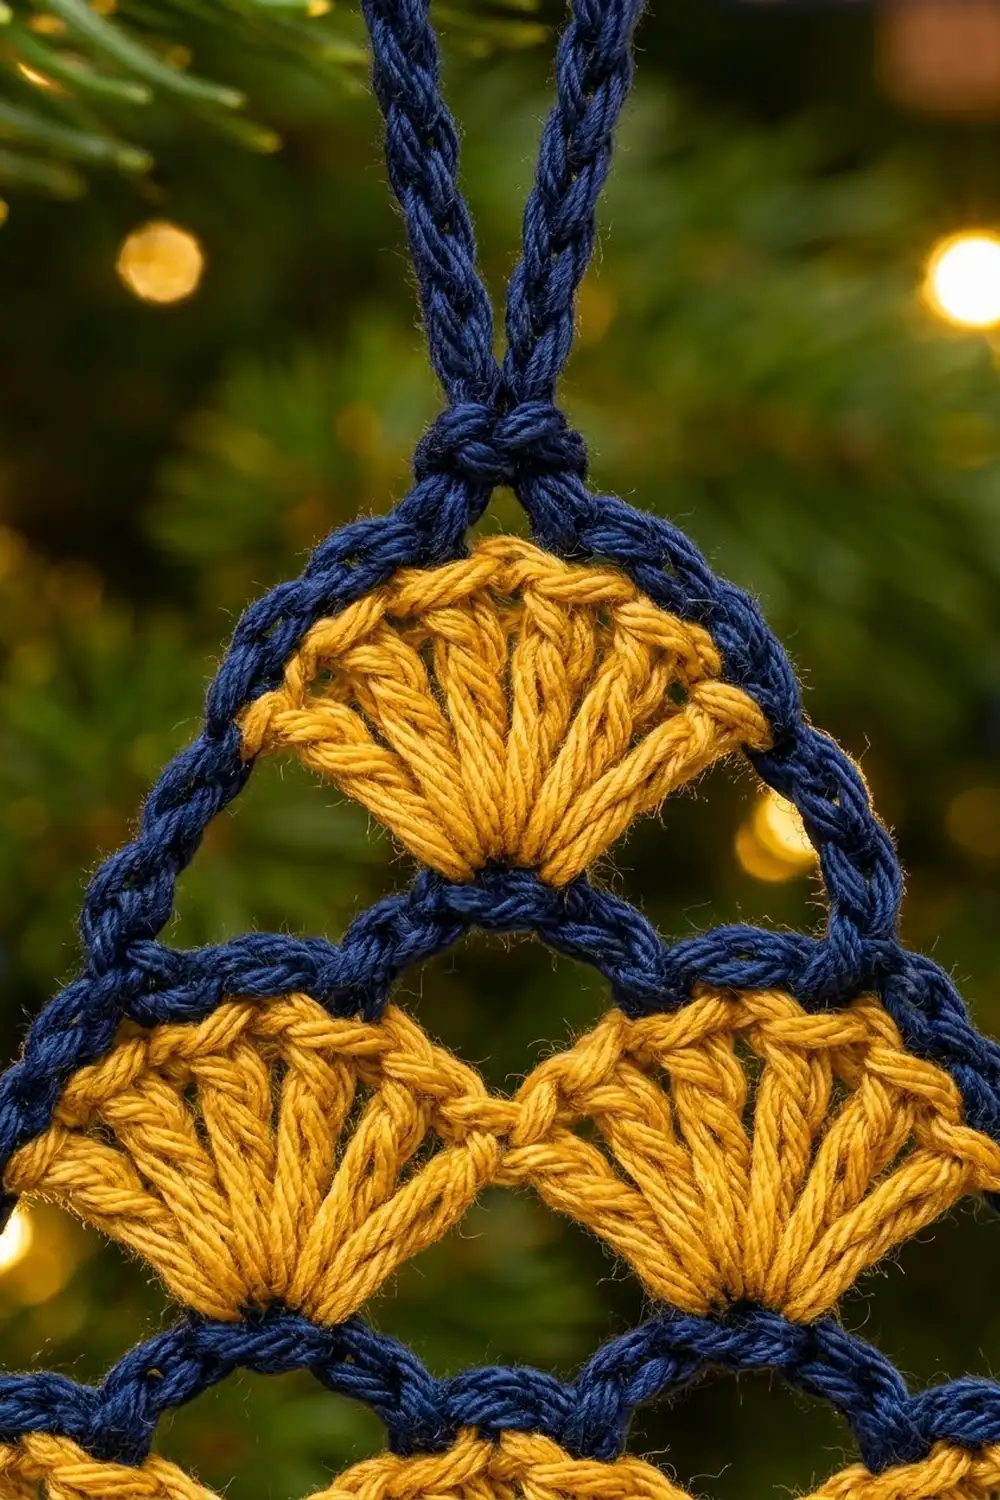
Pattern
Work every row with the RS facing you. Fasten off at the end of each row and rejoin at the right-hand edge with a standing sc. Leave 6 in (15.2 cm) tails and work over them where you can, so there are fewer ends to sew in later.
Row 1 – Base (Navy)
Ch 26.
Sc in the 2nd ch from the hook and in each ch across. Fasten off. (25 sc)
The strip should measure 4.25 in (10.8 cm).
Row 2 – Bottom Tier (Mustard)
With RS facing, join mustard with a standing sc in the first sc.
*Sk 3 sts, shell in the next st, sk 3 sts, sc in the next st; repeat from * 2 more times. Fasten off.
(3 shells + 4 sc = 25 sts: 21 dc + 4 sc)
The math: 1 sc + 3 x (3 skipped + 1 shell st + 3 skipped + 1 sc) = 1 + 24 = 25 sts used.
Number the shells 1, 2 and 3 from right to left. Each shell has dc 1–7, with dc 4 in the center.
Row 3 – First Divider (Navy)
This row hugs the tops of the shells and makes the first scalloped navy line. It skips the outer halves of shells 1 and 3, because the border covers those later.
Join navy with a standing sc in dc 4 of shell 1. Sc in each of dc 5–7 of shell 1. Sc in the next sc (between shells). Sc in each of dc 1–7 of shell 2. Sc in the next sc. Sc in each of dc 1–4 of shell 3. Fasten off.
(4 + 1 + 7 + 1 + 4 = 17 sc)
Mark the 5th and 13th sc with stitch markers. Both sit above the sc between two shells.
Row 4 – Middle Tier (Mustard)
Join mustard with a standing sc in the first sc.
Sk 3 sts, shell in the next st (the marked 5th sc), sk 3 sts, sc in the next st (the 9th sc, over the center of shell 2). Sk 3 sts, shell in the next st (the marked 13th sc), sk 3 sts, sc in the last st (the 17th sc). Fasten off and remove the markers.
(2 shells + 3 sc = 17 sts: 14 dc + 3 sc)
The math: 1 + 2 x (3 + 1 + 3 + 1) = 17 sts used.
Name the new shells A (right) and B (left). The tier should span about 2.75 in (7.0 cm). Each shell sits centered between two shells of the bottom tier.
Row 5 – Second Divider (Navy)
Join navy with a standing sc in dc 4 of shell A. Sc in each of dc 5–7 of shell A. Sc in the next sc. Sc in each of dc 1–4 of shell B. Fasten off.
(4 + 1 + 4 = 9 sc)
Row 6 – Top Tier (Mustard)
Join mustard with a standing sc in the first sc. Sk 3 sts, shell in the next st (the 5th sc), sk 3 sts, sc in the last st (the 9th sc). Fasten off.
(1 shell + 2 sc = 9 sts: 7 dc + 2 sc)
Checkpoint: The triangle should now measure 4.25 in (10.8 cm) wide x 2.25 in (5.7 cm) tall. Weave in the mustard tails now, while the edges are still open.
Border and Hanging Loop
This single navy round outlines the base, runs along both sloping sides over the outer halves of the shells, and makes the loop at the top point.
Border gauge: Work the border at your normal sc gauge. Each sc along the edge is about 0.17 in (0.4 cm) wide, so the round adds 0.125 in (0.3 cm) on every side without ruffling or pulling.
Border Round (Navy)
With RS facing, turn the tree so the foundation chain is at the top. Join navy with a standing sc in the first free foundation loop at the bottom-left corner.
Bottom edge: Work 2 more sc in the same loop (3 sc at the corner). Sc in each of the next 23 loops. Work 3 sc in the last loop (bottom-right corner).
(3 + 23 + 3 = 29 sc)
Right side (going up): Sc in the last sc of Row 2. Sc in dc 7, 6 and 5 of shell 3. Sc in the last sc of Row 3. Sc in the last sc of Row 4. Sc in dc 7, 6 and 5 of shell B. Sc in the last sc of Row 5. Sc in the last sc of Row 6. Sc in dc 7, 6 and 5 of the top shell.
(1 + 3 + 1 + 1 + 3 + 1 + 1 + 3 = 14 sc)
Apex and loop: Sc in dc 4 of the top shell, ch 20, sc in the same dc 4.
(2 sc + ch-20 loop)
Left side (going down): Sc in dc 3, 2 and 1 of the top shell. Sc in the first sc of Row 6. Sc in the first sc of Row 5. Sc in dc 3, 2 and 1 of shell A. Sc in the first sc of Row 4. Sc in the first sc of Row 3. Sc in dc 3, 2 and 1 of shell 1. Sc in the first sc of Row 2.
(14 sc)
Sl st to the first sc. Fasten off.
Round total: 29 + 14 + 2 + 14 = 59 sc, plus the ch-20 loop.
Why the math works: Each sloping side has exactly one stitch for every row end (Rows 2–6) and one for each exposed shell dc. Nothing is skipped, so there are no gaps, and nothing is doubled, so there are no ripples. The bottom edge matches Row 1’s 25 sts: 23 loops get one sc each and the 2 corner loops get 3 sc each, which turns the sharp corners without cupping. The 2 apex sc share one stitch, so the point stays sharp.
Checkpoint: 4.5 in (11.4 cm) wide x 2.5 in (6.4 cm) tall. The loop hangs about 1.5 in (3.8 cm) above the point.
Trunk
Count the 29 sc along the bottom edge from either corner. The 15th sc is the center. Place markers in the 13th and 17th sc.
Row 1 (Brown): With the RS facing and the tree upside down, join brown with a standing sc in the 13th sc. Sc in the next 4 sts. (5 sc)
Rows 2–6: Ch 1, turn, sc in each st across. (5 sc)
Fasten off, leaving an 8 in (20.3 cm) tail.
The math: 2 sts on each side of the center sc (13, 14, 15, 16, 17) keep the trunk exactly centered. The trunk measures about 0.85 in (2.2 cm) wide and 0.85 in (2.2 cm) long.
Use the brown tail to sew the side edges of the trunk tidy if needed, then weave it in.
Final Blocking
- Weave in all remaining ends through same-color stitches only. Hide navy tails inside the navy lines and brown tails inside the trunk.
- Lay the ornament RS up on the blocking mat.
- Pin the two bottom corners 4.5 in (11.4 cm) apart, keeping the base straight.
- Pin the apex so the body is 2.5 in (6.4 cm) tall, centered above the base.
- Pin the sloping sides into straight lines. Place one pin at each row end if needed.
- Shape each shell into an even fan with your fingertips. Square the trunk to 0.85 in (2.2 cm).
- Lay the hanging loop straight up from the apex.
- Mist the piece evenly until it is damp, but not dripping.
- Leave it to dry completely before you unpin it, usually 4–6 hours.
- Optional: for a stiffer ornament, mist lightly with fabric stiffener before drying.
Final Quality-Control Checklist
- [ ] Row 1 has 25 sc; Row 2 has 3 shells and 4 sc.
- [ ] Row 3 has 17 sc; Row 4 has 2 shells and 3 sc.
- [ ] Row 5 has 9 sc; Row 6 has 1 shell and 2 sc.
- [ ] Each upper shell sits centered between two shells below.
- [ ] The border has 59 sc plus the ch-20 loop.
- [ ] The bottom edge is straight, with neat 3-sc corners.
- [ ] Both sloping sides are straight and the same length.
- [ ] The trunk is 5 sc wide, 6 rows tall and centered.
- [ ] The body is 4.5 in (11.4 cm) x 2.5 in (6.4 cm).
- [ ] All ends are woven in, and no tails show on the RS.
Troubleshooting
Shells lean or look off-center. Count the skipped stitches again; it must be exactly 3 before and after every shell.
The navy dividers pucker. Your sc tension is tighter than your dc tension. Loosen up on the divider rows, or use a 3.25 mm hook for the navy rows only.
The sides wave after the border. You probably worked extra sc into the row ends. Use exactly 14 sc per side.
The base cups upward. The foundation chain is too tight. Redo it with a hook one size larger, then switch back for Row 1.
The apex is rounded. Make sure both apex sc go into dc 4 of the top shell and the loop sits between them.
The trunk is off-center. Count the bottom-edge sc again and confirm the trunk starts in the 13th sc.
The loop twists. Twist it the opposite way before blocking and pin it flat to dry.
Care
Hand wash in cool water with mild soap, then press out the water in a towel and reshape. Lay flat to dry, and store it flat or hanging so the shells keep their shape.
Final Notes
The measurement chain is simple, and every stage checks the one before it:
- Row 1: 25 sc = 4.25 in (10.8 cm).
- The shells reduce from 3 to 2 to 1 over 25, 17 and 9 stitches.
- The unbordered triangle measures 4.25 in (10.8 cm) x 2.25 in (5.7 cm).
- The 59-stitch border brings it to 4.5 in (11.4 cm) x 2.5 in (6.4 cm).
- The 5-stitch trunk and 20-chain loop finish the ornament at about 5 in (12.7 cm) tall.
If you hit the first checkpoint, every later step falls into place. Make one, check it against these numbers, and then make a whole forest for your tree.
Happy crocheting!