

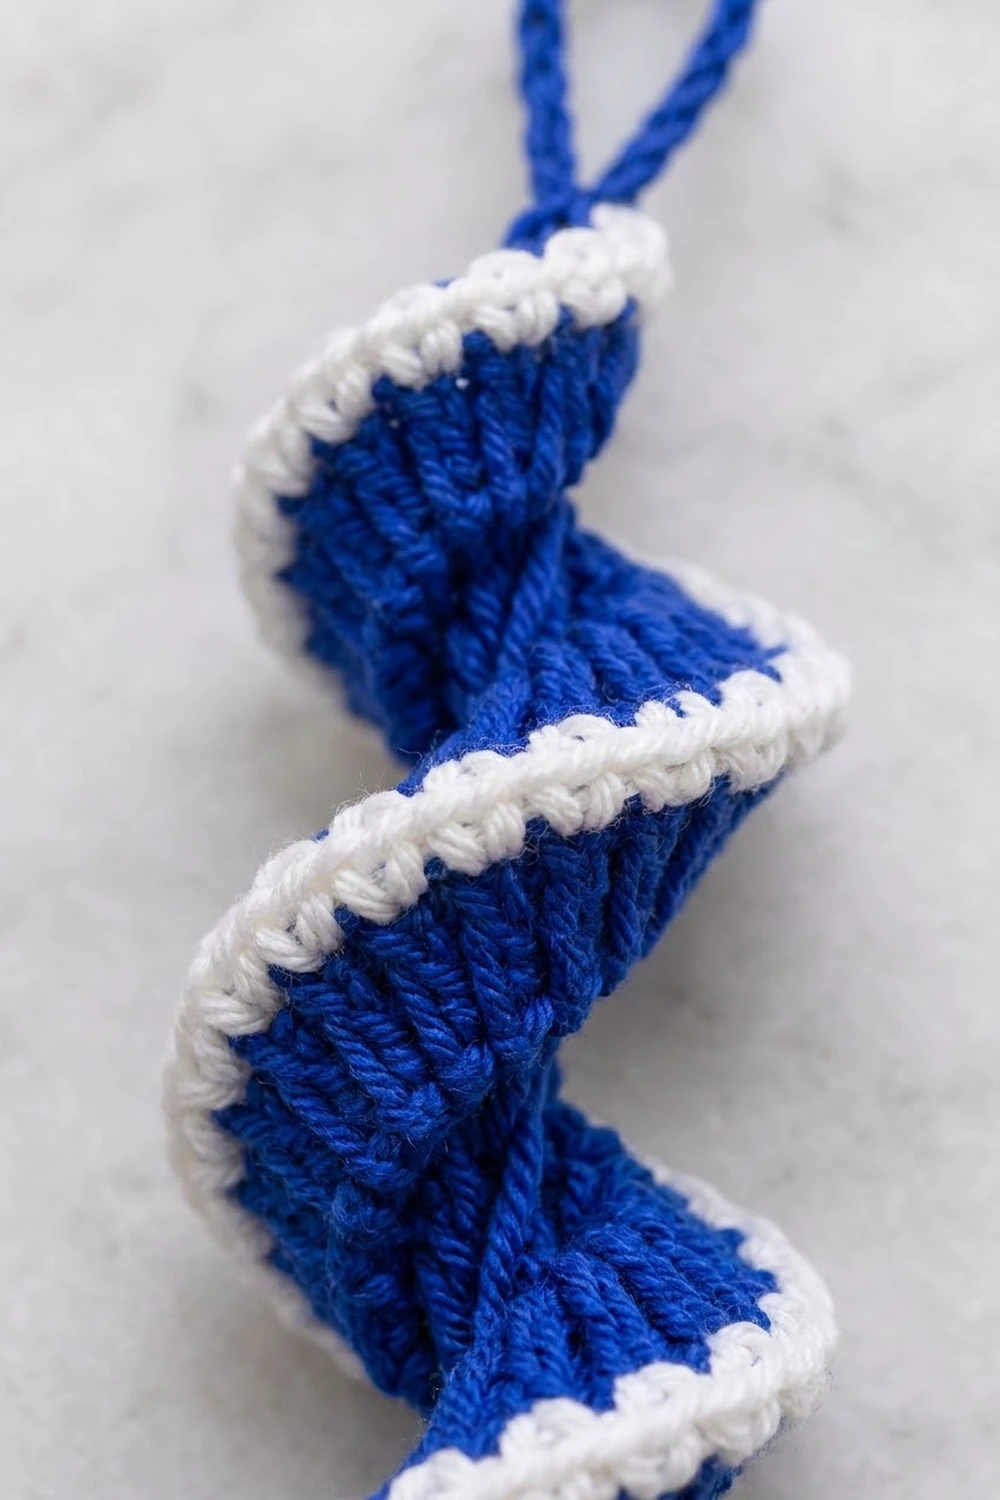
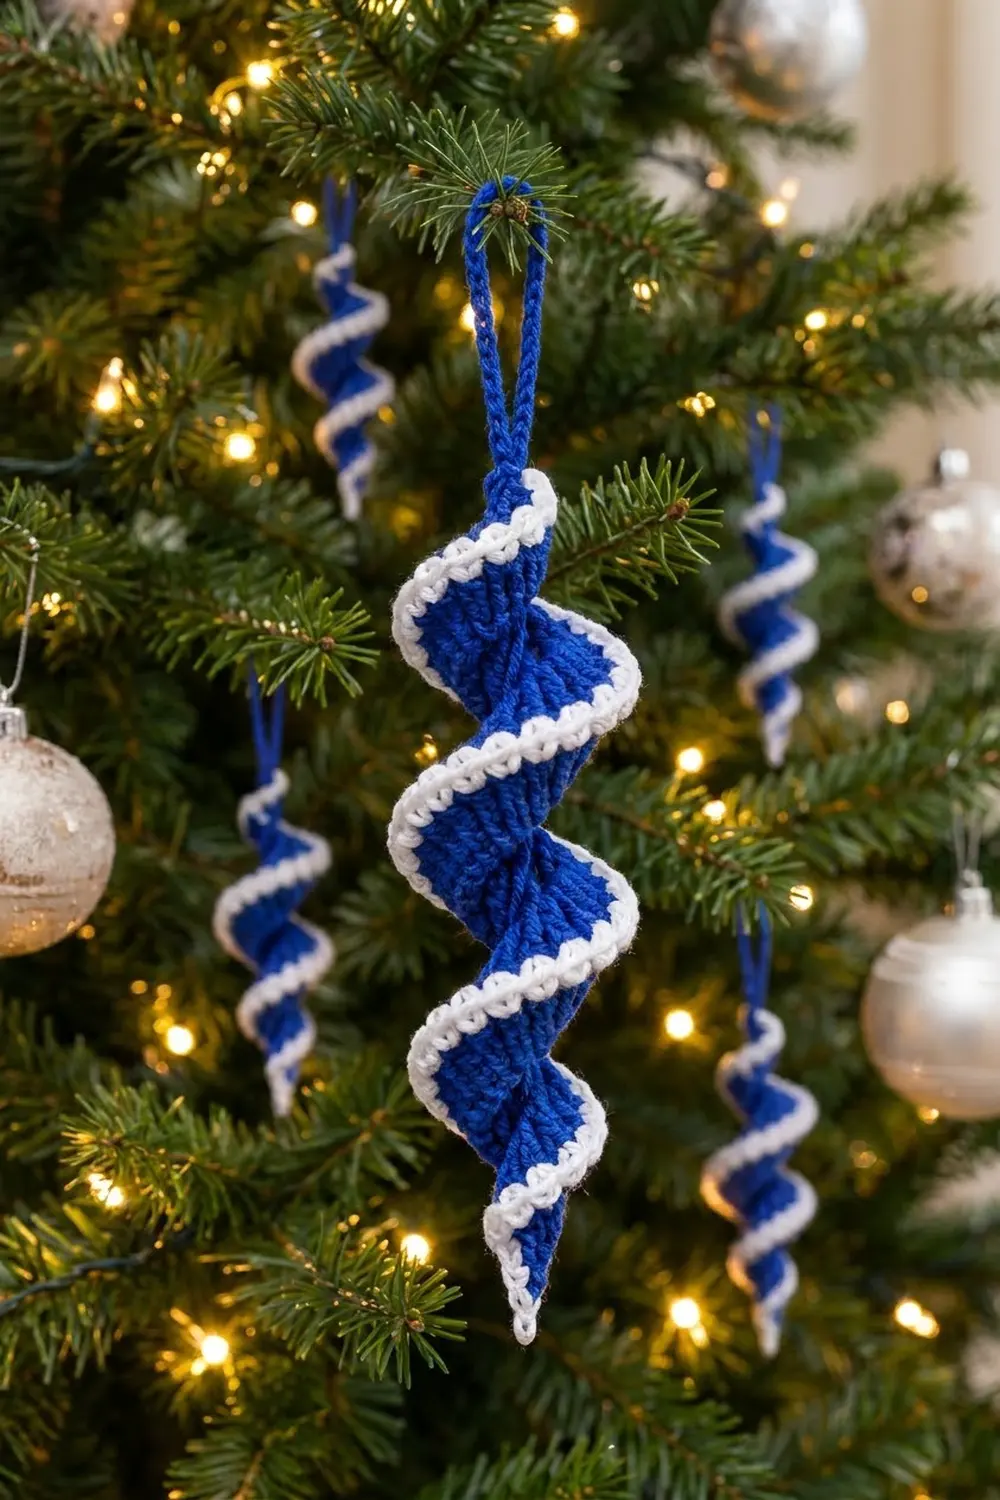
The Royal Twist Icicle is a slim spiral ornament that looks like a ribbon of winter color frozen mid-twist. A royal blue band winds down to a fine point, and a crisp white edge follows every turn. On the tree it catches the light and sways like a real icicle.
You only need two colors: royal blue for the body and the hanging loop, and white for the outer edging. The look is clean and classic. It suits a blue-and-white tree, a Hanukkah-and-winter display, or a gift tag. Make a dozen and the tree looks finished with almost no effort.
This pattern uses US crochet terms. The finished ornament is about 6 in (15.2 cm) tall without the loop and about 7.6 in (19.3 cm) including the loop. At its widest it measures about 2 in (5.1 cm) across.
The construction is simple. You work one foundation chain, then put several stitches into each chain. The extra stitches force the strip to curl into a corkscrew. Taller stitches in the middle make the band wide there, and shorter stitches at both ends make it taper. One blue row adds texture, one white row edges the spiral, and a chain cord forms the hanging loop. The whole ornament is a single piece.
Finished Size and Construction
- Finished size: 6 in (15.2 cm) tall without the loop; 7.6 in (19.3 cm) with the loop
- Widest diameter: about 2 in (5.1 cm)
- Skill level: Easy
- Terminology: US crochet terms
- Yarn weight: DK / light worsted (#3), cotton or cotton blend
- Hook: 4.0 mm (G-6)
- Number of pieces: 1 (the hanging loop is worked directly onto the piece)
- Layout: one twisted strip with the outer edge trimmed in white
- Piece size: 30-chain foundation = 6 in (15.2 cm) long
- Band depth before border: 0.75 in (1.9 cm) at the middle, 0.5 in (1.3 cm) at the ends
- Border depth: 0.25 in (0.6 cm), 1 row of white single crochet
- Finished band depth: 1 in (2.5 cm) at the middle, 0.75 in (1.9 cm) at the ends
Materials
Yarn advice: Use a smooth mercerized cotton or cotton blend in DK weight. Cotton holds the spiral shape well and gives clear stitches. Soft acrylic works too, but it relaxes more, so you will need to block it firmly.
- Royal blue: 8 g / about 18 m (20 yd)
- White: 3 g / about 7 m (8 yd)
These quantities include a margin for the gauge swatch and weaving in ends. One ornament uses about 6 g of blue and 2 g of white.
Tools:
– 4.0 mm (G-6) crochet hook
– Yarn needle
– Scissors
– 2 stitch markers
– Spray bottle with water, or fabric stiffener (optional)
– A pencil or a 0.25 in (0.6 cm) dowel for blocking
– Rust-proof pins
Abbreviations (US Terms)
- ch – chain
- sl st – slip stitch
- sc – single crochet
- hdc – half double crochet
- dc – double crochet
- st(s) – stitch(es)
- BLO – back loop only
- RS / WS – right side / wrong side
Special technique – back-bump slip stitch: Insert the hook under the single bump on the back of the chain, yarn over, and pull through the chain and the loop on the hook. This gives a firm, round cord for the hanging loop.
Gauge and Checkpoints
Gauge:
– 5 ch = 1 in (2.5 cm), lightly stretched
– 1 sc row = 0.25 in (0.6 cm) tall
– 1 hdc row = 0.375 in (1.0 cm) tall
– 1 dc row = 0.5 in (1.3 cm) tall
Test one ornament first. The ornament is small, so it works as its own gauge swatch. Check these measurements as you go:
- Foundation: 30 working chains measure 6 in (15.2 cm).
- After Row 1: the middle dc section is 0.5 in (1.3 cm) deep, and the strip has started to curl on its own.
- After Row 2: the middle depth is 0.75 in (1.9 cm).
- After Row 3 (border): the middle depth is 1 in (2.5 cm), and the ends are 0.75 in (1.9 cm).
- After blocking: the ornament is 6 in (15.2 cm) tall and 2 in (5.1 cm) at its widest.
If your ornament is too big: go down to a 3.5 mm hook, or check whether you are working the foundation chain loosely. If it is too small or too stiff to twist: go up to a 4.5 mm hook. Hold the foundation chain looser than the body stitches, because a tight chain stops the spiral from forming.
Pattern
Foundation
With royal blue, ch 31. The last chain made is the turning chain and is not counted. That leaves 30 working chains.
Mark the first chain you made (the end with the slip knot) with a stitch marker. This end is the top of the ornament, and the hanging loop goes there later.
Row 1 (Shaping Row) – Blue
Work into the back bumps of the chain if you can, because this keeps the foundation edge neat. Start in the 2nd ch from the hook. The first stitches go into the bottom end of the ornament, where the tip will be.
- Chains 1–3: 2 sc in each ch (6 sts)
- Chains 4–8: 2 hdc in each ch (10 sts)
- Chains 9–22: 3 dc in each ch (42 sts)
- Chains 23–27: 2 hdc in each ch (10 sts)
- Chains 28–30: 2 sc in each ch (6 sts)
Row 1 total: 74 sts (6 + 10 + 42 + 10 + 6). Turn.
The strip will already start to ruffle and twist. That’s expected. Don’t flatten it. The dc section in the middle doubles the edge length per chain compared with the ends, so the band comes out wide and full in the middle and tapers at both ends.
Checkpoint: the middle section is 0.5 in (1.3 cm) deep, and the foundation still measures 6 in (15.2 cm).
Row 2 (Texture Row) – Blue
Ch 1 (does not count as a st). Work 1 sc in the BLO of each st across.
Row 2 total: 74 sts (74 worked 1-per-existing-stitch + 0 added).
Working in the BLO leaves the front loops showing as fine ridges. These ridges sit next to the dc posts of Row 1 and give the band its upright, ribbed texture. Don’t add increases in this row. Row 1 has already set the edge length, and more stitches would make the spiral floppy instead of crisp.
Checkpoint: the middle depth is 0.75 in (1.9 cm) and the end depth is 0.5 in (1.3 cm).
Fasten off blue, leaving a 4 in (10.2 cm) tail.
Border
Border Gauge
The white edge is a single row of sc at 0.25 in (0.6 cm) tall. Work it at the same tension as Row 2. If it is tighter, the outer edge pulls in and the spiral flattens. If it is looser, the edge waves instead of making a smooth stripe.
Border Row (Row 3) – White
With RS facing, join white with a standing sc in the first st of Row 2. Work 1 sc in each st across (both loops).
Border total: 74 sts (74 worked 1-per-existing-stitch + 0 added).
The ornament has one working edge, the long outer curve, and the border runs only along that edge. The short ends and the foundation chain are left unbordered. Because the strip has no corners, you don’t add corner stitches.
Why the math works: Row 1 holds 74 sts on 30 chains. That is about 2.5 stitches of outer edge for every 1 chain of inner edge, and this ratio is what makes the strip spiral. Rows 2 and 3 keep the same 74 sts, so they keep the ratio exactly. The white edge follows the spiral without making it tighter or looser. Each blue row and the white row add depth only: 0.5 + 0.25 + 0.25 = 1 in (2.5 cm) at the middle, and 0.25 + 0.25 + 0.25 = 0.75 in (1.9 cm) at the ends.
Fasten off white, leaving a 4 in (10.2 cm) tail.
Hanging Loop – Blue
Find the stitch marker at the top end of the foundation. With RS facing, join blue with a sl st at the top corner, where the foundation chain meets the end of the rows.
- Ch 17.
- Starting in the 2nd ch from the hook, work 1 back-bump sl st in each ch across (16 sl sts).
- Fold the cord into a loop and sl st into the same top corner where you joined.
The cord is 16 ch long, which is 3.2 in (8.1 cm). Folded in half, it makes a loop about 1.6 in (4.1 cm) tall. Fasten off and use the tail to sew the base of the loop closed with 2–3 small stitches, so it hangs straight up from the center of the spiral.
Checkpoint: total length is 7.6 in (19.3 cm) from the tip to the top of the loop.
Final Blocking
- Weave in all ends except the tail at the bottom tip. Weave in the white tails along the white edge so they don’t show on the blue.
- At the bottom tip, weave the blue tail up through the foundation chain for about 1 in (2.5 cm). Pull it gently to tighten the point, then trim it.
- Hold the ornament by the loop and twist the strip in the direction it already curls. Each full turn should take about 1.5 in (3.8 cm) of length, which gives about 4 turns from top to tip.
- Slide a pencil or a 0.25 in (0.6 cm) dowel along the center, so the foundation chain wraps around it as the spiral’s core.
- Mist the ornament with water until it is damp but not dripping. For a firmer finish, brush on diluted fabric stiffener instead.
- Pin the top and the tip to hold the twist in place. Make sure the white edge faces outward along the whole spiral.
- Let it dry completely. This takes 6–12 hours.
- Remove the dowel. The ornament should measure 6 in (15.2 cm) without the loop and 2 in (5.1 cm) across at the widest turn.
Final Quality-Control Checklist
- Row 1 has exactly 74 sts: 6 sc, 10 hdc, 42 dc, 10 hdc, 6 sc.
- Row 2 and the white border each have 74 sts.
- The ribbed BLO ridges are on the RS.
- The white edge runs continuously from the top to the tip without gaps.
- The band is clearly wider in the middle, 1 in (2.5 cm), than at the ends, 0.75 in (1.9 cm).
- The tip comes to a clean, closed point.
- The hanging loop is about 1.6 in (4.1 cm) tall, centered, and firmly secured.
- The ornament hangs straight and doesn’t lean to one side.
- All ends are woven in and invisible.
Troubleshooting
The strip won’t twist and stays like a flat ruffle. The foundation chain is too loose compared with the stitches, or you skipped stitches in Row 1. Recount to 74 and try a tighter chain.
The spiral is too tight and bunches up. The chain is too tight. Use a hook one size larger for the foundation only.
The white edge waves. The border tension is too loose. Rework it a little tighter, or use a hook 0.5 mm smaller for the white row only.
The ornament leans when hung. The loop is off center. Re-sew its base so it sits right over the foundation chain.
The ends look blunt instead of tapered. Check that chains 1–3 and 28–30 have sc, not hdc. Pulling the tip tail snug also helps.
The twist relaxes after a few weeks. Re-block with fabric stiffener, or switch to a mercerized cotton for future ornaments.
Care
Spot clean with cool water and mild soap, then reshape around a pencil and let it air dry. Store the ornaments hanging or loosely wrapped in tissue so the spirals don’t get crushed.
Final Notes
The measurement chain is short and easy to check. Thirty chains give a 6 in (15.2 cm) core. Row 1 puts 74 shaped stitches on that core, which makes the spiral and the taper. Row 2 and the white border keep 74 sts each and add depth only, bringing the band to 1 in (2.5 cm) in the middle. The 16-chain cord adds a 1.6 in (4.1 cm) loop, for a total of 7.6 in (19.3 cm). If each checkpoint matches, the ornament will match too.
Happy crocheting!