
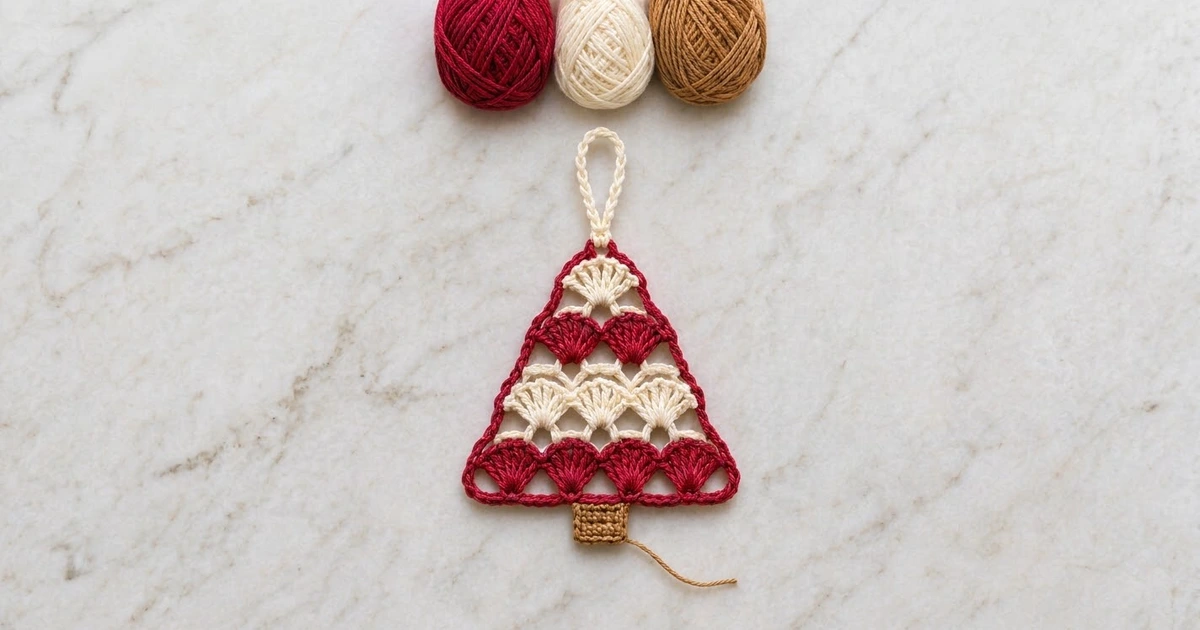
This little Christmas tree ornament is made of stacked rows of fan-shaped shells. The rows switch between deep cranberry red and soft cream, so the tree looks like a striped peppermint candy. A crisp red outline goes around the triangle. A small tan square makes the trunk, and a cream loop at the tip lets it hang from a branch.
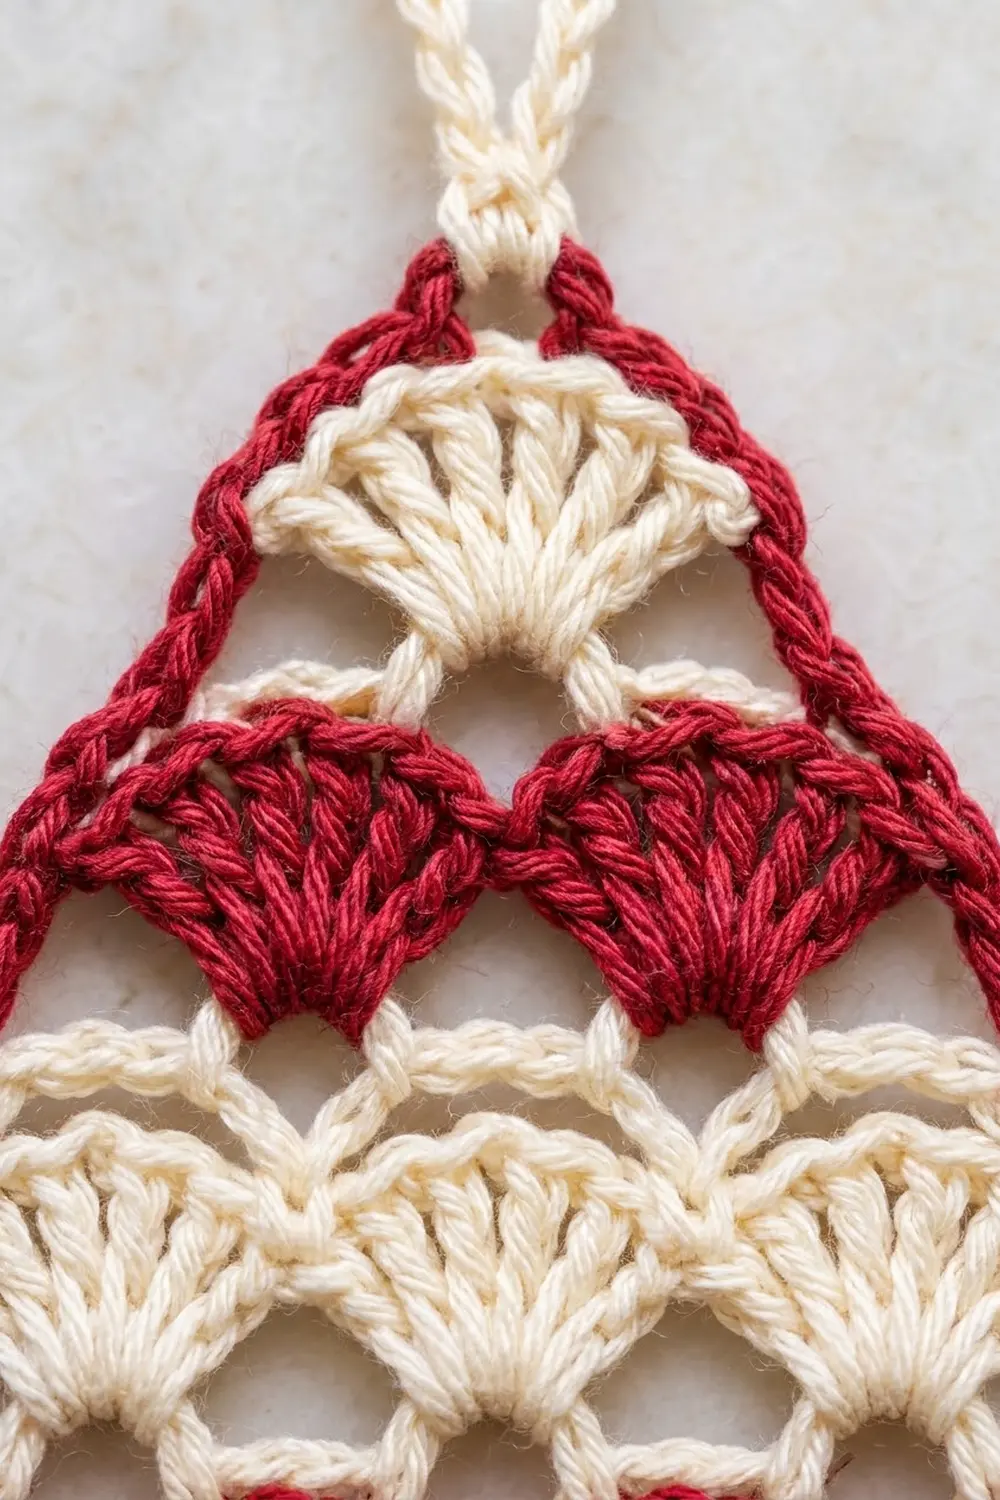
The ornament looks lacy but is not fragile. Each shell sits over the dip between two shells in the row below. This leaves small open triangles between the rows and along the sides, and those gaps give the ornament its light look against tree lights.
This pattern uses US crochet terms. The finished tree is about 5 in (12.7 cm) wide and 3.9 in (9.9 cm) tall from the bottom of the trunk to the tip. The hanging loop adds about 1.8 in (4.6 cm), so the total hanging height is about 5.7 in (14.5 cm).
The construction is simple. You crochet a foundation row and a row of 4 red shells. Then you add 3 cream shells, 2 red shells and 1 cream shell, each row centered over the one before it. One round of red border turns the stepped edges into straight sides. Last, you crochet the trunk onto the bottom edge and add the loop at the tip.
Finished Size and Construction
- Finished size: 5 in (12.7 cm) wide x 3.9 in (9.9 cm) tall, plus a 1.8 in (4.6 cm) loop
- Skill level: Easy to intermediate (basic stitches, simple color changes)
- Terminology: US crochet terms
- Yarn weight: DK (light worsted, category 3), cotton or cotton blend
- Hook: 3.5 mm (E-4)
- Number of pieces: 1 ornament made in one piece (you crochet the trunk and loop straight onto it)
- Layout: One triangle of 4 shell rows (4, 3, 2 and 1 shells from bottom to top)
- Size before border: 4.5 in (11.4 cm) wide x 2.6 in (6.6 cm) tall
- Border depth: 1 round of single crochet, about 0.2 in (0.5 cm)
- Trunk: 0.9 in (2.3 cm) wide x 0.9 in (2.3 cm) tall
Materials
Choose a smooth DK cotton, either mercerized or soft. Cotton shows the shell texture clearly and blocks into a crisp, flat shape. Acrylic also works, but it may need steam blocking to lie flat.
- Color A, cranberry red: 8 g, about 18 m
- Color B, cream: 5 g, about 11 m
- Color C, tan: 2 g, about 5 m
These amounts include extra yarn for testing your tension, weaving in ends and small tension differences. One 50 g ball of each color will make many ornaments.
Tools:
- 3.5 mm (E-4) crochet hook
- Tapestry needle
- Scissors
- 2 stitch markers
- Ruler or tape measure
- Pins and a blocking mat or folded towel
- Spray bottle with water
Abbreviations (US Terms)
- ch: chain
- sl st: slip stitch
- sc: single crochet
- dc: double crochet
- st(s): stitch(es)
- sk: skip
- RS: right side
- WS: wrong side
Special stitch – shell: Work 7 dc in the same stitch. The 4th dc is the center dc of the shell. The 1st and 7th dc are the outer dc.
Standard sc join: Put a slip knot on your hook and insert the hook into the stitch. Yarn over and pull up a loop, then yarn over and pull through both loops.
Gauge and Checkpoints
Gauge: 22 sc and 22 rows = 4 in (10.2 cm) in single crochet. One shell row is about 0.6 in (1.5 cm) tall.
The ornament is small, so it works as its own test swatch. Crochet Rows 1 and 2, then measure before you go on.
Measurement checkpoints:
- After Row 1: 25 sc, 4.5 in (11.4 cm) wide
- After Row 2: 4.5 in (11.4 cm) wide, 0.8 in (2.0 cm) tall
- After Row 3: 1.4 in (3.6 cm) tall at the center
- After Row 4: 2.0 in (5.1 cm) tall at the center
- After Row 5: 2.6 in (6.6 cm) tall at the center
- After the border: 5 in (12.7 cm) wide x 3 in (7.6 cm) tall
- After the trunk: 3.9 in (9.9 cm) total height
If your piece is too big: Go down one hook size to 3.25 mm (D-3). Also check that your dc are not extra tall, because loose dc stretch the rows upward.
If your piece is too small: Go up one hook size to 3.75 mm (F-5). A tight foundation chain can also pull the bottom in, so chain loosely or use a larger hook for the chain only.
Small size differences don’t matter much on an ornament. What matters is that the shells lie flat without ruffling or cupping.
Pattern
Row 1 (Foundation) – Color A
With Color A, ch 26.
Row 1 (WS): Sc in the 2nd ch from the hook and in each ch across. (25 sc)
Do not fasten off.
Row 2 (Bottom Row, 4 Shells) – Color A
Row 2 (RS): Ch 1, turn. Sc in the first sc. Sk 2 sc, shell (7 dc) in the next sc, sk 2 sc, sc in the next sc. Repeat from * 3 more times. (4 shells + 5 sc = 33 sts)*
Each repeat uses 6 foundation stitches, and 1 + (4 x 6) = 25. That uses every foundation stitch exactly once.
Fasten off Color A. The 5 sc sit in the low points between and beside the shells. You will attach the next row to these points.
Checkpoint: 4.5 in (11.4 cm) wide, 0.8 in (2.0 cm) tall.
Row 3 (Second Row, 3 Shells) – Color B
Do not turn. Work Rows 3, 4 and 5 with the RS facing, starting at the right edge each time. This keeps every shell facing the same way.
Row 3 (RS): Join Color B with a standard sc in the center dc of the first shell at the right edge. Sk 3 dc, shell in the next sc, sk 3 dc, sc in the center dc of the next shell. Repeat from * 2 more times. (3 shells + 4 sc = 25 sts)*
Fasten off Color B.
You leave the outer 3 dc of each end shell and the edge sc unworked. That half-shell step on each side shapes the triangle.
Checkpoint: 1.4 in (3.6 cm) tall at the center.
Row 4 (Third Row, 2 Shells) – Color A
Row 4 (RS): Join Color A with a standard sc in the center dc of the first shell at the right edge. Sk 3 dc, shell in the next sc, sk 3 dc, sc in the center dc of the next shell. Repeat from * 1 more time. (2 shells + 3 sc = 17 sts)*
Fasten off Color A.
Checkpoint: 2.0 in (5.1 cm) tall at the center.
Row 5 (Top Row, 1 Shell) – Color B
Row 5 (RS): Join Color B with a standard sc in the center dc of the first shell at the right edge. Sk 3 dc, shell in the next sc, sk 3 dc, sc in the center dc of the next shell. (1 shell + 2 sc = 9 sts)
Fasten off Color B.
Checkpoint: 2.6 in (6.6 cm) tall at the center and 4.5 in (11.4 cm) wide at the base.
Each row moves in by half a shell (3 stitches) on each side. Each step is about 0.55 in (1.4 cm) in and 0.6 in (1.5 cm) up. Because the slope is even, the border can run in a straight line.
Weave in the tails on the WS now, before the border covers the edges.
Border
Border gauge: The border is one round of sc in Color A, about 0.2 in (0.5 cm) deep. On the sides, chains bridge from row to row. Each ch-4 should lie straight and flat, about 0.8 in (2.0 cm) long, with no slack.
Work with the RS facing, going counterclockwise.
Bottom edge: Join Color A with a standard sc in the free loop of the first foundation ch at the bottom-left corner. Work 2 more sc in the same loop, for 3 sc in the corner. Sc in the free loop of each of the next 23 foundation ch. Work 3 sc in the last foundation ch loop at the bottom-right corner. (Bottom: 3 + 23 + 3 = 29 sc)
Right side, going up: Ch 3, sc in the top of the outer dc of the end shell of Row 2. Ch 4, sc in the outer dc of the end shell of Row 3. Ch 4, sc in the outer dc of the end shell of Row 4. Ch 4, sc in the outer dc of the Row 5 shell. (Side: 15 ch + 3 sc, not counting the Row 5 sc)
Tip: Sc in each of the next 2 dc. Work 3 sc in the center dc, and place a marker in the middle one of these 3 sc. Sc in each of the next 2 dc. Sc in the last (outer) dc. (Top: 1 + 2 + 3 + 2 + 1 = 9 sc over 7 dc)
Left side, going down: Ch 4, sc in the outer dc of the end shell of Row 4. Ch 4, sc in the outer dc of the end shell of Row 3. Ch 4, sc in the outer dc of the end shell of Row 2. Ch 3. Sl st to the first sc of the round. (Side: 15 ch + 3 sc)
Round total: 29 + 18 + 9 + 18 = 74 sts (44 sc and 30 ch).
Fasten off and weave in.
Why the math works: The bottom has 25 foundation stitches. Each corner gets 2 extra sc, so 23 + 3 + 3 = 29. Each side climbs 4 equal steps, so the chain lengths are the same on both sides and the triangle stays even. The tip gets 2 extra sc in the center dc, which makes a sharp point without crowding.
Checkpoint: 5 in (12.7 cm) wide x 3 in (7.6 cm) tall.
Trunk – Color C
Turn the ornament upside down so the bottom edge is at the top, with the RS facing.
Count the 29 sc along the bottom of the border. You crochet the trunk over the center 5 stitches (stitches 13 to 17), which leaves 12 sc free on each side: 12 + 5 + 12 = 29.
Row 1: Join Color C with a standard sc in the 13th sc. Sc in each of the next 4 sc. (5 sc)
Rows 2–5: Ch 1, turn. Sc in each sc across. (5 sc)
Fasten off and weave in.
Checkpoint: The trunk is 0.9 in (2.3 cm) wide x 0.9 in (2.3 cm) tall, and the ornament is now 3.9 in (9.9 cm) tall.
Hanging Loop – Color B
Join Color B with a sl st in the marked sc at the tip. Ch 18, then sl st in the same sc. Next, sl st in the back bump of each of the 18 ch around the loop. Finish with one more sl st in the tip sc.
The second pass of sl sts makes the loop thick and slightly twisted, so it holds its shape. Fasten off and weave the tail into the border.
Checkpoint: The loop stands about 1.8 in (4.6 cm) above the tip.
Final Blocking
- Weave in any tails that are left, hiding each one in stitches of the same color.
- Mist the ornament with water until it is damp, not soaked.
- Lay it RS up on a blocking mat or folded towel.
- Pin the 2 bottom corners 5 in (12.7 cm) apart.
- Pin the tip so the body is 3 in (7.6 cm) tall from the bottom edge to the point.
- Gently pull each side chain straight between the corner and the tip, and pin at each sc where the chain is attached.
- Open each shell into a neat fan with your fingers. Pin the outer dc of each fan if needed.
- Square up the trunk and lay the loop flat above the tip.
- Let it dry completely, which usually takes several hours.
Final Quality-Control Checklist
- Row 1 has 25 sc, and Row 2 has exactly 4 shells
- From bottom to top, the rows go red, cream, red, cream
- Each shell has 7 dc and is centered over the sc below it
- Open triangles show between the rows and inside the side chains
- The bottom border has 29 sc, with 3 sc in each corner
- Both sides use the same chain lengths: 3, 4, 4, 4
- The tip is a sharp point with 3 sc in the center dc
- The trunk is centered, with 12 free sc on each side
- The loop is firm and attached at the exact center of the tip
- The ornament is 5 in (12.7 cm) wide x 3.9 in (9.9 cm) tall
Troubleshooting
Shells ruffle or cup. Your dc are too loose or your sc are too tight. Try a smaller hook for the shell rows only.
Rows look off-center. Make sure you join each new color in the center dc of the right-hand shell, not in its outer dc.
Sides curve inward. The side chains are too short. Add 1 ch to each ch-4, and do the same on both sides.
Sides look loose or wavy. The side chains are too long. Try ch 3 instead of ch 4, or chain more firmly.
Bottom edge pulls in. The foundation chain was too tight. Use a larger hook for the chain, or pin the bottom edge firmly when blocking.
Trunk looks lopsided. Count the bottom border again, find stitch 13 and start the trunk again there.
Loop twists sideways. Steam block it flat, or redo it more loosely in the same center sc.
Care
Hand wash in cool water with mild soap, press the water out in a towel and dry flat. Store flat in a box so the shells and the loop keep their shape.
Final Notes
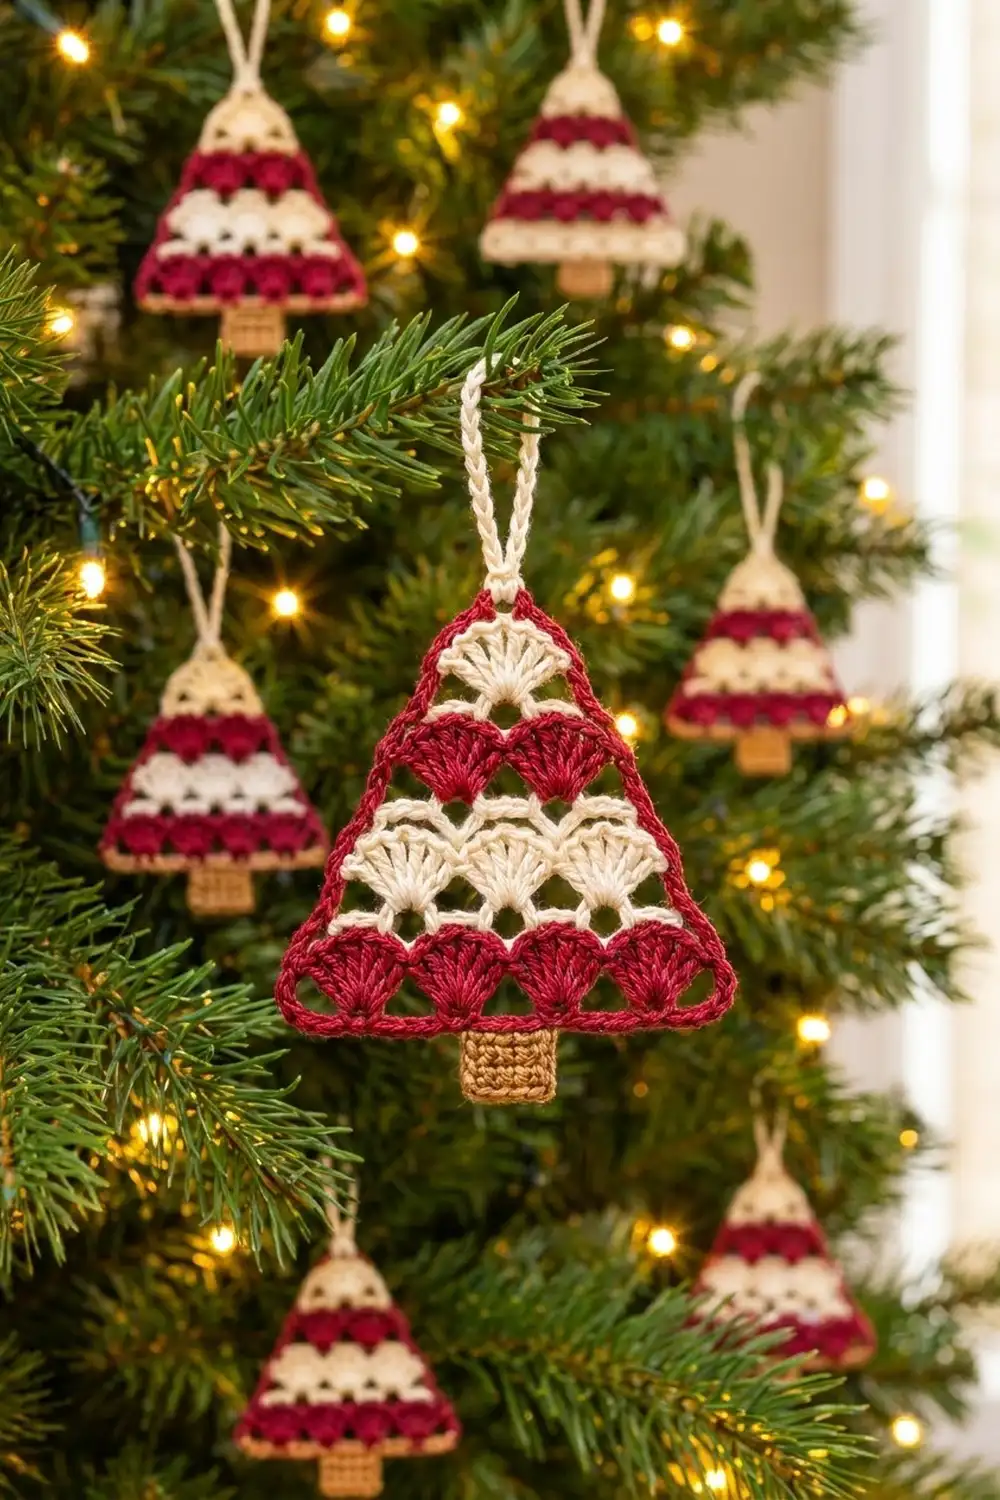
Each part of the ornament builds on the one before. Row 1 makes a base 4.5 in (11.4 cm) wide with 25 sc. Four shell rows of 0.6 in (1.5 cm) each bring the body to 2.6 in (6.6 cm) tall. The border adds 0.2 in (0.5 cm) all around, making a triangle 5 in (12.7 cm) wide x 3 in (7.6 cm) tall. The trunk adds 0.9 in (2.3 cm), for 3.9 in (9.9 cm) in total. The loop adds 1.8 in (4.6 cm) more, for 5.7 in (14.5 cm) of hanging height.
If your measurements match at each checkpoint, the finished tree will match too. Make one, check it against the numbers, and then you can make a whole set in an afternoon.
Happy crocheting!