
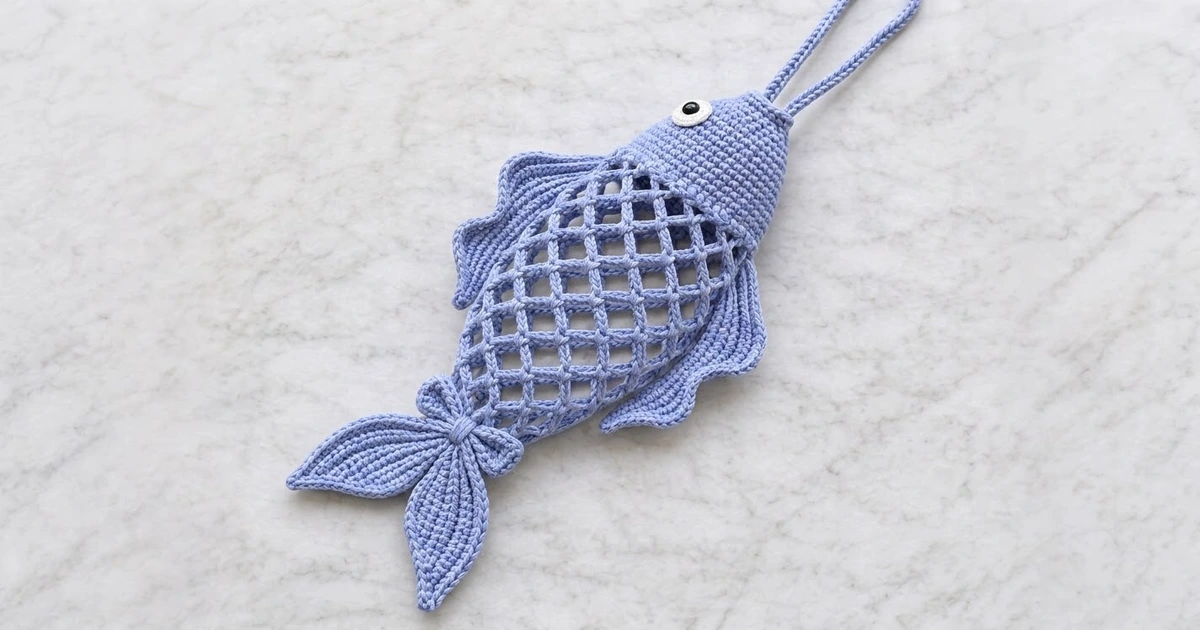
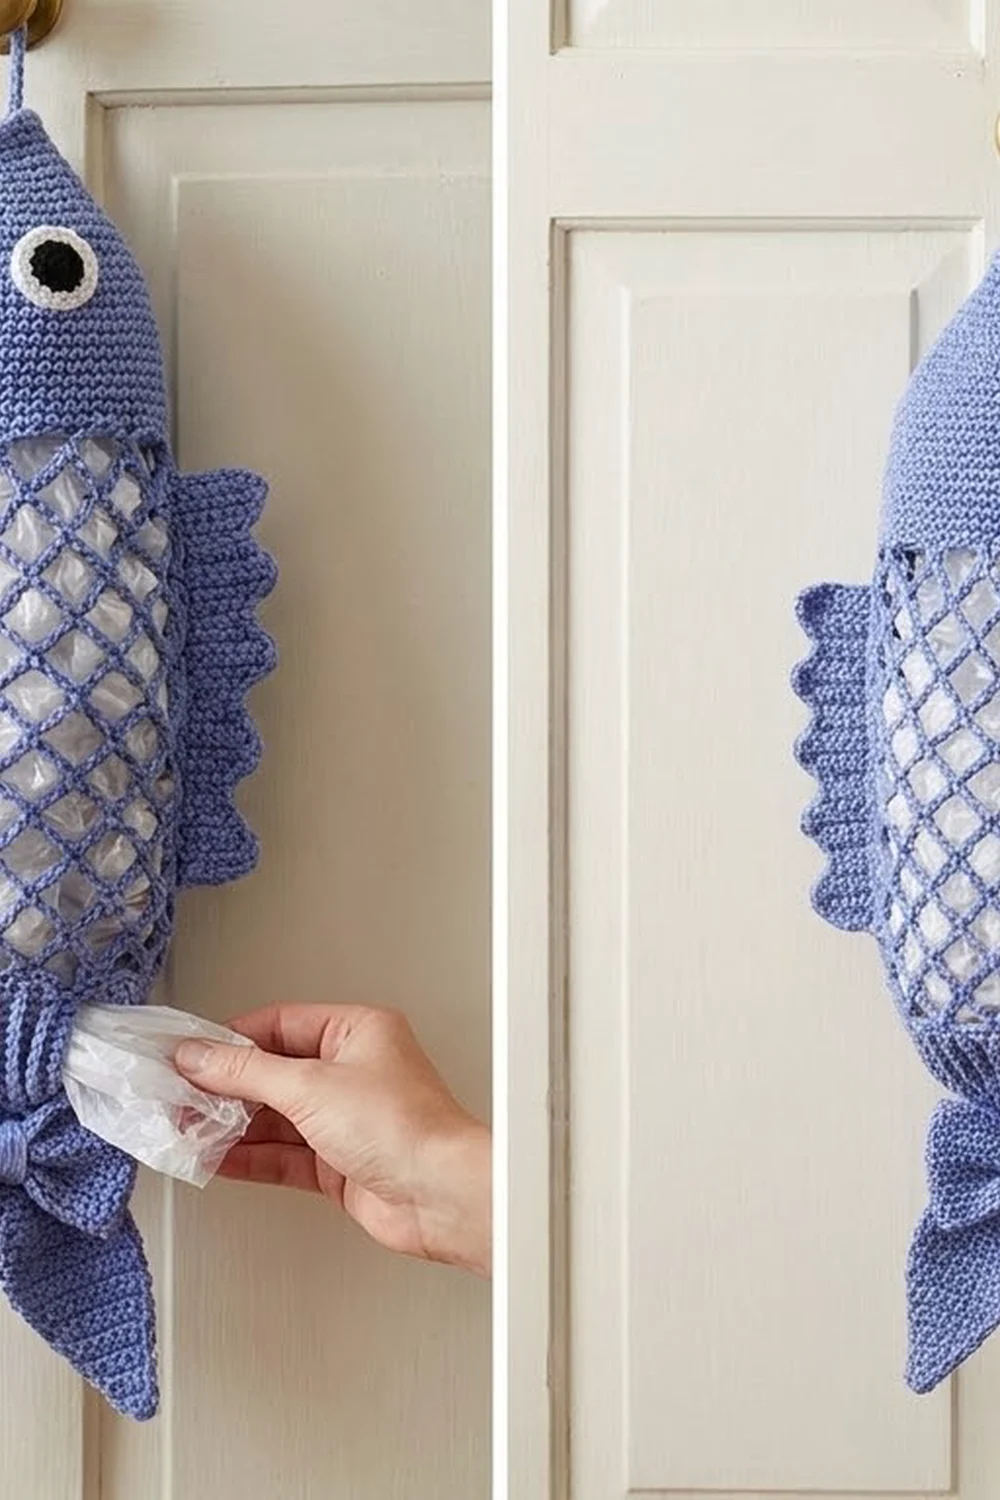
Plastic grocery bags don’t need to live in a crumpled pile under the sink. This fish bag holder keeps them in one tidy, cheerful place. You stuff bags in through the open top of the head and pull them out one at a time through the ribbed cuff at the bottom.
The design combines a solid single-crochet head with an airy diamond net body that stretches as it fills. Two wavy, ridged fins sit at the sides, a little bow ties the tail, and two pointed tail lobes hang below. The sample is in periwinkle blue with a white eye ring and a black safety eye. A soft peach looks just as good if you want a pair.
This pattern uses US crochet terms. The body is 16 in (40.6 cm) long. With the tail, the fish measures about 19.5 in (49.5 cm), not counting the hanging loops. At its widest, the mesh lies about 6.5 in (16.5 cm) across when flat and empty.
You work the body top-down in joined rounds: head, mesh, then the ribbed cuff. The fins, bow, tail lobes, eye ring and hangers are small flat pieces that you sew on at the end.
Finished Size and Construction
- Finished size: body 16 in (40.6 cm) long; total with tail about 19.5 in (49.5 cm); mesh about 6.5 in (16.5 cm) wide when flat
- Skill level: Easy-Intermediate
- Terminology: US
- Yarn weight: worsted (#4) cotton
- Hook: 4.5 mm (US 7)
- Number of pieces: 9 (1 body, 2 fins, 1 bow, 1 bow wrap, 2 tail lobes, 1 eye ring, 2 hanging loops; the bow wrap is counted with the bow in the layout below)
- Layout: head at the top, a fin on each side just below the head, bow and tail at the bottom, hangers at the top
- Head size: 4.25 in (10.8 cm) tall; 3 in (7.6 cm) wide flat at the top, 5 in (12.7 cm) wide flat at the base
- Size before cuff (border): 14.25 in (36.2 cm), head plus mesh
- Cuff (border) depth: 1.75 in (4.4 cm)
Materials
Use a smooth worsted-weight cotton or cotton blend of about 170 m (186 yd) per 100 g. Cotton holds the mesh shape and doesn’t stretch out the way acrylic can under the weight of the bags.
- Main color (periwinkle blue): 130 g, about 221 m (242 yd)
- White: 3 g, about 5 m (5.5 yd), for the eye ring
- Alternate main color (peach): 130 g, about 221 m (242 yd), if you are making a second fish instead of the blue one
Tools:
– 4.5 mm (US 7) crochet hook
– One 12 mm black safety eye with washer
– Yarn needle
– 6–8 locking stitch markers
– Rust-proof pins and a blocking mat
– Measuring tape
The quantities include a margin of about 15% for gauge swatching and differences in tension.
Abbreviations (US Terms)
- ch: chain
- sl st: slip stitch
- sc: single crochet
- hdc: half double crochet
- dc: double crochet
- inc: 2 sc in the same stitch
- blo: back loop only
- sp: space
- st(s): stitch(es)
- MR: magic ring
- FPdc (front post double crochet): Yarn over, insert the hook from front to back to front around the post of the stitch, then complete a dc.
- BPdc (back post double crochet): Yarn over, insert the hook from back to front to back around the post of the stitch, then complete a dc.
Special stitch: wave. Work (sc in next st, hdc in next st, 3 dc in next st, hdc in next st, sc in next st). One wave uses 5 sts and makes 7 sts.
Gauge and Checkpoints
Gauge: 16 sc x 18 rounds = 4 in (10.2 cm) in sc worked in joined rounds.
Before you commit to the whole body, test the head. Work Rounds 1–3 and lay the tube flat. It should measure 3 in (7.6 cm) across, which is 6 in (15.2 cm) around.
Checkpoints:
– After Round 19 (head): 4.25 in (10.8 cm) tall, 5 in (12.7 cm) wide flat
– After Round 33 (mesh): about 14.25 in (36.2 cm) from the top edge, hanging and unstretched
– After Round 39 (cuff): 16 in (40.6 cm) total; cuff 2.5 in (6.4 cm) wide flat
If the head is too wide, go down to a 4 mm hook. If it is too narrow, go up to a 5 mm hook. The mesh follows the head’s tension, so once the head is right, the rest of the body will be close.
Body
The body is worked top-down in joined rounds. Don’t turn between rounds.
Head
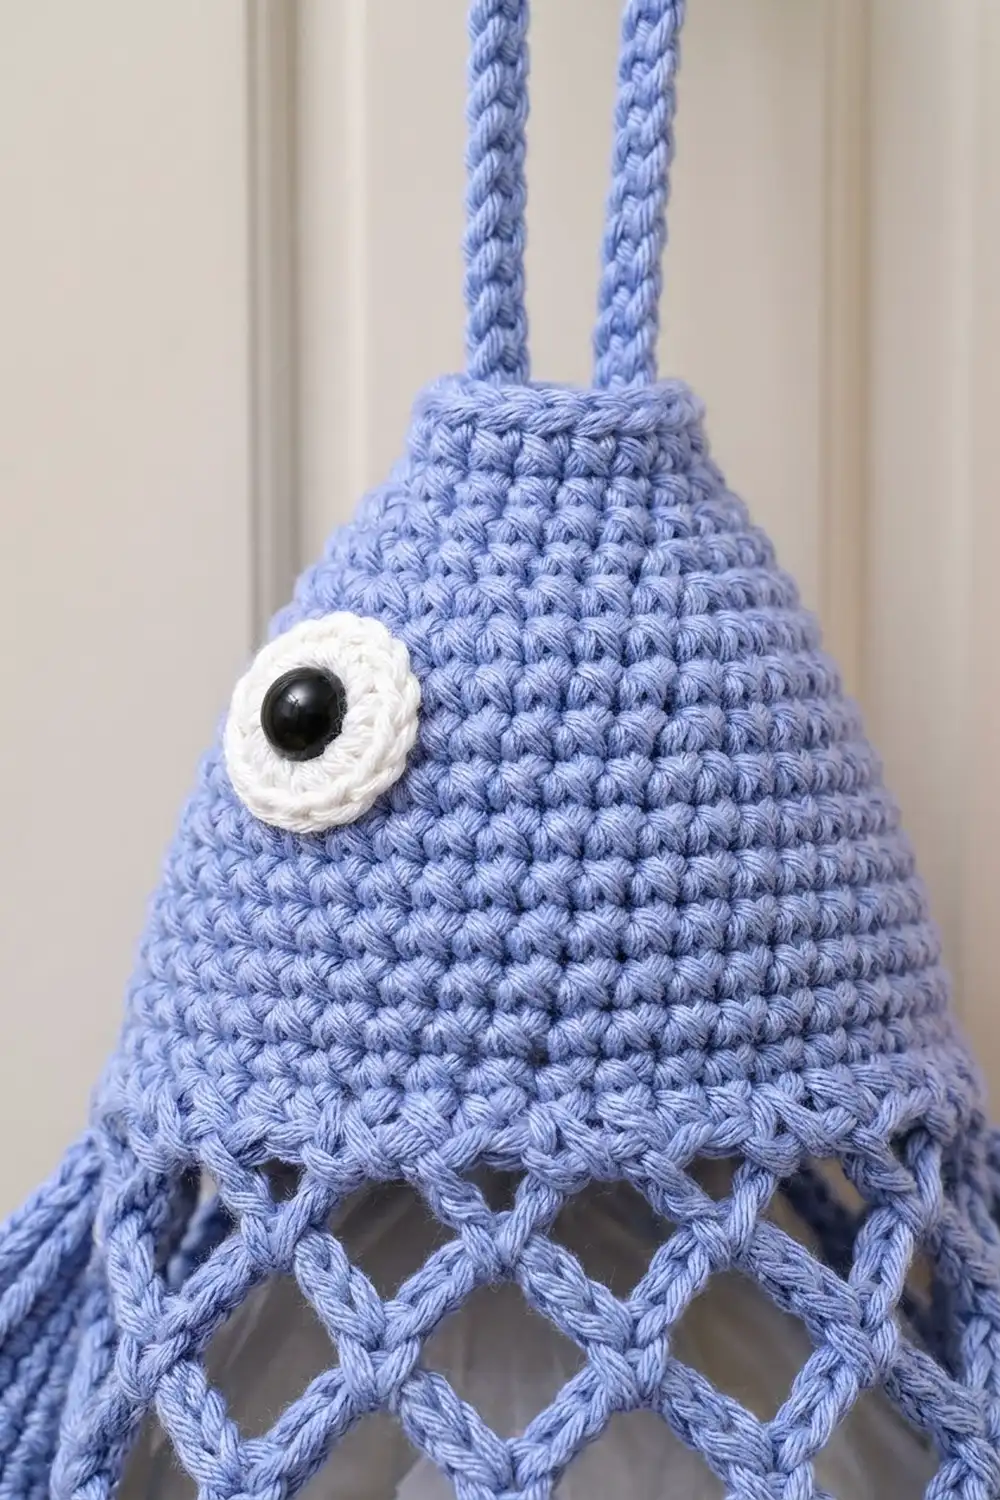
Rnd 1: Ch 24 and join with a sl st to the first ch to form a ring, taking care not to twist it. Ch 1, then sc in each ch around and join with a sl st to the first sc. (24 sts)
Rnds 2–3: Ch 1, sc in each st around, join. (24 sts)
Rnd 4: Ch 1, sc in next 5 sts, inc 4 times, join. (28 sts)
Rnds 5–6: Ch 1, sc in each st around, join. (28 sts)
Rnd 7: Ch 1, sc in next 6 sts, inc 4 times, join. (32 sts)
Rnds 8–9: Ch 1, sc in each st around, join. (32 sts)
Rnd 10: Ch 1, sc in next 7 sts, inc 4 times, join. (36 sts)
Rnds 11–12: Ch 1, sc in each st around, join. (36 sts)
Rnd 13: Ch 1, sc in next 8 sts, inc 4 times, join. (40 sts)
Rnds 14–19: Ch 1, sc in each st around, join. (40 sts)
Check your measurements now: the head should be 4.25 in (10.8 cm) tall and 5 in (12.7 cm) wide when flat. Flatten the head so the join sits at one side fold, and place a marker in the 21st st to mark the opposite fold.
Diamond Mesh
You always anchor each mesh round’s sc in the center of a loop from the round below. That offset is what creates the diamonds.
Rnd 20 (set-up): Ch 1, sc in the first st, ch 5, skip 3 sts. Then work sc in next st, ch 5, skip 3 sts 9 times and join with a sl st to the first sc. (10 ch-5 loops; 1 + 3 + 9 x 4 = 40 sts used)
To start every mesh round from Round 21 on: Sl st into the first 2 chains of the first loop (3 chains when the loops below are ch-6 or ch-7), ch 1, and sc around that loop.
Rnds 21–22: Ch 5, sc in next loop 9 times, ch 5, join to the first sc. (10 ch-5 loops)
Rnds 23–24: Work as Round 21 but with ch 6. (10 ch-6 loops)
Rnds 25–27: Work as Round 21 but with ch 7. This is the widest part. (10 ch-7 loops)
Rnds 28–29: Work as Round 21 but with ch 6. (10 ch-6 loops)
Rnds 30–31: Work as Round 21 but with ch 5. (10 ch-5 loops)
Rnd 32: Work as Round 21 but with ch 4. (10 ch-4 loops)
Rnd 33: Work as Round 21 but with ch 3. (10 ch-3 loops)
Let the body hang without pulling on it. It should measure about 14.25 in (36.2 cm) from the top edge, and the mesh should lie about 6.5 in (16.5 cm) wide at Rounds 25–27.
Don’t fasten off. The cuff is next and is covered in the Border section below.
Fins (Make 2)
The fins are worked in rows, with every row after Row 1 in blo to create raised ridges. All the increases fall on the same edge, so each fin becomes a wedge that flares toward one tip.
Row 1: Ch 17. Sc in the 2nd ch from the hook and in each ch across, then turn. (16 sts)
Row 2: Ch 1, sc blo in the next 15 sts, 2 sc blo in the last st, turn. (17 sts)
Row 3: Ch 1, 2 sc blo in the first st, sc blo in the next 16 sts, turn. (18 sts)
Row 4: Ch 1, sc blo in the next 17 sts, 2 sc blo in the last st, turn. (19 sts)
Row 5: Ch 1, 2 sc blo in the first st, sc blo in the next 18 sts, turn. (20 sts)
Row 6: Ch 1, sc blo in each st across, turn. (20 sts)
Row 7 (wave edge): Ch 1, then work 4 waves across. (20 sts worked 1-per-stitch + 8 added = 28 sts)
Fasten off, leaving a 12 in (30.5 cm) tail for sewing. Each fin measures about 5 in (12.7 cm) long and 2 in (5.1 cm) wide including the waves.
Bow
Row 1: Ch 13. Sc in the 2nd ch from the hook and in each ch across, then turn. (12 sts)
Rows 2–8: Ch 1, sc blo in each st across, turn. (12 sts)
Fasten off. The rectangle measures 3 in (7.6 cm) by 1.75 in (4.4 cm).
Wrap: Ch 9. Sc in the 2nd ch from the hook and in each ch across. (8 sts) For Row 2, ch 1, turn, and sc blo in each st across. (8 sts) Fasten off, leaving a long tail. The wrap measures 2 in (5.1 cm) by 0.5 in (1.3 cm).
Pinch the bow rectangle at its center, wrap the strip tightly around the pinch, and sew the wrap’s ends together at the back.
Tail Lobes (Make 2)
Rnd 1: Ch 17. Starting in the 2nd ch from the hook, work sc in the next 2 ch, hdc in the next 3 ch, dc in the next 6 ch, hdc in the next 3 ch, sc in the next ch, and 3 sc in the last ch (this is the tip). Now work along the other side of the foundation chain: sc in the next ch, hdc in the next 3 ch, dc in the next 6 ch, hdc in the next 3 ch, sc in the next 2 ch. Join. (15 + 3 + 15 = 33 sts)
Rnd 2: Ch 1, sc in each st around, working 3 sc in the center st of the tip. Join. (33 sts worked 1-per-stitch + 2 added = 35 sts)
Fasten off and leave a tail for sewing. Each lobe measures 4.25 in (10.8 cm) long and 1.75 in (4.4 cm) wide.
Eye Ring
With white, make a MR and work 6 sc into it. (6 sts) For Round 2, work 2 sc in each st, then join. (12 sts) Fasten off. The ring is about 1 in (2.5 cm) across.
Hanging Loops (Make 2)
Ch 50 and join with a sl st to the first ch to form a ring, taking care not to twist it. Ch 1, sc in each ch around, then join. (50 sts) Fasten off and leave a tail. Flattened, each loop measures 6.25 in (15.9 cm) long.
Make All Pieces
Count your pieces before you start assembling.
- Main color: 1 body, 2 fins, 1 bow (with its wrap), 2 tail lobes, 2 hanging loops
- White: 1 eye ring
- Hardware: 1 safety eye, 12 mm
Layout (front view, body flattened):
        [loop]   [loop]
            \     /
          [  HEAD  ] (eye)
   [fin] [ MESH BODY ] [fin]
          [   mesh   ]
            [ BOW ]
          [lobe][lobe]
Joining (Assembly)
Assemble the pieces with whipstitch, using the yarn tails and a yarn needle. Sew the white eye ring to the safety eye first, then attach everything else to the body.
- Eye: Push the safety eye’s shank through the center of the white ring. Insert it into the head between Rounds 8 and 9, about 4 sts in from one side fold. Reach in through the open top to snap the washer on from the inside. Sew the edge of the white ring down using white yarn.
- Fins: Line up each fin’s Row 1 edge (16 sts) along a side fold of the body, with the narrow end touching Round 20 and the flared tip pointing down. Sew 1 fin st to each sc anchor and chain along the fold. Each fin covers about the first 4 mesh rounds.
- Tail lobes: Overlap the base ends of the two lobes by 0.5 in (1.3 cm) to form a V. Sew them to the front of the body at Round 33, with the tips angled outward and down.
- Bow: Sew the bow’s wrap over the point where the lobes meet, so it covers the seam.
- Hangers: Sew the base of one loop to each side fold at Round 1 (the join and the marked opposite st). Stitch through 3 sts so the weight is spread out.
Tension advice: Sew firmly but don’t pull. If you tighten too much, the mesh puckers and the fins curl.
Size checkpoint: Measured from the top of the head to the tips of the tail lobes, the finished fish should be about 19.5 in (49.5 cm). The lobes hang about 3.5 in (8.9 cm) below the cuff, leaving the opening clear behind them.
Border: Ribbed Dispenser Cuff
The cuff continues directly from Round 33. Post-stitch ribbing grips the bags gently, so they come out one at a time.
Border gauge: 4 sts = 1 in (2.5 cm) around. Four ribbing rounds plus two sc rounds measure 1.75 in (4.4 cm) deep.
Rnd 34 (conversion): Ch 1, then sc in the next sc, sc in the next ch-3 sp 10 times and join. (10 sts worked 1-per-sc + 10 added in the spaces = 20 sts; 10 on each flattened side)
Rnd 35: Ch 2 (does not count as a st), then FPdc around next st, BPdc around next st 10 times. Join to the first FPdc. (20 sts; 5 FPdc and 5 BPdc on each side)
Rnds 36–38: Ch 2, then work FPdc around each FPdc and BPdc around each BPdc. Join. (20 sts; 10 on each side)
Rnd 39: Ch 1, sc in each st around, join. (20 sts; 10 on each side) Fasten off and weave in the end.
Why the math works: The mesh ends with 10 sc anchors and 10 spaces. One sc in each gives 20 sts, an even number, so the 1×1 ribbing repeats cleanly with no half repeat at the join. At 4 sts per inch, 20 sts make a 5 in (12.7 cm) circle, or 2.5 in (6.4 cm) flat. That is snug enough to hold the bags but loose enough for one to slide out.
Final Blocking
- Wet-block only the fins, bow and lobes. Soak them in cool water and gently press out the excess.
- Pin each fin flat, opening each wave into a smooth curve.
- Pin the lobes to 4.25 in (10.8 cm) long with sharp tips.
- Spray the body lightly. Stuff it loosely with plastic bags and lay it flat so the diamonds even out.
- Leave everything to dry completely, which takes 24 hours, before hanging.
Final Quality-Control Checklist
- The head measures 4.25 in (10.8 cm) tall and 5 in (12.7 cm) wide flat
- Every mesh round has 10 loops, and the diamonds line up evenly
- The cuff has 20 sts, and the ribs run straight down
- The fins flare toward the bottom tips, and their waves are open
- The eye washer is secure from the inside
- Both hanger loops are attached at opposite side folds
- All ends are woven in at least 2 in (5.1 cm)
Troubleshooting
- The head flares or cups: Your gauge is off. Change the hook size and redo the head.
- The diamonds slant: You are skipping the move to the center of the loop. Always slip stitch to the middle before you sc.
- The mesh is too long: Leave out one of the ch-7 rounds (Rounds 25–27).
- The cuff is too tight: Work Round 34 with 2 sc in every second space instead (25 sts), then change the ribbing to end with 1 FPdc.
- The fins curl: Wet-block them again and pin them flatter.
- The hanger stretches: Work a second sc round on each loop.
Care
Hand wash in cool water and lay flat to dry. Remove the bags first and don’t put the holder in the dryer.
Final Notes
Here is the whole measurement chain. A gauge of 16 sc = 4 in (10.2 cm) gives a head 5 in (12.7 cm) wide. Its 40 sts become 10 mesh loops, which flare to about 6.5 in (16.5 cm). The loops narrow back to 20 cuff sts, 2.5 in (6.4 cm) wide. That makes a 16 in (40.6 cm) body and a 19.5 in (49.5 cm) fish. Check each stage as you go and the fish will hang straight and dispense smoothly.
Happy crocheting!