

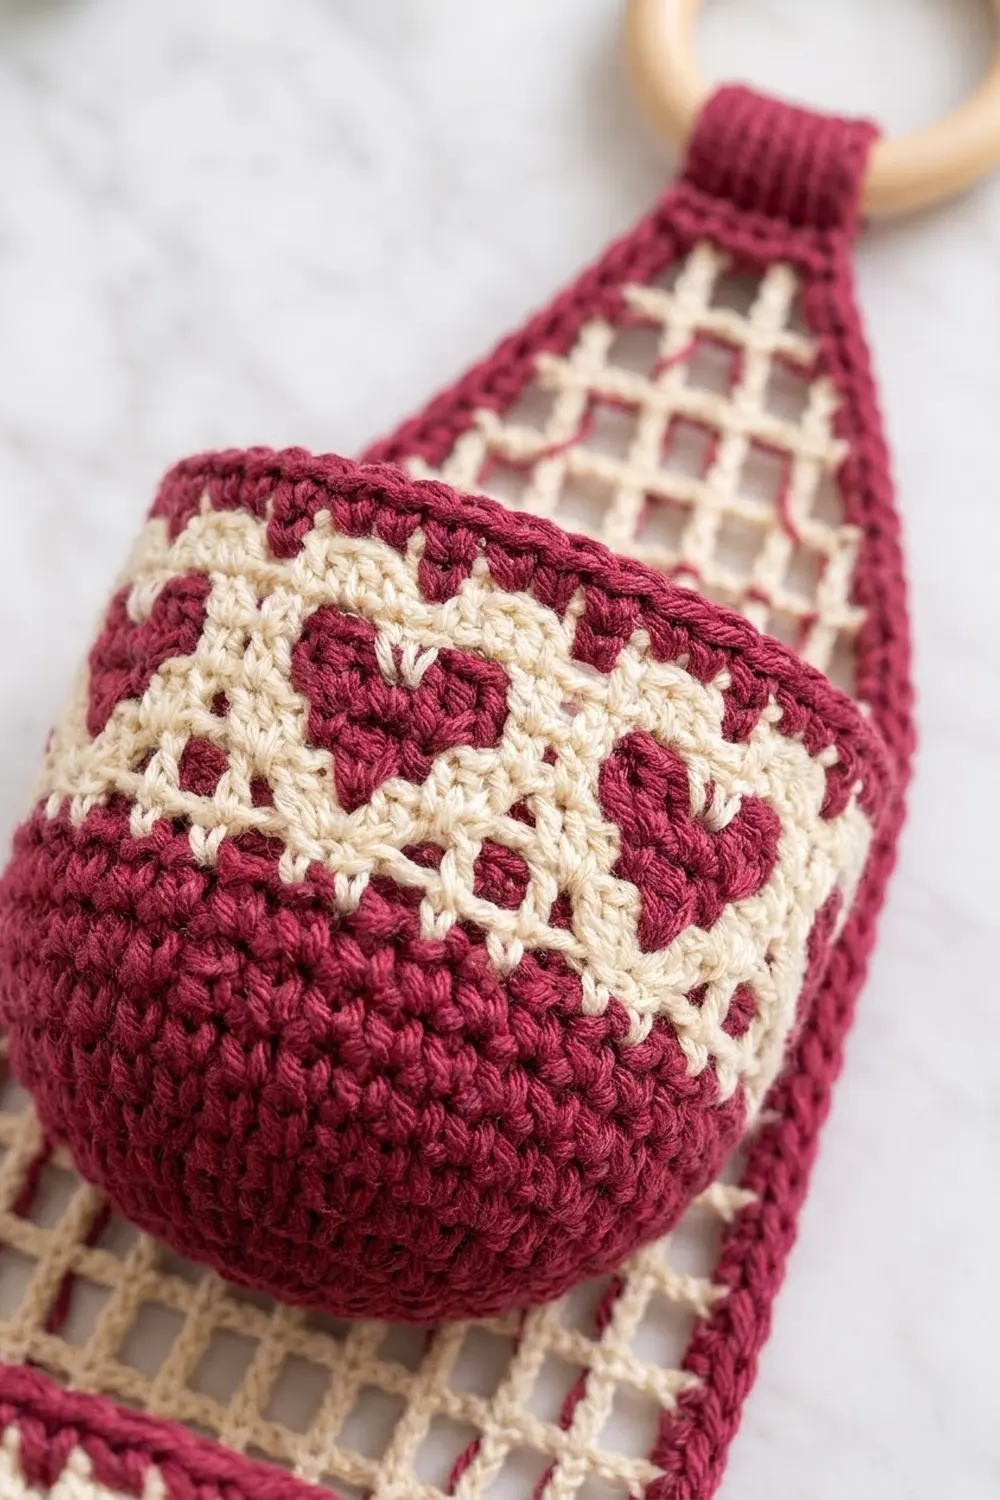
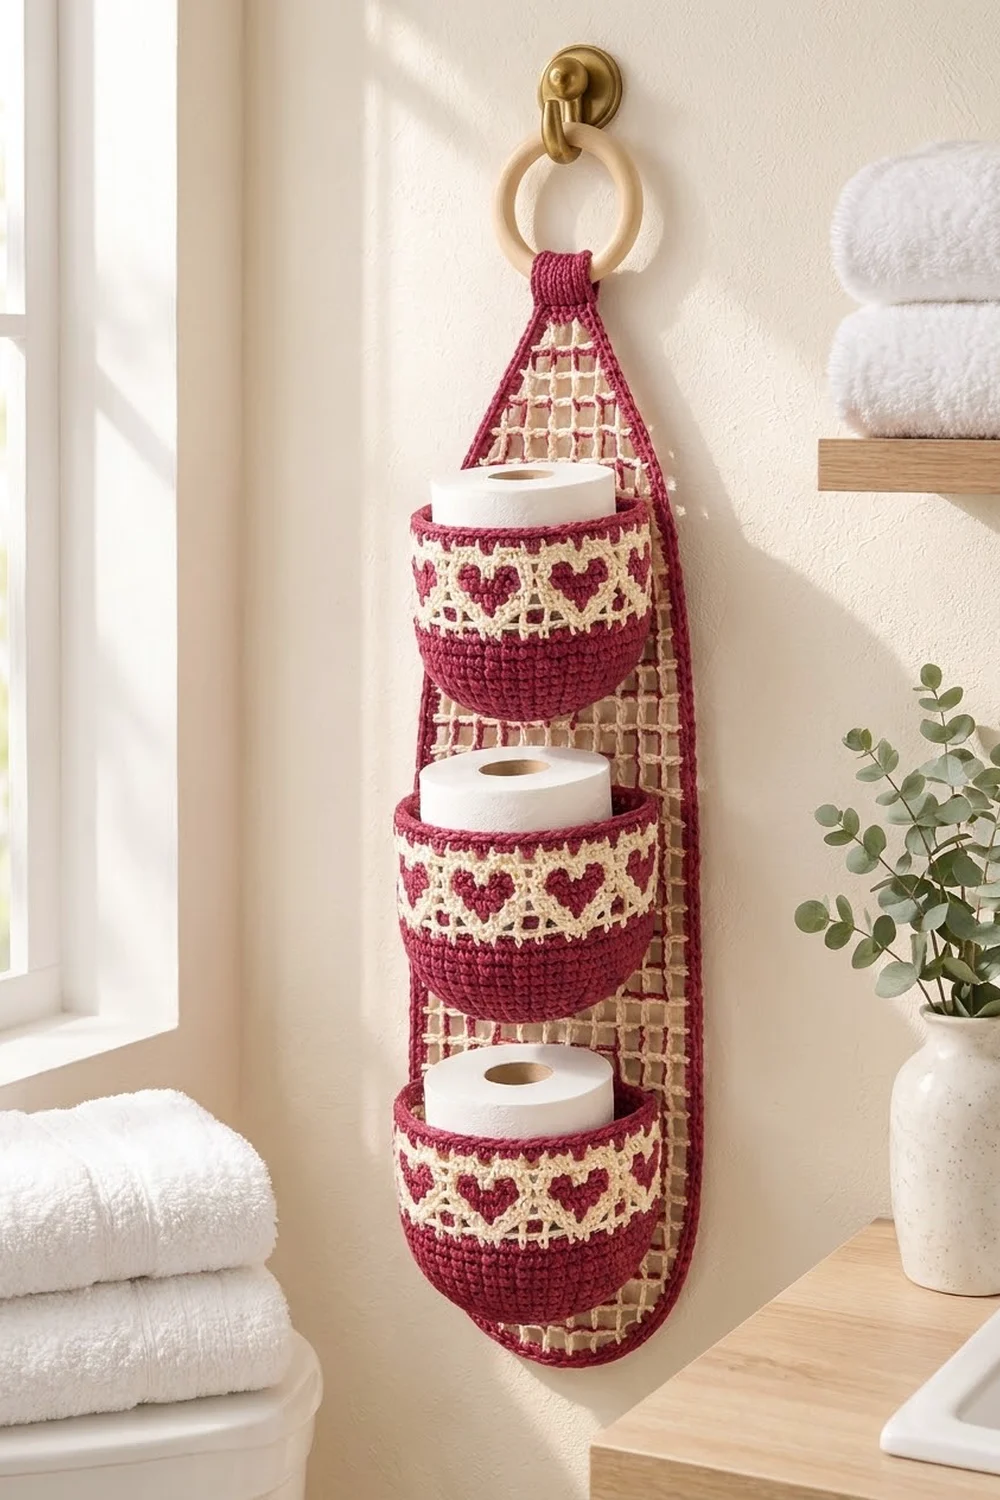
This hanging holder keeps three spare rolls tidy and in reach. A long, open filet-mesh panel hangs from a wooden ring, and three snug half-bowl pockets are stacked down its front, each wearing a band of little hearts.
The palette is simple: deep burgundy for the pocket bodies and the rope-like edging, and cream for the mesh and the heart band. The look is cottage-style and gentle, and it suits a bathroom all year round, not just in February.
The pattern uses US crochet terms. The bordered panel measures 7.5 in x 22.5 in (19.1 cm x 57.2 cm), and the holder is about 26 in (66.0 cm) tall from the bottom edge to the top of the ring. Each pocket is about 6 in (15.2 cm) wide and 3.75 in (9.5 cm) tall.
Construction is straightforward. You crochet three oval-based pockets in joined rounds with tapestry-crochet hearts, then make one filet-mesh panel in rows. Next you sew the pockets onto the mesh, edge the panel with a three-round border, and finish with a folded tab around a wooden ring.
Finished Size and Construction
- Finished size: 7.5 in x 22.5 in (19.1 cm x 57.2 cm) panel; about 26 in (66.0 cm) including the ring
- Skill level: Intermediate
- Terminology: US
- Yarn weight: Worsted (#4) cotton
- Hook: 4.5 mm (US 7)
- Number of pieces: 4 crocheted pieces (1 panel + 3 pockets) plus a tab worked onto the panel
- Layout: 3 pockets stacked vertically down the center of the panel
- Pocket size: 6 in (15.2 cm) wide x 3.75 in (9.5 cm) tall; base 6 in x 4.75 in (15.2 cm x 12.1 cm)
- Panel size before border: 6.5 in x 21.5 in (16.5 cm x 54.6 cm)
- Border depth: about 0.5 in (1.3 cm) on every edge
Materials
Use a smooth worsted-weight cotton or cotton blend. Cotton holds the pocket shape, is easy to wash, and shows tapestry hearts crisply. Avoid fuzzy yarns, because they blur the mesh squares.
- Color B (burgundy): about 125 g / 200 m
- Color C (cream): about 75 g / 120 m
The quantities include a margin of roughly 20%, so you have spare yarn for a gauge swatch and seaming.
Tools:
– 4.5 mm (US 7) crochet hook
– 1 wooden ring, 2.75 in (7.0 cm) diameter
– Tapestry needle
– Locking stitch markers (at least 8)
– Rust-proof pins and a blocking mat
– Measuring tape
– Scissors
Abbreviations (US Terms)
- B – burgundy; C – cream
- BLO – back loop only
- ch – chain
- dc – double crochet
- inc – 2 sc in the same stitch
- rev sc – reverse single crochet (crab stitch)
- rnd(s) – round(s)
- RS / WS – right side / wrong side
- sc – single crochet
- sl st – slip stitch
- sp – space
- st(s) – stitch(es)
Special techniques:
- Tapestry color change: Work the last sc before a color change until 2 loops remain on the hook, then yarn over with the new color and pull through. Carry the unused color along the top of the round and work over it so it stays hidden inside the stitches.
- Mesh square: One “ch 1, dc” unit in the filet panel.
- Beginning increase (beg inc): Ch 6, turn, dc in the first dc. This adds 1 mesh square at the start of a row: 2 chains form its base, 3 form its outer post, and 1 forms its top.
- End decrease (end dec): Stop after the dc that comes before the last mesh square, leaving that square unworked, and turn.
Gauge and Checkpoints
- Single crochet in rounds: 16 sts and 18 rnds = 4 in (10.2 cm)
- Filet mesh: 8 squares and 8 rows = 4 in (10.2 cm), so each square is 0.5 in (1.3 cm)
This pairing is intentional. One mesh square is the width of exactly 2 sc, which makes the seams and border land evenly.
Make one pocket before anything else, because it is your real gauge test.
Checkpoints:
– Pocket Rnd 5: about 2.4 in (6.1 cm) across the short axis
– Pocket Rnd 10: 6 in x 4.75 in (15.2 cm x 12.1 cm)
– Panel Row 7: 13 squares = 6.5 in (16.5 cm) wide, 3.5 in (8.9 cm) tall
– Panel Row 31: 15.5 in (39.4 cm) tall
– Panel Row 43: 21.5 in (54.6 cm) tall
If your pieces come out too big, go down a hook size. If they come out too small, go up one. Re-check both gauges, because sc and dc can react differently to the same hook change.
Pockets (Make 3)
Work in joined rounds with RS facing. Join each round with a sl st to the first sc and ch 1 (the ch 1 does not count as a stitch).
Oval Base
With B, ch 8.
Rnd 1: Sc in the 2nd ch from hook, sc in each of the next 5 ch, 3 sc in the last ch. Working along the opposite side of the foundation, sc in each of the next 5 ch, then 2 sc in the last ch (the same ch as the first sc). Join. (16 sts)
Rnd 2: Inc in the first st, sc 5, inc in each of the next 3 sts, sc 5, inc in each of the next 2 sts. (22 sts)
Rnds 3–10: Use the formula below, where X = the round number minus 2:
[Sc X, inc] once, sc 5, [sc X, inc] 3 times, sc 5, [sc X, inc] twice.
| Rnd | X | Total |
|---|---|---|
| 3 | 1 | 28 |
| 4 | 2 | 34 |
| 5 | 3 | 40 |
| 6 | 4 | 46 |
| 7 | 5 | 52 |
| 8 | 6 | 58 |
| 9 | 7 | 64 |
| 10 | 8 | 70 |
Each round adds exactly 6 sts, 3 at each curved end. The two 5-st straight sections never change.
In Rnd 10, sts 11–15 form one straight section (the front) and sts 46–50 form the other (the back). Place a marker in st 48 to mark the center back.
Walls
Rnd 11: Sc in BLO of each st around. (70 sts) The unused front loops form a ridge that sharply defines the base.
Rnds 12–14: Sc around. (70 sts each)
Heart Band
The chart is 10 sts wide, repeated 7 times around (7 x 10 = 70). Join C at the start of Rnd 15 and carry both colors from here to the end of the band.
| Rnd | Repeat (10 sts) |
|---|---|
| 15 | 10C |
| 16 | 4C, 1B, 5C |
| 17 | 3C, 3B, 4C |
| 18 | 2C, 5B, 3C |
| 19 | 1C, 7B, 2C |
| 20 | 1C, 7B, 2C |
| 21 | 1C, 3B, 1C, 3B, 2C |
| 22 | 2C, 1B, 3C, 1B, 3C |
| 23 | 10C |
| 24 | 10C |
Rnds 15–24: Work the chart around. (70 sts each)
The hearts are centered on sts 5, 15, 25, 35, 45, 55, and 65. Three of them (sts 5, 15, and 25) sit across the front, and the cream columns between them read as a lattice. Fasten off C at the end of Rnd 24.
Rim
Rnds 25–26: With B, sc around. (70 sts each)
Rnd 27: Rev sc around. (70 sts) Fasten off and leave a 40 in (101.6 cm) tail for sewing. Weave in the other ends.
Each pocket’s wall is 17 rnds, or about 3.75 in (9.5 cm) tall.
Mesh Panel
With C, ch 18.
Row 1 (RS): Dc in the 6th ch from hook, [ch 1, skip 1 ch, dc in next ch] 6 times. Turn. (7 squares)
Rows 2–7: Beg inc, [ch 1, dc in next dc] across, working the last dc into the 4th ch of the turning chain. Turn.
Square counts: Row 2: 8, Row 3: 9, Row 4: 10, Row 5: 11, Row 6: 12, Row 7: 13.
The increases alternate sides, so the left edge gets 3 increases (Rows 2, 4, and 6) and the right edge gets 3 (Rows 3, 5, and 7). This is what makes the rounded bottom.
Rows 8–31: Ch 4 (counts as dc + ch 1), dc in the next dc, [ch 1, dc in next dc] across. Turn. (13 squares each)
Rows 32–43: Work as Row 8, then end dec. Turn.
Square counts: Row 32: 12, Row 33: 11, and so on, down to Row 43: 1. The decreases also alternate sides, 6 on each edge, which forms the point.
Fasten off. The panel now measures 6.5 in x 21.5 in (16.5 cm x 54.6 cm).
Make All Pieces
Totals: 3 pockets (B with C hearts) and 1 panel (C).
Layout (rows counted from the bottom of the panel):
Rows 33–43   open mesh, taper to point
Rows 26–32   POCKET 3  (base on Row 25, rim on Row 32)
Rows 24–25   open gap
Rows 17–23   POCKET 2  (base on Row 16, rim on Row 23)
Rows 15–16   open gap
Rows 8–14    POCKET 1  (base on Row 7,  rim on Row 14)
Rows 1–7     rounded bottom
Joining
Each pocket is attached along two horizontal seams, with the back flattened against the mesh and the front left to bulge out.
- Mark the pocket back. Mark Rnd 10 sts 38–59 (22 sts, centered on st 48) and Rnd 26 sts 38–59. Count from the join, and check that st 48 lines up with your center-back marker.
- Mark the panel. Use the center 11 squares of the row: skip 1 square at each edge of a 13-square row. On Row 32, which has 12 squares, use the same columns. Lay the panel RS up with Row 1 at the bottom.
- Sew the base seam. Using B, whipstitch the 22 marked front loops along the Rnd 11 ridge to the top of the base row (Row 7, 16, or 25).
- Sew the rim seam. Whipstitch the 22 marked Rnd 26 stitches to the top of the rim row (Row 14, 23, or 32), just below the rev sc edge.
The stitch-to-stitch logic is simple: 22 sts across 11 squares means 2 sts per square. Place one stitch beside each dc post and one over each ch-1 space.
The wall is 3.75 in (9.5 cm) tall, but the seams are 7 rows, or 3.5 in (8.9 cm), apart. Ease in that extra 0.25 in (0.6 cm) evenly; it gives the front room to round out.
Tack each side wall down with 3 small stitches. Keep the seams snug but not tight, so the mesh does not pucker.
Checkpoint: The panel should still lie flat at 6.5 in (16.5 cm) wide, and each pocket front should stand about 4.75 in (12.1 cm) out from the mesh.
Border
Border gauge: 4 sc = 1 in (2.5 cm), the same as the pocket gauge.
Use B and work with RS facing. Join each round with a sl st.
Rnd 1: Work 2 sc into each mesh row-end (around the dc post or turning chain) and 2 sc into each exposed horizontal square edge. Count by section:
- Bottom curve (row-ends of Rows 1–7 on both sides, plus 13 horizontal edges): 28 + 26 = 54 sc
- Left side (Rows 8–31): 48 sc
- Top taper (row-ends of Rows 32–43 on both sides, plus 13 horizontal edges): 48 + 26 = 74 sc
- Right side (Rows 8–31): 48 sc
Total: 224 sts. Place markers at the 4 section boundaries.
Rnd 2:
– Bottom curve: [sc 17, inc] 3 times (57 sts)
– Left side: sc 48 (48 sts)
– Top taper: sc 1, [sc 23, inc] 3 times, sc 1 (77 sts)
– Right side: sc 48 (48 sts)
Total: 230 sts.
Rnd 3: Rev sc in each st around. (230 sts) Fasten off.
Why the math works: Each row is 0.5 in (1.3 cm) tall, and 2 sc at 4 sts/in also cover 0.5 in. Each side’s 24 rows therefore take 48 sc, which is exactly 12 in (30.5 cm). Across the bottom, 13 squares at 0.5 in each give 26 sc, which is exactly 6.5 in (16.5 cm). The 6 increases in Rnd 2 go only on the curved ends, which need extra length as the edge grows outward, so the straight sides stay flat.
The bordered panel measures 7.5 in x 22.5 in (19.1 cm x 57.2 cm).
Hanging Tab and Ring
With RS facing, join B in the back loop of the center Rnd 2 stitch of the top taper section (st 39 of 77).
Row 1: Ch 1, sc in BLO of that st and the next 4 sts. Turn. (5 sts) This places sts 39–43 at the tip; if you’d like the tab perfectly centered, work sts 37–41 instead.
Rows 2–11: Ch 1, sc 5. Turn. (5 sts each)
The tab is 1.25 in (3.2 cm) wide and about 2.5 in (6.4 cm) long. Fold it over the wooden ring to the WS and whipstitch Row 11 to the base of the tab.
Final Blocking
- Lightly spritz the whole holder with water.
- Pin the panel flat, RS up, to 7.5 in x 22.5 in (19.1 cm x 57.2 cm). Keep the mesh squares straight and the point centered.
- Stuff each pocket with a toilet roll or a rolled towel so the half-bowl shape sets.
- Let it dry completely, which usually takes 12–24 hours.
- Unpin and hang it from the ring.
Final Quality-Control Checklist
- Each pocket has 70 sts in every wall round.
- 3 hearts face forward on each pocket.
- The panel is 13 squares wide through Rows 8–31.
- The tip comes to a single square at Row 43.
- Border Rnd 1 has 224 sts and Rnds 2–3 have 230 sts.
- Each pocket has 22 sts sewn on both its base seam and its rim seam.
- The pockets are centered with 1 open square on each side.
- The tab is secure and the ring does not slip.
- All ends are woven in on the WS.
Troubleshooting
- The base cups instead of lying flat: Your tension is too tight on the increases. Loosen up, or go up a hook size for Rnds 1–10.
- Hearts look lopsided: Check the repeat against the chart and confirm the round starts at st 1.
- Carried strands show through: Keep the carried yarn on top of the stitches and work over it each time.
- The mesh slants: Work the turning chains consistently and dc into the actual dc, not the ch-1 spaces.
- The border ruffles: You have too many sc. Count each section against the numbers above.
- The border cups: Add the Rnd 2 increases exactly where they’re shown.
- A pocket sags forward: Re-sew the rim seam more firmly and add one more tack at each side.
Care
Hand wash or machine wash on a gentle cold cycle, then reshape and dry flat. Don’t wring out the mesh panel.
Final Notes
The measurement chain runs like this. Each pocket’s 70 sts give a 17.5 in (44.5 cm) rim. The 13-square mesh body is 6.5 in (16.5 cm) wide, and its 43 rows are 21.5 in (54.6 cm) long. The 0.5 in (1.3 cm) border brings the panel to 7.5 in x 22.5 in (19.1 cm x 57.2 cm). With the tab and the 2.75 in (7.0 cm) ring, the holder hangs about 26 in (66.0 cm) tall. Since one mesh square equals 2 sc, every seam and every border section comes out even.
Happy crocheting!