

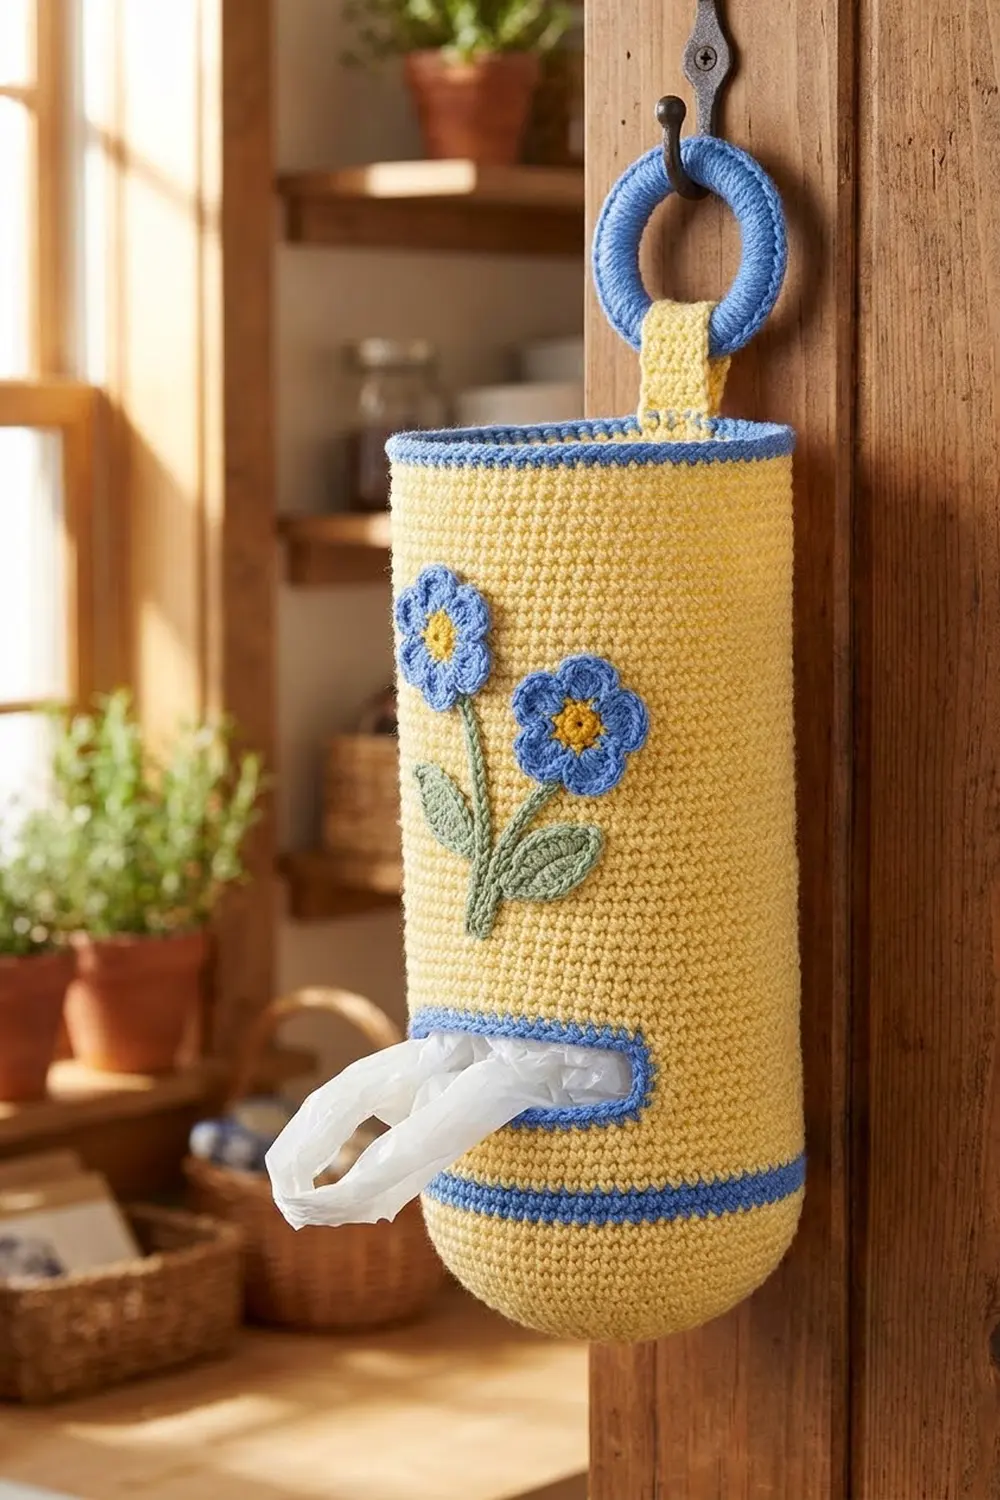
This bag holder is a tall, round tube in soft butter yellow. It has a domed bottom, a cornflower-blue stripe near the base, and a blue-edged oval slot that lets you pull plastic grocery bags out one at a time. A blue crocheted rim finishes the top, and a yellow tab loops over a blue covered ring for hanging.
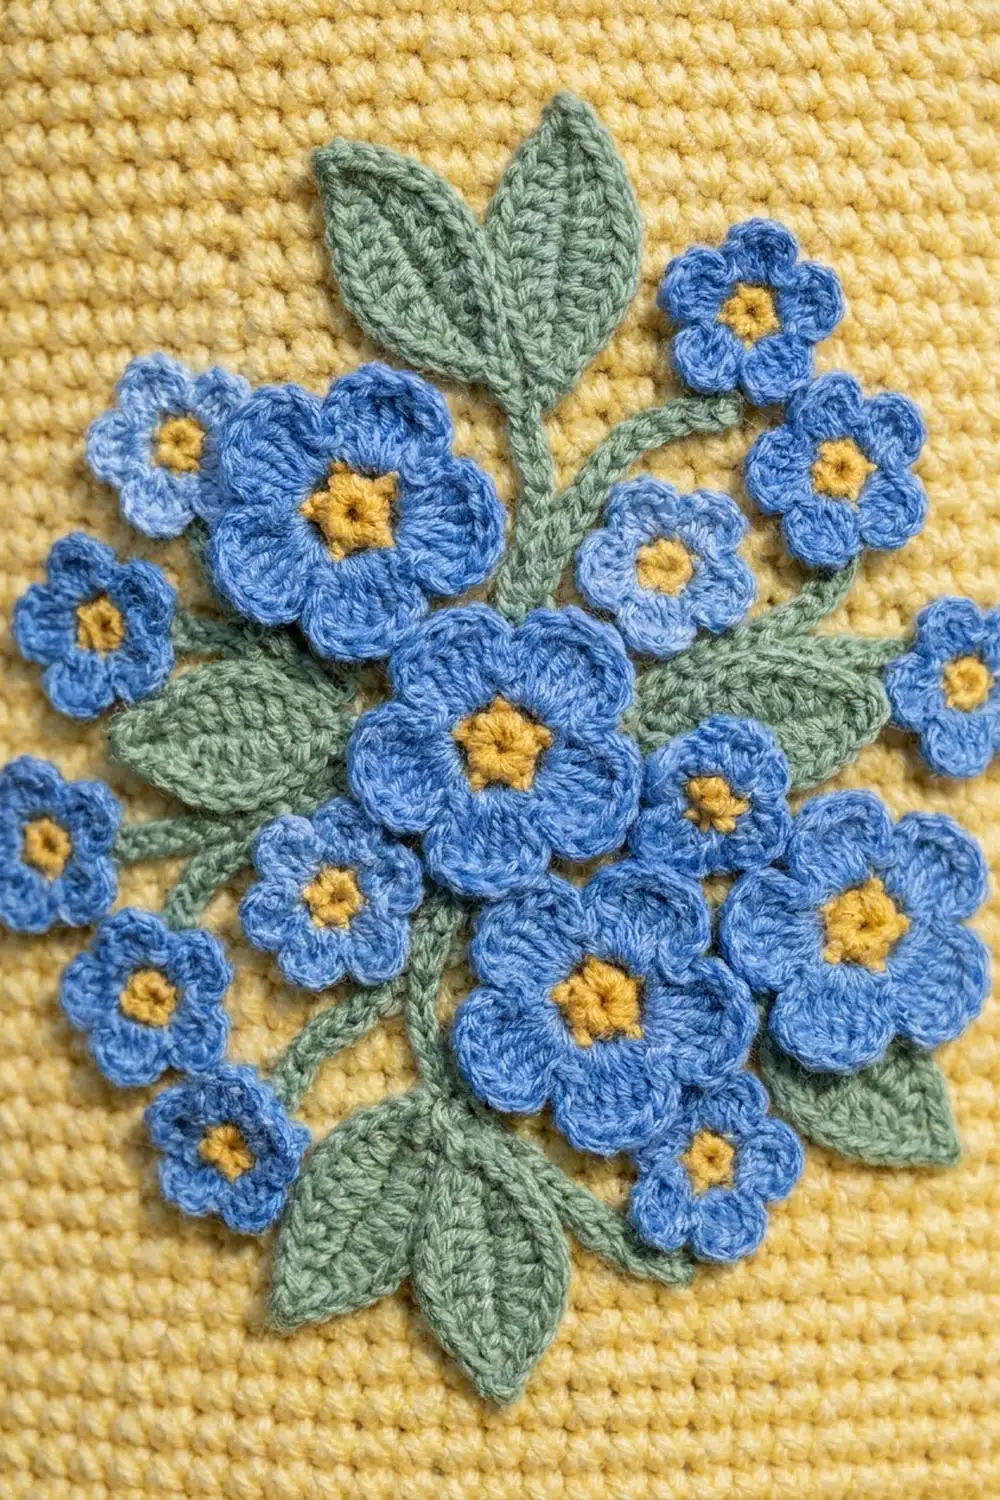
The front has two sprays of raised forget-me-not flowers: blue five-petal blossoms with mustard centers, sage-green leaves and slip-stitched stems. It has a fresh, cottage look and works well in a kitchen or on a pantry door.
The pattern uses US crochet terms. The finished body measures about 6 in (15.2 cm) wide when flat and about 15 in (38.1 cm) long, or about 19 in (48.3 cm) including the tab and ring.
You work the body from the bottom up in joined rounds of single crochet. A short section of turned rows creates the slot, a chain closes it, and plain rounds continue to the rim. The tab, ring cover, flowers and leaves are made separately and sewn on.
Finished Size and Construction
- Finished size: 6 in (15.2 cm) flat width x 15 in (38.1 cm) body length
- Circumference: 12 in (30.5 cm)
- Skill level: Easy–Intermediate
- Terminology: US
- Yarn weight: Worsted (#4)
- Hooks: 5.0 mm (H-8) for the body and tab; 4.0 mm (G-6) for the appliqués
- Number of pieces: 1 body, 1 tab, 1 covered ring, 8 flowers and 5 leaves, all sewn into one finished holder
- Layout: slot centered on the front, 4 rounds above the blue stripe; flower sprays on the front above the slot
- Slot size: 3.5 in (8.9 cm) x 1.8 in (4.6 cm) before edging
- Size before rim: 14.4 in (36.6 cm) long
- Rim depth: about 0.6 in (1.5 cm)
Materials
Choose a smooth worsted-weight cotton or cotton blend. Cotton holds its shape, doesn’t stretch much under the weight of the bags, and shows the stitch texture clearly.
- Color Y (butter yellow): 110 g / 220 m
- Color B (cornflower blue): 30 g / 60 m
- Color G (sage green): 15 g / 30 m
- Color M (mustard): 5 g / 10 m
These amounts include about 15 percent extra to cover gauge swatching and differences in tension.
Tools:
- 5.0 mm (H-8) and 4.0 mm (G-6) crochet hooks
- 1 plastic or wooden ring, 3 in (7.6 cm) outer diameter
- Stitch markers (at least 4)
- Tapestry needle
- Scissors
- Measuring tape
- Pins for placing the appliqués
Abbreviations (US Terms)
- ch – chain
- sl st – slip stitch
- sc – single crochet
- hdc – half double crochet
- dc – double crochet
- inc – 2 sc in the same stitch
- rev sc – reverse single crochet (crab stitch)
- st(s) – stitch(es)
- rnd(s) – round(s)
- RS / WS – right side / wrong side
Reverse single crochet: work from left to right (if you are right-handed). Insert the hook into the next stitch to the right, yarn over, pull up a loop, yarn over and pull through both loops. This makes a corded, beaded edge.
Standing sc: with a slip knot on the hook, insert the hook into the stitch, yarn over, pull up a loop, yarn over and pull through both loops.
Gauge and Checkpoints
Gauge: 16 sc x 18 rnds = 4 in (10.2 cm) with the 5.0 mm hook, worked in rounds.
Check your gauge by working the base (Rnds 1–11) first. The base is part of the holder, so nothing is wasted.
Checkpoints:
- After Rnd 11: 48 sts. The edge measures 12 in (30.5 cm) around when the dome is cupped.
- After Rnd 20: the tube lies flat at 6 in (15.2 cm) wide. The length from the bottom tip is about 3.75 in (9.5 cm).
- After Rnd 29: the slot is complete. The length is about 5.75 in (14.6 cm).
- After Rnd 68: the length is about 14.4 in (36.6 cm).
- After Rnd 71: the length is about 15 in (38.1 cm).
If the tube is too wide: go down one hook size (4.5 mm). If it is too narrow: go up one hook size (5.5 mm). If only the length is off, add or remove plain rounds between Rnds 30 and 68. Each round adds about 0.22 in (0.6 cm).
Body
Work in joined rounds. At the end of every round, sl st to the first sc, then ch 1. The ch 1 does not count as a stitch. Change colors in the final yarn over of the joining sl st.
Domed Base
With Y and the 5.0 mm hook, make a magic ring.
- Rnd 1: 6 sc in the ring. (6)
- Rnd 2: inc in each st. (12)
- Rnd 3: [sc, inc] 6 times. (18)
- Rnd 4: [2 sc, inc] 6 times. (24)
- Rnd 5: sc in each st. (24)
- Rnd 6: [3 sc, inc] 6 times. (30)
- Rnd 7: [4 sc, inc] 6 times. (36)
- Rnd 8: sc in each st. (36)
- Rnd 9: [5 sc, inc] 6 times. (42)
- Rnd 10: sc in each st. (42)
- Rnd 11: [6 sc, inc] 6 times. (48)
The plain rounds (5, 8 and 10) slow the growth, so the base cups into a rounded dome instead of lying flat.
Set up markers: the round join sits at the back center. Mark st 13 and st 36. Sts 13–36 are the front (24 sts), and sts 37–48 plus 1–12 are the back (24 sts).
Lower Tube and Stripe
- Rnds 12–14: with Y, sc in each st. (48)
- Rnds 15–16: with B, sc in each st. (48)
- Rnds 17–20: with Y, sc in each st. (48)
Fasten off Y at the end of Rnd 20.
Slot Section
The slot is 14 sts wide and centered on the front, over sts 18–31. Five front sts remain on each side of it (sts 13–17 and 32–36).
- Row 21 (RS): join Y with a standing sc in st 32. Sc in sts 33–48, then sc in sts 1–17. Leave sts 18–31 unworked. (34)
- Rows 22–28: ch 1, turn, sc in each st across. (34)
Fasten off. The slot opening is now 14 sts wide x 8 rows tall, or 3.5 in (8.9 cm) x 1.8 in (4.6 cm).
- Rnd 29: with RS facing, join Y with a standing sc in the back-center st (st 1 position). Sc in the next 16 sts (17 sc so far). Ch 14 loosely across the slot, skip the opening, and sc in the remaining 17 sts. Join. (17 sc + 14 ch + 17 sc = 48)
- Rnd 30: sc in each sc and in each ch. (48)
Working the slot in turned rows keeps the opening a clean rectangle, which becomes a soft oval once it is edged. Rejoining at the back center keeps every round join off the front.
Upper Tube
- Rnds 31–68: with Y, sc in each st. (48)
Change to B at the end of Rnd 68. The body should now be about 14.4 in (36.6 cm) long.
Tab
With Y and the 5.0 mm hook, ch 7.
- Row 1: sc in the 2nd ch from the hook and in each ch across. (6)
- Rows 2–22: ch 1, turn, sc in each st. (6)
Fasten off, leaving a 12 in (30.5 cm) tail. The tab measures 1.5 in (3.8 cm) x 4.9 in (12.4 cm).
Covered Ring
With B and the 5.0 mm hook, make a slip knot and hold it against the ring. Work sc around the ring, inserting the hook through the center each time. Keep going until the ring is fully covered with stitches packed side by side, about 66 sc. The exact count can vary; aim for full coverage without ruffling. Sl st to the first sc and fasten off.
Flowers
Use the 4.0 mm hook for all appliqués.
Large Flower (make 6)
- Rnd 1: with M, make a magic ring and work 5 sc in it. Join with a sl st to the first sc. Fasten off M. (5)
- Rnd 2: join B in any sc. In each sc around, work [sl st, ch 2, 3 dc, ch 2, sl st]. (5 petals)
Fasten off, leaving an 8 in (20.3 cm) tail. Each flower measures about 1.5 in (3.8 cm) across.
Small Flower (make 2)
- Rnd 1: with M, make a magic ring and work 5 sc in it. Join. Fasten off M. (5)
- Rnd 2: join B in any sc. In each sc around, work [sl st, ch 1, 3 hdc, ch 1, sl st]. (5 petals)
Each small flower measures about 1.1 in (2.8 cm) across.
Leaves (make 5)
With G and the 4.0 mm hook, ch 8.
- Side 1: sc in the 2nd ch from the hook, hdc in the next ch, dc in each of the next 2 ch, hdc in the next ch, sc in the next ch. (6)
- Tip: work [sc, ch 2, sc] in the last ch.
- Side 2: working along the opposite side of the foundation chain, sc in the next ch, hdc in the next ch, dc in each of the next 2 ch, hdc in the next ch, sc in the next ch. (6)
- Sl st into the first skipped ch.
Total: 14 sts plus the ch-2 tip. Fasten off, leaving a tail. For the center vein, surface sl st with G along the middle of the leaf, from base to tip. Each leaf measures about 1.75 in (4.4 cm) long x 1 in (2.5 cm) wide.
Stems and Appliqué Placement
Lay the body flat with the slot facing you. Place everything within front sts 13–36, between Rnd 30 and Rnd 68.
Upper spray: pin 4 large flowers in a tight cluster over sts 16–26, Rnds 58–66. With G, surface sl st a stem about 3.5 in (8.9 cm) long, from st 20 on Rnd 42 up to the cluster, with a short branch to each flower. Pin one leaf to the right of the cluster (around st 30, Rnd 60) and one to the left of the stem (around st 15, Rnd 48).
Lower spray: pin 2 large flowers and 1 small flower over sts 22–34, Rnds 38–46. Surface sl st a stem about 1.5 in (3.8 cm) long, from st 20 on Rnd 33 up to the flowers. Pin leaves at the upper right (st 34, Rnd 46), the lower right (st 32, Rnd 34) and beside the stem (st 19, Rnd 36). Place the last small flower on its own at st 16, Rnd 34.
Slide a rolled towel inside the tube so you don’t sew through both layers. Whipstitch each flower around its center and the bases of the petals, leaving the petal tips free so they stand up. Sew the leaves along their centers and bases.
Border
The border has two parts: the top rim and the slot edging. The border gauge matches the body: 16 sc = 4 in (10.2 cm).
Top Rim
Continue with B from Rnd 68.
- Rnd 69: sc in each st. (48: 24 front + 24 back)
- Rnd 70: sc in each st. (48: 24 front + 24 back)
- Rnd 71: ch 1, rev sc in each st. Join and fasten off. (48: 24 front + 24 back)
Why the math works: each side keeps 24 sts, which is 6 in (15.2 cm) at gauge, the same as the tube. Working one stitch into each stitch keeps the rim flat, with no flaring or puckering.
Slot Edging
With RS facing, join B with a standing sc in one bottom corner of the opening.
- Rnd 1: work 14 sc along the bottom (one in each of the 14 skipped sts), 8 sc up the first side (1 per row end), 14 sc into the underside of the 14 ch along the top, and 8 sc down the second side. Join. (14 + 8 + 14 + 8 = 44)
- Rnd 2: sl st loosely in each st. Join and fasten off. (44)
Why the math works: the top and bottom each take one sc per stitch, so they stay at 3.5 in (8.9 cm). The 8 row ends on each side get 8 sc, slightly more than the stitch gauge calls for. That extra fullness rounds the short ends into an oval. The finished opening is about 3 in (7.6 cm) x 1.3 in (3.3 cm).
Assembly of Tab and Ring
Thread the tab through the covered ring and fold it in half. Center both ends on the inside of the back rim so they overlap the inside by 1 in (2.5 cm). Whipstitch the ends firmly through the rim and the top two Y rounds, going through each layer twice.
Final Blocking
- Weave in all ends on the inside, securing each tail in two directions.
- If the flowers and leaves curl, block them before sewing: pin them flat, mist and let them dry.
- Roll a hand towel to about 3.8 in (9.7 cm) thick and slide it inside the tube.
- Mist the body lightly until it is damp but not wet.
- Smooth the rim and slot edging with your fingers so they lie flat.
- Check the width: 6 in (15.2 cm) flat. Check the length: about 15 in (38.1 cm).
- Let it dry completely, then remove the towel.
Final Quality-Control Checklist
- The body has 48 sts in every round from Rnd 11 to Rnd 71.
- All round joins run up the back center.
- The blue stripe is 2 rnds tall and level all the way around.
- The slot is centered on the front with 5 sts on each side.
- The slot edging has 44 sts and lies flat.
- The rim has 48 sts with an even corded edge.
- The tab is sewn on firmly and the ring is fully covered.
- All 8 flowers and 5 leaves are secure, with the petal tips raised.
- No stitches go through to the back layer.
Troubleshooting
The dome is flat instead of rounded: you may have skipped a plain round. Check Rnds 5, 8 and 10.
The joins drift diagonally: this is normal in joined rounds. Keep each join at the back center by joining into the first sc, not the ch 1.
The slot is off center: count from the back-center join before Row 21. Sts 18–31 must be the skipped section.
The slot edging ruffles: use fewer sts along the row ends (7 per side), or go down a hook size for the edging.
The rim flares: work Rnd 71 with the 4.0 mm hook.
The tube sags with bags inside: your gauge is too loose. Use a smaller hook and cotton yarn.
The flowers look flat: sew down only the center and the base of each petal.
Care
Hand wash in cool water with mild soap and press the water out with a towel. Dry flat with a rolled towel inside, and do not machine dry.
Final Notes
The whole holder rests on one measurement chain. At 16 sc = 4 in (10.2 cm), 48 sts give a 12 in (30.5 cm) circumference and a 6 in (15.2 cm) flat width. The base reaches 48 sts by Rnd 11 and the stripe sits at Rnds 15–16. The 14-st slot opens over Rows 21–28, and Rnds 29–68 bring the length to 14.4 in (36.6 cm). Three blue rim rounds finish the body at about 15 in (38.1 cm), and the tab and ring add about 4 in (10.2 cm) for hanging.
Happy crocheting!