
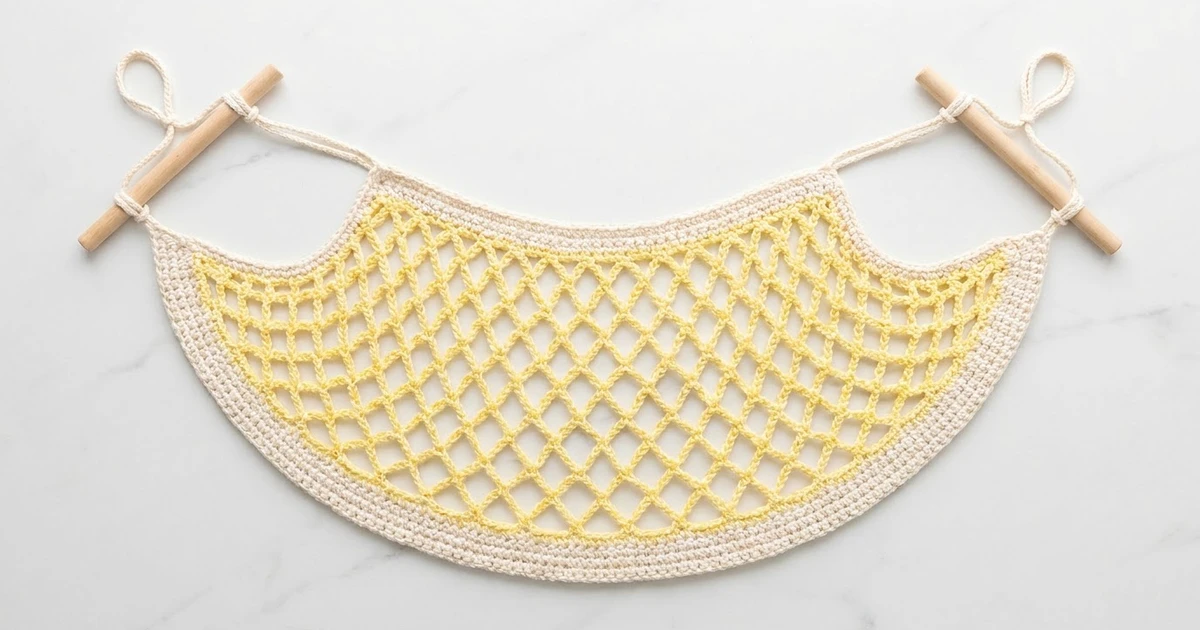
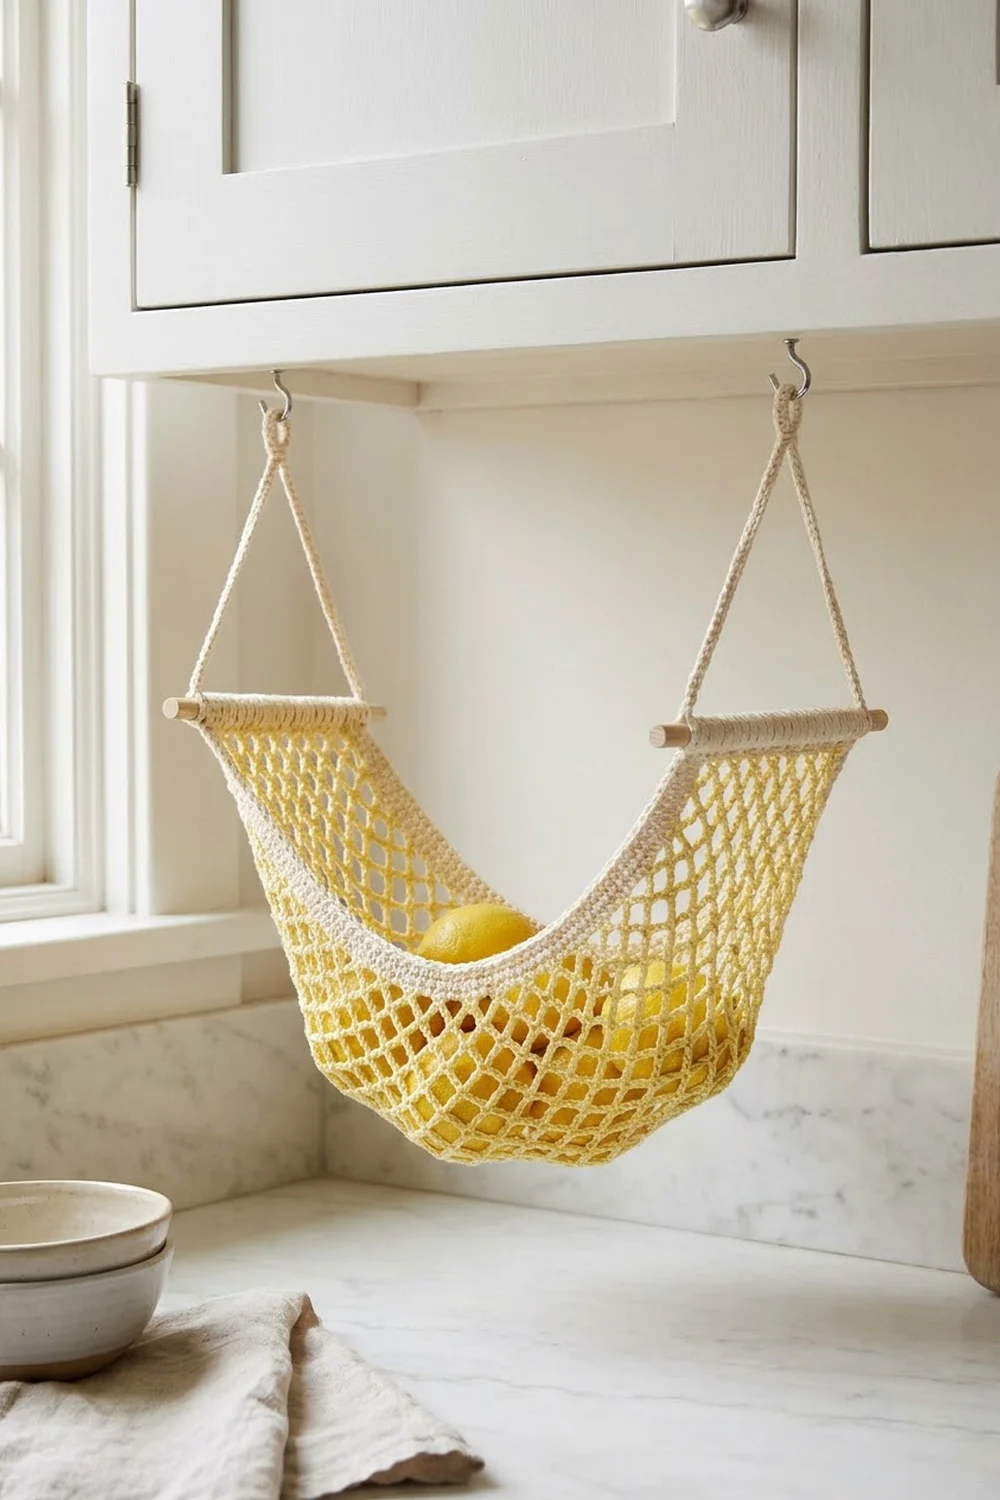
This under-cabinet fruit hammock is a single crescent of open diamond mesh in soft lemon yellow, framed by a firm cream border. Two short wooden dowels hold the pointed tips open. Two cream cord hangers let it hang from cup hooks, so lemons, limes, or onions sit up off the counter.
The look is light and airy. The yellow net shows off the fruit, and the cream band gives the edge enough structure to keep its curve. All instructions use US crochet terms.
The finished hammock measures about 19 in (48.3 cm) from tip to tip and 6.25 in (15.9 cm) deep at the center, laid flat and blocked. It stretches deeper once it’s loaded with fruit.
Construction is simple. You work the mesh in flat rows from the long top edge down, losing loops at each end so the piece tapers into a crescent. Then you work two rounds of single crochet around the whole edge, make two slip-stitch cords, and fit the dowels.
Finished Size and Construction
- Finished size: 19 in (48.3 cm) wide x 6.25 in (15.9 cm) deep, blocked flat
- Skill level: Easy
- Terminology: US crochet terms
- Yarn weight: Worsted (medium #4) cotton
- Hook: 5.0 mm (US H-8)
- Number of pieces: 1 mesh body plus 2 hanger cords; no joining
- Layout: Single crescent with a dowel at each tip
- Mesh size before border: 18 in (45.7 cm) wide x 5.25 in (13.3 cm) deep
- Border depth: 0.5 in (1.3 cm), 2 rounds
Materials
Use a smooth, mercerized or combed cotton. Cotton holds its shape under weight and won’t stretch out the way acrylic does. Avoid fuzzy or very splitty yarns, because the chain loops need to stay crisp.
- Pale yellow (Color A, mesh): 50 g, about 90 m
- Cream (Color B, border and hangers): 30 g, about 55 m
- 5.0 mm (US H-8) crochet hook
- 2 wooden dowels, 0.5 in (1.3 cm) diameter, 4 in (10.2 cm) long
- Tapestry needle
- Scissors
- Rust-proof pins and a blocking mat
- 2 under-cabinet cup hooks for hanging
These quantities include a margin of about 15% for testing gauge and weaving in ends.
Abbreviations (US Terms)
- ch – chain
- sl st – slip stitch
- sc – single crochet
- sc2tog – single crochet 2 together
- sk – skip
- st(s) – stitch(es)
- ch-5 loop – the space under a chain-5 arch
- rep – repeat
Special stitch: mesh row. Work sc into the center of each ch-5 loop of the previous row, with ch 5 between. Each sc forms the top point of a diamond.
Gauge and Checkpoints
Mesh gauge: 4 ch-5 loops = 4 in (10.2 cm) wide, and 4 mesh rows = 3 in (7.6 cm) tall, measured with a light stretch. That means 1 loop = 1 in (2.5 cm) and 1 row = 0.75 in (1.9 cm).
Border gauge: 16 sc = 4 in (10.2 cm), or 4 sc = 1 in (2.5 cm). Each sc round adds about 0.25 in (0.6 cm).
Use the piece itself as your gauge test. Work the foundation and Row 1, then lay it flat and stretch it gently.
- After Row 1: 18 in (45.7 cm) wide, 18 loops
- After Row 4: 3 in (7.6 cm) deep, 15 loops in Row 4
- After Row 7: 5.25 in (13.3 cm) deep, 8 loops in Row 7
- After border: 19 in (48.3 cm) x 6.25 in (15.9 cm)
If Row 1 is longer than 18.5 in (47.0 cm): go down to a 4.5 mm hook. If it’s shorter than 17.5 in (44.5 cm): go up to a 5.5 mm hook. Don’t change the stitch counts, because the border math depends on them.
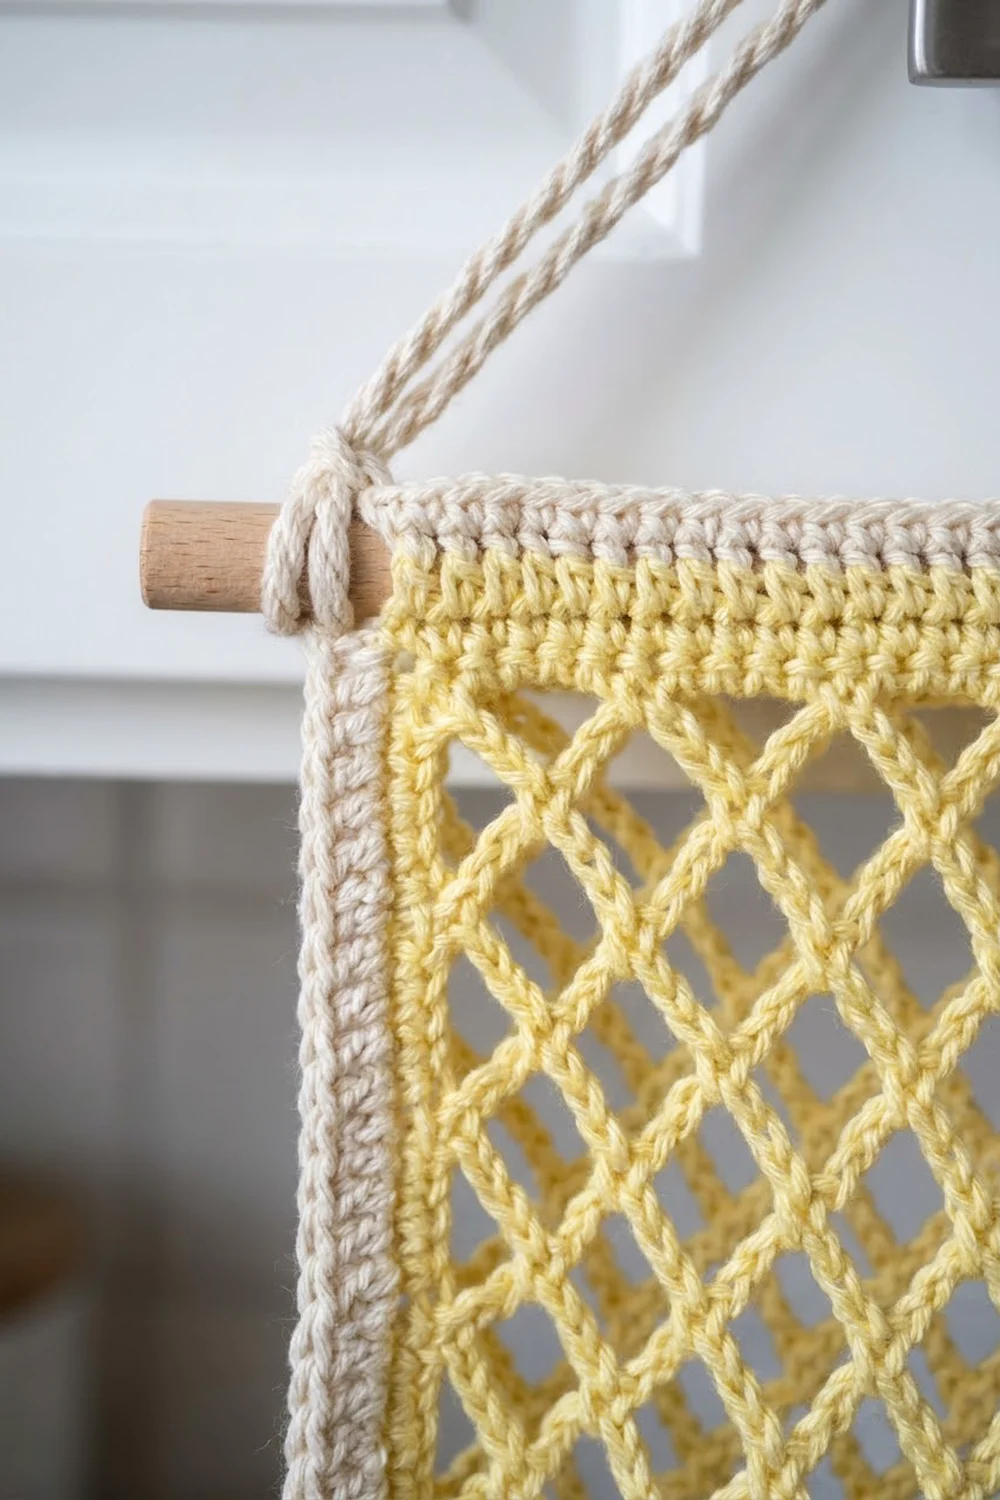
Mesh Body
With Color A, ch 74.
Row 1: Sc in 2nd ch from hook. Ch 5, sk 3 ch, sc in next ch. Rep from * across. (19 sc, 18 ch-5 loops; 73 foundation ch used)
Row 2: Turn. Sl st in each of next 3 ch, which brings you to the center of the first loop. Ch 1, sc in same loop. Ch 5, sc in next ch-5 loop. Rep from * across, ending with sc in last loop. (18 sc, 17 ch-5 loops)
Starting at the center of the first loop and ending in the last loop moves the edge in by half a loop on each side. That removes 1 loop per row with no extra shaping.
Row 3: Rep Row 2. (17 sc, 16 ch-5 loops)
Row 4: Rep Row 2. (16 sc, 15 ch-5 loops)
Checkpoint: the piece is 3 in (7.6 cm) deep.
Row 5: Rep Row 2. (15 sc, 14 ch-5 loops)
Row 6 (steep taper): Turn. Sl st in each of next 5 ch, sl st in next sc, then sl st in each of next 3 ch. You are now at the center of the second loop. Ch 1, sc in same loop. Ch 5, sc in next ch-5 loop. Rep from * until you have worked sc into the second-to-last loop. Leave the last loop unworked. (12 sc, 11 ch-5 loops)
You work into 12 of the 14 loops, which makes 11 new loops. Losing 3 loops instead of 1 makes the ends climb steeply into the crescent tips.
Row 7: Rep Row 6. (9 sc, 8 ch-5 loops)
Fasten off Color A.
Checkpoint: the top edge is still 18 in (45.7 cm), the bottom edge spans 8 loops, about 8 in (20.3 cm), and the center depth is 5.25 in (13.3 cm). For now the piece is a trapezoid with stepped, sloping sides. The border and blocking turn it into a crescent.
Border
Border gauge: 4 sc = 1 in (2.5 cm).
There are 4 corners: the 2 ends of the foundation chain (the crescent tips) and the 2 end sc of Row 7 (the bottom corners). Each corner gets 3 sc, and the center sc of that group is the corner stitch. The side counts below are stitches between corner stitches. They do not include the corners.
Round 1: With the right side facing, join Color B in the last sc of Row 7.
- Bottom corner: 3 sc in that sc.
- Side edge (34 sc): Work up the row ends: 7 sc across each of the wide steps at Rows 7 and 6, 4 sc across each step at Rows 5, 4, 3, and 2, and 4 sc along the end of Row 1. That’s 14 + 16 + 4 = 34.
- Tip corner: 3 sc in the foundation ch at this end.
- Top edge (71 sc): Working into the opposite side of the foundation ch, sc in each of the next 71 ch.
- Tip corner: 3 sc in the last foundation ch.
- Side edge (34 sc): Work down the second side in reverse order: 4 sc along Row 1, 4 sc on each step at Rows 2–5, and 7 sc on each step at Rows 6 and 7.
- Bottom corner: 3 sc in the first sc of Row 7.
- Bottom edge (39 sc): 4 sc in each of the 8 ch-5 loops and 1 sc in each of the 7 inner sc. That’s 32 + 7 = 39.
Join with sl st to first sc. Round 1 total: 71 + 34 + 34 + 39 = 178 side sts, plus 4 corners x 3 sc = 12, for 190 sts.
Round 2: Ch 1. Sc in each st around, with 3 sc in each corner stitch and these changes:
- Top edge: There are now 71 + 2 = 73 sts between corners (the 71 plus one flanking sc from each corner group). Work 4 sc2tog evenly spaced, about every 18th st, for 69 sc.
- Each side edge: 34 + 2 = 36 sc, no shaping.
- Bottom edge: 39 + 2 = 41 sts. Work 2 sc in each of 4 evenly spaced sts, about every 10th st, for 45 sc.
Join with sl st to first sc. Fasten off. Round 2 total: 69 + 36 + 36 + 45 = 186 side sts, plus 4 corners x 3 sc = 12, for 198 sts.
Why the math works: At 4 sc per inch, the 71 top sc in Round 1 fit the 18 in (45.7 cm) foundation almost exactly, so the top edge neither ruffles nor puckers. In Round 2, the 4 sc2tog shorten the top by about 1 in (2.5 cm), which pulls it into a gentle inward curve. The 4 bottom increases add the same length there, so the lower edge rounds outward. The total stays balanced: 190 + 8 (corner increases) − 4 + 4 = 198. Two rounds add 0.5 in (1.3 cm) on every side: 18 + 1 = 19 in (48.3 cm) wide and 5.25 + 1 = 6.25 in (15.9 cm) deep.
Hanger Cords (Make 2)
With Color B, ch 61.
Row 1: Sl st in back bump of 2nd ch from hook and in each ch across. (60 sl sts) Fasten off, leaving a 10 in (25.4 cm) tail.
Each cord measures about 13 in (33.0 cm). Fold it in half. Wrap the tail tightly around both strands 1.5 in (3.8 cm) below the fold 5 or 6 times to form the hanging loop. Pass the needle up through the wraps to lock them. That leaves two legs about 5 in (12.7 cm) long each.
Attaching the Dowels and Hangers
- Lay one crescent tip across the center of a dowel and fold it 1 in (2.5 cm) over the dowel to the wrong side.
- With Color B, whipstitch the folded edge to the mesh behind it to make a snug sleeve. Leave about 1.5 in (3.8 cm) of dowel showing on each side.
- Tie one cord leg around each end of the dowel, about 0.5 in (1.3 cm) from the end. Wrap twice and sew the end to itself.
- Repeat at the other tip.
- Check that both hanging loops sit the same height above their dowels.
Final Blocking
- Block before fitting the dowels, or slide them out first. Soak the hammock in cool water for 10 minutes.
- Roll it in a towel to press out the water. Don’t wring it.
- Lay it right side up on the blocking mat.
- Pin the two tips 19 in (48.3 cm) apart.
- Pin the center of the top edge 1 in (2.5 cm) below an imaginary line between the tips. This sets the inward curve.
- Pin the center of the bottom edge 6.25 in (15.9 cm) below the top-edge center. Ease the bottom border into a smooth arc.
- Open each diamond evenly with your fingers so the diagonals run straight.
- Let it dry completely, usually about 24 hours.
Final Quality-Control Checklist
- Row 7 has 9 sc and 8 ch-5 loops.
- Border Round 2 has 198 sts.
- The tips are 19 in (48.3 cm) apart and the center is 6.25 in (15.9 cm) deep.
- The top edge curves smoothly inward with no pleats.
- The dowel sleeves are snug and the stitching is hidden on the wrong side.
- Both hanger loops hang at the same height.
- Ends are woven in at least 2 in (5.1 cm) and trimmed.
Troubleshooting
The mesh leans to one side: You may be tapering at only one end. Count your loops after every row.
The top edge ruffles: Your border tension is loose. Add 2 more sc2tog in Round 2, or use a smaller hook for the border only.
The bottom edge cups or pulls: Add 2 more increases along the bottom in Round 2.
The side edges pucker: Add 1 sc to each step at Rows 6 and 7, and do the same on both sides.
The hammock hangs too low: Shorten the cord legs by wrapping them once more around the dowel.
A dowel slips out: Tighten the sleeve stitching, or put a small dab of glue under the fold.
Care
Hand wash in cool water with mild soap, reshape, and dry flat. If the dowels aren’t glued, remove them before washing.
Final Notes
Here’s the measurement chain. Row 1 sets the 18 in (45.7 cm) top edge. Seven mesh rows build the 5.25 in (13.3 cm) depth while tapering from 18 loops to 8. The 198-stitch border adds 0.5 in (1.3 cm) all around, for a 19 x 6.25 in (48.3 x 15.9 cm) crescent. If each of those numbers checks out as you go, the hammock will hang evenly.
Happy crocheting!