
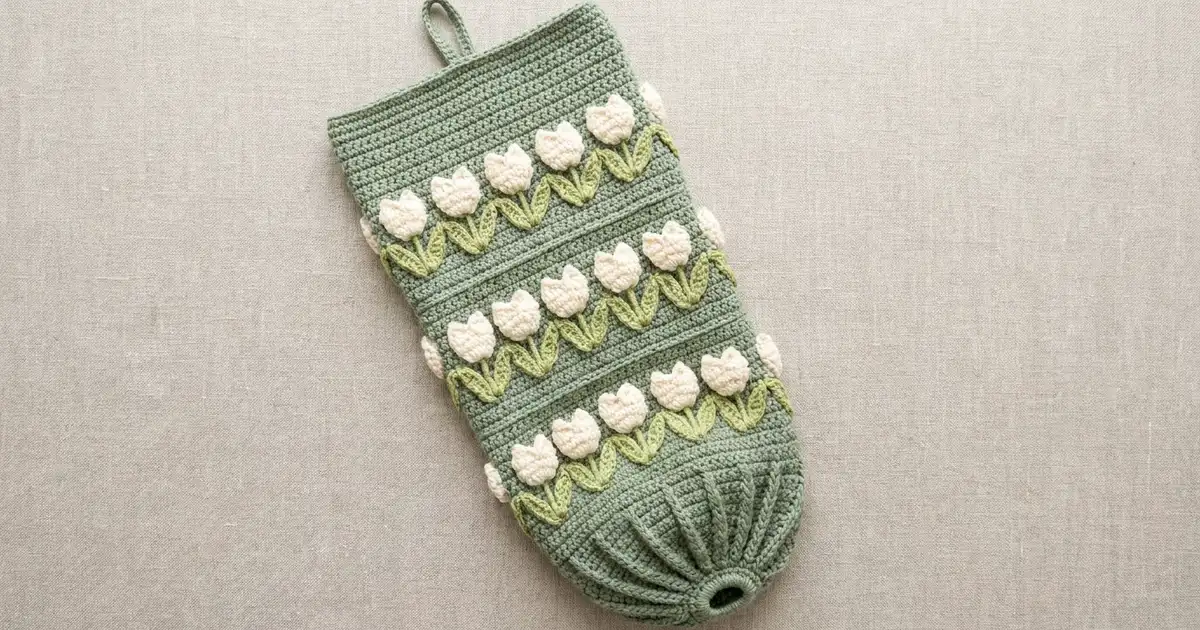
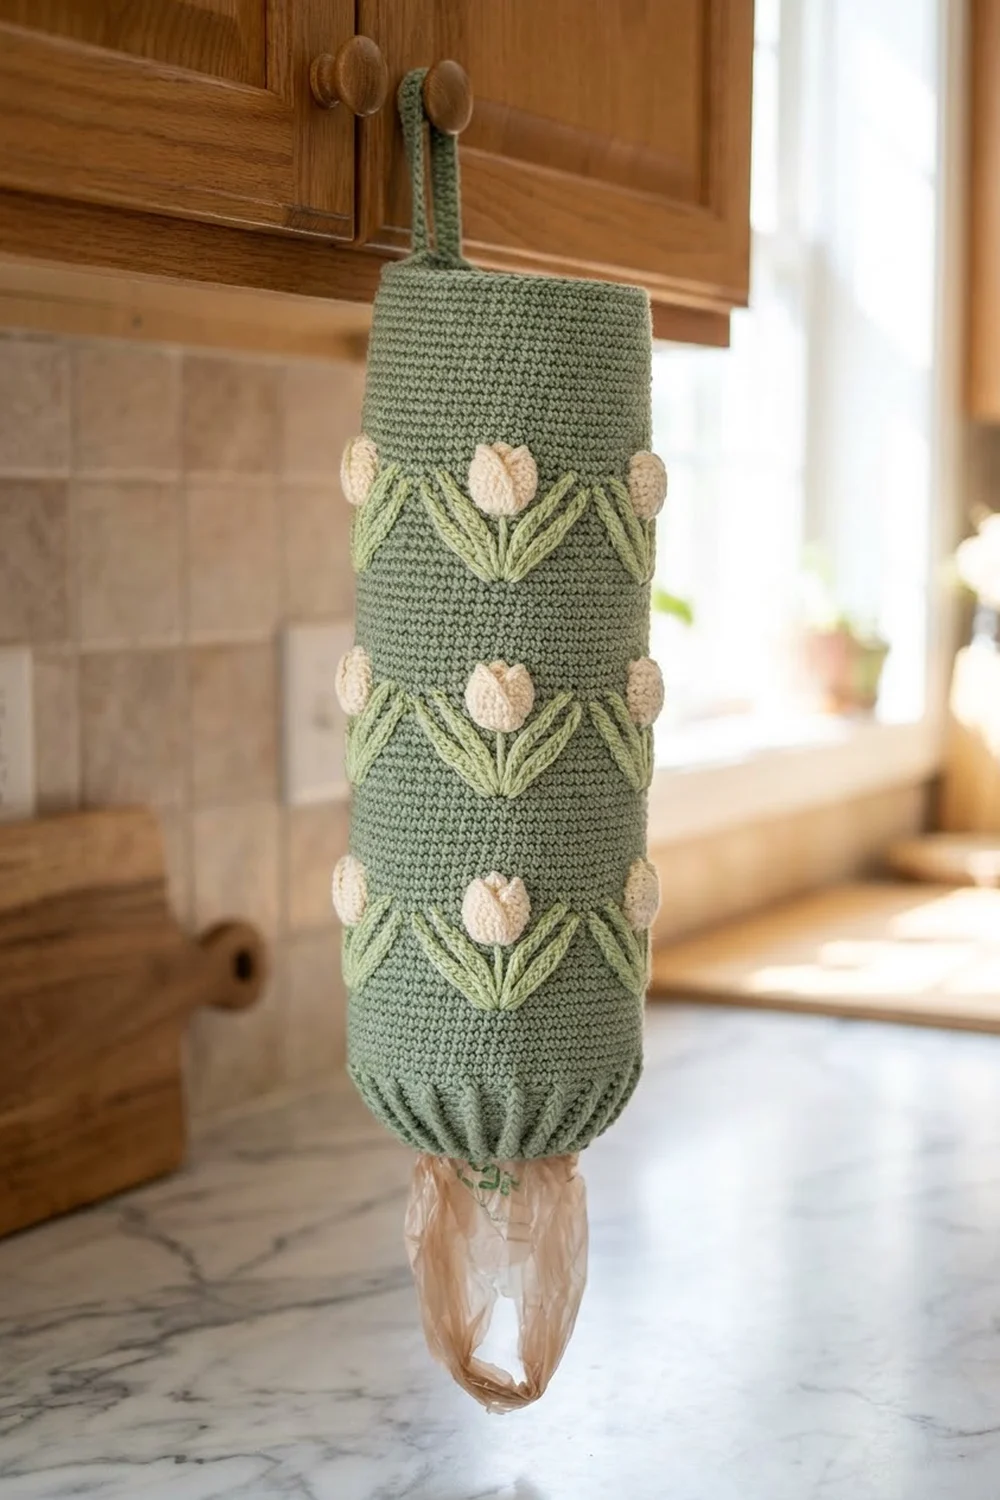
The Tulip Garden Bag Holder is a tall crochet tube that keeps plastic grocery bags tidy and looks good doing it. Three bands of cream tulips with fresh green stems and leaves wrap around a soft sage green body. It hangs from a cabinet knob by a slim loop, and you pull bags out one at a time through the gathered bottom.
The colors suit a kitchen: sage green for the body, cream for the tulip buds, and a lighter spring green for the stems and leaves. The style is cottage and botanical. Raised puff-stitch petals and spike-stitch leaves give the surface real texture.
This pattern uses US crochet terms. The finished holder measures 6″ (15.2 cm) wide when flattened, 12″ (30.5 cm) around, and 17″ (43.2 cm) tall. The hanging loop adds 4″ (10.2 cm) above the rim.
You work the body from the bottom up in joined rounds. You start with a small ring, build a ridged cap, then go straight up in half double crochet with three tulip bands. A single crochet rim finishes the top, and you sew a separate loop strap inside the rim.
Finished Size and Construction
- Finished size: 6″ (15.2 cm) wide flat x 17″ (43.2 cm) tall; the loop adds 4″ (10.2 cm)
- Circumference: 12″ (30.5 cm)
- Skill level: Intermediate (puff stitches, spike stitches, carrying colors)
- Terminology: US
- Yarn weight: Worsted (#4)
- Hook: 4.5 mm (US 7)
- Number of pieces: 2 (one tubular body, one hanging loop)
- Layout: One vertical tube with three tulip bands of 12 tulips each
- Piece size: Body 6″ x 17″ (15.2 x 43.2 cm) flat; loop strip 10″ x 0.5″ (25.4 x 1.3 cm)
- Size before border: 6″ x 15″ (15.2 x 38.1 cm) after Round 43
- Border depth: 2″ (5.1 cm) single crochet top rim
Materials
Choose a smooth worsted weight cotton or cotton blend. Cotton holds its shape, stretches less under the weight of the bags, and shows the tulip texture clearly. Acrylic also works but may stretch more.
- Color A, sage green (body): 100 g, about 180 m (197 yd)
- Color B, cream (tulip buds): 15 g, about 27 m (30 yd)
- Color C, light spring green (stems and leaves): 10 g, about 18 m (20 yd)
All quantities include about 15 percent extra for gauge checks, carried strands, and weaving in.
Tools:
- 4.5 mm (US 7) crochet hook
- Tapestry needle
- 1 locking stitch marker
- Scissors
- Measuring tape
- Spray bottle, plus a rolled towel or a 6″ (15.2 cm) wide strip of cardboard for blocking
Abbreviations (US Terms)
- ch – chain
- sl st – slip stitch
- sc – single crochet
- hdc – half double crochet
- dc – double crochet
- FPdc – front post double crochet
- st(s) – stitch(es)
- rnd(s) – round(s)
- yo – yarn over
Special stitches:
Spike sc: Insert the hook into the stitch named in the instructions, one round below the round you are working into. Pull up a loop to the height of the current round, yo, and draw through both loops. Skip the stitch in the current round that sits in front of the spike. Each spike sc counts as 1 st.
Leaf Fan (LF), worked over 3 sts: Work 3 spike sc, one in place of each of the next 3 sts. Insert all three into the same stitch: the one in the round below, directly under the center (2nd) of those 3 sts. The two outer spikes lean in toward the shared base and the middle one stands straight. This makes a stem with two leaves opening upward. Counts as 3 sts.
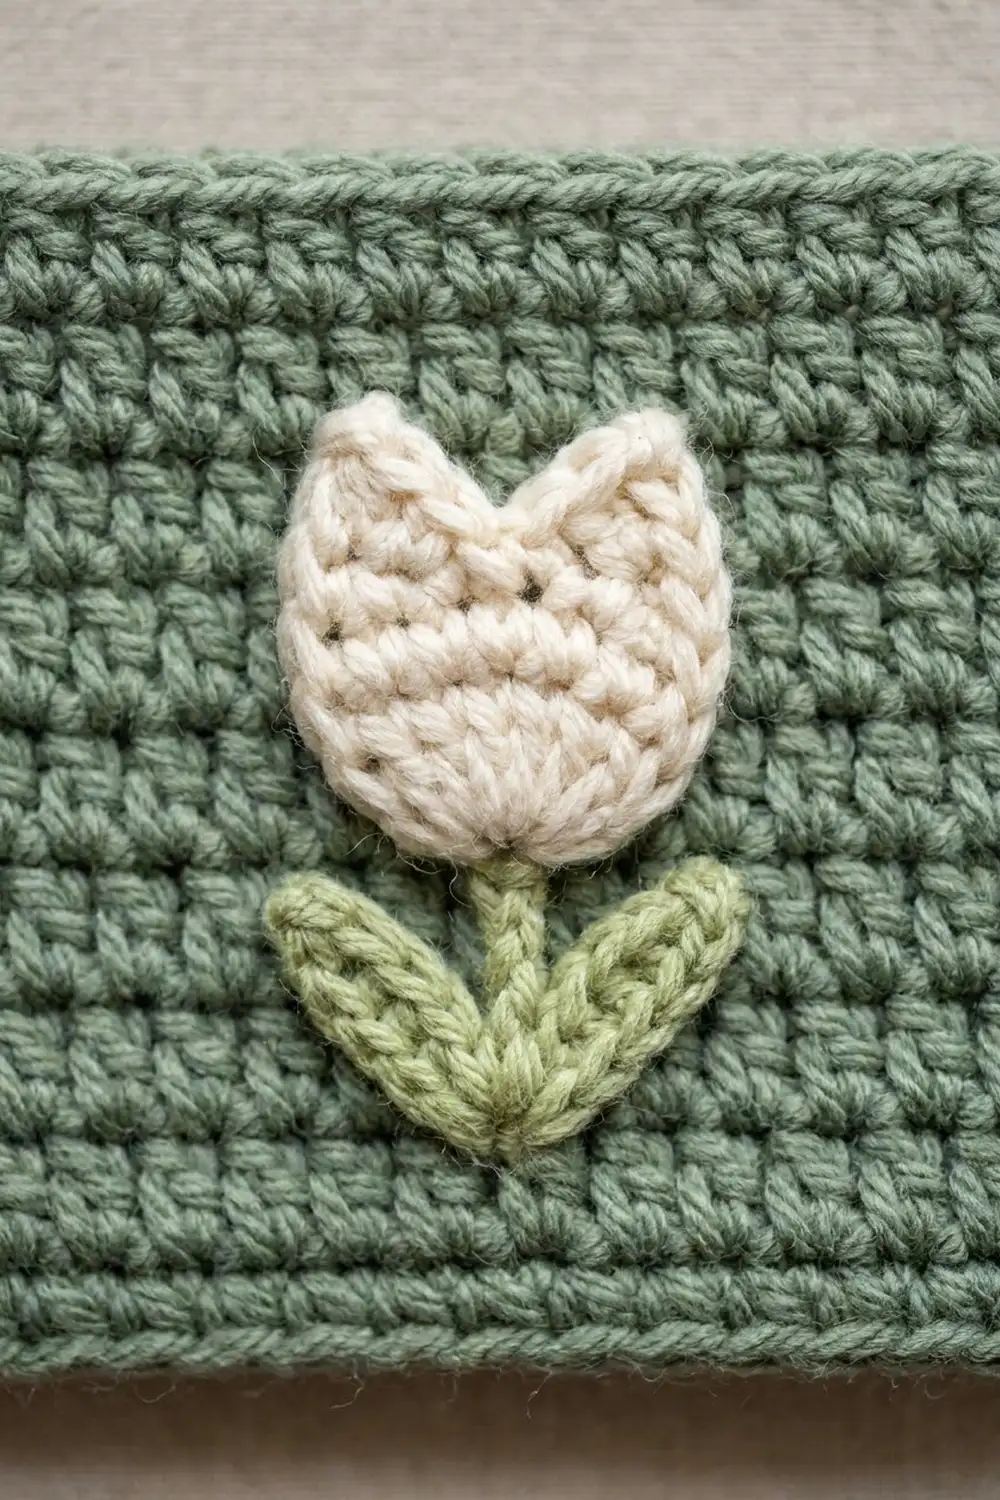
Tulip (Tul): In the same st, [yo, insert hook, pull up a loop] 3 times, yo and draw through all 7 loops (first petal); ch 1. In the same st again, [yo, insert hook, pull up a loop] 3 times, yo and draw through all 7 loops (second petal); ch 1 to close. The two petals spread apart at the top and leave a notch in the middle. Counts as 1 st.
Gauge and Checkpoints
Body gauge: 16 hdc and 12 rnds = 4″ (10.2 cm), worked in joined rounds.
Rim gauge: 16 sc and 16 rnds = 4″ (10.2 cm).
Since this is a single piece, the bottom section is also your test piece. Work Rounds 1 to 10, then flatten the tube and measure it before you start the first tulip band.
Checkpoints:
- After Round 4: the cap is about 3.75″ (9.5 cm) across when flattened and curves up into a shallow cup.
- After Round 10: flat width is 6″ (15.2 cm); length from the opening is 4″ (10.2 cm).
- After Round 13: length is 5″ (12.7 cm).
- After Round 25: length is 9″ (22.9 cm).
- After Round 37: length is 13″ (33.0 cm).
- After Round 43: length is 15″ (38.1 cm).
- After Round 51: length is 17″ (43.2 cm).
If too big: Change to a 4 mm hook and start again. A tube wider than 6.25″ (15.9 cm) looks baggy and lets bags slip out too easily.
If too small: Change to a 5 mm hook. A tube narrower than 5.75″ (14.6 cm) holds fewer bags.
If the width is right but the length is off: Add or remove plain hdc rounds in the sections between bands. Keep the three bands evenly spaced.
Body
Work in joined rounds with the right side facing you the whole time. The beginning ch does not count as a stitch. Put a marker in the first stitch of each round so the join seam stays at the back of the tube.
Bottom Cap
With Color A, ch 12 and sl st to the first ch to form a ring.
Rnd 1: Ch 2, work 24 dc into the ring, sl st to the first dc. (24 sts)
Rnd 2: Ch 2, *FPdc around the next st, 2 dc in the next st; repeat from * 11 more times, sl st to the first FPdc. (36 sts: 12 FPdc + 24 dc)
Rnd 3: Ch 2, *FPdc around the FPdc, dc in the next st, 2 dc in the next st; repeat from * 11 more times, sl st to the first FPdc. (48 sts: 12 FPdc + 36 dc)
Rnd 4: Ch 2, *FPdc around the FPdc, dc in the next 3 sts; repeat from * 11 more times, sl st to the first FPdc. (48 sts)
The 12 FPdc columns make the raised ridges that spread out from the 1″ (2.5 cm) opening. Leave the ring open so bags can come through it.
Lower Section
Rnds 5–10: Ch 1, hdc in each st around, sl st to the first hdc. (48 sts)
Keep Color A attached. Add Color C at the start of Round 11 by working over its tail.
Tulip Band (Rounds 11–13)
Each band is 3 rounds deep and has 12 tulips, one in each 4-st repeat. Lay the unused color along the tops of the stitches and work over it. Keep it loose enough that the fabric does not pucker.
Rnd 11 (leaf round): With Color A, ch 1 and sc in the first st. With Color C, work an LF over the next 3 sts, putting the spikes into Round 9. *With Color A, sc in the next st; with Color C, LF over the next 3 sts; repeat from * 10 more times. With Color A, sl st to the first sc. Cut Color C. (48 sts: 12 sc + 36 spike sc)
Each LF puts its stem on the 3rd st of the repeat. That is where the tulip will sit.
Rnd 12 (tulip round): Add Color B by working over its tail. With Color A, ch 1 and hdc in the first 2 sts. With Color B, Tul in the next st. With Color A, hdc in the next st. *With Color A, hdc in the next 2 sts; with Color B, Tul in the next st; with Color A, hdc in the next st; repeat from * 10 more times. With Color A, sl st to the first hdc. Cut Color B. (48 sts: 36 hdc + 12 Tul)
Each Tul sits directly on top of a stem.
Rnd 13: With Color A, ch 1, hdc in each st around, sl st to the first hdc. On each Tul, work the hdc under the closing ch-1 only. Leave the center ch-1 unworked so the notch between the petals stays open. (48 sts)
Middle Sections and Remaining Bands
Rnds 14–22: Ch 1, hdc in each st around, sl st to the first hdc. (48 sts)
Rnds 23–25: Work Rounds 11–13 of the Tulip Band again exactly. In Round 23, put the spikes into Round 21. (48 sts)
Rnds 26–34: Ch 1, hdc in each st around, sl st to the first hdc. (48 sts)
Rnds 35–37: Work the Tulip Band one more time. In Round 35, put the spikes into Round 33. (48 sts)
Upper Section
Rnds 38–43: Ch 1, hdc in each st around, sl st to the first hdc. (48 sts)
Check: the tube should measure 6″ x 15″ (15.2 x 38.1 cm) flat. This is the size before the border.
Hanging Loop
With Color A, ch 41.
Row 1: Sc in the 2nd ch from the hook and in each ch across. (40 sts)
Row 2: Ch 1, turn, sc in each st across. (40 sts)
Fasten off and leave a 12″ (30.5 cm) tail. The strip measures 10″ x 0.5″ (25.4 x 1.3 cm).
Set the loop aside. You will sew it in after the rim is done.
Border (Top Rim)
Border gauge: 16 sc and 16 rnds = 4″ (10.2 cm). Sixteen sc also cover 4″ (10.2 cm) across, so the rim stays the same width as the hdc body.
Rnd 44 (conversion round): Ch 1, sc in each st around, sl st to the first sc. (48 sc worked 1 per existing st + 0 added = 48 sts)
Rnds 45–51: Ch 1, sc in each st around, sl st to the first sc. (48 sts)
Fasten off and weave in the end.
Per-side count: When you flatten the tube, it has 24 sts on the front and 24 sts on the back. A tube has folds instead of corners, so there are no corner stitches to add. 24 + 24 = 48 on every rim round.
Why the math works: The rim keeps all 48 sts. At 16 sc per 4″ (10.2 cm), 48 sc go 12″ (30.5 cm) around, which is 6″ (15.2 cm) flat. That matches the body exactly, so the rim doesn’t flare or pull in. Eight sc rounds at 16 rnds per 4″ (10.2 cm) give the 2″ (5.1 cm) rim depth. That takes the tube from 15″ (38.1 cm) to 17″ (43.2 cm).
Attach the Loop
Fold the strip in half. Place both ends side by side inside the rim at the back seam, with 1″ (2.5 cm) of each end overlapping the inside of the rim. Use the tail to whipstitch each end to Rounds 48–51 of the rim. Catch only the inside loops so the stitches don’t show on the outside.
Each leg is 5″ (12.7 cm) long. With 1″ (2.5 cm) sewn inside, the loop stands 4″ (10.2 cm) above the rim. The total hanging length is 21″ (53.3 cm).
Final Blocking
- Weave in all ends on the inside, running each tail through stitches of its own color.
- Lay the holder flat with the seam centered on the back.
- Slide a rolled towel or a 6″ (15.2 cm) wide cardboard strip inside to hold the width.
- Mist evenly with water until it is damp but not soaked.
- Shape the tulip petals gently with your fingers so each notch opens and each bud sits upright.
- Straighten the leaf fans so the stems point straight up.
- Pat the body to 6″ x 17″ (15.2 x 43.2 cm).
- Shape the bottom cap into a smooth curve around the opening.
- Let it dry completely, then remove the form.
Final Quality-Control Checklist
- Every round from Round 3 through Round 51 has 48 sts.
- There are 36 tulips in total, 12 in each band.
- Each tulip sits directly above the center stem of its leaf fan.
- The three bands are evenly spaced, with 9 plain rounds between them.
- Carried strands don’t show through on the outside.
- The bottom opening is about 1″ (2.5 cm) across.
- The tube measures 6″ x 17″ (15.2 x 43.2 cm) flat.
- The loop is sewn on securely and stands 4″ (10.2 cm) above the rim.
Troubleshooting
Tulips lean or drift sideways: The join seam is moving. Always join into the first stitch of the round and move your marker up every round.
Fabric puckers in the bands: The carried yarn is too tight. Spread your stitches out before you work over the carried strand.
Leaves look flat or short: The spike loops aren’t pulled up high enough. Lift each loop to the full height of the current round before you finish the stitch.
Petal notch disappears: You worked into the center ch-1 on the next round. Work only under the closing ch-1.
Bottom opening too big: Pull the starting tail to tighten the ring, then weave it in firmly.
Rim flares: Your sc is looser than your hdc. Work the rim with a 4 mm hook.
Care
Hand wash, or machine wash on a gentle cycle in cool water. Reshape while damp and lay flat to dry.
Final Notes
Every measurement comes from the 48-st round. At 16 hdc per 4″ (10.2 cm), 48 sts give a 12″ (30.5 cm) circumference and a 6″ (15.2 cm) flat width. The cap and lower section reach 4″ (10.2 cm), each band adds 1″ (2.5 cm), and the plain sections bring the body to 15″ (38.1 cm). The 2″ (5.1 cm) rim finishes the tube at 17″ (43.2 cm), and the loop adds 4″ (10.2 cm) above it. Check your gauge early and keep your carried strands relaxed, and your tulips will line up neatly.
Happy crocheting!