
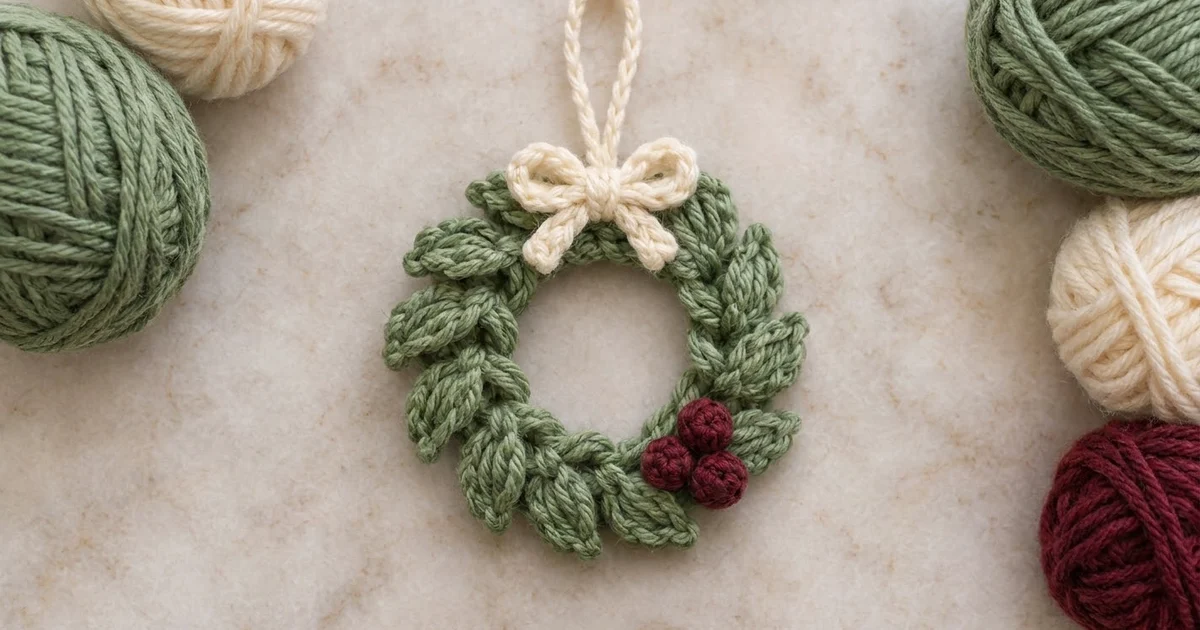
This little wreath is the kind of ornament people pick up and ask to keep. A chunky sage-green ring is covered in soft, overlapping leaves that all lean the same way. It is finished with a cream bow, a tall cream hanging loop and a cluster of three burgundy berries.
The colors are muted on purpose: soft sage, warm cream and deep wine red. It looks like classic Christmas without being loud, so it suits rustic, Scandinavian and traditional trees alike. It also works as a gift topper or a napkin-ring accent.
The pattern uses US crochet terms. The finished wreath measures about 3.5 in (8.9 cm) across, and about 5.5 in (14.0 cm) tall including the hanging loop.
Construction is simple. You crochet a flat base ring in two rounds. Then you work two rounds of chain-built leaves directly onto it, one round on the outer edge and one round on the front face. The berries, bow and hanging loop are made separately and sewn on.
Finished Size and Construction
- Finished size: 3.5 in (8.9 cm) diameter; 5.5 in (14.0 cm) tall with loop
- Skill level: Easy
- Terminology: US crochet terms
- Yarn weight: Worsted (medium #4)
- Hook: 4.0 mm (G-6); 3.5 mm (E-4) for berries
- Number of pieces: 1 wreath body plus 5 small add-ons (3 berries, 1 bow, 1 hanging loop)
- Layout: Single ornament; no motifs to join
- Base ring size (before leaf border): 2.25 in (5.7 cm) outer diameter, 1.5 in (3.8 cm) center opening
- Leaf border depth: about 0.625 in (1.6 cm) beyond the base ring on every side
Materials
Choose a smooth worsted-weight yarn with good stitch definition. Cotton blends and soft acrylics both work well, and a slightly matte yarn makes the leaf texture easier to see. The quantities below assume about 200 m per 100 g.
- Sage green: 10 g (20 m) for the base ring and all leaves
- Cream: 4 g (8 m) for the bow and hanging loop
- Burgundy: 3 g (6 m) for three berries
All quantities include extra for a gauge check and sewing tails.
Tools
- 4.0 mm (G-6) hook
- 3.5 mm (E-4) hook
- Tapestry needle
- Scissors
- Stitch marker
- Small amount of fiberfill or yarn scraps (optional, for the berries)
- Rust-proof pins and a foam board for blocking
Abbreviations (US Terms)
- ch chain
- sl st slip stitch
- sc single crochet
- hdc half double crochet
- dc double crochet
- sc2tog single crochet 2 together
- BLO back loop only
- MR magic ring
- st(s) stitch(es)
Special stitches
- Large Leaf (LL): Ch 7, sl st in 2nd ch from hook, sc in next ch, hdc in next ch, dc in next 2 ch, hdc in last ch. (6 sts along the chain.) The leaf ends back at its base.
- Small Leaf (SL): Ch 6, sl st in 2nd ch from hook, sc in next ch, hdc in next ch, dc in next ch, hdc in last ch. (5 sts along the chain.)
Each leaf is worked down one side of its own chain, which gives it a narrow, tapered shape. Each leaf is followed by slip stitches that move forward around the ring. This makes it lean clockwise and partly cover the leaf before it, which creates the layered laurel look.
Gauge and Checkpoints
Gauge with the 4.0 mm hook: 18 sc and 20 rows = 4 in (10.2 cm) in sc rows.
For a tiny ornament, the best gauge test is the ring itself. Make the base ring (Rounds 1 and 2) first and measure it before you start any leaves.
Checkpoints
- After Round 1: center opening about 1.5 in (3.8 cm)
- After Round 2: outer diameter 2.25 in (5.7 cm); the ring lies flat
- One Large Leaf: about 1.25 in (3.2 cm) long
- One Small Leaf: about 1 in (2.5 cm) long
- After Round 3: overall diameter 3.5 in (8.9 cm)
- After Round 4: overall diameter unchanged; center opening about 1.25 in (3.2 cm)
- Each berry: about 0.6 in (1.5 cm) across
If the ring is too big: go down to a 3.5 mm (E-4) hook. If it is too small or stiff: go up to a 4.5 mm (7) hook. A 1/4 in (0.6 cm) difference at the ring grows to about 3/8 in (1.0 cm) after the leaves, so fix it early.
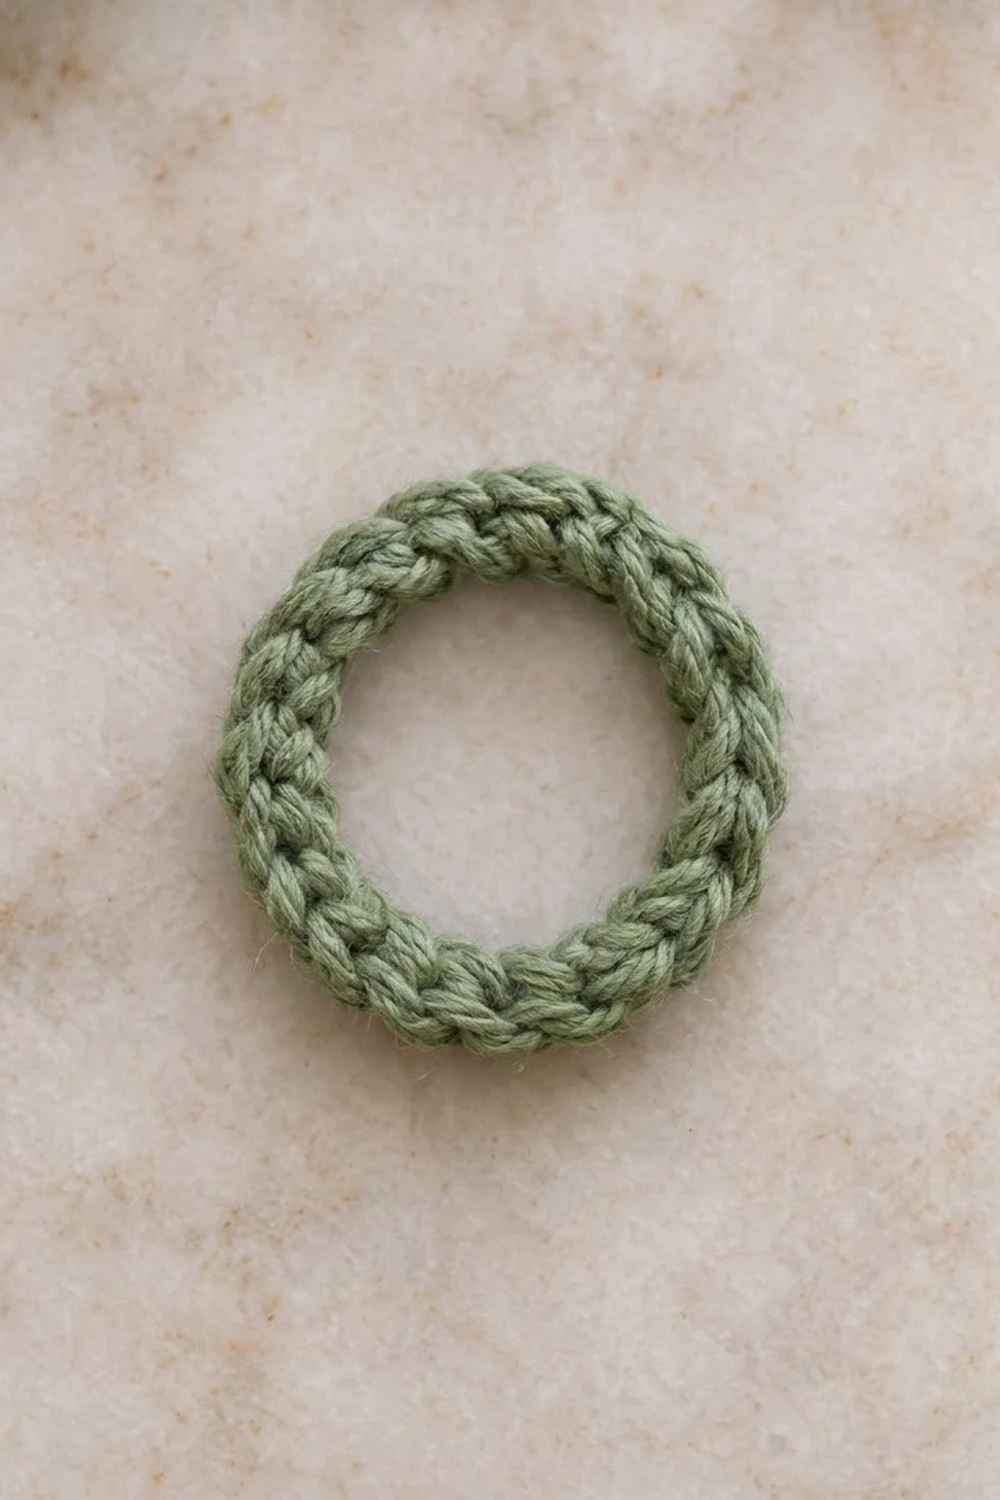
Base Ring
Use sage green and the 4.0 mm hook.
Foundation: Ch 24. Sl st in the first ch to form a ring, taking care not to twist the chain.
Round 1: Ch 1 (does not count as a st), sc in each ch around, sl st in first sc to join. (24 sts)
Place a marker in the first st. The ring should look like a flat donut with a clear center opening.
Round 2 (growth round, BLO): Ch 1, working in BLO only, sc in next 2 sts, 2 sc in next st; repeat from * 7 more times, sl st in first sc to join. (32 sts)
Check: 8 repeats x 3 stitches of Round 1 = 24 stitches used, and 8 repeats x 4 stitches made = 32 stitches. The 8 increases let the outer edge grow without cupping.
Working Round 2 in BLO leaves the 24 front loops of Round 1 free on the front face. You will use them for the inner leaves later.
Do not fasten off. Measure: 2.25 in (5.7 cm) across.
Berries (Make 3)
Use burgundy and the 3.5 mm hook. The smaller hook keeps the fabric tight so the stuffing does not show.
Round 1: Make a MR, 6 sc in ring. (6 sts)
Round 2 (growth round): 2 sc in each st around. (12 sts)
Round 3: Sc in each st around. (12 sts)
Round 4 (decrease round): Sc2tog 6 times. (6 sts)
Push the starting tail and a pinch of fiberfill or scrap yarn inside. Fasten off, leaving an 8 in (20.3 cm) tail. Thread the tail through the front loops of the last 6 sts and pull closed. Keep the tail for sewing.
Each berry should be a firm ball about 0.6 in (1.5 cm) across.
Bow
Use cream and the 4.0 mm hook.
Ch 41. Sl st in the back bump of the 2nd ch from hook and in the back bump of each ch across. (40 sl sts)
Fasten off, leaving a 12 in (30.5 cm) tail. The cord should be about 8 in (20.3 cm) long.
Shaping the bow
- Lay the cord flat and find its middle.
- Form a loop on each side of the middle, using about 2.5 in (6.4 cm) of cord per loop.
- Let the two ends hang down as tails, each about 0.75 in (1.9 cm) long.
- Pinch the center, which uses about 1.5 in (3.8 cm) of cord.
- Wrap the long cream tail tightly around the center 6 times to form the knot, then stitch through the back to secure it.
The finished bow is about 1.75 in (4.4 cm) wide and 1 in (2.5 cm) tall, with two rounded loops and two short tails angled downward.
Hanging Loop
Use cream and the 4.0 mm hook. Leave an 8 in (20.3 cm) starting tail.
Ch 26. Sl st in the back bump of the 2nd ch from hook and in each ch across. (25 sl sts)
Fasten off, leaving another 8 in (20.3 cm) tail. The cord should be about 5 in (12.7 cm) long. Folded in half and sewn down, it makes a loop about 2 in (5.1 cm) tall.
Leaf Border
The leaf border is the edging of this ornament. It is worked in two rounds: outer leaves on the stitches of Round 2, and inner leaves on the free front loops of Round 1.
Border gauge: one leaf for every 2 stitches. Divide the ring into quarters (12, 3, 6 and 9 o’clock) to check your spacing as you go.
Round 3 (trim round, outer leaves): Continue with sage green from the joining sl st of Round 2, which sits in the first st. LL, sl st in each of next 2 sts; repeat from * 15 more times. The final sl st lands in the first st, where the round began. Fasten off and weave in.
Count for Round 3: (32 sl sts, worked 1 per existing stitch) + (16 Large Leaves added).
Per quarter: 8 stitches of Round 2 and 4 Large Leaves.
Round 4 (trim round, inner leaves): Turn the ring so the front faces you. Join sage green with a sl st in any free front loop of Round 1. SL, sl st in each of next 2 free front loops; repeat from * 11 more times. The final sl st lands in the loop where you joined. Fasten off, leaving a 6 in (15.2 cm) tail.
Count for Round 4: (24 sl sts, worked 1 per free front loop) + (12 Small Leaves added).
Per quarter: 6 front loops of Round 1 and 3 Small Leaves.
Why the math works: Round 2 has 32 stitches and each leaf repeat uses exactly 2, so 32 / 2 = 16 leaves close the round evenly. Round 1 has 24 free front loops, so 24 / 2 = 12 leaves. Neither round adds stitches to the base, so the ring stays at 2.25 in (5.7 cm). The leaves add about 0.625 in (1.6 cm) on every side: 2.25 + 0.625 + 0.625 = 3.5 in (8.9 cm). That makes 28 leaves in total.
Gently push each Small Leaf so it lies on the front face and leans clockwise, matching the outer leaves.
Assembly
- Hanging loop: Fold the cord in half. Sew both ends to the back of the base ring at 12 o’clock, side by side and about 1/4 in (0.6 cm) apart. Sew through Round 2 only so nothing shows on the front.
- Bow: Place the bow centered at 12 o’clock on the front, so the knot covers the base of the hanging loop. Sew through the knot into the base ring with small stitches. Stitch each bow loop down once at its outer edge so it stays flat.
- Berries: Place the three berries at about 4 to 5 o’clock in a tight triangle: two side by side and one just below, touching both. Sew each one through the leaves into the base ring. Then stitch the berries to each other once so the cluster holds its shape.
Weave in all remaining ends on the back, hiding them under the leaves.
Final Blocking
- Lightly mist the wreath with water until it is just damp. Do not soak it, since the berries are stuffed.
- Lay it face up on a foam board.
- Shape the ring into a true circle with a center opening of about 1.25 in (3.2 cm).
- Smooth each leaf so it points clockwise, at the same angle all the way around.
- Pin the outer leaf tips to a 3.5 in (8.9 cm) circle.
- Pin the bow loops flat and spread the bow tails slightly outward.
- Let it dry completely, then remove the pins.
- Hang the ornament by its loop and check that it hangs straight. If it tilts, the loop is off-center; sew one end again.
Final Quality-Control Checklist
- Round 1 has 24 sts and Round 2 has 32 sts.
- There are 16 Large Leaves on the outer edge and 12 Small Leaves on the front face.
- All 28 leaves lean clockwise.
- Overall diameter is 3.5 in (8.9 cm).
- Center opening is clear and round, about 1.25 in (3.2 cm).
- Bow is 1.75 in (4.4 cm) wide and centered at 12 o’clock.
- Hanging loop stands about 2 in (5.1 cm) above the wreath and does not twist.
- Three berries sit together at 4 to 5 o’clock, firm and closed.
- No ends or stuffing show from the front.
Troubleshooting
The ring cups or ruffles. Cupping means Round 2 is too tight; ruffling means it is too loose. Check that you made exactly 8 increases, then change your hook size by 0.5 mm.
The chain ring twisted. Undo it and chain again. A twisted ring will never lie flat.
Leaves stick straight out instead of leaning. Pull the 2 sl sts after each leaf snug, and pin each leaf at an angle during blocking.
Leaves look floppy. Use the 3.5 mm hook for the leaf rounds only, and keep the base ring at 4.0 mm.
Gaps show between outer leaves. Make sure each repeat uses exactly 2 sts, not 3. Recount each quarter: 4 leaves per 8 sts.
Stuffing shows through the berries. Use the smaller hook, or fill them with matching burgundy scraps instead of fiberfill.
The bow sags or spreads. Wrap the center more tightly and add a small securing stitch at each loop.
The ornament hangs crooked. Move the hanging loop ends so they sit exactly at 12 o’clock.
Care
Spot clean with cool water and mild soap, then reshape and dry flat. Store flat in tissue paper so the leaves and bow keep their shape.
Final Notes
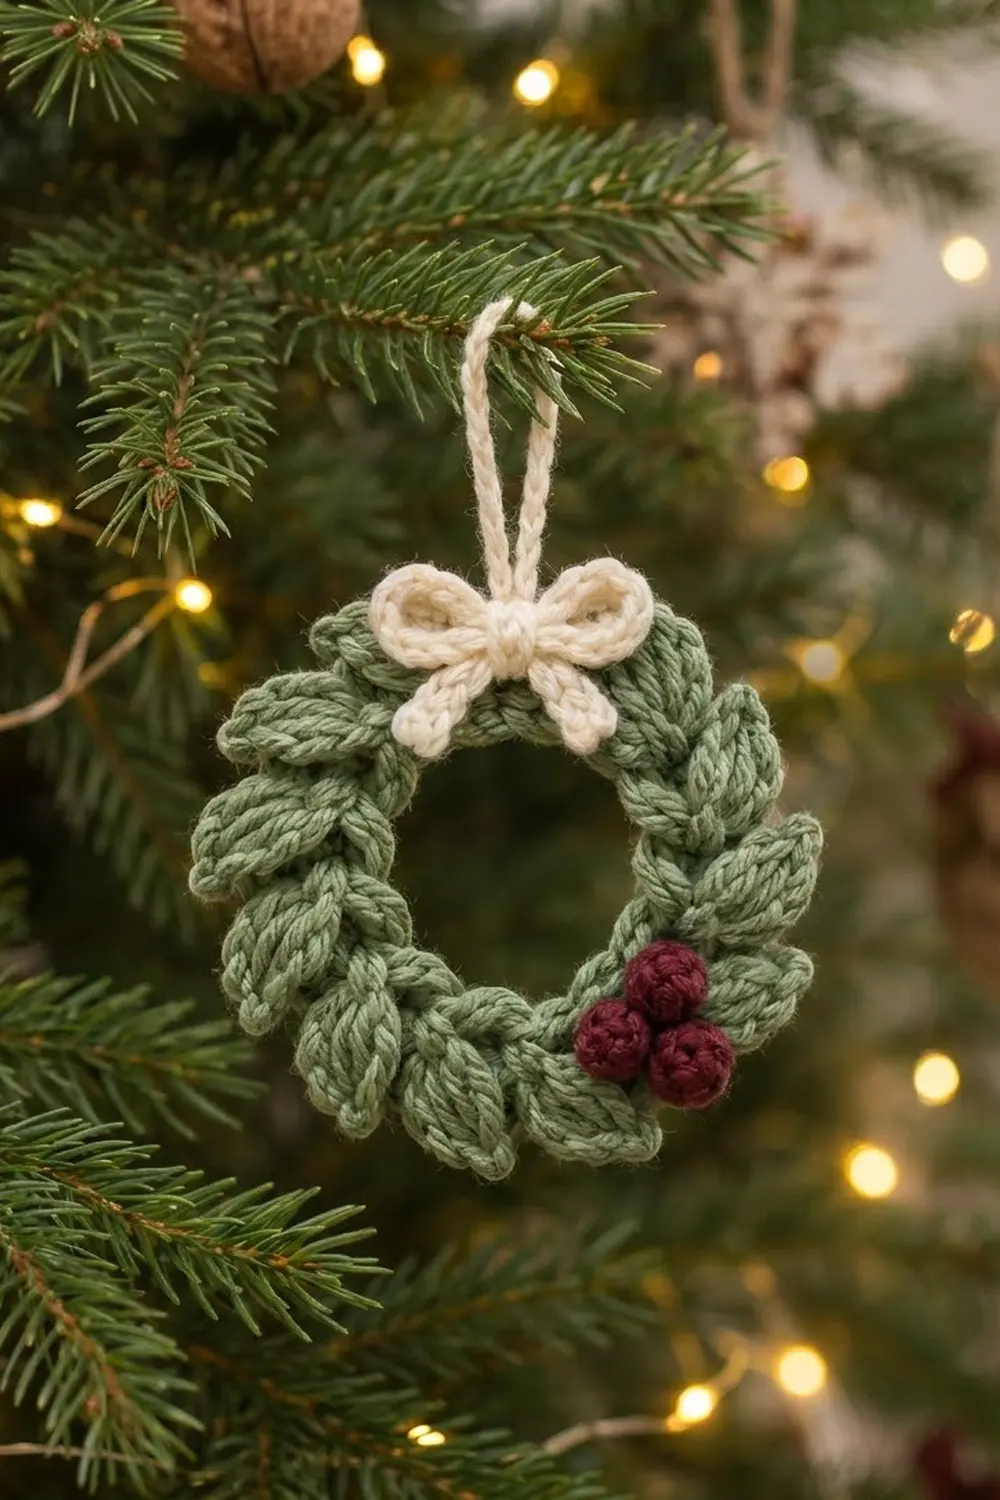
Every measurement in this ornament builds on the one before. A 24-stitch Round 1 gives a 1.5 in (3.8 cm) center opening. Eight increases bring Round 2 to 32 stitches and a 2.25 in (5.7 cm) base ring. Sixteen Large Leaves on 32 stitches and twelve Small Leaves on 24 front loops add 0.625 in (1.6 cm) per side, for a 3.5 in (8.9 cm) wreath. A 2 in (5.1 cm) hanging loop brings the total height to 5.5 in (14.0 cm), and the bow and three berries finish the look.
Check the base ring before you start the leaves and keep every leaf leaning the same way. You will have a neat little wreath ready for the tree in an evening.
Happy crocheting!