
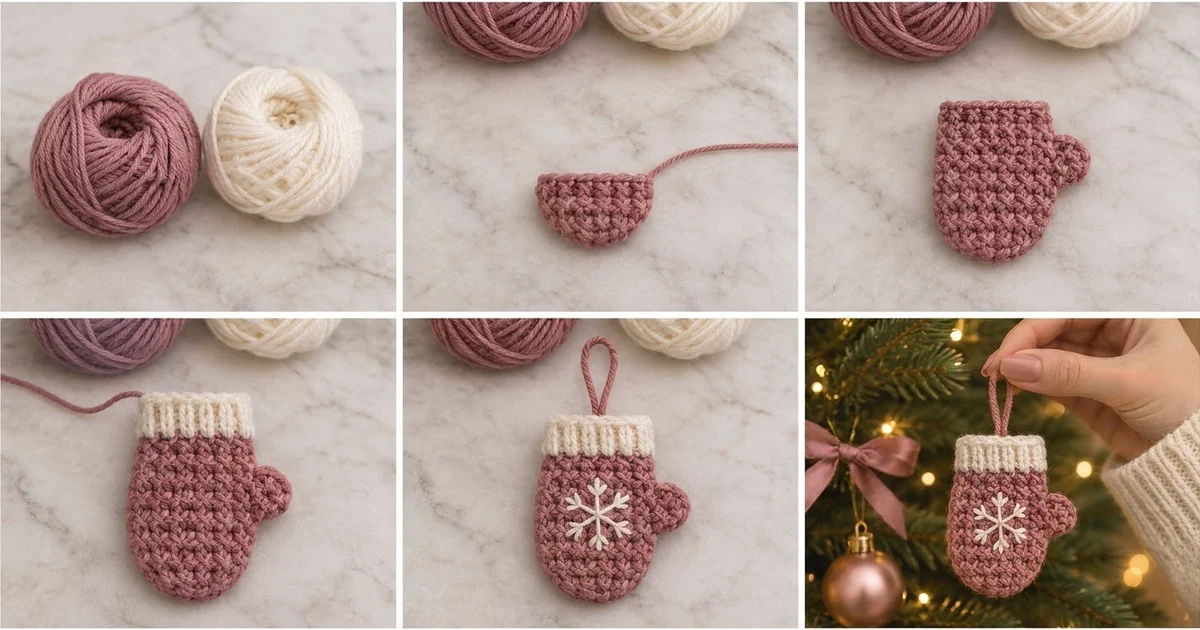
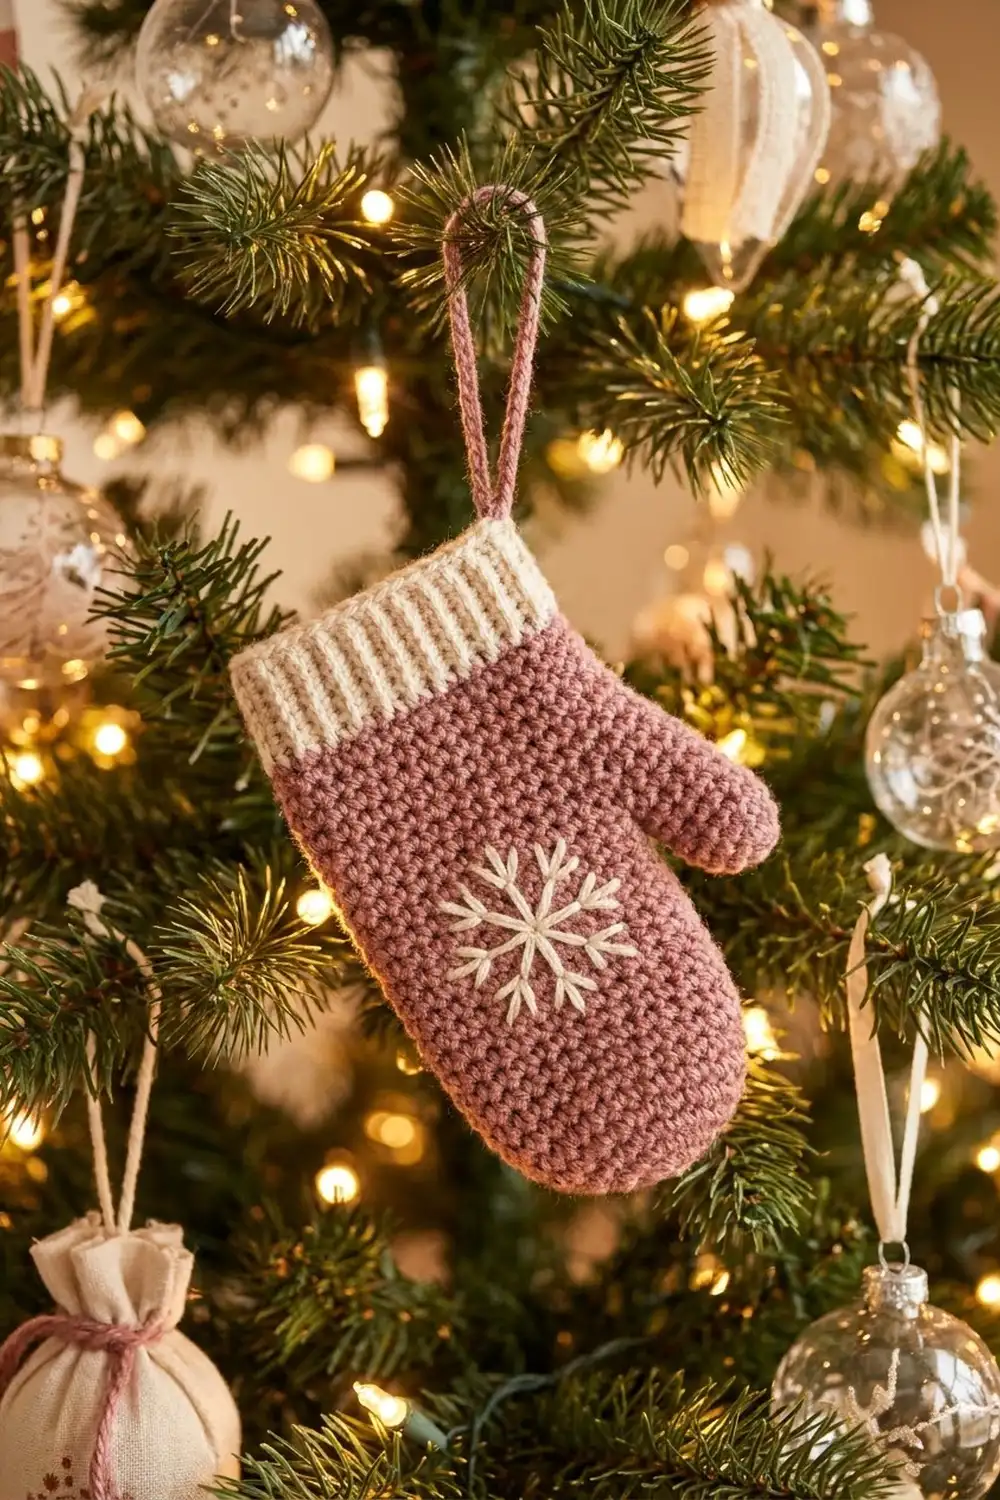
This little mitten is a flat, single-layer ornament in a soft dusty rose. It has a ribbed cream cuff, a small rounded thumb, and an embroidered cream snowflake in the middle of the palm. A slim rose chain loop at the top lets it hang from a tree branch, a gift tag, or a door knob.
The body is worked in plain single crochet rows. Turning every row gives the firm, pebbly texture you see in the photo. The cuff uses front post and back post double crochet, so the vertical ribs look like the knitted cuff on a real mitten. The colors are rose for the body, border, and loop, and cream for the cuff and snowflake.
This pattern uses US crochet terms. The finished ornament measures about 3.7 in (9.4 cm) wide including the thumb and 4.3 in (10.9 cm) tall, not counting the hanging loop.
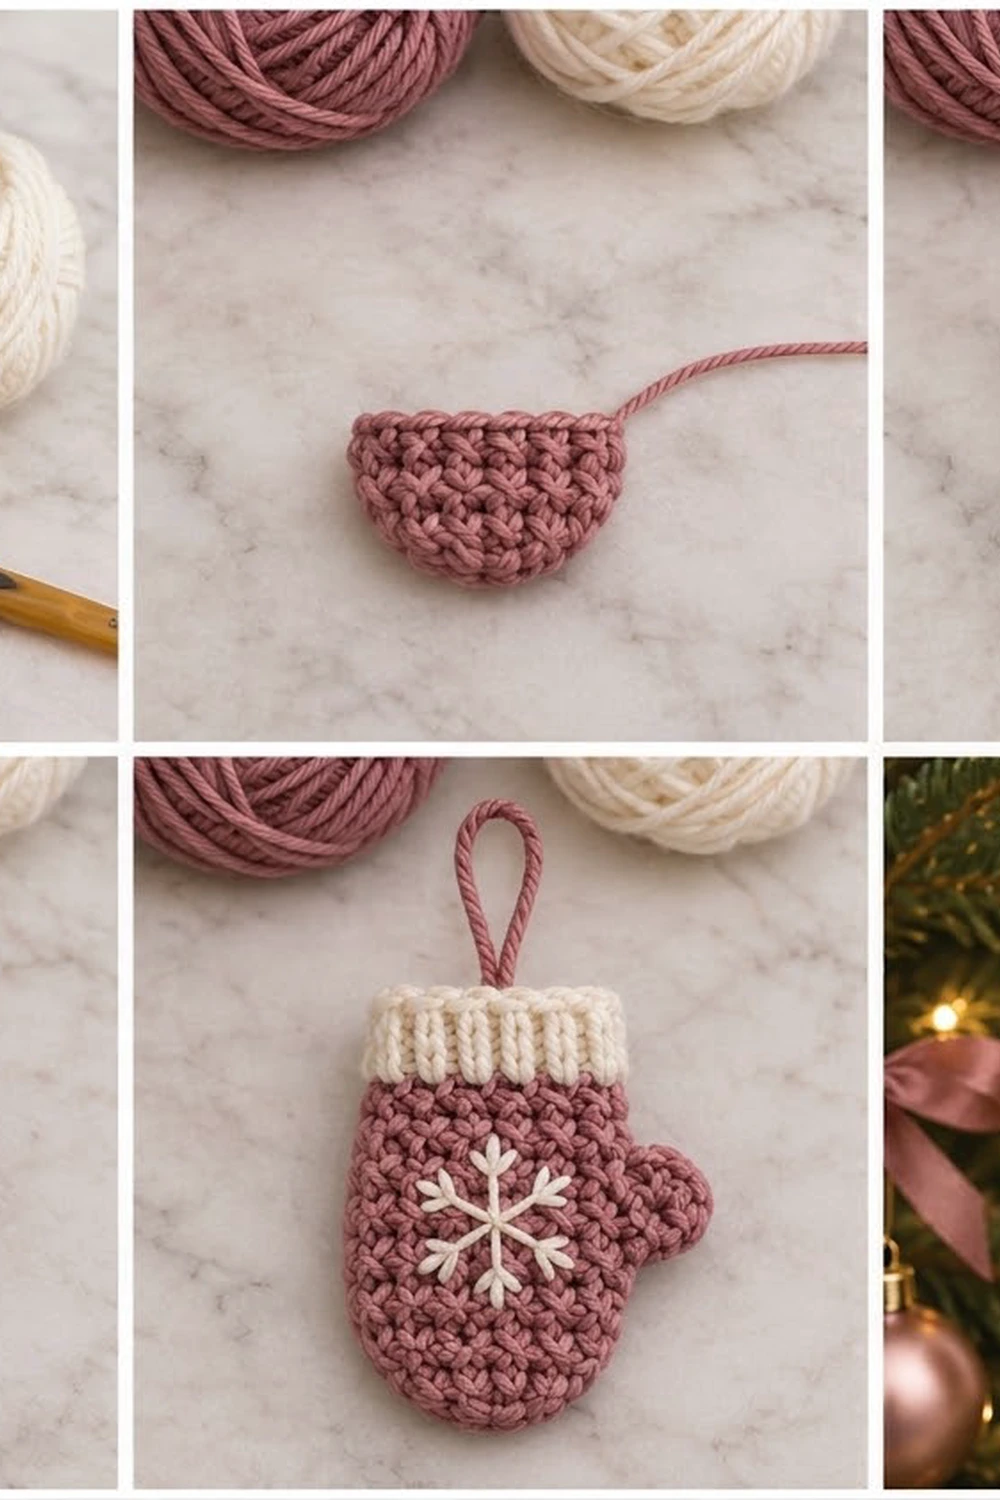
Construction is simple and stays in one piece. You work the body from the bottom up in rows, add the thumb with a short chain partway up, change to cream for the two-row ribbed cuff, and then edge the whole thing. The snowflake is embroidered last, and the loop is chained directly onto the cuff.
Finished Size and Construction
- Finished size: 3.7 in (9.4 cm) wide including thumb, 3.3 in (8.4 cm) wide across the palm, 4.3 in (10.9 cm) tall
- Skill level: Easy
- Terminology: US crochet terms
- Yarn weight: Worsted weight (#4)
- Hook: 4.0 mm (US G-6)
- Number of pieces: 1 (single flat mitten, no joining)
- Layout: Not applicable; one stand-alone ornament
- Piece size before border: 3.3 in (8.4 cm) wide including thumb, 2.9 in (7.4 cm) across the palm, 4.1 in (10.4 cm) tall
- Border depth: about 0.2 in (0.5 cm) along the rose edges
Materials
Use a smooth worsted weight yarn so the stitches and post ribs show clearly. Cotton or a cotton blend gives the crispest texture and blocks well. Soft acrylic also works, but it may come out a little puffier.
Yarn
- Dusty rose (A): 8 g, about 15 m, for the body, border, and hanging loop
- Cream (B): 4 g, about 7 m, for the cuff, cuff edging, and snowflake
Both quantities include a margin for checking gauge and weaving in ends.
Tools
- 4.0 mm (US G-6) crochet hook
- Blunt tapestry needle with an eye wide enough for worsted yarn
- Scissors
- Stitch marker
- Ruler or tape measure
- Water-soluble fabric pen (optional, for marking the snowflake)
- Pins and a foam blocking mat
Abbreviations (US Terms)
- ch – chain
- sl st – slip stitch
- sc – single crochet
- dc – double crochet
- sc2tog – single crochet 2 together
- FPdc – front post double crochet
- BPdc – back post double crochet
- st(s) – stitch(es)
- RS / WS – right side / wrong side
Special stitches
- FPdc: Yarn over, insert the hook from front to back to front around the post of the stitch, yarn over and pull up a loop, then (yarn over, pull through 2 loops) twice.
- BPdc: Yarn over, insert the hook from back to front to back around the post of the stitch, then finish like a regular dc.
- sc2tog: (Insert hook in next st, yarn over, pull up a loop) twice, yarn over, pull through all 3 loops.
Gauge and Checkpoints
Gauge: 18 sc and 20 rows = 4 in (10.2 cm) in sc worked in rows.
That works out to 4.5 sts and 5 rows per 1 in (2.5 cm). Since this is a single small piece, the mitten itself is your test piece. Stop and measure at each checkpoint below.
- After Row 5: 13 sts wide, 2.9 in (7.4 cm) across; about 1 in (2.5 cm) tall.
- After Row 9: still 2.9 in (7.4 cm) wide; about 1.8 in (4.6 cm) tall.
- After Row 16: 3.2 in (8.1 cm) tall; 3.3 in (8.4 cm) wide including the thumb.
- After the cuff: 4.1 in (10.4 cm) tall.
If your piece is too big, switch to a 3.75 mm hook and restart. If it’s too small, switch to a 4.5 mm hook. Height is more forgiving than width. If the palm measures within 0.1 in (0.3 cm) of 2.9 in (7.4 cm) after Row 5, keep going.
Pattern
Body (Color A, Dusty Rose)
The body is worked flat in rows from the bottom up. Start every row with ch 1, which doesn’t count as a stitch, and turn at the end of every row. Row 1 is the RS. With the RS facing you, RS rows begin at the right edge and WS rows end at the right edge.
Row 1 (RS): Ch 6, sc in 2nd ch from hook and in each ch across, turn. (5 sc)
Row 2 (WS): Ch 1, 2 sc in first st, sc in next 3 sts, 2 sc in last st, turn. (7 sc)
Row 3: Ch 1, 2 sc in first st, sc in next 5 sts, 2 sc in last st, turn. (9 sc)
Row 4: Ch 1, 2 sc in first st, sc in next 7 sts, 2 sc in last st, turn. (11 sc)
Row 5: Ch 1, 2 sc in first st, sc in next 9 sts, 2 sc in last st, turn. (13 sc)
Rows 1–5 make the rounded fingertip end of the mitten. Each row adds exactly 2 sts, one at each edge, so the curve stays even on both sides.
Rows 6–9: Ch 1, sc in each st across, turn. (13 sc in each row)
Thumb
The thumb sits on the right-hand edge when the RS is facing. That is where every WS row ends, so you add the thumb chain at the end of a WS row.
Row 10 (WS): Ch 1, sc in each st across (13 sc), then ch 3, turn.
Row 11 (RS): Sc in 2nd ch from hook and in next ch (2 thumb sts), then sc in each of the 13 body sts, turn. (15 sc)
Row 12 (WS): Ch 1, sc in each st across, turn. (15 sc)
Row 13 (RS): Ch 1, sc2tog over the 2 thumb sts, sc in each of the 13 body sts, turn. (14 sts: 1 sc2tog + 13 sc)
Row 14 (WS): Ch 1, sc in each of the 13 body sts, turn, leaving the sc2tog unworked. (13 sc)
The thumb is now a small tab, 2 sts wide and 3 rows tall, narrowing at its tip. The border will round it off into the smooth bump shown in the photo.
Rows 15–16: Ch 1, sc in each st across, turn. (13 sc in each row)
Fasten off Color A after Row 16 and leave a 4 in (10.2 cm) tail.
Checkpoint: The body should measure 3.2 in (8.1 cm) tall and 2.9 in (7.4 cm) across the palm.
Cuff (Color B, Cream)
The cuff is worked straight up from the top edge of the body. Row 16 was a WS row and ended at the right edge. Turn the piece so the RS faces you.
Row 1 (RS): Join B with a sl st in the first st at the right edge. Ch 2 (does not count as a st), dc in each st across, turn. (13 dc)
Row 2 (WS): Ch 2 (does not count as a st), dc in first st, BPdc around next st, FPdc around next st; repeat from * to * 4 more times, BPdc around next st, dc in last st. (13 sts: 2 dc + 6 BPdc + 5 FPdc)
Because you’re working from the WS, each BPdc pushes its post toward the RS. That gives you 6 raised ribs on the front with 5 recessed ribs between them, plus a plain dc at each edge. Fasten off B and leave a 4 in (10.2 cm) tail.
Checkpoint: The mitten should now be 4.1 in (10.4 cm) tall and 2.9 in (7.4 cm) wide at the cuff.
Border
The border has two parts: a rose sc edge around the body, and a cream sl st edge around the cuff. The rose edge is about 0.2 in (0.5 cm) deep. The cream sl st edge just tidies the cuff and adds almost nothing to the size.
Border gauge: The sc rows run 5 rows and 4.5 sts per 1 in (2.5 cm). Those numbers are close enough that 1 sc per sc row end keeps straight edges flat. Each dc row is about twice as tall as an sc row, so it gets 2 sts per row end.
Round 1 (Color A, Rose Sc Edge)
Hold the mitten RS facing with the cuff at the top. Join A with a sl st in the row end of Row 16 on the left edge, just below the cuff. Work counterclockwise down the left side, around the fingertips, and up the right side.
Left side: Ch 1, sc in the row ends of Rows 16 down to 6. (11 sc)
Fingertip curve: Sc in the row ends of Rows 5, 4, 3, and 2 (4 sc). Work 2 sc in the row end of Row 1 (2 sc). Sc in the underside of each of the 5 foundation chains (5 sc). Work 2 sc in the other row end of Row 1 (2 sc). Sc in the row ends of Rows 2, 3, 4, and 5 (4 sc). (17 sc)
Right side and thumb:
- Sc in the row ends of Rows 6–9. (4 sc)
- Sc in the underside of the 2 thumb chains from Row 10. (2 sc)
- Work 2 sc in the row end of each of Rows 11, 12, and 13. (6 sc)
- Sc in the top of the Row 13 sc2tog. (1 sc)
- Sc in the row ends of Rows 14, 15, and 16. (3 sc)
That’s 16 sc for the right side.
Round 1 total: 11 + 17 + 16 = 44 sc. Fasten off A.
Why the math works:
- Straight edges: 1 sc per row matches the 5-rows-to-4.5-sts ratio closely enough to stay flat without ruffling.
- Fingertip corners: The 2 sc at each end of Row 1 fill the sharp corner where the foundation chain meets the side, which keeps the curve round.
- Thumb tip: 6 sc around the 3 thumb row ends give the tip enough stitches to curve into a smooth half circle instead of cupping.
Round 2 (Color B, Cream Cuff Edge)
With the RS facing, join B with a sl st in the row end of cuff Row 1 on the right edge, just above the rose border.
Right cuff side: Work 1 more sl st in the row end of Row 1, then 2 sl st in the row end of Row 2. The joining sl st counts as the first of these. (4 sl st)
Cuff top: Sl st in each of the 13 sts of cuff Row 2. (13 sl st)
Left cuff side: 2 sl st in the row end of Row 2, then 2 sl st in the row end of Row 1. (4 sl st)
Round 2 total: 4 + 13 + 4 = 21 sl st. Fasten off B. Keep the sl sts loose so the ribs don’t pucker.
Why the math works: Each dc row end is about 0.45 in (1.1 cm) tall, roughly 2 sc rows, so 2 sl st per row end lies flat. The 13 top sl sts match the cuff’s 13 sts one to one.
Hanging Loop (Color A)
Join A with a sl st in the 7th (center) sl st along the cuff top. Ch 20, then sl st in the same st. Fasten off and weave the tail into the cuff. The loop measures about 2 in (5.1 cm) long.
Snowflake Embroidery (Color B)
Thread the needle with about 20 in (50.8 cm) of cream. Center the snowflake on the palm between Rows 6 and 13, with its middle at about Row 9, stitch 7. It measures about 1 in (2.5 cm) across.
- Make 3 straight stitches, each 1 in (2.5 cm) long, crossing at the center. Make one vertical and set the other two at 60-degree angles to it. This gives 6 arms.
- On each arm, about 0.25 in (0.6 cm) from the tip, make a small V with two short straight stitches, each about 0.2 in (0.5 cm) long, angled outward toward the tip.
- Tack down the center with one tiny stitch so the crossing lies flat.
- Weave the ends in on the WS, under the sc rows, so they don’t show through.
Final Blocking
- Weave in all remaining tails on the WS, following the direction of the stitches.
- Mist the mitten lightly with water, or steam it from about 1 in (2.5 cm) above. Never press the iron onto it.
- Pin it flat on a foam mat, RS up.
- Shape the fingertip curve and round the thumb with your fingers.
- Pin the palm to 3.3 in (8.4 cm) wide and the total height to 4.3 in (10.9 cm).
- Square up the cuff so its sides are parallel, but don’t stretch the ribs flat.
- Let it dry completely before unpinning.
Final Quality-Control Checklist
- Width including the thumb is 3.7 in (9.4 cm); the palm is 3.3 in (8.4 cm).
- Height without the loop is 4.3 in (10.9 cm).
- Body rows are 13 sts wide from Row 5 through Row 16.
- The cuff shows 6 raised cream ribs on the RS.
- The rose border has 44 sc and lies flat with no ruffles.
- The thumb is a smooth, round bump, not a square tab.
- The snowflake has 6 even arms, each with a V tip, and is centered on the palm.
- The hanging loop is centered on the cuff and secure.
- No yarn tails show on the RS.
Troubleshooting
The fingertip curve is pointed. Your Row 1–5 increases may be too tight. Loosen your tension, and don’t skip the 2 sc in each Row 1 end on the border.
The thumb cups or curls. Check that you worked 2 sc into each of the 3 thumb row ends, then block it flat.
The border ruffles. Your edge stitches are too loose. Go down half a hook size just for Round 1.
The cuff is narrower than the body. Post stitches pull in. Work the cuff with a 4.5 mm hook.
The ribs lean or look flat. Check that Row 2 alternates BPdc and FPdc exactly and starts and ends with a plain dc.
The snowflake puckers. Your embroidery stitches are too tight. Let each stitch lie on the surface without pulling.
Care
Hand wash in cool water with mild soap, press the water out in a towel, and lay flat to dry. Reshape the thumb and cuff while the mitten is damp.
Final Notes
Every measurement in this mitten follows from the gauge:
- 18 sc and 20 rows to 4 in (10.2 cm) gives a 13-st palm of 2.9 in (7.4 cm).
- Sixteen body rows make 3.2 in (8.1 cm) of height.
- The two-row cuff brings the height to 4.1 in (10.4 cm).
- The 44-st rose border and the 21-st cream edge finish the mitten at 3.7 in (9.4 cm) wide and 4.3 in (10.9 cm) tall.
If your measurements match at each checkpoint, your mitten will match the photo. Make one for every branch, tie one onto a gift, or keep a few by the door for last-minute presents.
Happy crocheting!