

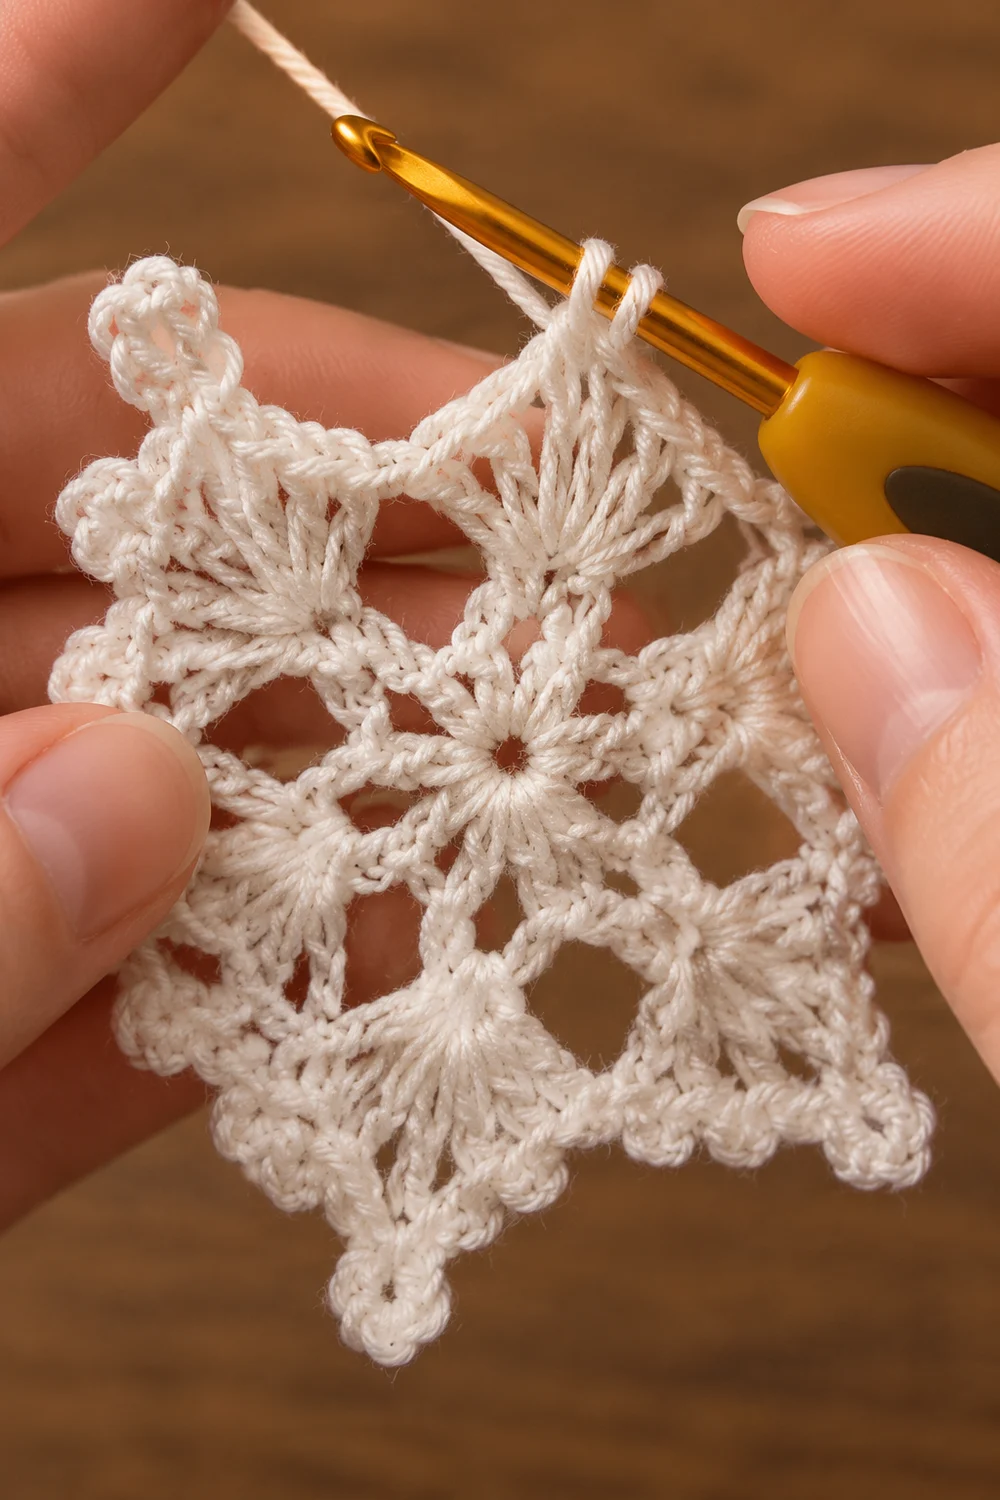
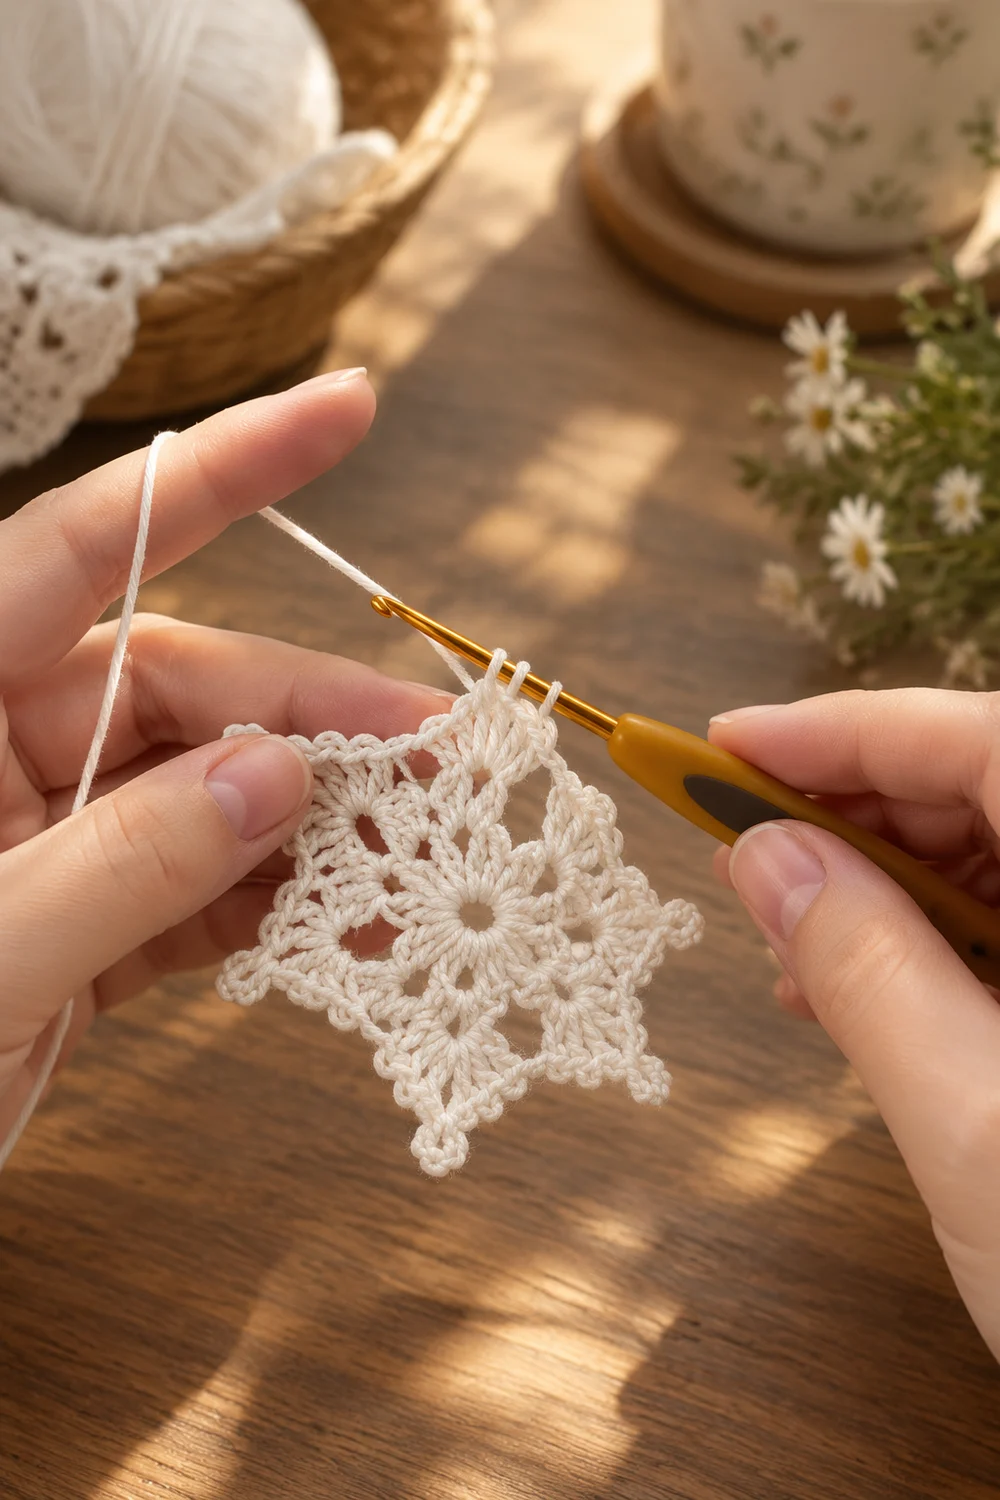
The Frostlace Snowflake Motif is a small, delicate appliqué worked in off-white cotton thread. It has an open, lacy center and a scalloped edge finished with tiny picot loops. The result is a dainty silhouette that reads as a snowflake or a frosted leaf, depending on how you block the points.
Because the picots and shells give the edge a soft, slightly uneven texture, the motif looks organic rather than machine-perfect. The cream color keeps it gentle and vintage in style. It works well sewn onto a gift tag, pinned to a card, or stitched onto a knit hat.
This pattern uses US crochet terms. The finished motif measures 2.75 in (7.0 cm) from point to point, which is within the 2–3 in (5.1–7.6 cm) range of the piece shown in the photo.
Construction is simple. You work one single piece in the round from a center ring. Rounds 1–3 build the openwork body, and Round 4 adds the scalloped shell-and-picot edging. The photo shows a motif in the middle of this process, with the edge still being worked.
Finished Size and Construction
- Finished size: 2.75 in (7.0 cm) point to point
- Skill level: Easy-intermediate
- Terminology: US crochet terms
- Yarn weight: Size 10 cotton crochet thread (Lace, weight 0)
- Hook: 1.75 mm steel hook (US steel 4)
- Number of pieces: 1
- Layout: Single motif worked in the round, 6 points
- Piece size before edging: 2 in (5.1 cm) point to point after Round 3
- Edging depth: about 0.375 in (1.0 cm) added at each point tip
Materials
Yarn advice: Choose a mercerized cotton thread in size 10. Mercerized cotton shows stitch definition, keeps the picots crisp, and holds a starched shape well. Avoid fuzzy or very soft threads, because they blur the openwork. Pick an off-white, cream, or ecru shade to match the look in the photo.
- Cream (main and only color): 3 g, about 12 m (13 yd)
The quantity includes a margin for a gauge test, the starting tail, and weaving in ends. If you plan to make a test motif first, allow a second 3 g.
Tools:
– 1.75 mm steel crochet hook (US steel 4)
– Fine tapestry needle or small-eye sewing needle
– Small sharp scissors
– Rustproof pins
– Foam blocking mat or a piece of cardboard covered in plastic wrap
– Fabric stiffener or spray starch (optional, for a firm finish)
– Ruler or tape measure with inch and cm markings
Abbreviations (US Terms)
- ch – chain
- sl st – slip stitch
- sc – single crochet
- dc – double crochet
- sp – space
- st(s) – stitch(es)
- beg – beginning
- rep – repeat
Special stitch – Picot: Ch 3, sl st into the 3rd ch from the hook (the first ch you made). This forms a small closed loop. A picot is not counted as a stitch in the stitch totals.
Special stitch – Shell (Rounds 2 and 3): (2 dc, ch 2, 2 dc) in the same space for Round 2. For Round 3, the shell is (2 dc, ch 3, 2 dc) in the same space.
Gauge and Checkpoints
Gauge matters less for an appliqué than for a garment. Still, the motif only looks right if the openings stay open and the points sit flat. Make one test motif first and measure it at each checkpoint below. Measure lightly flattened, before blocking.
- After Round 1: about 0.75 in (1.9 cm) across
- After Round 2: about 1.25 in (3.2 cm) across
- After Round 3: about 2 in (5.1 cm) point to point
- After Round 4: about 2.75 in (7.0 cm) point to point
A tolerance of 0.125 in (0.3 cm) at any checkpoint is fine.
If your motif is too big: Switch to a 1.5 mm hook (US steel 7). You can also tighten the chain spaces by pulling the working thread snug after each ch.
If your motif is too small: Switch to a 2.0 mm hook (US steel 2). Loosen your chains slightly. Tight chains are the most common reason a lace motif comes out small and cupped.
If the size is right but it cups or ruffles: Check the Troubleshooting section before changing hooks. Cupping and ruffling usually come from chain tension, not overall gauge.
Pattern: Rounds 1–3 (Openwork Body)
Leave a 4 in (10.2 cm) tail at the start. Do not turn between rounds. Work with the right side facing you throughout.
Round 1 (six 3-dc groups):
Make a magic ring. Ch 3 (counts as dc), 2 dc in ring, ch 2. 3 dc in ring, ch 2. Rep from * 4 more times. Sl st to top of beg ch-3. Pull the ring closed firmly.
Count: 18 dc (six groups of 3 dc) and 6 ch-2 sps.
The ring must close completely. A gap in the center weakens the whole motif.
Round 2 (six shells):
Sl st in next 2 dc and into the next ch-2 sp. Ch 3 (counts as dc), (dc, ch 2, 2 dc) in the same ch-2 sp. This is the first shell. Ch 1. Shell of (2 dc, ch 2, 2 dc) in next ch-2 sp, ch 1. Rep from * 4 more times. Sl st to top of beg ch-3.
Count: 24 dc (six shells of 4 dc each), 6 ch-2 sps at the shell centers, and 6 ch-1 sps.
This is a growth round. Its own complete total is 24 dc. Each ch-1 sp sits directly above a 3-dc group from Round 1. The 3-dc groups themselves are not worked into, so they stay visible as solid “spokes” between the shells.
Round 3 (points and side loops):
Sl st in next dc and into the next ch-2 sp. Ch 3 (counts as dc), (dc, ch 3, 2 dc) in the same ch-2 sp. This is the first point. Ch 3, sc in next ch-1 sp, ch 3. Point of (2 dc, ch 3, 2 dc) in next ch-2 sp, ch 3, sc in next ch-1 sp, ch 3. Rep from * 4 more times. Sl st to top of beg ch-3.
Count: 24 dc (six points of 4 dc each), 6 sc, 6 ch-3 tip sps, and 12 ch-3 side loops (2 per point).
This is a growth round. The dc total stays at 24, but the motif gains 6 sc and 12 new ch-3 side loops. Those loops create the open, airy look between the points.
Checkpoint: The motif should measure about 2 in (5.1 cm) point to point. It should lie flat with six clear points and twelve open side loops. Do not fasten off.
Border: Picot Scallop Edging (Round 4)
Round 4 is the decorative edge. It produces the scalloped, shell-like outline with picot loops shown in the photo.
Border gauge: The edging is worked into the Round 3 spaces, not into individual stitches. Each ch-3 side loop takes 3 sc, which is 1 sc per chain. That density lets the sc lie flat without pulling. Each ch-3 tip space takes 6 dc plus a picot. That is twice the chain count, so the extra stitches fan out around the point and form a rounded scallop.
Round 4:
Sl st in next dc and into the next ch-3 tip sp. Ch 3 (counts as dc), 2 dc, picot, 3 dc, all in the same tip sp. This is the first scallop. 3 sc in next ch-3 side loop, picot, 3 sc in next ch-3 side loop.
(3 dc, picot, 3 dc) in next ch-3 tip sp, 3 sc in next ch-3 side loop, picot, 3 sc in next ch-3 side loop. Rep from * 4 more times. Sl st to top of beg ch-3.
Note that the sc from Round 3 is not worked into. The valley picot sits directly above it and forms a small loop between the two side loops.
Count per point segment (one-sixth of the motif):
– Tip scallop: 6 dc + 1 picot
– Side loops: 3 sc + 3 sc = 6 sc
– Valley: 1 picot
– Segment total: 12 sts + 2 picots
Total for Round 4: 6 segments × 12 sts = 72 sts (36 dc + 36 sc), plus 12 picots.
Why the math works:
– Tip scallops: 6 tip sps × 6 dc = 36 dc. This matches the six Round 3 tip spaces exactly.
– Side loops: 12 side loops × 3 sc = 36 sc. This matches the twelve Round 3 side loops exactly.
– Picots: 6 tip picots + 6 valley picots = 12.
Every Round 3 space receives exactly one group, so the edge closes evenly with no leftover or missing spaces.
Checkpoint: The motif should measure about 2.75 in (7.0 cm) point to point. That is the 2 in (5.1 cm) body plus about 0.375 in (1.0 cm) of edging at each tip.
Fasten off, leaving a 6 in (15.2 cm) tail. Weave in both tails along the back of the dc stitches. Do not trim them closely until after blocking.
Final Blocking
Blocking turns a slightly ruffled lace piece into a crisp, flat motif. Do not skip it.
- Wet the motif. Soak it in cool water for 5 minutes, then press out the water gently in a towel. Do not wring or twist it.
- Pin the center. Lay the motif face up on the mat. Place one pin through the center ring.
- Pin the six tip picots. Pin each one to an even circle 2.75 in (7.0 cm) across. Work in opposite pairs so the shape stays balanced.
- Pin the six valley picots. Pull each one gently outward until the side loops open into neat arcs.
- Shape the side loops. Use a pin tip to open any loop that has twisted or closed up.
- Stiffen if you like. For a firm ornament or appliqué, apply fabric stiffener or spray starch while the motif is pinned. Blot away any excess so it does not fill the openings.
- Dry fully. Leave it pinned until it is completely dry. This usually takes several hours.
- Remove the pins and finish. Remove the pins, check the size, then trim the woven-in tails close to the work.
Final Quality-Control Checklist
- [ ] The center ring is closed with no hole.
- [ ] Round 1 has 18 dc in six groups of 3.
- [ ] Round 2 has six shells (24 dc total).
- [ ] Round 3 has six points, 6 sc, and 12 open side loops.
- [ ] Round 4 has 36 dc, 36 sc, and 12 picots.
- [ ] All six tip scallops look the same size.
- [ ] All six valley picots sit directly above a Round 3 sc.
- [ ] The motif measures 2.75 in (7.0 cm) point to point, within 0.125 in (0.3 cm).
- [ ] The motif lies flat with no cupping or ruffling.
- [ ] Tails are woven in securely and trimmed after blocking.
Troubleshooting
The motif cups into a bowl shape.
Your chains are too tight, usually in Round 3. Loosen the chains slightly or go up to a 2.0 mm hook for the chain spaces only.
The edge ruffles or waves.
Your chains or dc stitches are too loose. Snug up the chains. Also check that you put exactly 3 sc in each side loop, not 4.
One point looks smaller than the others.
You probably put a ch 2 instead of a ch 3 in that tip during Round 3. Count the chains in each tip space before starting Round 4.
The picots disappear or lean sideways.
Make sure you sl st into the 3rd ch from the hook, not the 2nd. Pin each picot straight out during blocking.
There is a hole in the center.
The magic ring was not pulled tight enough before Round 1 was joined. Thread the starting tail onto a needle, weave it around the ring, and pull it closed.
The stitch count is off in Round 4.
Check whether you accidentally worked into the Round 3 sc. That sc must be skipped. Only the picot goes above it.
The join line is visible.
Join each round into the top of the beg ch-3, not into the side of it. Then sl st across neatly to the next space.
Care
Hand wash in cool water with a mild soap, press dry in a towel, and re-pin to shape if needed. If you used stiffener, reapply it after washing to restore the crisp finish.
Final Notes
The Frostlace Snowflake Motif follows a short, predictable measurement chain:
- Round 1: 0.75 in (1.9 cm) across
- Round 2: 1.25 in (3.2 cm) across
- Round 3: 2 in (5.1 cm) point to point
- Round 4 edging: 2.75 in (7.0 cm) point to point, after adding about 0.375 in (1.0 cm) at each tip
The stitch counts follow the same steady logic:
- Round 1: 18 dc
- Round 2: 24 dc in six shells
- Round 3: 24 dc, 6 sc, and 18 ch-3 spaces
- Round 4: 36 dc, 36 sc, and 12 picots
If each checkpoint matches, the finished motif will lie flat and keep its dainty scalloped outline.
Optional: if you enjoy the motif, you can make a few more as separate gift-tag or card appliqués. Each one is still a single piece made exactly as written above.
Happy crocheting!