

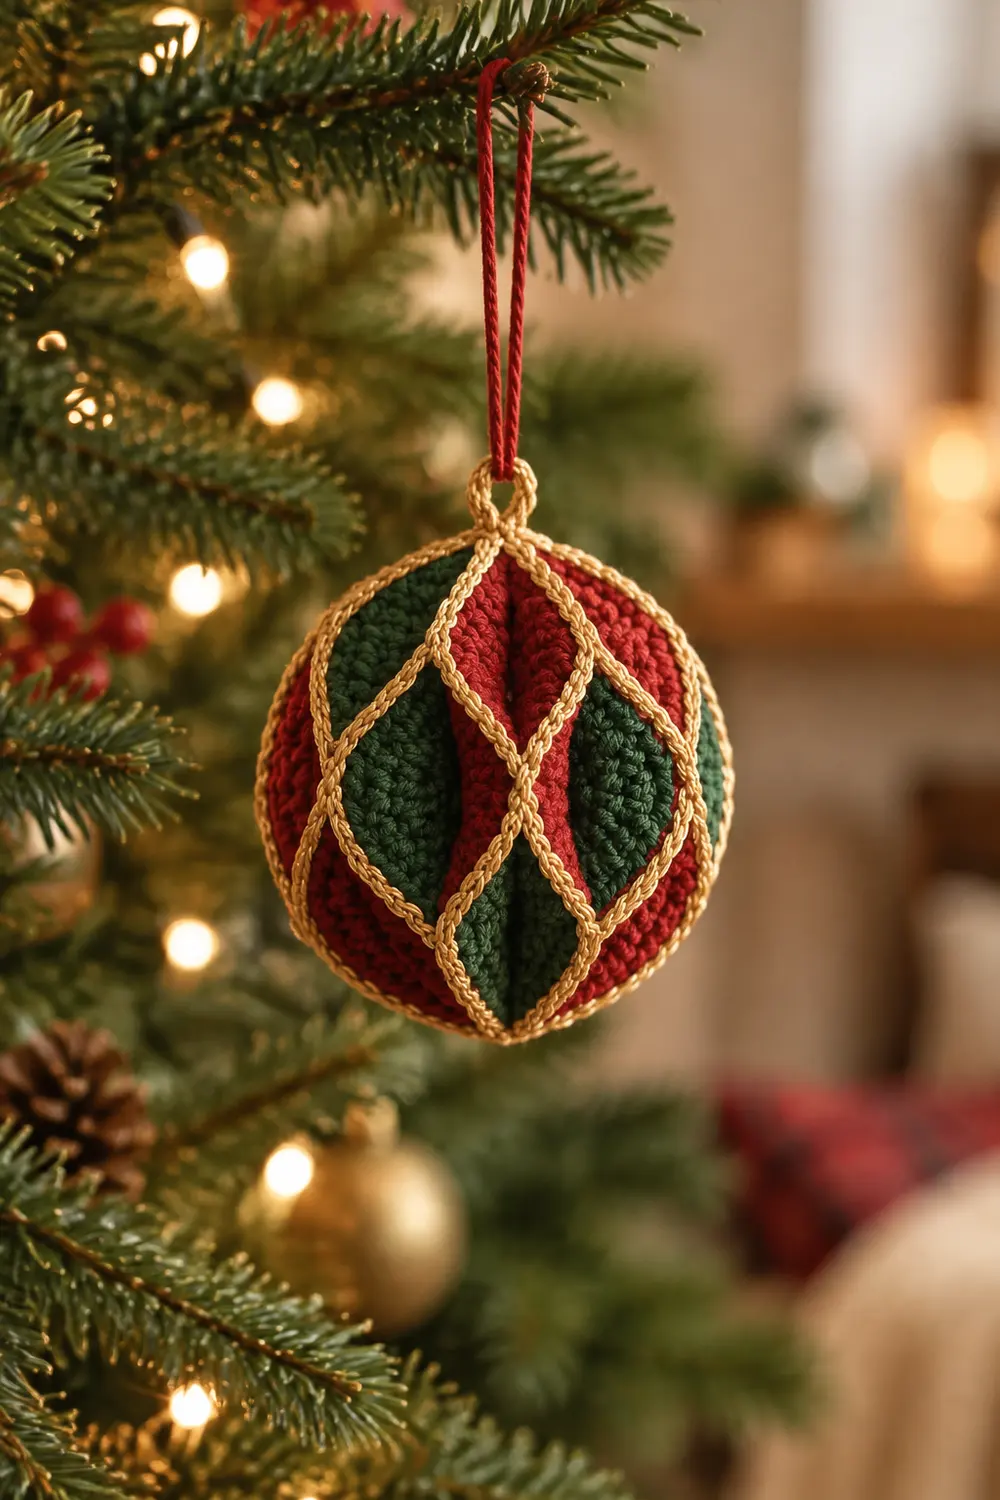
The Gilded Lattice Ornament is a crocheted Christmas ball made of six petal-shaped panels in deep forest green and rich red. Gold seams outline every panel, so the surface reads like a traditional patchwork bauble with a glowing lattice.
The colors alternate red, green, red, green, red, green around the ball. At the top, a small gold crocheted loop holds a red hanging cord, and a textured gold bow sits at the suspension point. It is classic, cozy, and ready to hang.
This pattern uses US crochet terms. The finished ornament measures about 3.5 in (8.9 cm) in diameter and about 11 in (27.9 cm) around the equator.
Construction is simple. You crochet six flat panels in rows, join them with raised gold slip-stitch seams on the outside, and close each pole with a small gold cap. Then you add the loop, the bow, and the cord.
Finished Size and Construction
- Finished size: about 3.5 in (8.9 cm) diameter, 11 in (27.9 cm) circumference
- Skill level: Easy-intermediate
- Terminology: US crochet terms
- Yarn weight: DK (light #3), cotton or cotton blend
- Hook: 3.0 mm (between US C/2 and D/3)
- Number of pieces: 6 panels, 1 bow, 1 cord (pole caps and loop are worked in place)
- Layout: 6 panels around the ball, alternating red and green
- Piece size: each panel about 1.8 in (4.6 cm) wide at its widest and 4.9 in (12.4 cm) long
- Size before border: about 3.5 in (8.9 cm) across at the equator, with a 0.7 in (1.8 cm) opening at each pole
- Border depth: 2 gold rounds at each pole, about 0.3 in (0.8 cm) deep
Materials
Choose a smooth, mercerized DK cotton. It shows stitch definition, holds its shape when stuffed, and gives the gold seams a crisp chain look. Avoid fuzzy yarns, because they blur the lattice lines.
- Red: 15 g, about 35 m (3 panels plus the cord)
- Forest green: 10 g, about 23 m (3 panels)
- Gold or tan: 8 g, about 18 m (seams, pole caps, loop, bow)
All quantities include a comfortable margin, so you will not run short if your tension is a little loose.
Tools:
– 3.0 mm crochet hook
– Polyester fiberfill, about 5 g
– Tapestry needle
– Scissors
– Stitch markers
– Ruler or tape measure
Abbreviations (US Terms)
- ch – chain
- sc – single crochet
- sc2tog – single crochet 2 together (decrease)
- sl st – slip stitch
- BLO – back loop only
- st(s) – stitch(es)
- inc – 2 sc in the same st
Special technique – Slip-stitch seam: Hold two panels wrong sides together. Insert the hook through the matching row-end of both panels, yarn over, and pull through both layers and the loop on the hook. Worked on the outside, this makes a raised gold chain ridge.
Gauge and Checkpoints
Gauge: 11 sc and 13 rows = 2 in (5.1 cm) in sc worked in rows. That equals 5.5 sc and 6.5 rows per 1 in (2.5 cm).
Make one complete panel first and measure it before starting the rest.
Checkpoints:
– After Row 11 (10 sts): panel width is 1.8 in (4.6 cm).
– After Row 32: panel length is 4.9 in (12.4 cm).
– After all 6 seams (unstuffed): each pole opening is about 0.7 in (1.8 cm) across.
– After stuffing: equator measures about 11 in (27.9 cm) around, or 3.5 in (8.9 cm) across.
If your panel is too big, go down to a 2.75 mm hook. If it is too small, go up to a 3.25 mm hook. Do not change the stitch counts, because the seams and pole caps depend on them.
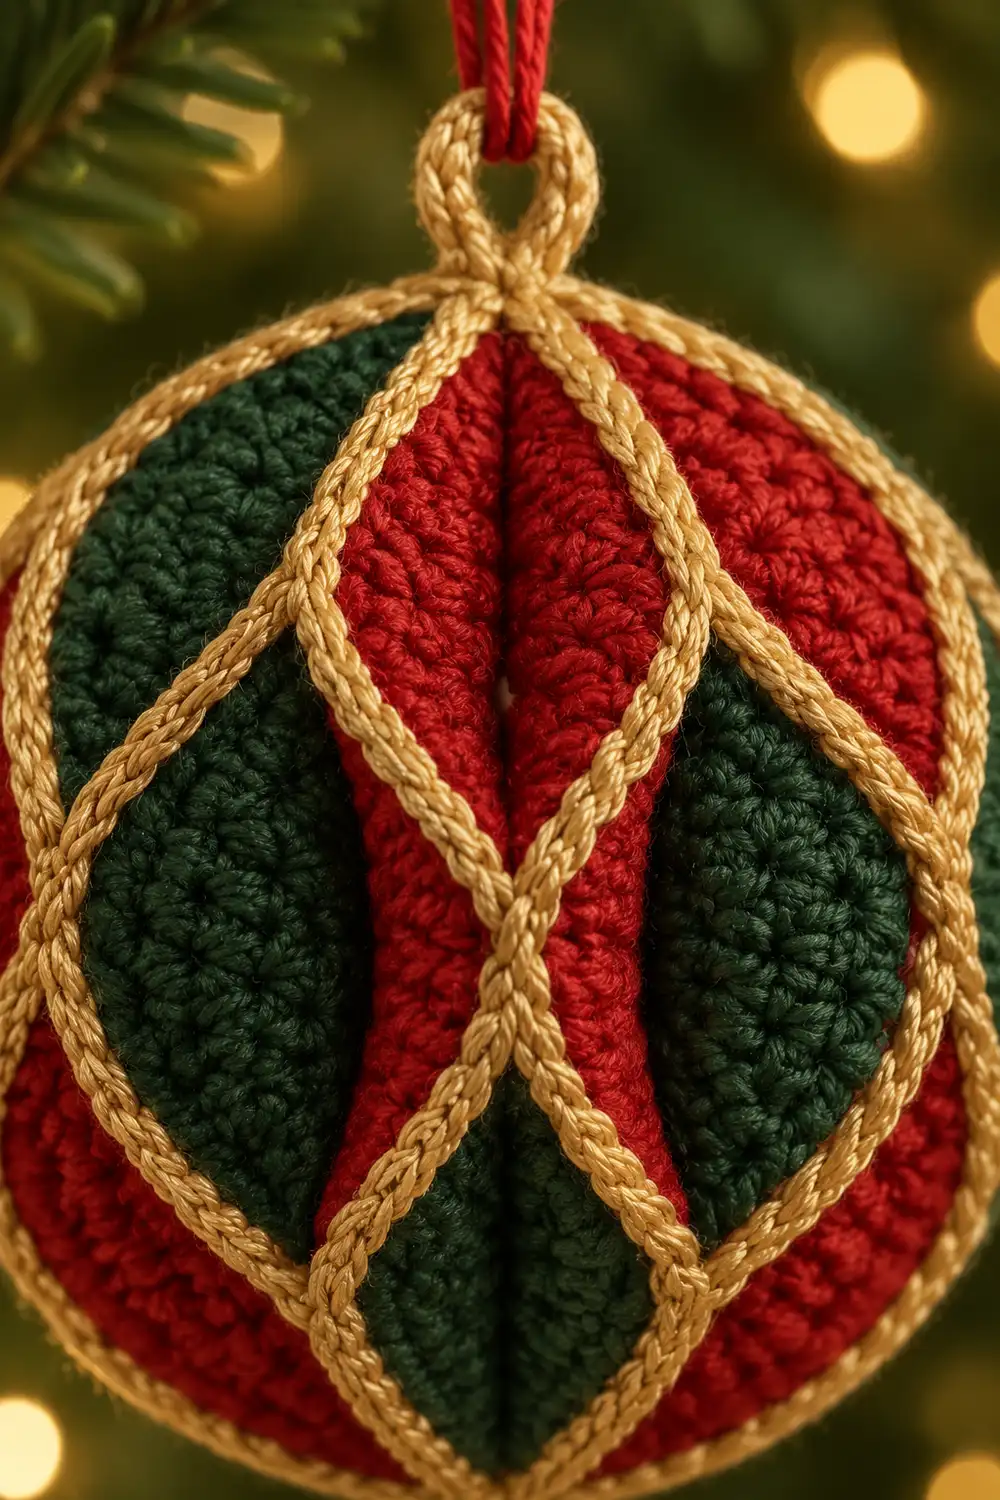
Panel Pattern (Make 6)
Each panel is a pointed oval, narrow at both ends and widest in the middle. Ch 1 at the start of each row does not count as a stitch. Turn at the end of every row.
Row 1: Ch 3, sc in 2nd ch from hook and in next ch. (2 sts)
Row 2: Ch 1, inc in each st. (4 sts)
Row 3: Ch 1, sc in each st across. (4 sts)
Row 4: Ch 1, inc in first st, sc in next 2 sts, inc in last st. (6 sts)
Rows 5–6: Ch 1, sc in each st across. (6 sts)
Row 7: Ch 1, inc in first st, sc in next 4 sts, inc in last st. (8 sts)
Rows 8–10: Ch 1, sc in each st across. (8 sts)
Row 11: Ch 1, inc in first st, sc in next 6 sts, inc in last st. (10 sts)
Checkpoint: width is 1.8 in (4.6 cm).
Rows 12–22: Ch 1, sc in each st across. (10 sts)
Row 23: Ch 1, sc2tog, sc in next 6 sts, sc2tog. (8 sts)
Rows 24–26: Ch 1, sc in each st across. (8 sts)
Row 27: Ch 1, sc2tog, sc in next 4 sts, sc2tog. (6 sts)
Rows 28–29: Ch 1, sc in each st across. (6 sts)
Row 30: Ch 1, sc2tog, sc in next 2 sts, sc2tog. (4 sts)
Row 31: Ch 1, sc in each st across. (4 sts)
Row 32: Ch 1, sc2tog twice. (2 sts)
Fasten off and weave in ends.
The panel is perfectly symmetrical. Rows 1–11 and Rows 22–32 mirror each other, with 12 rows of 10 sts in the center. One panel uses 240 sts total. Each long side has 32 row-ends, and each tip is 2 sts wide.
Checkpoint: length is 4.9 in (12.4 cm).
Bow (Make 1, Gold)
Row 1: Ch 13, sc in 2nd ch from hook and in each ch across. (12 sts)
Rows 2–4: Ch 1, turn, sc BLO in each st across. (12 sts)
Fasten off and leave a 12 in (30.5 cm) tail. The BLO rows create horizontal ridges for texture. The bow strip measures about 2.2 in (5.6 cm) by 0.6 in (1.5 cm).
Wrap the tail tightly around the center of the strip 6 times to pinch it into a bow. Secure the tail, but do not cut it yet.
Cord (Make 1, Red)
Ch 40, sl st in the back bump of 2nd ch from hook and in each ch across. (39 sl st)
The cord is about 6 in (15.2 cm) long. Add or remove chains if you want a different hanging length. Leave short tails for knotting.
Make All Pieces
Quantities per color:
– Red: 3 panels and 1 cord
– Forest green: 3 panels
– Gold: 1 bow, plus all seams, pole caps, and the loop (worked during assembly)
Layout (viewed around the equator, panels side by side):
AROUND: RED GREEN RED GREEN RED GREEN
Panel 6 (green) joins back to Panel 1 (red) to close the sphere. Every red panel sits between two green panels, so the colors stay balanced from every viewing angle.
Joining
Method: Gold slip-stitch seam, worked on the outside with wrong sides together.
- Hold Panel 1 (red) and Panel 2 (green) wrong sides together, with Row 1 tips aligned.
- Join gold at the Row 1 end. Sl st through both layers in each matching row-end, from Row 1 up to Row 32. (32 sl st)
- Fasten off and weave in ends.
- Repeat to join Panel 2 to Panel 3, then 3 to 4, 4 to 5, and 5 to 6.
- Join Panel 6 to Panel 1 to close the ball. (6 seams × 32 sl st = 192 sl st in total)
Stitch-to-stitch logic: All panels have identical row counts and shaping, so Row 12 of one panel always meets Row 12 of the next. One sl st per row-end pair keeps the seam exactly as long as the panel edge, with no gathering or stretching.
Tension advice: Keep the slip stitches relaxed, matching the height of a sc row. Tight slip stitches pucker the seam and pull the ball into a lemon shape. If you tend to slip stitch tightly, use a 3.25 mm hook for the seams only.
Checkpoint: After joining, you have an unstuffed shell with a 0.7 in (1.8 cm) opening at each pole. Each opening is ringed by 12 sts, made up of the 2 tip sts from each of the 6 panels.
Border (Gold Pole Caps and Loop)
Border gauge: The caps use the same gauge as the panels, 5.5 sc per 1 in (2.5 cm).
Bottom Cap
Work into the free loops of the Row 1 foundation chains.
Rnd 1: Join gold in any panel’s tip st. Sc in each of the 2 tip sts of each panel around. (2 sts per panel × 6 panels = 12 sc) Do not join; mark the first st.
Rnd 2: Sc2tog 6 times. (1 decrease per panel = 6 sts)
Fasten off. Weave the tail through the front loops of all 6 sts, pull tight, and secure inside.
Top Cap and Loop
Stuff the ball firmly through the top opening until the equator measures about 11 in (27.9 cm) around.
Rnd 1: Join gold in any Row 32 tip st. Sc in each of the 2 tip sts of each panel around. (12 sc)
Add a little more stuffing if needed.
Rnd 2: Sc2tog 6 times. (6 sts)
Loop: Ch 8, then sl st in the same st to form a loop about 0.6 in (1.5 cm) tall.
Fasten off. Weave the tail through the front loops of the 6 sts, pull closed, and secure.
Why the math works: Each panel contributes 2 tip sts, so each pole ring has exactly 12 sts. Twelve divides evenly by 6, so Rnd 2 places one sc2tog over each panel. This keeps each cap centered and the seams running straight into the pole.
Finishing the Hanger
- Thread the red cord through the gold loop and tie its ends together in an overhand knot.
- Place the bow at the base of the loop and wrap its tail around the loop base twice.
- Stitch the bow down through the top cap and weave in the end.
Final Blocking
- Lightly mist the ornament with water. Do not soak it, because wet fiberfill shifts.
- Roll the ball between your palms to even out the stuffing.
- Pinch each gold seam gently so it stands up as a raised ridge.
- Shape the pole caps into small, neat domes with your fingertips.
- Let it dry hanging from its cord, away from heat, for several hours.
- Measure: 3.5 in (8.9 cm) diameter and 11 in (27.9 cm) circumference.
Final Quality-Control Checklist
- [ ] Six panels alternate red and green with no repeats side by side.
- [ ] Every panel has 32 rows and is 1.8 in (4.6 cm) at its widest.
- [ ] Each seam has 32 sl st and lies smooth without puckering.
- [ ] Gold ridges sit on the outside of all six seams.
- [ ] Both pole caps follow the 12-to-6 count and close tightly.
- [ ] Stuffing is firm and even, with no flat spots.
- [ ] Diameter is about 3.5 in (8.9 cm).
- [ ] Loop, bow, and cord are securely attached at the top.
- [ ] All ends are woven in and hidden inside.
Troubleshooting
Ball looks pointy or lemon-shaped: The seams are too tight. Redo them with a larger hook, or stuff more firmly at the equator.
Panels have different lengths: Count rows. Each panel needs exactly 32. Also make sure each ch 1 at the start of a row is not counted as a stitch.
Seams wander off line: You skipped or doubled a row-end. Undo and work exactly one sl st per row-end.
Pole opening is lumpy: Check that Rnd 1 has 12 sc, 2 per panel. Then make sure each sc2tog is centered over one panel.
Gold seam disappears into the fabric: You joined right sides together. Rejoin with wrong sides together so the ridge sits on the outside.
Stuffing shows through: Your gauge is too loose. Go down a hook size, or add a thin layer of matching-color felt behind the stuffing.
Bow flops forward: Tack its center to the top cap with two extra stitches.
Care
Spot clean only with a damp cloth and mild soap, then air dry while hanging. Store in a box with tissue so the ball keeps its round shape.
Final Notes
The measurement chain is simple to track. Each panel is 1.8 in (4.6 cm) wide and 4.9 in (12.4 cm) long. Six panels joined edge to edge make a circumference of about 11 in (27.9 cm), which stuffs out to a 3.5 in (8.9 cm) ball.
The pole caps work because 6 panels × 2 tip sts = 12 sts, which halve evenly to 6 before closing. Check your gauge on the first panel, keep your seams relaxed, and the lattice will fall into place on its own.
Optional: For a matching set, make extra ornaments in reversed colors with green as the lead color.
Happy crocheting!