

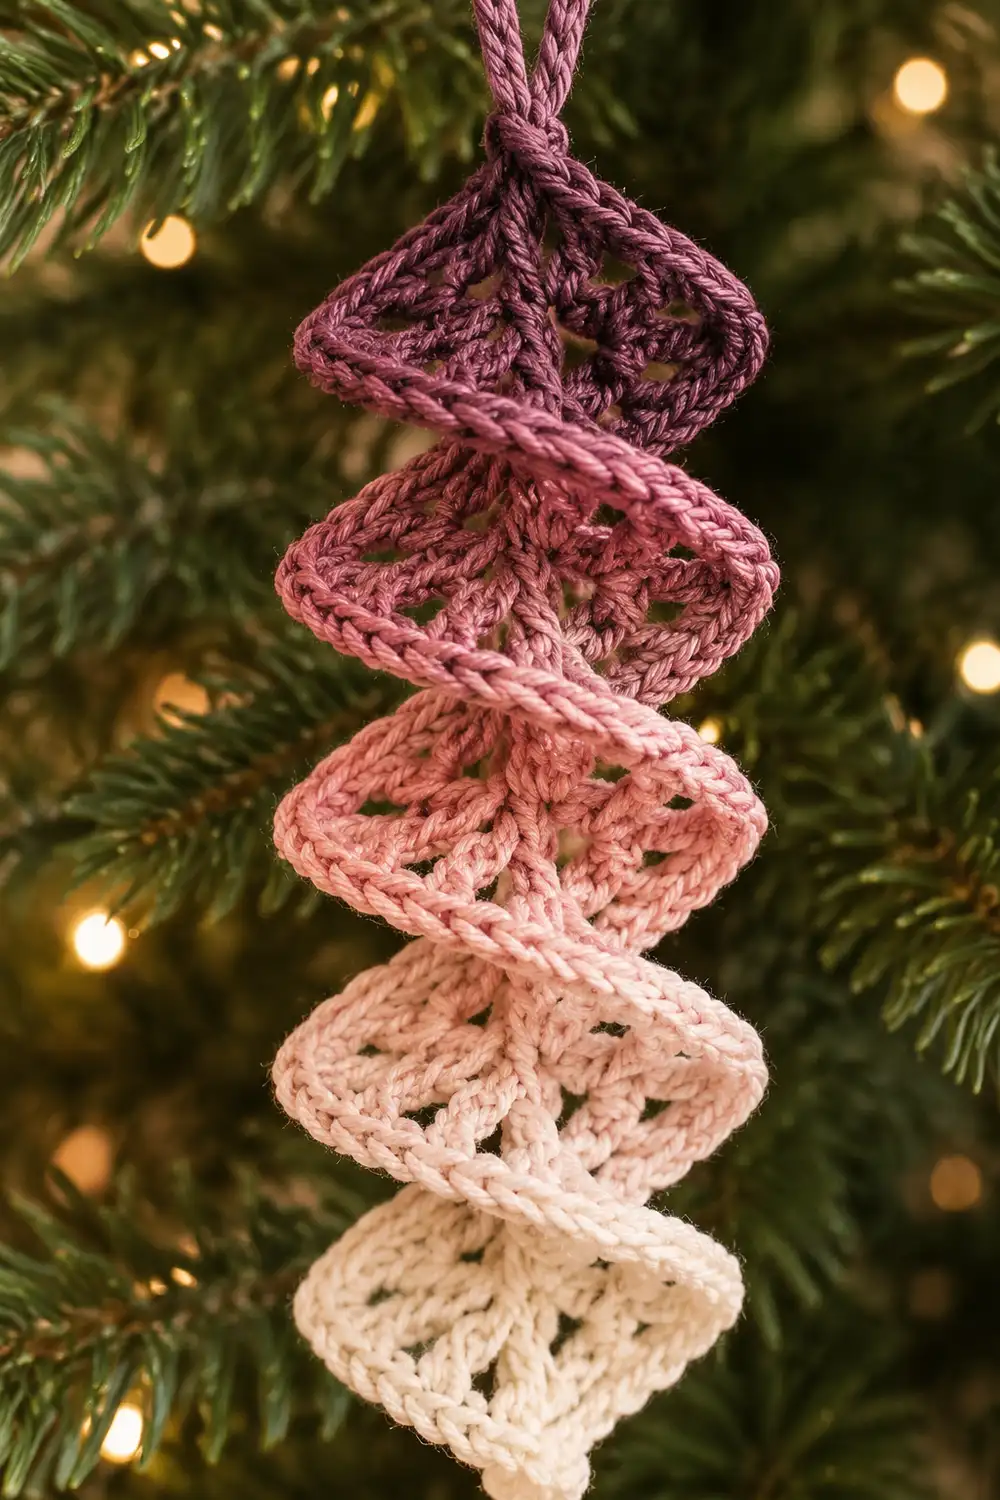
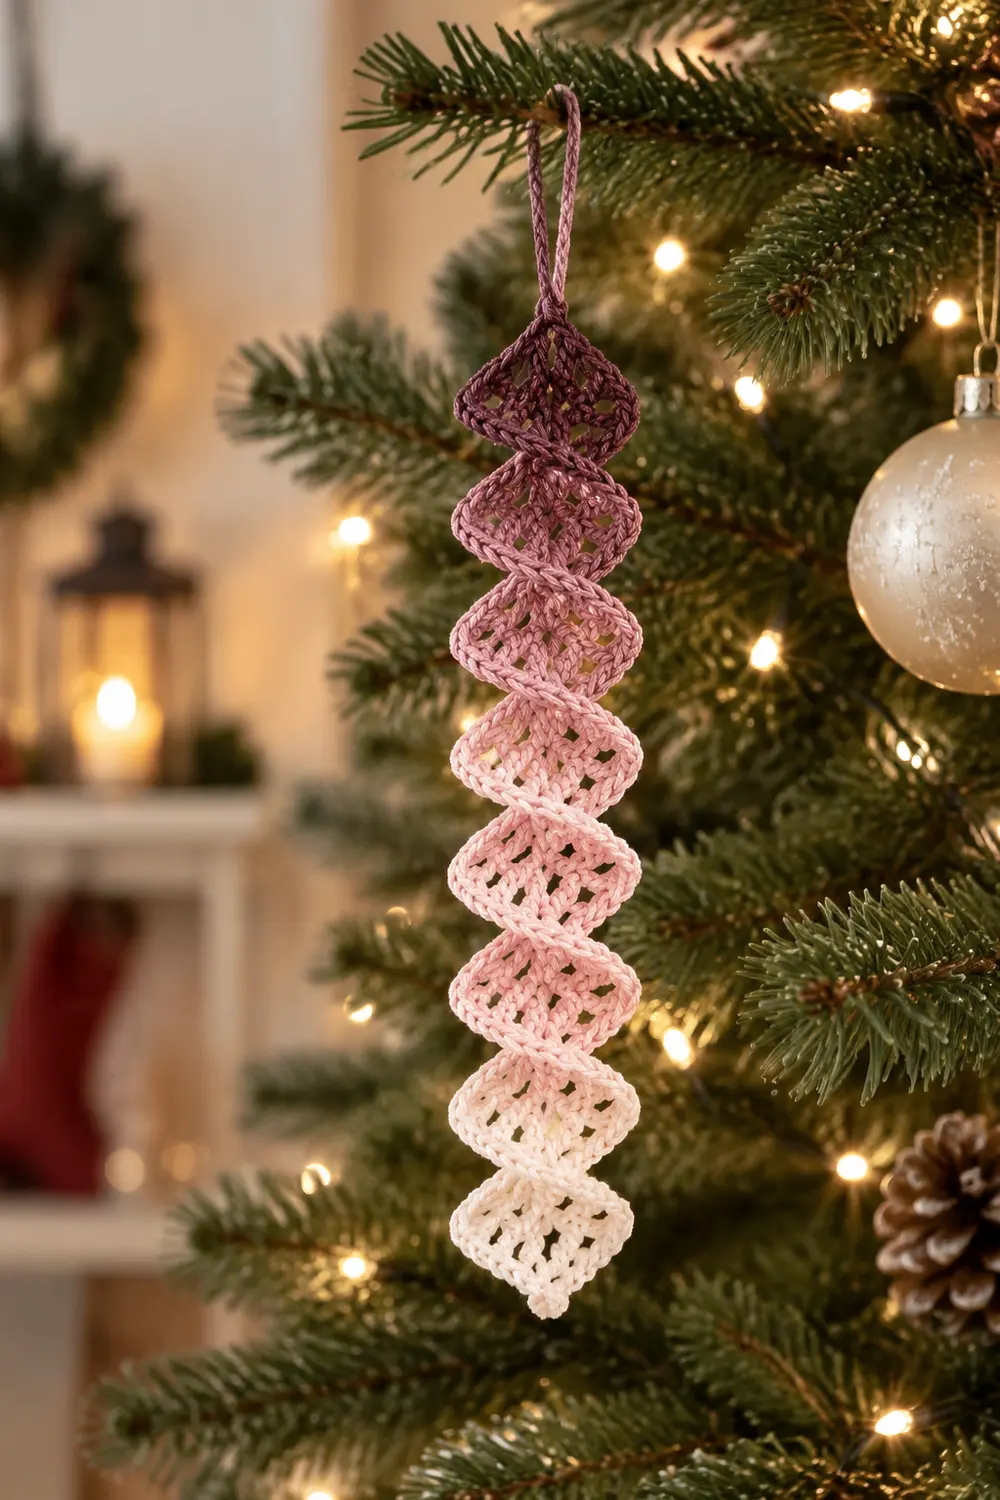
The Plum Frost Cascade is a slim hanging ornament made from five tiny lacy granny squares stacked in a single vertical column. The squares shift in color from deep purple at the top through mauve, dusty rose, and pale pink to cream at the bottom. The finished piece looks soft and airy, and it reads clearly against dark evergreen branches.
Each square is a two-round granny motif with open chain spaces, followed by a smooth single crochet trim round. The squares are stitched together edge to edge and finished with one round of sc border. A slip-stitch hanging loop sits at the top center. When the ornament turns on its loop, each square catches the light like a small diamond tier.
This pattern uses US crochet terms. The finished ornament body measures about 4.7 in (11.9 cm) long and 1.1 in (2.8 cm) wide, not including the hanging loop.
Construction overview: make five squares, one in each gradient color. Whipstitch them into a column, work one border round in matching colors, add the loop, and block flat.
Finished Size and Construction
- Finished size: 4.7 in x 1.1 in (11.9 cm x 2.8 cm), plus a loop about 1.3 in (3.3 cm) tall
- Skill level: Advanced beginner
- Terminology: US crochet terms
- Yarn weight: Size 3 crochet thread (Lace / Weight 0 cotton)
- Hook: 1.75 mm steel hook, or the size needed to meet gauge
- Number of pieces: 5 granny squares
- Layout: 1 square wide x 5 squares tall
- Piece size: 0.9 in x 0.9 in (2.3 cm x 2.3 cm) per square
- Size before border: 0.9 in x 4.5 in (2.3 cm x 11.4 cm)
- Border depth: about 0.1 in (0.3 cm) on each edge
Materials
Yarn: Use size 3 mercerized cotton crochet thread. Mercerized cotton holds crisp lace openings and blocks well. Avoid fuzzy or very stretchy fibers, because they blur the open spaces and make the column sag. Pick five shades that step evenly from dark to light. Lay them side by side in daylight before you start.
- Deep purple: 3 g (about 5 m). This includes the hanging loop.
- Mauve: 2 g (about 3 m)
- Dusty rose: 2 g (about 3 m)
- Pale pink: 2 g (about 3 m)
- Cream: 2 g (about 3 m)
Tools:
- 1.75 mm steel crochet hook
- Fine tapestry needle with an eye small enough for thread
- Small sharp scissors
- Rust-proof pins and a foam blocking board
- Ruler marked in inches and cm
- Spray bottle with water
- Optional: light spray starch
All quantities include a small margin for gauge swatching and weaving in ends.
Abbreviations (US Terms)
- ch – chain
- sl st – slip stitch
- sc – single crochet
- dc – double crochet
- sp – space
- st(s) – stitch(es)
- rnd – round
- rep – repeat
- RS – right side
- BLO – back loop only
Special technique – magic ring: Wrap the thread around two fingers to form a loop. Insert the hook, pull up a loop, and chain to secure. Work the first round into the ring, then pull the tail to close the center tightly.
Special stitch note – ch-3 start: At the start of Rnds 1 and 2, ch 3 counts as the first dc of the round.
Gauge and Checkpoints
Gauge: 12 sc = 1 in (2.5 cm) in size 3 thread with a 1.75 mm hook.
Make one complete square before you make the rest. It is your real gauge swatch. Measure after each round:
- After Rnd 1: about 0.45 in (1.1 cm) across
- After Rnd 2: about 0.75 in (1.9 cm) across
- After Rnd 3: 0.9 in (2.3 cm) across, with 11 sts per side
If the square is too big: Change to a 1.5 mm hook, or tighten your chain spaces.
If the square is too small: Change to a 2.0 mm hook. Make sure your dc stitches are pulled up to full height.
A difference of 0.1 in (0.3 cm) per square adds 0.5 in (1.3 cm) to the column length. Matching gauge matters even on a small piece.
Granny Square Motif (Make 5)
Work each square entirely in one color. Leave an 8 in (20.3 cm) tail at the end of every square except Square 1 (deep purple). You will use these tails for joining.
Rnd 1 (RS): Make a magic ring. Ch 3 (counts as dc), 2 dc in ring, ch 2. *3 dc in ring, ch 2; rep from * 2 more times. Sl st to top of beginning ch-3. Pull the ring closed.
Count: 12 dc in four 3-dc groups, and 4 ch-2 corner sps.
Transition: Sl st in the next 2 dc, then sl st into the ch-2 sp.
Rnd 2: Ch 3 (counts as dc). In the same ch-2 sp work (2 dc, ch 2, 3 dc). Ch 1. *(3 dc, ch 2, 3 dc) in next ch-2 sp, ch 1; rep from * 2 more times. Sl st to top of beginning ch-3.
Count: 24 dc in eight 3-dc groups, 4 ch-2 corner sps, and 4 ch-1 side sps. This is a growth round. The 24 dc is this round’s own complete total.
The ch-1 side spaces and ch-2 corners create the airy openwork texture.
Rnd 3 (trim): Ch 1. Sc in the same st as the join and in the next 2 dc. 3 sc in the ch-2 sp. Sc in the next 3 dc. Sc in the ch-1 sp. *Sc in the next 3 dc, 3 sc in the next ch-2 sp, sc in the next 3 dc, sc in the next ch-1 sp; rep from * 2 more times. Sl st to the first sc. Fasten off.
Count: 24 sc (1 in each dc) + 4 sc (1 in each ch-1 sp) + 12 sc (3 in each corner sp) = 40 sc.
This is a conversion round, not a growth round. It turns the lacy edge into a smooth sc edge.
Per-side count: Each side has 11 sts. That is 1 corner center sc, 9 sts between corners, and 1 corner center sc. The 9 middle sts are 1 corner-flank sc, 3 sc, 1 sc in the ch-1 sp, 3 sc, and 1 corner-flank sc. Each corner center is shared by two sides: 4 sides x 11 = 44, minus 4 shared corners = 40 ✓.
Make All Pieces
Make 1 square in each color:
- Deep purple: 1
- Mauve: 1
- Dusty rose: 1
- Pale pink: 1
- Cream: 1
Layout grid (top to bottom):
ROW 1: DEEP PURPLE
ROW 2: MAUVE
ROW 3: DUSTY ROSE
ROW 4: PALE PINK
ROW 5: CREAM
Before joining, lightly steam or mist each square. Pin it to 0.9 in x 0.9 in (2.3 cm x 2.3 cm) and let it dry. Squares of the same size join much more neatly.
Joining
Method: Whipstitch through the back loops only, using the tail of the lower square. This joins the squares flat and adds no height, so the column stays 5 x 0.9 in = 4.5 in (11.4 cm) long.
- Place Square 1 (deep purple) above Square 2 (mauve), both RS up. The bottom edge of Square 1 should touch the top edge of Square 2.
- Thread the mauve tail onto the needle.
- Match the stitches one to one. Corner center meets corner center, and each of the 9 middle sts meets its partner. That makes 11 stitch pairs.
- Whipstitch through the BLO of each pair, working from one corner to the other.
- Repeat to join Square 3 below Square 2, Square 4 below Square 3, and Square 5 below Square 4. Always use the tail of the lower square.
Tension: Pull each stitch just snug enough to close the gap. If you pull too hard, the seam puckers and the column narrows. If you pull too loosely, the squares hinge and the ornament flops. After each seam, the joined edge should lie as flat as the squares on either side.
Checkpoint: The joined column should measure 0.9 in x 4.5 in (2.3 cm x 11.4 cm). Each long side now holds 5 x 11 = 55 sts, and each short side holds 11 sts.
Border
Border gauge: The border uses the same gauge as the squares, 12 sc per in. A long side of 55 sts over 4.5 in and a short side of 11 sts over 0.9 in both match that gauge. Working 1 sc per existing st keeps the edges flat.
Change colors so each segment of the border matches the square beneath it. Change color in the last yarn-over of the final sc of a segment. Cut the old color, leaving a 6 in (15.2 cm) tail.
Starting counts:
- Long sides: 55 sts each (5 squares x 11 sts, outer corners included)
- Short sides: 11 sts each (outer corners included)
- Total distinct sts: 55 + 55 + 11 + 11 − 4 shared corners = 128
At each seam on a long side, there are two corner sts side by side. One is the bottom corner of the upper square and one is the top corner of the lower square. Both are already counted in each square’s 11 sts. Work 1 sc into each one, and do not add anything extra.
Border Rnd (RS):
- With deep purple, join with sc in the top-right outer corner st. Work 2 more sc in the same st (3 sc in corner).
- Right side, going down:
- Deep purple: sc in the next 10 sts of Square 1 (9 middle sts + bottom corner). Change to mauve.
- Mauve: sc in all 11 sts of Square 2. Change to dusty rose.
- Dusty rose: sc in all 11 sts of Square 3. Change to pale pink.
- Pale pink: sc in all 11 sts of Square 4. Change to cream.
- Cream: sc in the top corner st and the next 9 sts of Square 5.
- Cream: 3 sc in the bottom-right outer corner. Sc in the next 9 sts of the bottom edge. 3 sc in the bottom-left outer corner.
- Left side, going up:
- Cream: sc in the next 10 sts of Square 5 (9 middle sts + top corner). Change to pale pink.
- Pale pink: sc in all 11 sts of Square 4. Change to dusty rose.
- Dusty rose: sc in all 11 sts of Square 3. Change to mauve.
- Mauve: sc in all 11 sts of Square 2. Change to deep purple.
- Deep purple: sc in the bottom corner st and the next 9 sts of Square 1.
- Deep purple: 3 sc in the top-left outer corner. Sc in the next 9 sts of the top edge. Sl st to the first sc. Fasten off.
Count: 124 sc (1 in each non-corner st) + 12 sc (3 in each of 4 outer corners) = 136 sc.
Per side after border:
- Long sides: 55 + 2 corner-flank sc = 57 sc each, corner centers included
- Short sides: 11 + 2 = 13 sc each
Check: 57 + 57 + 13 + 13 − 4 = 136 ✓.
Why the math works: Every side st gets exactly 1 sc, so the edges neither ruffle nor pull in. The 3-sc corners add the extra stitches needed to turn each 90° corner cleanly. The finished size becomes 1.1 in x 4.7 in (2.8 cm x 11.9 cm), which adds 0.1 in (0.3 cm) on each edge.
Hanging Loop
The top edge has 13 sc. The 7th sc sits directly above the center of Square 1.
- With deep purple, join with sl st in the 7th sc of the top edge.
- Ch 40. Sl st in the same sc to form a loop.
- Sl st in each ch around the loop (40 sl st).
- Sl st in the base st. Fasten off.
The loop hangs about 1.3 in (3.3 cm) tall. Weave each tail into the square of matching color, working through the back of the stitches only.
Final Blocking
- Mist the ornament evenly until it is damp but not dripping.
- Lay it RS up on the blocking board.
- Pin the four outer corners to 1.1 in x 4.7 in (2.8 cm x 11.9 cm).
- Pin each seam on both long sides so the edges run straight.
- Use a pin to gently open the ch-1 and ch-2 spaces in each square so the lace shows clearly.
- Optional: lightly spray with starch for a crisper hang.
- Let it dry completely, at least 4 hours, before unpinning.
- Shape the loop so it stands upright, and let it finish drying.
Final Quality-Control Checklist
- [ ] All five squares follow the color order: deep purple, mauve, dusty rose, pale pink, cream
- [ ] Each square measures 0.9 in (2.3 cm) and has 40 sc in Rnd 3
- [ ] Each seam joins 11 stitch pairs, corner to corner
- [ ] The joined column measured 0.9 in x 4.5 in (2.3 cm x 11.4 cm) before the border
- [ ] Border total is 136 sc: 57 on each long side and 13 on each short side
- [ ] Border colors match the square beneath each segment
- [ ] Finished size is 1.1 in x 4.7 in (2.8 cm x 11.9 cm)
- [ ] The loop is centered and firmly anchored
- [ ] All ends are woven in invisibly
- [ ] The lace spaces are open and even
Troubleshooting
The magic ring opens up. Weave the tail back through the ring once before trimming it.
A square cups. Your chain spaces are too tight. Loosen the ch-2 corners, or go up a hook size.
A square ruffles. Your dc stitches are too loose or tall. Go down a hook size.
The column curves to one side. One square is larger than the others. Re-block it to 0.9 in (2.3 cm), or remake it.
Gaps appear at the seams. Whipstitch tension is too loose. Redo the seam with snugger stitches.
The border ruffles. You worked extra sts at a seam. Recount to 57 sts per long side.
The loop stretches over time. Work the sl sts back along the chain more firmly, or starch the loop.
Care
Hand wash in cool water with mild soap, press out the water in a towel, and dry flat. Store flat in tissue paper to protect the lace and the loop.
Optional: hang several ornaments together for a cascading cluster. Each one is still made exactly as written.
Final Notes
The measurement chain keeps this small ornament accurate. Gauge is 12 sc = 1 in (2.5 cm). Each square measures 0.9 in (2.3 cm) with 11 sts per side. Five joined squares make a column of 0.9 in x 4.5 in (2.3 cm x 11.4 cm), with 55 sts on each long side. One border round brings it to 1.1 in x 4.7 in (2.8 cm x 11.9 cm), with 57 sts on each long side. Check each stage, and the gradient column will hang straight and light on your tree.
Happy crocheting!