

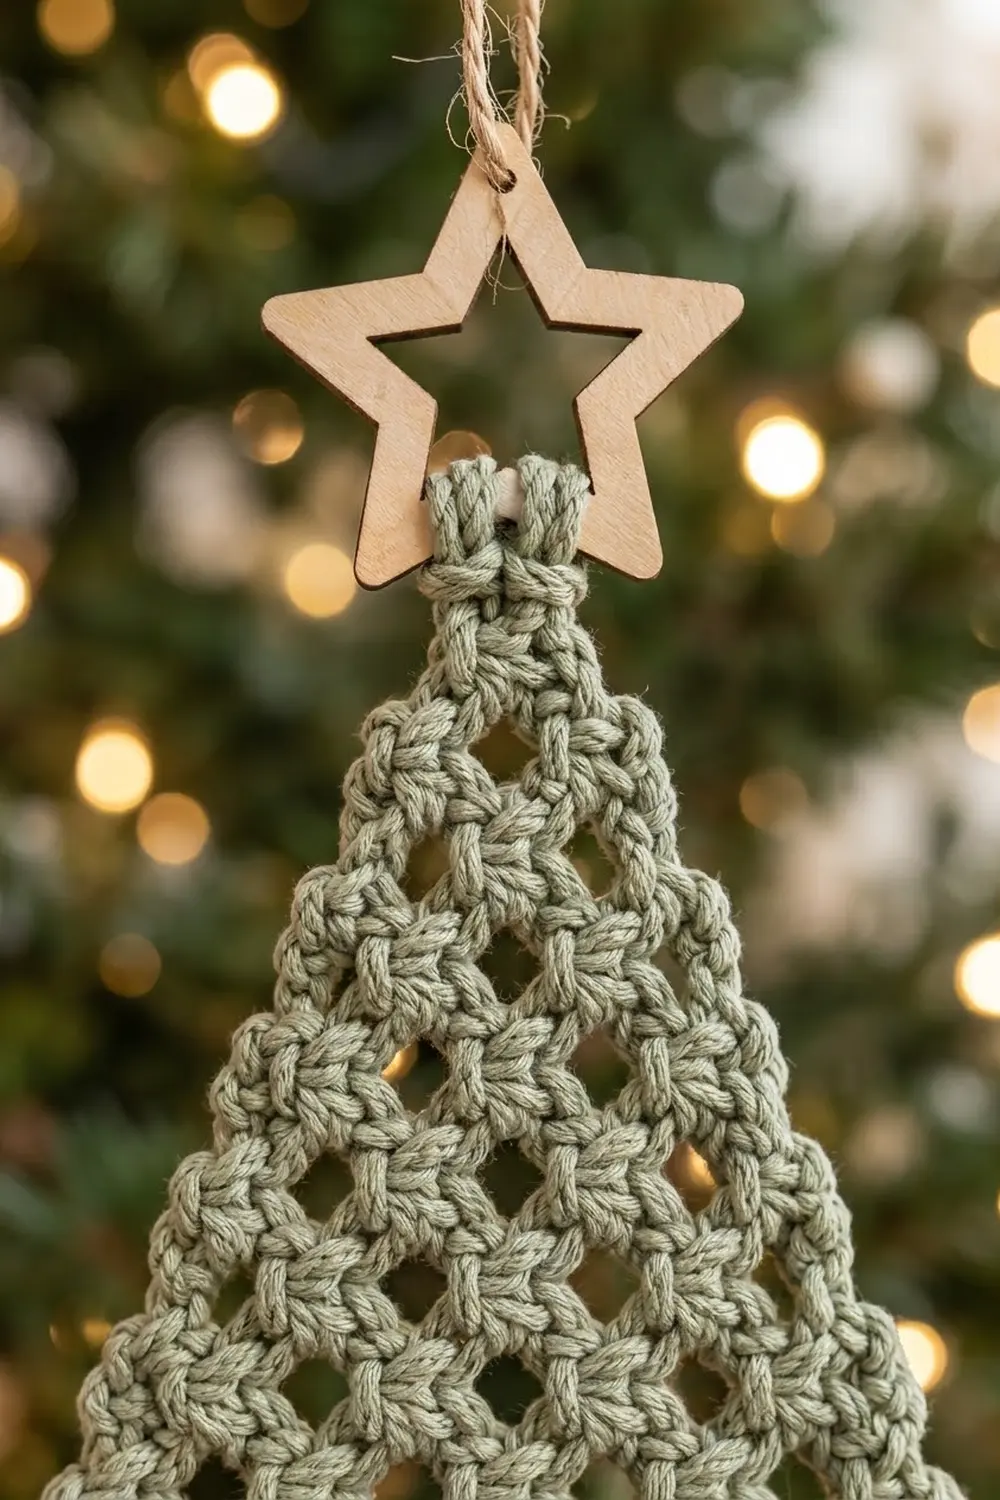
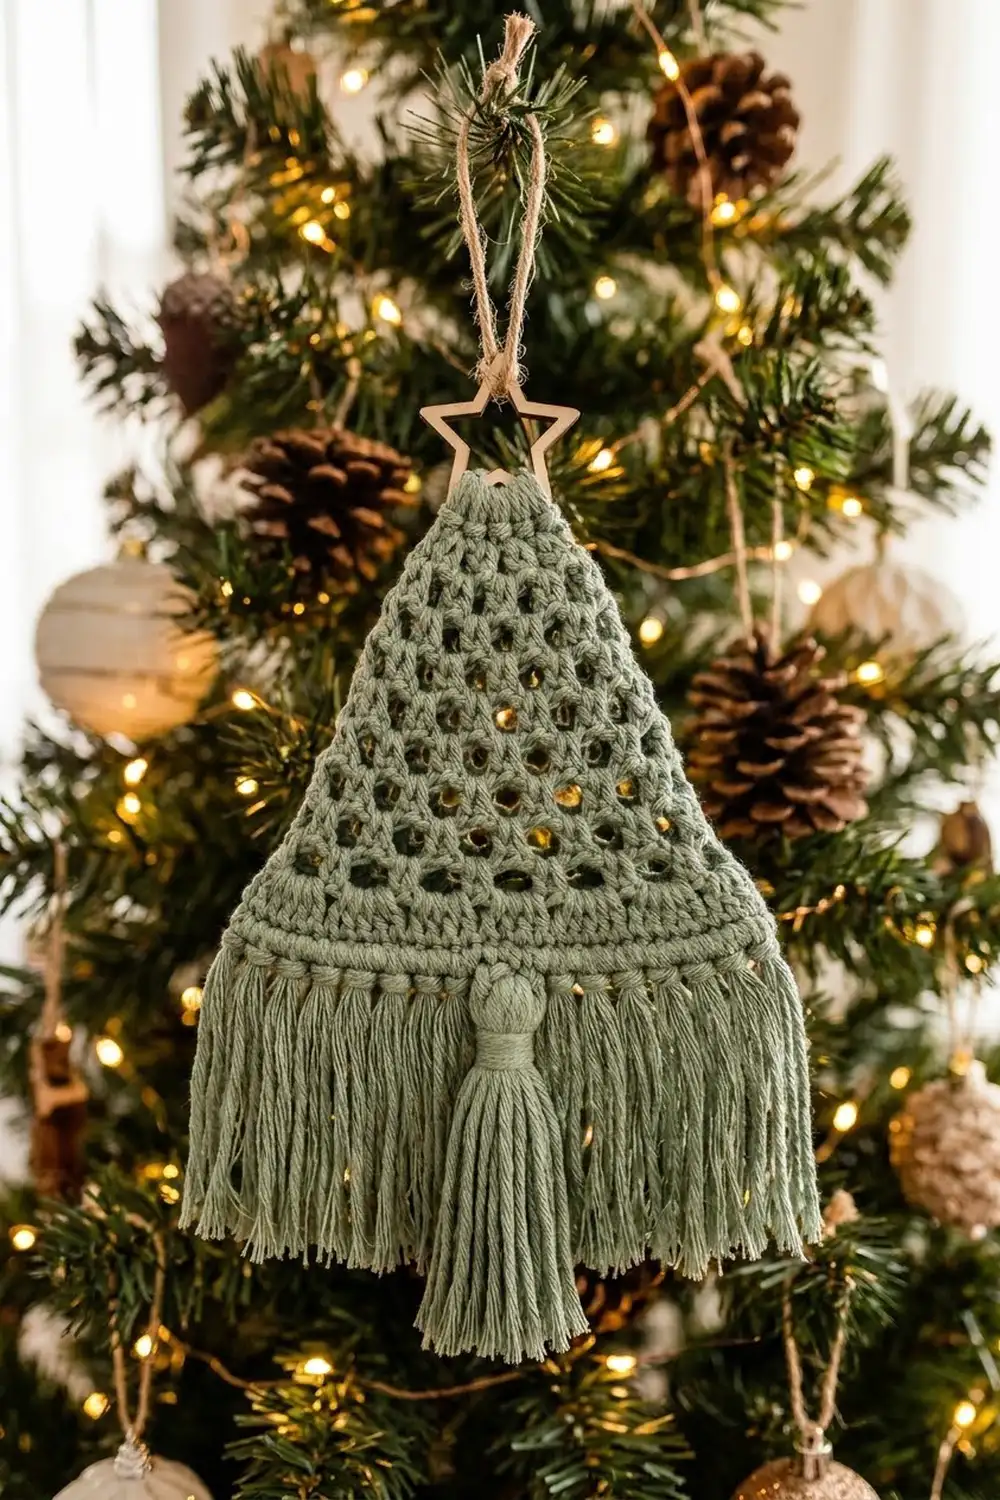
This little tree is a single triangle of openwork lattice with a soft fringe skirt and a chunky trunk tassel. It hangs from jute twine threaded through a small wooden star, so it looks a lot like a macramé ornament, but the whole tree body is crocheted.
The sample uses one color, a muted sage green cotton. Matte cotton shows off the cluster texture, and the pale wood star and natural jute give the ornament a calm, Scandinavian, rustic look.
This pattern uses US crochet terms. The finished tree body is 5 in (12.7 cm) wide at the base and 5.5 in (14.0 cm) tall. The trunk tassel adds 3.5 in (8.9 cm), so the ornament hangs 9 in (22.9 cm) long, not counting the hanging loop.
Construction is simple. You work a solid single crochet band from the bottom up. Then you work a lattice of clusters and chain spaces that loses one cluster per row until a single cluster forms the tip. A single crochet edging goes up one side, makes the hanging loop at the top, and comes down the other side. The fringe and trunk tassel are knotted into the foundation edge last.
Finished Size and Construction
- Finished size: 5 in (12.7 cm) wide x 5.5 in (14.0 cm) tall tree body; 9 in (22.9 cm) long including the trunk tassel
- Skill level: Easy / advanced beginner
- Terminology: US crochet terms
- Yarn weight: Worsted (#4) cotton
- Hook: 4.5 mm (US 7)
- Number of pieces: 1 crocheted tree body, plus knotted fringe and 1 trunk tassel
- Layout: Single triangle, point up; no joining
- Piece size before edging: 5 in (12.7 cm) wide x 5.5 in (14.0 cm) tall
- Edging depth: About 0.25 in (0.6 cm) along each slanted side
- Fringe length: 2 in (5.1 cm) after trimming
Materials
Yarn. Choose a smooth worsted weight cotton or cotton blend with a matte finish. Cotton keeps the clusters crisp and brushes out into soft, even fringe. Acrylic works too, but its fringe looks fluffier and less sharp. A yarn with about 85 to 100 yd (78 to 91 m) per 50 g matches the sample.
- Sage green: 25 g, about 45 m (49 yd)
That total covers the tree body (about 12 g), the fringe (about 4 g), and the trunk tassel and ties (about 3 g). It includes a margin of roughly 25 percent, so you won’t run short if your tension is looser or you want slightly fuller fringe.
Tools and notions
- 4.5 mm (US 7) crochet hook
- Wooden star cut-out, about 2 in (5.1 cm) across, with an open center
- Natural jute twine, 12 in (30.5 cm)
- Sharp scissors
- Tapestry needle
- Stiff card 3.5 in (8.9 cm) tall, for the tassel
- Fine-tooth comb or pet brush, for the fringe
- Ruler or tape measure
- Spray bottle and blocking mat with pins
Abbreviations (US Terms)
- ch – chain
- sl st – slip stitch
- sc – single crochet
- dc – double crochet
- sk – skip
- sp(s) – space(s)
- st(s) – stitch(es)
- yo – yarn over
- RS / WS – right side / wrong side
Special stitch – Cluster (cl): *Yo, insert hook in the indicated stitch or space, yo and pull up a loop, yo and pull through 2 loops; repeat from * 2 more times in the same stitch or space (4 loops on hook), yo and pull through all 4 loops. This is a 3-dc cluster worked in one place. It makes the plump, knot-like “bead” of the lattice.
Gauge and Checkpoints
Single crochet gauge: 20 sc and 16 rows = 4 in (10.2 cm). That is 5 sc and 4 rows per 1 in (2.5 cm).
Lattice gauge: One cluster repeat (cl plus ch 2) spans 3 sts, or 0.6 in (1.5 cm). Each lattice row is 0.5 in (1.3 cm) tall.
This is a single small piece, so the ornament itself is your gauge test. Work the band first and measure it before you go on.
Checkpoints
- After Row 4 (band): 5 in (12.7 cm) wide, 1 in (2.5 cm) tall
- After Row 9 (5 clusters): top row 2.6 in (6.6 cm) wide; total height 3.5 in (8.9 cm)
- After Row 13 (1 cluster): total height 5.5 in (14.0 cm)
If your band is too wide (over 5.25 in / 13.3 cm), go down to a 4 mm (US G-6) hook. If it is too narrow (under 4.75 in / 12.1 cm), go up to a 5 mm (US H-8) hook. If the width is right but the lattice rows come out too tall, pull each cluster a little snugger as you close it. If the rows come out too short, pull the first loop of each dc up to full stitch height.
Tree Body
You work the body flat in rows from the base up. Turn at the end of every row.
Foundation: Ch 26.
Row 1 (RS): Sc in 2nd ch from hook and in each ch across, turn. (25 sc)
Rows 2–4: Ch 1 (does not count as a st), sc in each st across, turn. (25 sc per row)
The band is now 5 in (12.7 cm) wide and 1 in (2.5 cm) tall. This solid strip anchors the fringe and keeps the base of the tree straight.
Row 5 (first lattice row): Ch 3 (does not count as a st), cl in first sc, ch 2, sk 2 sc, cl in next sc; repeat from * 7 more times, turn. (9 cl, 8 ch-2 sps)*
Check: 9 cl + (8 x 2 skipped sts) = 25 sts used, so the last cluster lands in the last sc.
Row 6 (decrease row): Sl st in top of first cl and in next ch-2 sp, ch 3 (does not count as a st), cl in same sp, ch 2, cl in next ch-2 sp; repeat from * across, leaving the last cl unworked, turn. (8 cl, 7 ch-2 sps)*
Each new cluster sits over a ch-2 space, and each new ch-2 space sits over a cluster. That offset opens the diamond-shaped holes of the lattice. Leaving the outer half-repeat unworked at each edge narrows the tree by 0.3 in (0.8 cm) per side on every row.
Rows 7–13: Repeat Row 6. Each row has one cluster fewer than the row before.
- Row 7: (7 cl, 6 ch-2 sps)
- Row 8: (6 cl, 5 ch-2 sps)
- Row 9: (5 cl, 4 ch-2 sps)
- Row 10: (4 cl, 3 ch-2 sps)
- Row 11: (3 cl, 2 ch-2 sps)
- Row 12: (2 cl, 1 ch-2 sp)
- Row 13: Sl st in top of first cl and in ch-2 sp, ch 3 (does not count), cl in same sp. (1 cl)
Fasten off. The single cluster of Row 13 is the treetop.
You now have 9 lattice rows, 4.5 in (11.4 cm) tall, on top of the 1 in (2.5 cm) band, for 5.5 in (14.0 cm) in total.
Border
The border has two parts. First is a single crochet edging along the slanted sides, with the hanging loop at the top. Second is the fringe along the bottom edge.
Border gauge. Each slanted side is a series of steps. Each lattice step is 0.5 in (1.3 cm) tall and 0.3 in (0.8 cm) in, so its diagonal length is about 0.58 in (1.5 cm). Three sc over that length works out to about 5.2 sc per 1 in (2.5 cm), which matches the flat gauge of 5 sc per 1 in (2.5 cm). The band rows are straight and 0.25 in (0.6 cm) tall, so 1 sc per band row end lies flat.
Edging Row (RS): With RS facing, join yarn in the side of Row 1 at the lower right corner.
- Right side: Work 1 sc in the end of each band row (4 sc), then 3 sc in the end of each lattice row, Rows 5 to 13 (27 sc). (4 + 27 = 31 sc)
- Top: (Sc, ch 10, sc) in the top of the Row 13 cluster. (2 sc + 1 ch-10 loop)
- Left side: 3 sc in the end of each lattice row, Rows 13 down to 5 (27 sc), then 1 sc in the end of each band row (4 sc). (27 + 4 = 31 sc)
Fasten off. Edging total: 31 + 2 + 31 = 64 sc, plus the ch-10 hanging loop, which stands about 1 in (2.5 cm) tall.
This is a conversion row. Its count comes from the row ends, (4 band rows x 1 sc) + (9 lattice rows x 3 sc) per side, not from the stitches of an earlier row. The bottom edge gets no edging because it stays open for the fringe.
Hanging loop collar: Wrap a 12 in (30.5 cm) strand 6 times around the base of the ch-10 loop, just above the tip cluster. Knot it, and weave the ends down into the center of the lattice. This makes the tight, wrapped collar at the top of the tree.
Fringe. The bottom edge has 25 foundation loops, which are the unused loops of the foundation chain. Loop 13 is the center and holds the trunk tassel. Each of the other 24 loops holds one fringe knot.
- Cut 48 strands, each 5 in (12.7 cm) long.
- Hold 2 strands together and fold them in half.
- Insert the hook from back to front through foundation loop 1, catch the fold, and pull it through to make a loop. Pull all 4 ends through that loop and snug it against the band (lark’s head knot).
- Repeat in loops 2 to 12 and 14 to 25. (24 knots, 96 fringe ends)
Each knot leaves ends about 2.5 in (6.4 cm) long. You’ll trim them to 2 in (5.1 cm) after blocking.
Trunk tassel.
- Wrap yarn 20 times around the 3.5 in (8.9 cm) card.
- Slide a 10 in (25.4 cm) tie strand under the wraps at the top of the card and knot it tightly.
- Cut the wraps open along the bottom of the card. (40 tassel ends, 3.5 in / 8.9 cm long)
- Thread both tie ends onto a tapestry needle. Pass them through foundation loop 13 from front to back, then up through the tassel head. Pull the tassel tight against the band and knot the tie ends inside the tassel.
- With a 24 in (61.0 cm) strand, wrap the tassel neck firmly for 0.75 in (1.9 cm), starting right at the band edge. Tie off and bury the ends inside the tassel.
Final Blocking
- Mist the whole ornament lightly with water until it’s damp, not dripping.
- Lay it RS up on a blocking mat.
- Pin the two bottom corners 5 in (12.7 cm) apart, keeping the band straight.
- Pin the tip cluster so the body is 5.5 in (14.0 cm) tall, measured from the bottom of the band to the top of the tip cluster.
- Pin each slanted side in a straight line between the corner and the tip. Open each lattice hole gently with a fingertip.
- While the ornament is damp, comb the fringe and tassel straight down. Separate the plies if you want a softer, brushed fringe.
- Let it dry fully, at least 4 hours.
- Unpin. Lay a ruler across the fringe and trim it level at 2 in (5.1 cm) below the band. Trim the tassel level at 3.5 in (8.9 cm) below the band.
- Thread the 12 in (30.5 cm) jute twine through the hanging loop and the center of the wooden star so the star rests at the treetop. Knot the twine ends together to make the hanger.
Final Quality-Control Checklist
- Band measures 5 in (12.7 cm) wide and lies straight
- Body measures 5.5 in (14.0 cm) tall from band bottom to tip
- Rows 5 to 13 have 9, 8, 7, 6, 5, 4, 3, 2, and 1 clusters
- Every lattice hole is open and about the same size
- Each slanted side has 31 edging sc and lies flat without ruffling or pulling
- Hanging loop is centered above the tip cluster, with a wrapped collar
- 24 fringe knots, all snug and evenly spaced
- Trunk tassel is exactly centered (foundation loop 13)
- Fringe trimmed level at 2 in (5.1 cm); tassel at 3.5 in (8.9 cm)
- All ends woven in and hidden
Troubleshooting
The tree leans to one side. You probably skipped or added a cluster at one edge. Count the clusters row by row. Each row must have exactly one fewer than the row before.
The last cluster of Row 5 doesn’t land in the last sc. Recount the band. You need exactly 25 sc, and you must skip exactly 2 sc between clusters.
The slanted sides ruffle. The edging is too full. Work 2 sc instead of 3 in a few lattice row ends, and make the same change on both sides.
The slanted sides pull inward. The edging is too tight. Go up one hook size for the edging only.
The lattice holes look closed. Your ch-2 spaces are too tight. Chain a little looser, or use more pins when blocking to open the diamonds.
The fringe looks thin. Use a third strand in each knot, and allow an extra 2 g of yarn.
The tassel splays at the top. Wrap the neck tighter and closer to the band.
Care
Spot clean with cool water and mild soap, then reshape and dry flat. Store the ornament flat or hanging so the fringe stays straight.
Final Notes
The whole ornament follows one measurement chain. A 25 sc band at 5 sc per 1 in (2.5 cm) gives the 5 in (12.7 cm) base. Four band rows add 1 in (2.5 cm) of height. Nine lattice rows, going from 9 clusters down to 1, add 4.5 in (11.4 cm), for a 5.5 in (14.0 cm) tree. The edging puts 31 sc on each slanted side, matched to the diagonal length of the steps. The 25 foundation loops along the bottom edge hold 24 fringe knots and 1 centered trunk tassel. Get the band right and keep counting your clusters, and the rest takes care of itself.
Make one for the tree, or a small forest in matching sage. Each one is quick, relaxing to crochet, and done in an evening.
Happy crocheting!