

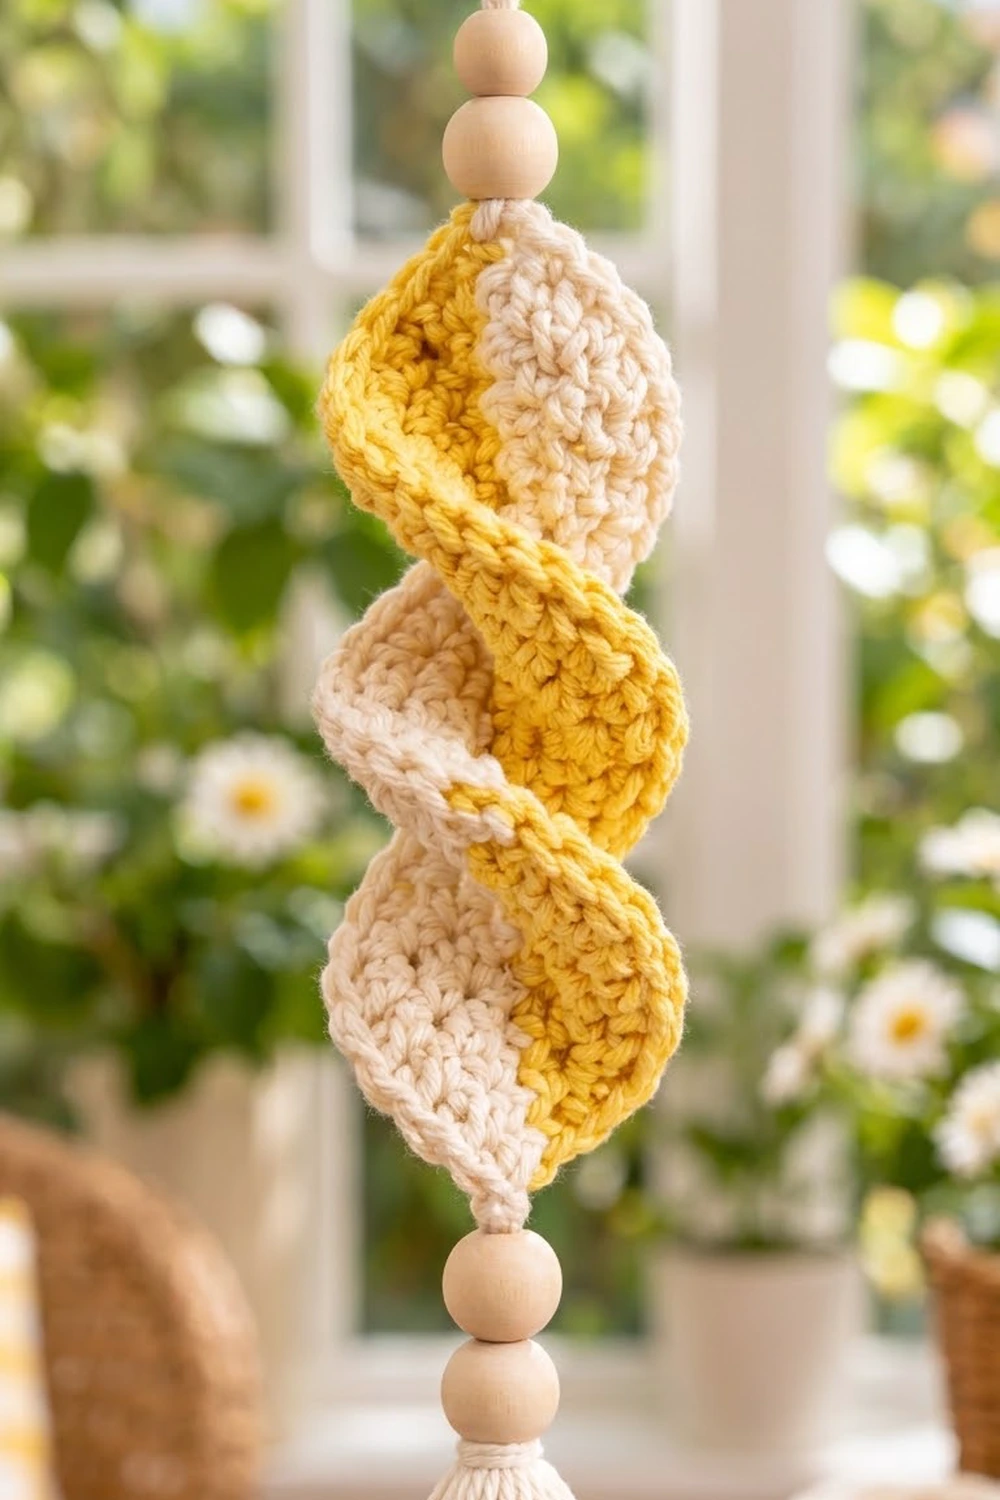
The Sunny Twist is a cheerful spiral ornament that looks like a ribbon of sunshine twisting around itself. The finished spiral has two colors side by side: a creamy inner band and a bright yellow outer band. As the strip coils, the two colors swap places all the way down.
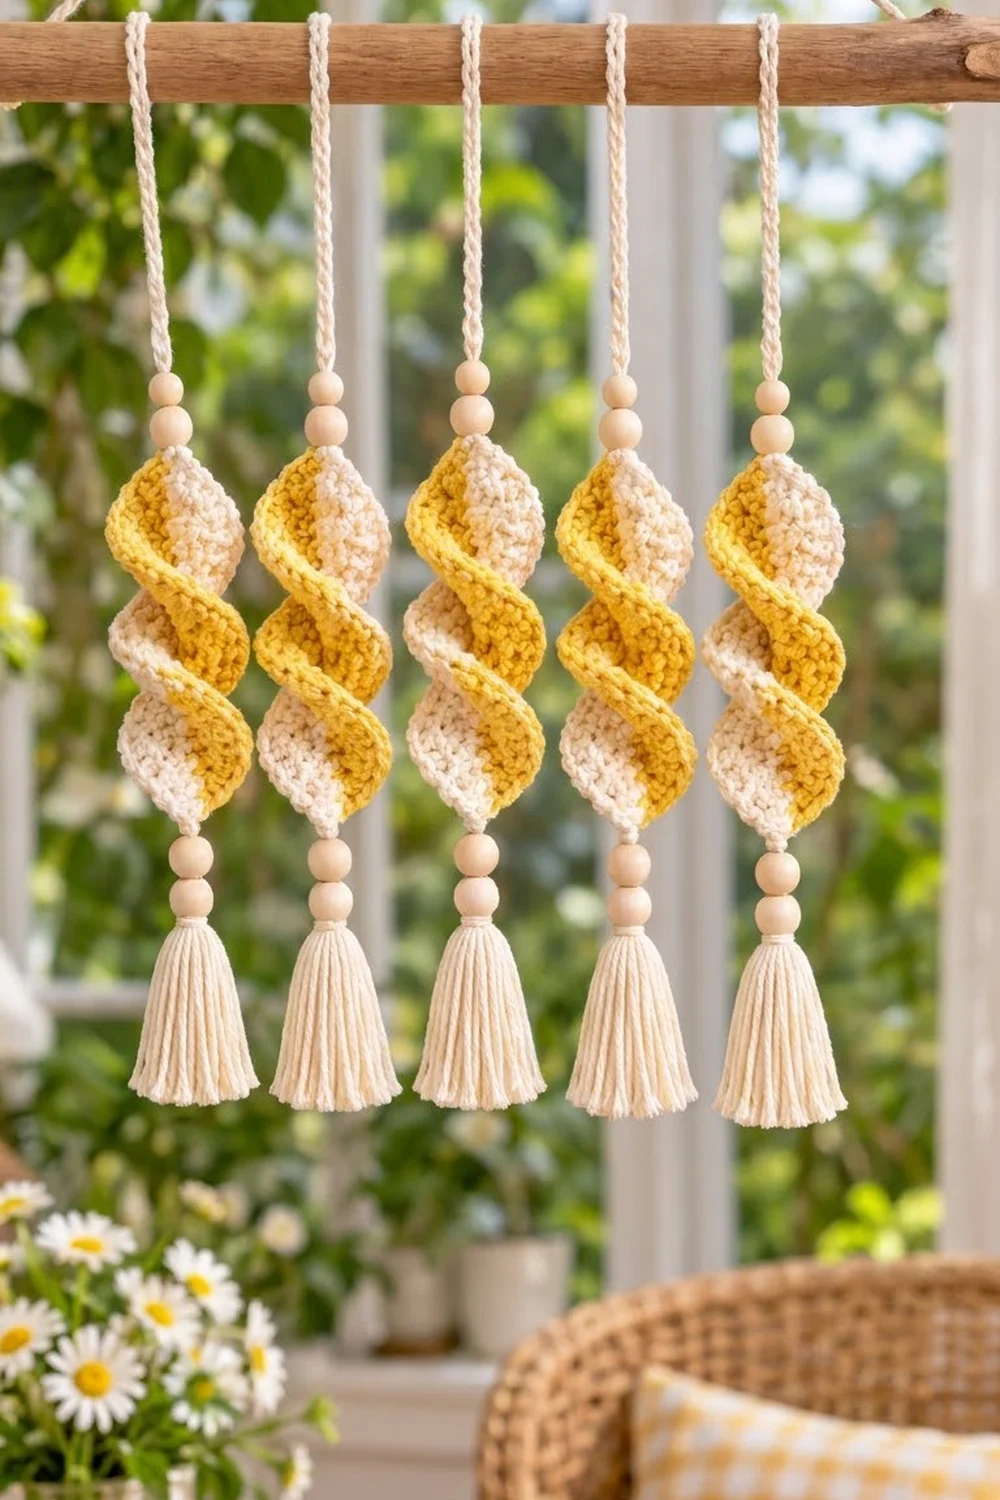
Natural wooden beads and a soft cream tassel give the ornament a calm boho feel. It looks good in a sunny window, on a plant shelf, from a doorknob, or on a dowel with a few others.
This pattern uses US crochet terms. The spiral is about 4.5 in (11.4 cm) long and 2 in (5.1 cm) across. From the top of the loop to the tip of the tassel, the ornament hangs about 13 in (33.0 cm).
Construction is simple. You crochet one flat strip in rows: three cream rows, then three yellow rows with increases, then a slip-stitch rim. The yellow edge is twice as long as the cream edge, so the strip curls into a corkscrew by itself. A slip-stitch cord runs through the center to hold the shape, and then you add the beads and the tassel.
Finished Size and Construction
- Spiral size: 4.5 in (11.4 cm) long × 2 in (5.1 cm) across
- Total hanging length: about 13 in (33.0 cm)
- Skill level: Easy
- Terminology: US crochet terms
- Yarn weight: Worsted (#4) cotton
- Hook: 4.0 mm (G-6)
- Number of pieces: 1 spiral strip (plus a crocheted cord and a wrapped tassel as finishing)
- Layout: single hanging ornament, read top to bottom: loop, 2 beads, spiral, 3 beads, tassel
- Flat strip size: 8.9 in (22.6 cm) along the cream edge × 1.2 in (3.0 cm) wide
- Size before border: 1.2 in (3.0 cm) wide, 80 stitches on the outer edge
- Border depth: about 0.1 in (0.3 cm), one slip-stitch row on the yellow edge only
Materials
Use a smooth, firm worsted-weight cotton or cotton blend. Cotton holds the spiral shape well and shows every stitch clearly. Soft acrylic will work, but the coil may relax over time.
Yarn:
– Cream: 15 g (about 25 m). Covers the strip, the cord, and the tassel.
– Yellow: 8 g (about 12 m). Covers the outer band and the rim.
These amounts include a small safety margin.
Tools and notions:
– 4.0 mm (G-6) crochet hook
– Tapestry needle
– 2 wooden beads, 16 mm (0.63 in), with holes of at least 5 mm
– 3 wooden beads, 12 mm (0.47 in), with holes of at least 5 mm
– A piece of stiff card 3 in (7.6 cm) tall, for the tassel
– Scissors
– 4 stitch markers
– Ruler or tape measure
– Optional: a small piece of tape to stiffen the cord end for threading beads
Abbreviations (US Terms)
- ch – chain
- sc – single crochet
- sl st – slip stitch
- st(s) – stitch(es)
- 2 sc in next – increase: work 2 single crochet in the same stitch
- rep – repeat
- *…* – repeat the instructions between the asterisks as directed
Special technique, slip-stitch cord: Make a foundation chain. Then work a sl st into the back bump of each chain, starting in the 2nd chain from the hook. The result is a firm, round cord that does not stretch.
Gauge and Checkpoints
Gauge: 18 sc and 20 rows = 4 in (10.2 cm) in single crochet.
Quick swatch: Ch 11. Work 10 sc per row for 10 rows. The swatch should measure 2.2 in (5.6 cm) wide and 2 in (5.1 cm) tall.
Gauge matters here because the spiral’s length and the bead spacing depend on it. Test the strip once before making a set.
Checkpoints:
– After Row 1: the strip is 8.9 in (22.6 cm) long.
– After Row 3 (cream): the strip is 0.6 in (1.5 cm) wide and still lies flat.
– After Row 4: the yellow edge starts to ripple.
– After Row 6: the strip is 1.2 in (3.0 cm) wide and twists on its own when you hold it up by one end.
– Cord: 15 in (38.1 cm) long.
If your strip is too long: go down to a 3.75 mm (F-5) hook. If it is too short: go up to a 4.5 mm (7) hook.
Keep the 40-stitch base whatever happens. The stitch ratio is what makes the twist, so change the hook, not the counts.
The Spiral Strip
Work in rows. Turn at the end of each row. The ch 1 at the start of a row does not count as a stitch.
Foundation (cream): Ch 41.
Row 1 (cream): Sc in 2nd ch from hook and in each ch across, turn. (40 sc)
Checkpoint: the strip is 8.9 in (22.6 cm) long.
Row 2 (cream): Ch 1, sc in each st across, turn. (40 sc)
Row 3 (cream): Ch 1, sc in each st across. On the last sc, pull the final loop through with yellow. Turn. (40 sc)
Cut the cream yarn, leaving a 4 in (10.2 cm) tail.
Checkpoint: the cream band is 0.6 in (1.5 cm) wide and flat.
Row 4 (yellow, growth): Ch 1, *sc in next st, 2 sc in next st*, rep 20 times, turn.
(60 sc = 40 sts worked once + 20 extra)
Row 5 (yellow): Ch 1, sc in each st across, turn. (60 sc)
Row 6 (yellow, growth): Ch 1, *sc in next 2 sts, 2 sc in next st*, rep 20 times, turn.
(80 sc = 60 sts worked once + 20 extra)
Do not fasten off. Go straight on to the border.
Checkpoint: the strip is 1.2 in (3.0 cm) wide. The cream edge still has 40 sts and the yellow edge has 80 sts. Hold the strip by one end and it should twist into a loose corkscrew.
Why it twists: The outer edge is exactly twice as long as the inner edge (80 sts against 40). The extra fabric has nowhere to go, so it rolls around the shorter cream edge. The cream edge becomes the core of the spiral and the yellow edge becomes its outer ridge.
Border: Slip-Stitch Rim
The border is one round of slip stitches along the yellow edge only. It gives the outer ridge the crisp, raised line you see on the finished ornament.
Border gauge: 1 sl st per sc, worked loosely. Use the same 4.0 mm hook. If your slip stitches pull tight, go up one hook size for this row only.
Row 7 (yellow, border): With the yellow yarn still attached, sl st loosely in each st across Row 6. (80 sl st)
Fasten off and leave a 4 in (10.2 cm) tail.
Stitch count per side:
– Outer (yellow) long edge: 80 sl st, worked 1 into each of Row 6’s 80 sts. Nothing is added.
– Inner (cream) long edge: 40 foundation sts, left plain. This edge gets attached to the cord.
– Short ends: 6 row-ends each. No border stitches here, because the ends tuck against the cord.
Why the math works: The rim is worked one stitch into each existing stitch. It adds no length, so the 2:1 ratio (80 to 40) stays exactly as built and the twist is not affected. The rim adds only about 0.1 in (0.3 cm) of depth, so the finished strip is about 1.3 in (3.3 cm) wide.
Weave in all tails along the rows of their own color so they don’t show through.
Hanging Cord
Cord (cream): Ch 75. Sl st in the back bump of the 2nd ch from the hook and in each ch across. (74 sl st)
Fasten off and leave a 10 in (25.4 cm) tail. You will use this tail to sew the hanging loop.
Checkpoint: the cord is 15 in (38.1 cm) long.
Make the hanging loop: Fold the first 6 in (15.2 cm) of the cord in half to make a 3 in (7.6 cm) loop. With the tail, stitch the cut end firmly to the cord and wrap it 5 times to make a neat collar. That leaves 9 in (22.9 cm) of single cord below the loop.
Upper beads: Thread one 12 mm bead, then one 16 mm bead, and slide them up against the collar. Together they take up 1.1 in (2.8 cm).
Attaching the Spiral to the Cord
The spiral stays on the cord because you sew its cream inner edge to the cord at evenly spaced points.
- Place stitch markers on the inner edge at sts 1, 5, 9, 13, 17, 21, 25, 29, 33, 37, and 40. That is 11 attachment points with 10 gaps: nine gaps of 4 sts and one gap of 3 sts.
- Below the upper beads, mark the cord every 0.45 in (1.1 cm). Make 11 marks over 4.5 in (11.4 cm).
- Thread a needle with 18 in (45.7 cm) of cream yarn. Sew st 1 of the inner edge to the first cord mark with 2 small stitches.
- Wrap the strip around the cord in one direction. Sew each marked stitch to the next cord mark. Run the yarn up the inside of the coil, where it won’t show.
- Fasten off and bury the tail inside the coil.
Checkpoint: the spiral is 4.5 in (11.4 cm) long and about 2 in (5.1 cm) across. The yellow and cream bands should alternate evenly all the way down.
Lower beads: Thread one 16 mm bead, then two 12 mm beads. Push them up snugly under the spiral. Together they take up 1.6 in (4.1 cm), which leaves about 1.8 in (4.6 cm) of cord.
Tassel
- Wrap cream yarn around the 3 in (7.6 cm) card 40 times.
- Slide a 10 in (25.4 cm) strand of cream under all the wraps at the top and tie it tightly. Leave both ends long.
- Cut the wraps open along the bottom edge.
- About 0.5 in (1.3 cm) below the top, wrap a separate 12 in (30.5 cm) strand 6 times around the bundle to form the head. Knot it and push the ends down into the tassel.
- Tie the long top strands tightly around the end of the cord with 3 square knots. Slide the lowest bead down over the knot if it fits, and trim the extra cord to 0.5 in (1.3 cm).
- Trim the tassel evenly to 2.75 in (7.0 cm).
Final Blocking
- Lightly spritz the spiral with water until it is damp but not wet.
- Using your fingers, pinch each yellow ridge so it stands out evenly.
- Gently pull the ornament lengthwise until the spiral measures 4.5 in (11.4 cm), then let it go.
- Hang it up to dry with the tassel’s weight pulling straight down.
- Steam the tassel lightly, then comb the strands straight with your fingers.
- Let the ornament dry completely, at least 4 hours, before you handle it.
Final Quality-Control Checklist
- [ ] Row counts: 40, 40, 40, 60, 60, 80, and 80 sl st
- [ ] Flat strip measured 8.9 in (22.6 cm) along the cream edge
- [ ] Strip width is 1.3 in (3.3 cm) including the rim
- [ ] All 11 attachment points are sewn to the cord
- [ ] Spiral is 4.5 in (11.4 cm) long and 2 in (5.1 cm) across
- [ ] Bead order: loop, 12 mm, 16 mm, spiral, 16 mm, 12 mm, 12 mm, tassel
- [ ] Tassel is 2.75 in (7.0 cm) and trimmed evenly
- [ ] Total hanging length is about 13 in (33.0 cm)
- [ ] No tails show anywhere
Troubleshooting
The strip ruffles instead of twisting. Your yellow rows are looser than your cream rows. Crochet the yellow rows with slightly tighter tension, or use a 3.75 mm (F-5) hook for Rows 4–6.
The strip barely twists. Check your counts: Row 4 should have 60 sts and Row 6 should have 80. A missed increase weakens the twist.
The spiral leans or bunches up. The attachment points are spaced unevenly on the cord. Re-measure the 0.45 in (1.1 cm) marks and sew the points again.
The beads won’t go onto the cord. Wrap the cord tip in tape, or switch to beads with 6 mm holes.
The rim looks tight and puckered. Undo it and redo it with a 4.5 mm (7) hook, keeping the same 80 sl st.
The tassel looks thin. Wrap 50 times instead of 40.
Care
Hand wash in cool water and press out the water in a towel, without wringing. Reshape the coil and hang the ornament to dry with the tassel pulling it straight.
Final Notes
Every measurement in this ornament follows from the one before it. A gauge of 18 sc per 4 in (10.2 cm) gives a 40-stitch strip that is 8.9 in (22.6 cm) long. Rows 4 and 6 double the outer edge to 80 stitches, and that 2:1 ratio makes the twist. The slip-stitch rim keeps all 80 stitches without adding length. Sewing 11 points to the cord at 0.45 in (1.1 cm) spacing sets the spiral at 4.5 in (11.4 cm). The beads, loop, and tassel then bring the full ornament to about 13 in (33.0 cm).
Make one, check it against the checkpoints, and then make a row of them for a sunny window.
Happy crocheting!