

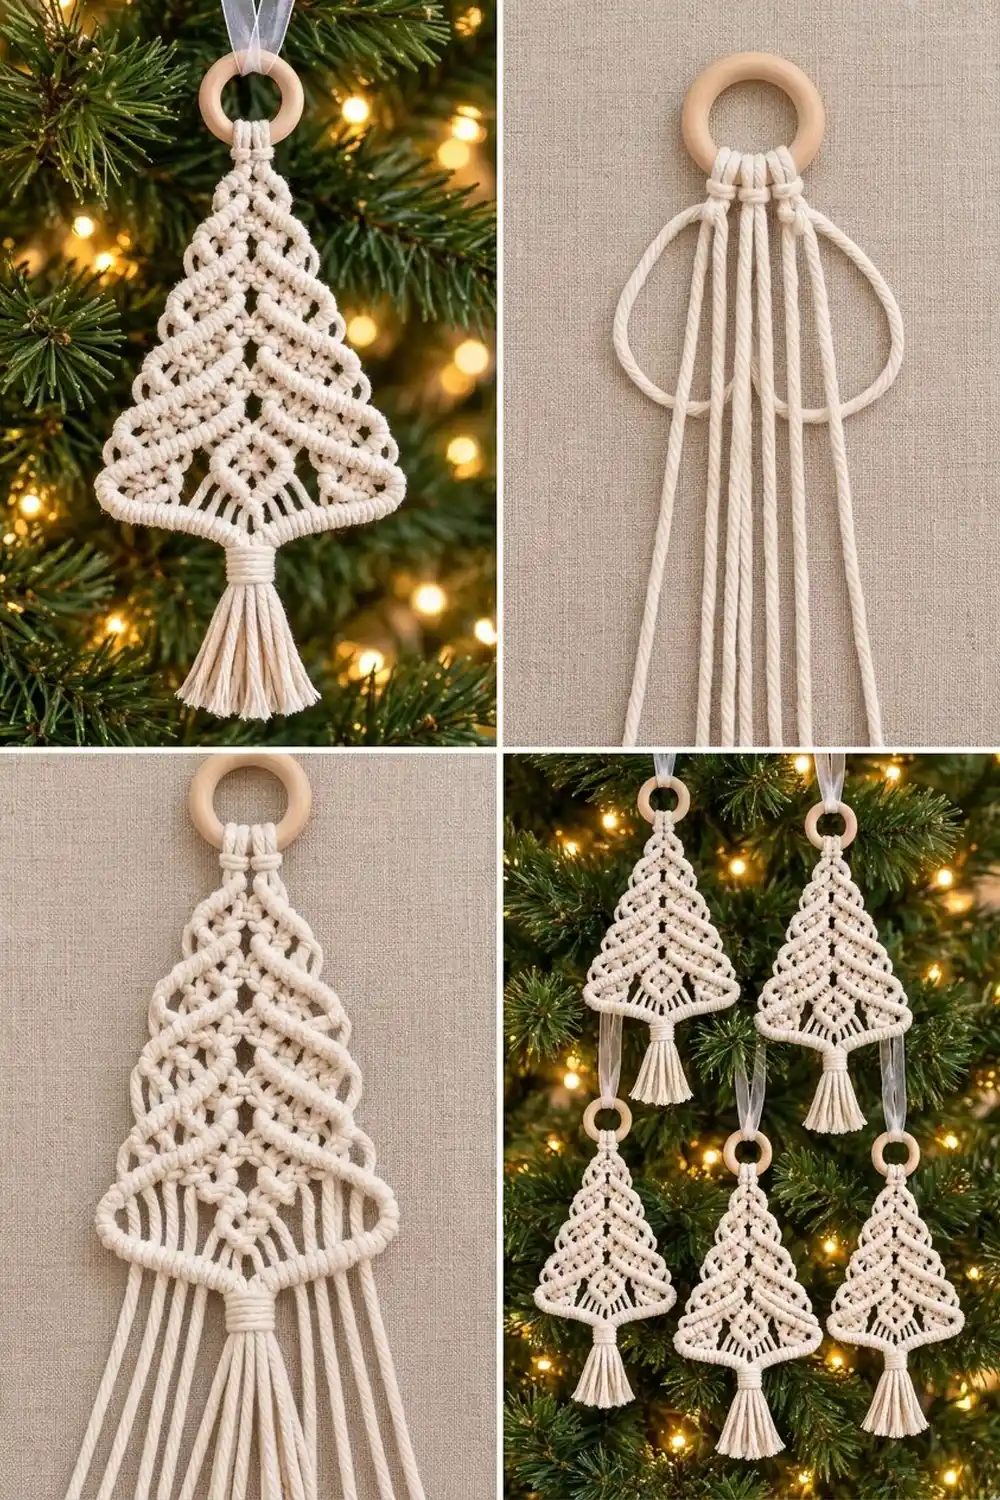
This little tree ornament has the soft, knotted look of macramé, but it is crocheted from start to finish. Raised diagonal ridges stack down the tree like layered branches. They grow out of a lacy column of open eyelet diamonds that runs down the center.
The ornament is worked in a single cream cotton yarn and hangs from a natural wooden ring. A padded, rolled bar finishes the base, and a full tassel with a wrapped neck hangs below it. It looks calm and Scandinavian, and it reads well on a busy, brightly lit tree. The pattern uses US crochet terms throughout.
The finished tree measures about 4.5 in (11.4 cm) wide at the base and 4.25 in (10.8 cm) tall from the ring to the bottom of the bar. With the ring and tassel, the ornament is about 8 in (20.3 cm) long.
Construction is simple. You work single crochet stitches around the wooden ring, then work rows from the top down, increasing at both edges so the triangle grows by itself. Front post stitches make the ridges and chain-1 eyelets make the lattice. A single crochet row worked over a filler cord makes the padded base. A reverse single crochet border adds the corded edge, and the tassel goes on last.
Finished Size and Construction
- Finished size: 4.5 in (11.4 cm) wide × 4.25 in (10.8 cm) tall, not counting the ring and tassel
- Overall hanging length: about 8 in (20.3 cm)
- Skill level: Easy-intermediate
- Terminology: US
- Yarn weight: Sport (#2) cotton
- Hook: 3.5 mm (E-4)
- Number of pieces: 1 crocheted tree, plus 1 tassel
- Layout: Single triangle, point at the top
- Piece size before border: 4.2 in (10.7 cm) wide × 4.25 in (10.8 cm) tall
- Border depth: about 1/8 in (0.3 cm) on each sloped side
Materials
Yarn: Use a smooth, tightly plied sport-weight cotton in cream or natural. Mercerized cotton gives crisp ridges. Unmercerized cotton looks closer to soft macramé cord. Avoid fuzzy or splitty yarns, because the eyelets need clean edges.
- Cream: 20 g, about 66 m (72 yd), based on a yarn with roughly 165 m per 50 g. This covers the tree, border, filler cord and tassel.
These quantities include a margin of about 25%, so you have spare yarn for a gauge test and the tassel.
Tools and notions:
- 3.5 mm (E-4) crochet hook
- 1 wooden ring, 1.5 in (3.8 cm) outer diameter
- 10 in (25.4 cm) of sheer white ribbon, 3/8 in (1.0 cm) wide
- Tapestry needle
- Sharp scissors
- 2 stitch markers
- Blocking board or foam mat, rustproof pins and a spray bottle
- A 3 in (7.6 cm) piece of card for trimming the tassel (optional)
Abbreviations (US Terms)
- ch – chain
- sc – single crochet
- dc – double crochet
- FPdc – front post double crochet
- rev sc – reverse single crochet (crab stitch)
- sl st – slip stitch
- st(s) – stitch(es)
- sk – skip
- sp – space
- tch – turning chain
- yo – yarn over
- RS / WS – right side / wrong side
Special stitches:
- Eyelet: Ch 1, then sk the next st. The ch-1 counts as 1 stitch.
- FPdc: Yo, insert the hook from front to back to front around the post of the next st, yo and pull up a loop, then (yo, pull through 2 loops) twice. Skip the top of the st behind it. It counts as 1 stitch.
- Rev sc: With RS facing, work sc from left to right into the next st or space. Left-handed crocheters work from right to left.
- Turning chain: On every dc row, ch 3 counts as the first dc.
Gauge and Checkpoints
Gauge: 20 sts and 9 rows of dc = 4 in (10.2 cm). One dc row is about 0.44 in (1.1 cm) tall.
The tree itself is a good gauge test. Work Rows 1–5 and measure before you go on.
Checkpoints:
- After Row 1: The 3 sc span about 0.6 in (1.5 cm) along the ring.
- After Row 2: The row is about 1 in (2.5 cm) wide.
- After Row 5: The row is about 2.2 in (5.6 cm) wide, and the piece is about 2 in (5.1 cm) tall from the ring.
- After Row 9: The row is about 3.8 in (9.7 cm) wide, and the piece is about 3.8 in (9.7 cm) tall.
- After Row 10: The bar is about 4.2 in (10.7 cm) wide, and the piece is about 4.25 in (10.8 cm) tall.
If your piece is too big by more than 0.25 in (0.6 cm) at Row 5, go down half a hook size. If it is too small, go up half a size. Rip back and restart rather than forcing it, because the slope of the edges depends on the ratio of row height to stitch width.
Tree Body
Place a marker on the first row you mark as RS. Keep a second marker in the center stitch of each RS row. This helps you keep the eyelet column straight.
Row 1 (WS): Make a slip knot. Insert the hook through the wooden ring, yo and pull up a loop, then ch 1. Work 3 sc around the ring and slide them to the bottom center of the ring. Turn. (3 sts)
Row 2 (RS): Ch 3, dc in the first sc, eyelet over the center sc, 2 dc in the last sc. Turn. (5 sts: 4 dc and 1 ch-1 sp)
Row 3 (WS): Ch 3, dc in the first st, dc in each st and ch-1 sp across to the tch, 2 dc in the top of the tch. Turn. (7 sts)
This is the plain WS row. Every WS row from here on is worked the same way and adds exactly 2 stitches.
Row 4 (RS): Ch 3, dc in the first st, FPdc around the next st, eyelet, dc in the next st (the center), eyelet, FPdc around the next st, 2 dc in the top of the tch. Turn. (9 sts)
Row 5 (WS): Work the plain WS row. (11 sts)
Row 6 (RS): Ch 3, dc in the first st, [FPdc around the next st, dc in the next st] twice, eyelet over the center st, [dc in the next st, FPdc around the next st] twice, 2 dc in the top of the tch. Turn. (13 sts)
Row 7 (WS): Work the plain WS row. (15 sts)
Row 8 (RS): Ch 3, dc in the first st, [FPdc around the next st, dc in the next st] twice, FPdc around the next st, eyelet, dc in the next st (the center), eyelet, FPdc around the next st, [dc in the next st, FPdc around the next st] twice, 2 dc in the top of the tch. Turn. (17 sts)
Row 9 (WS): Work the plain WS row. (19 sts)
How the texture builds:
- The lattice: The eyelets alternate between 1 eyelet at the center (Rows 2 and 6) and 2 eyelets around a solid center dc (Rows 4 and 8). This makes the open diamond lattice.
- The ridges: Each FPdc stays the same number of stitches in from the edge on every RS row, so each ridge runs parallel to the sloped side.
- Ridge 1 begins in Row 4.
- Ridge 2 begins in Row 6.
- Ridge 3 begins in Row 8.
- The look: Each new ridge starts next to the lattice, so the ridges stack as nested inverted V’s that branch out from the center.
Padded Base Bar
Cut 3 strands of yarn, each 7 in (17.8 cm) long. Hold them together as a filler cord.
Row 10 (RS): Ch 1. Lay the filler cord along the top of Row 9 so that about 1.6 in (4.1 cm) extends past each edge. Working over the cord, 2 sc in the first st, sc in the next 17 sts, 2 sc in the last st. Do not turn and do not fasten off. (19 sc worked 1 per stitch + 2 extra sc = 21 sc)
Pack the sc snugly along the cord so it is completely hidden. The 2 extra stitches make the bar flare slightly past the sides, like the rolled base in the photo.
Trim the filler cord ends to 1/4 in (0.6 cm). Tuck them into the last sc at each end with the hook tip.
Border
The border is a single pass of reverse single crochet. It runs up the left sloped side, around the ring at the top and down the right sloped side. The bar already finishes the base, so the bottom edge gets no border stitches.
Border gauge:
- 1 rev sc into each sc row end (Rows 1 and 10)
- 2 rev sc into each dc row end (Rows 2–9)
This places about 4 stitches per inch (2.5 cm) along the slope.
Border pass (RS): With RS facing, ch 1 at the end of Row 10 (the bottom-left corner). Do not turn.
- Left side: Work 1 rev sc in the end of Row 10, 2 rev sc in each dc row end from Row 9 up to Row 2, and 1 rev sc in the end of Row 1. (18 sts)
- Apex: Work 1 rev sc around the ring, directly above the center sc of Row 1. (1 st)
- Right side: Work 1 rev sc in the end of Row 1, 2 rev sc in each dc row end from Row 2 down to Row 9, and 1 rev sc in the end of Row 10. (18 sts)
- Finish: Sl st into the end of the bar and fasten off. (Total: 18 + 1 + 18 = 37 sts)
Why the math works:
- Side height: Each sloped side covers Row 1 (about 0.25 in / 0.6 cm), eight dc rows (about 3.56 in / 9.0 cm) and the bar (about 0.4 in / 1.0 cm). That is about 4.2 in (10.7 cm) of height.
- Side length: The side also moves 1.9 in (4.8 cm) sideways, so it is about 4.6 in (11.7 cm) long.
- Fit: 18 stitches over that length is about 3.9 stitches per inch. That matches relaxed crab stitch in sport cotton, so the edge lies flat without ruffling or pulling the slope inward.
- Width: The border adds about 1/8 in (0.3 cm) on each side. The 4.2 in (10.7 cm) bar becomes about 4.5 in (11.4 cm) wide at its widest point.
Tassel
- Cut 16 strands, each 6 in (15.2 cm) long. Lay them side by side, all edges even.
- Cut a 10 in (25.4 cm) tie strand. Knot it tightly around the middle of the bundle.
- Thread both tie ends onto the needle. Pass them up through the bar between the 10th and 11th sc, so the tassel hangs at the exact center.
- Knot the tie ends securely on the WS and weave them in.
- Let the strands fall down, folded at the tie, to make 32 ends.
- Cut a 24 in (61.0 cm) wrapping strand. Wrap it 8 times around the bundle about 0.4 in (1.0 cm) below the bar, making a neck about 3/8 in (1.0 cm) deep. Thread the tail into the needle, pass it under the wraps and out through the tassel, and trim it to blend in.
- Trim the tassel ends evenly to 2.25 in (5.7 cm) below the bar.
Hanging Loop
Fold the ribbon in half and pass the fold through the ring from front to back. Pull the ribbon ends through the fold (a lark’s head knot). Tie the ends in a knot about 4 in (10.2 cm) above the ring.
Final Blocking
- Weave in all remaining tails along the WS of the nearest dc row. Leave the ribbon on.
- Lay the tree RS up on the blocking board.
- Pin the apex just below the ring, then pin both base corners of the bar so the bar measures 4.5 in (11.4 cm) wide.
- Check the height: the distance from the bottom of the ring to the bottom of the bar should be 4.25 in (10.8 cm).
- Pin along each sloped side every 0.75 in (1.9 cm) so the edges are straight, not scalloped.
- Push a pin into each eyelet to open the diamonds.
- Mist the tree until it is evenly damp, but not soaked.
- Nudge the bar ends very slightly upward so they curve like a rolled base.
- Spray the tassel, comb it straight with your fingers or a fine comb, and lay it flat.
- Let everything dry completely, about 6–8 hours, before you unpin it.
- Trim any tassel strands that have relaxed longer than the rest.
Final Quality-Control Checklist
- The final row counts are 19 sts in Row 9, 21 sc in Row 10 and 37 sts in the border pass.
- The eyelet column runs in a straight vertical line from the ring to the bar.
- There are 3 ridges on each side, starting in Rows 4, 6 and 8, all parallel to the sloped edges.
- The ridges mirror each other exactly left and right.
- The filler cord is fully covered and the bar is evenly round.
- The sloped sides are straight and each measures about 4.6 in (11.7 cm).
- The tree is 4.5 in (11.4 cm) wide and 4.25 in (10.8 cm) tall.
- The tassel is centered, the neck wrap is snug, and the ends are an even 2.25 in (5.7 cm).
- All tails are invisible from the RS.
Troubleshooting
The sides curve inward. You probably missed an increase. Every dc row must begin with “dc in the first st” and end with 2 dc in the top of the tch. Count each row against the numbers given.
The lattice drifts off-center. Count the stitches on each side of the center marker. They should be equal before you work each RS row.
The ridges look flat. Pull up the FPdc loop to full dc height. Tight post stitches sink into the fabric.
The border ruffles. Go down one hook size for the border only, or work 1 rev sc into one of the eight dc row ends on each side. If you change the count, keep both sides equal.
The bar ends look lumpy. Trim the filler cord shorter and block the corners flat.
The tassel looks thin. Add 4 more strands of 6 in (15.2 cm) before you tie the bundle.
Care
Hand wash in cool water with a mild soap and press out the water in a towel. Re-block it flat, combing the tassel straight, and store it flat in tissue so the bar and ridges keep their shape.
Final Notes
Each stage of this ornament builds on the one before:
- The gauge of 20 sts and 9 rows = 4 in (10.2 cm) gives a Row 9 width of 3.8 in (9.7 cm).
- The padded bar extends the base to 4.2 in (10.7 cm).
- The 18-stitch crab stitch sides bring the finished tree to 4.5 in (11.4 cm) wide and 4.25 in (10.8 cm) tall.
- With the ring and tassel, the full ornament hangs about 8 in (20.3 cm).
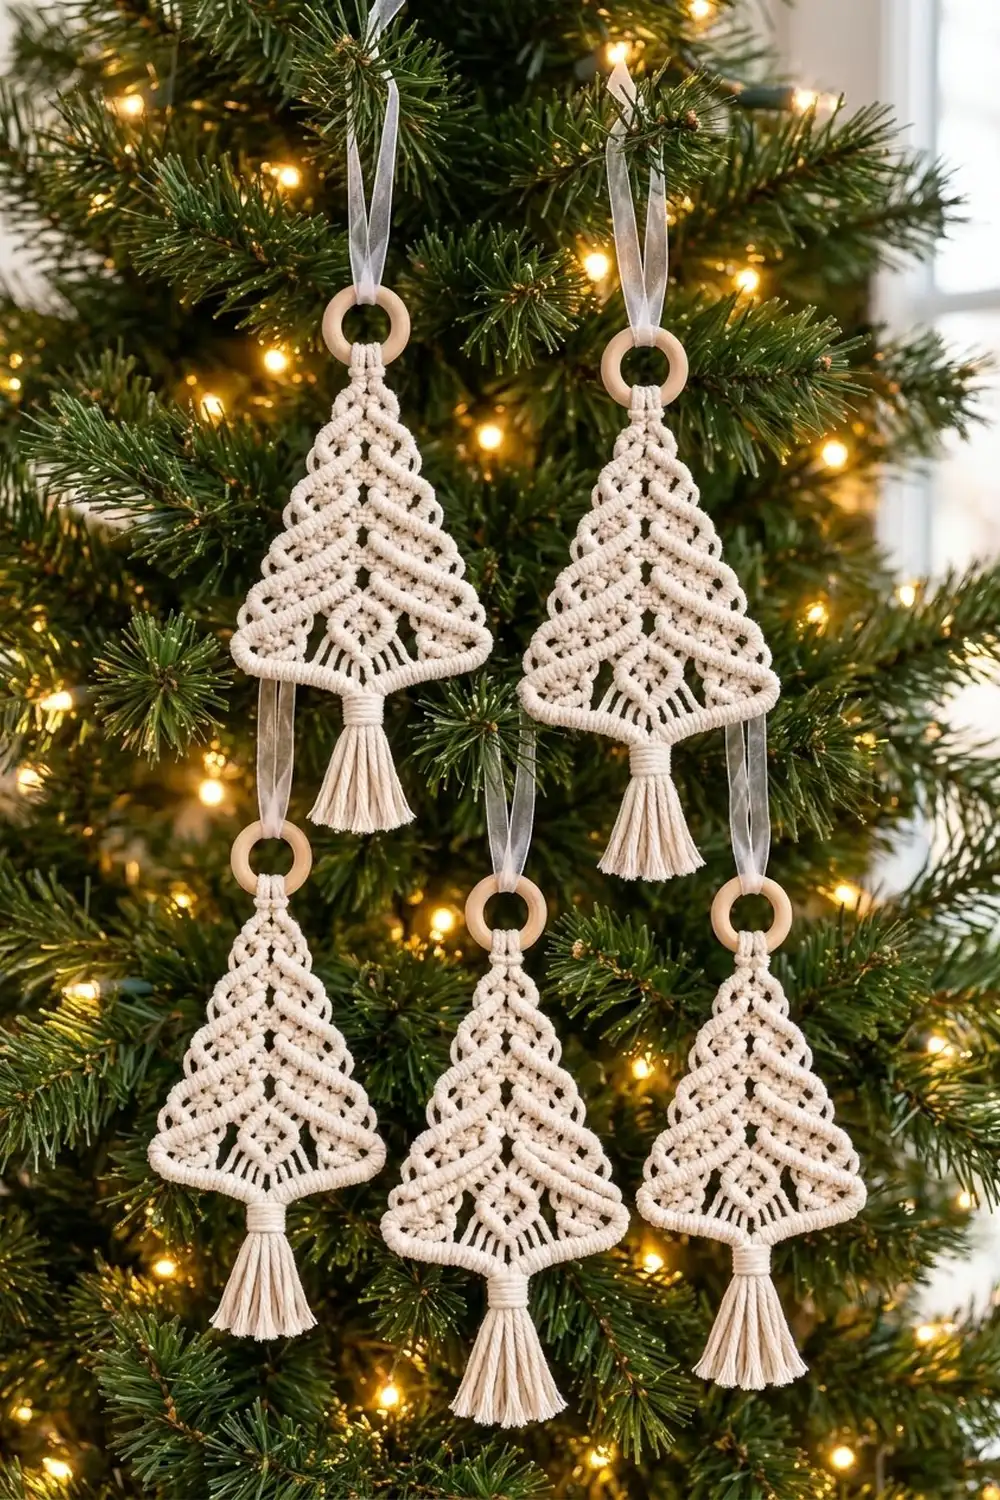
Check your measurements at Row 5 and the rest falls into place. Make one, then make a whole set to hang across your tree.
Happy crocheting!