

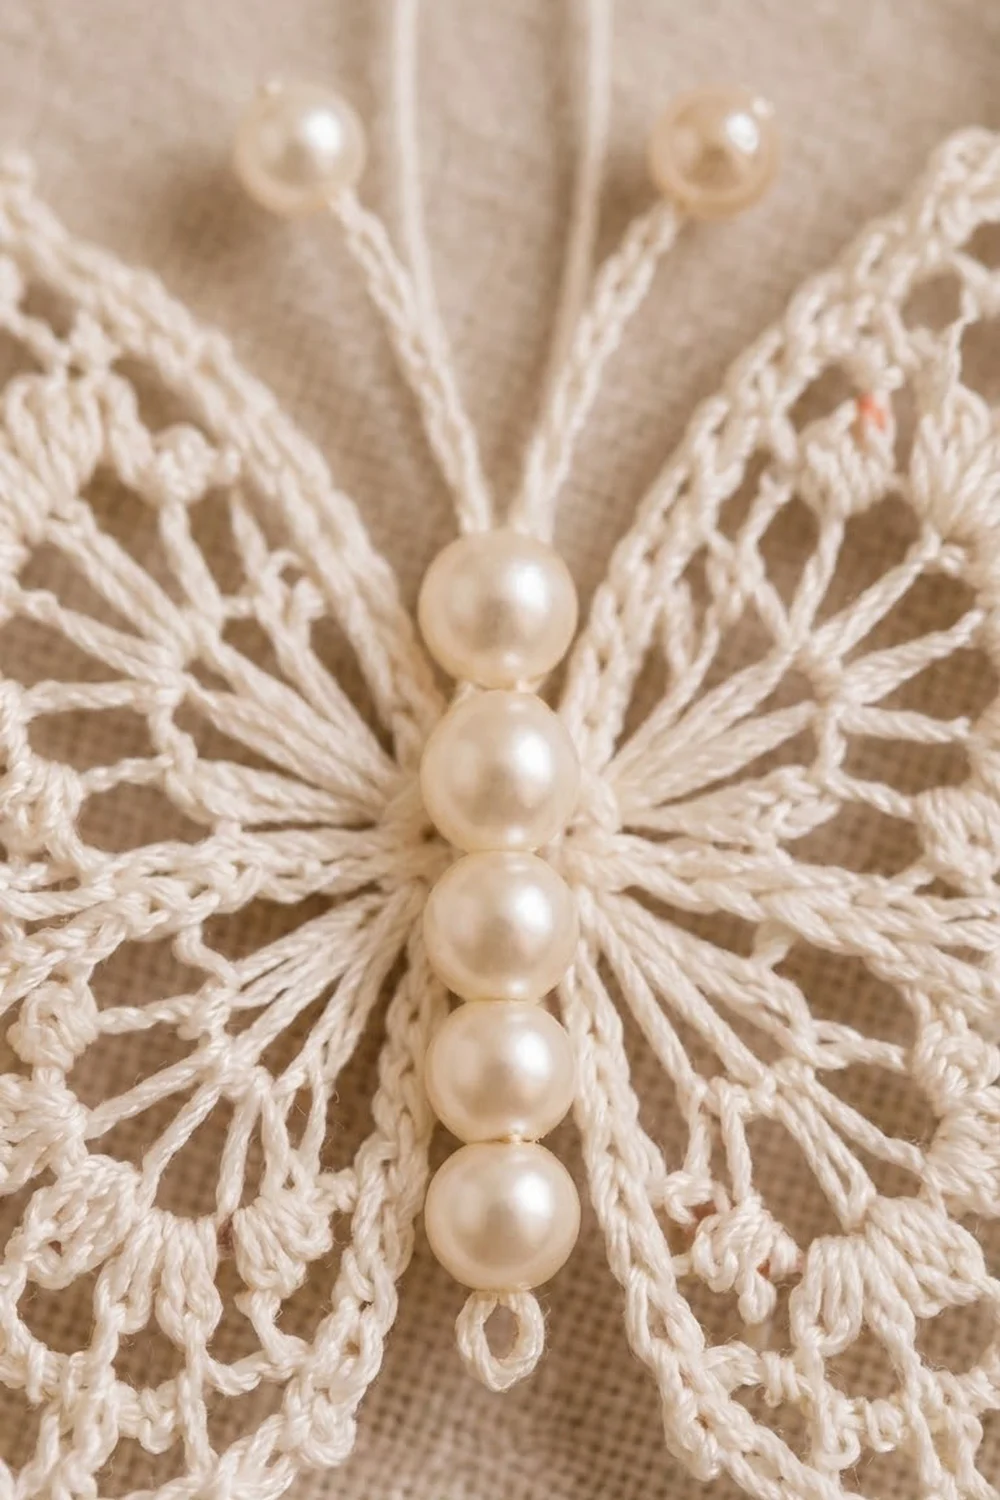
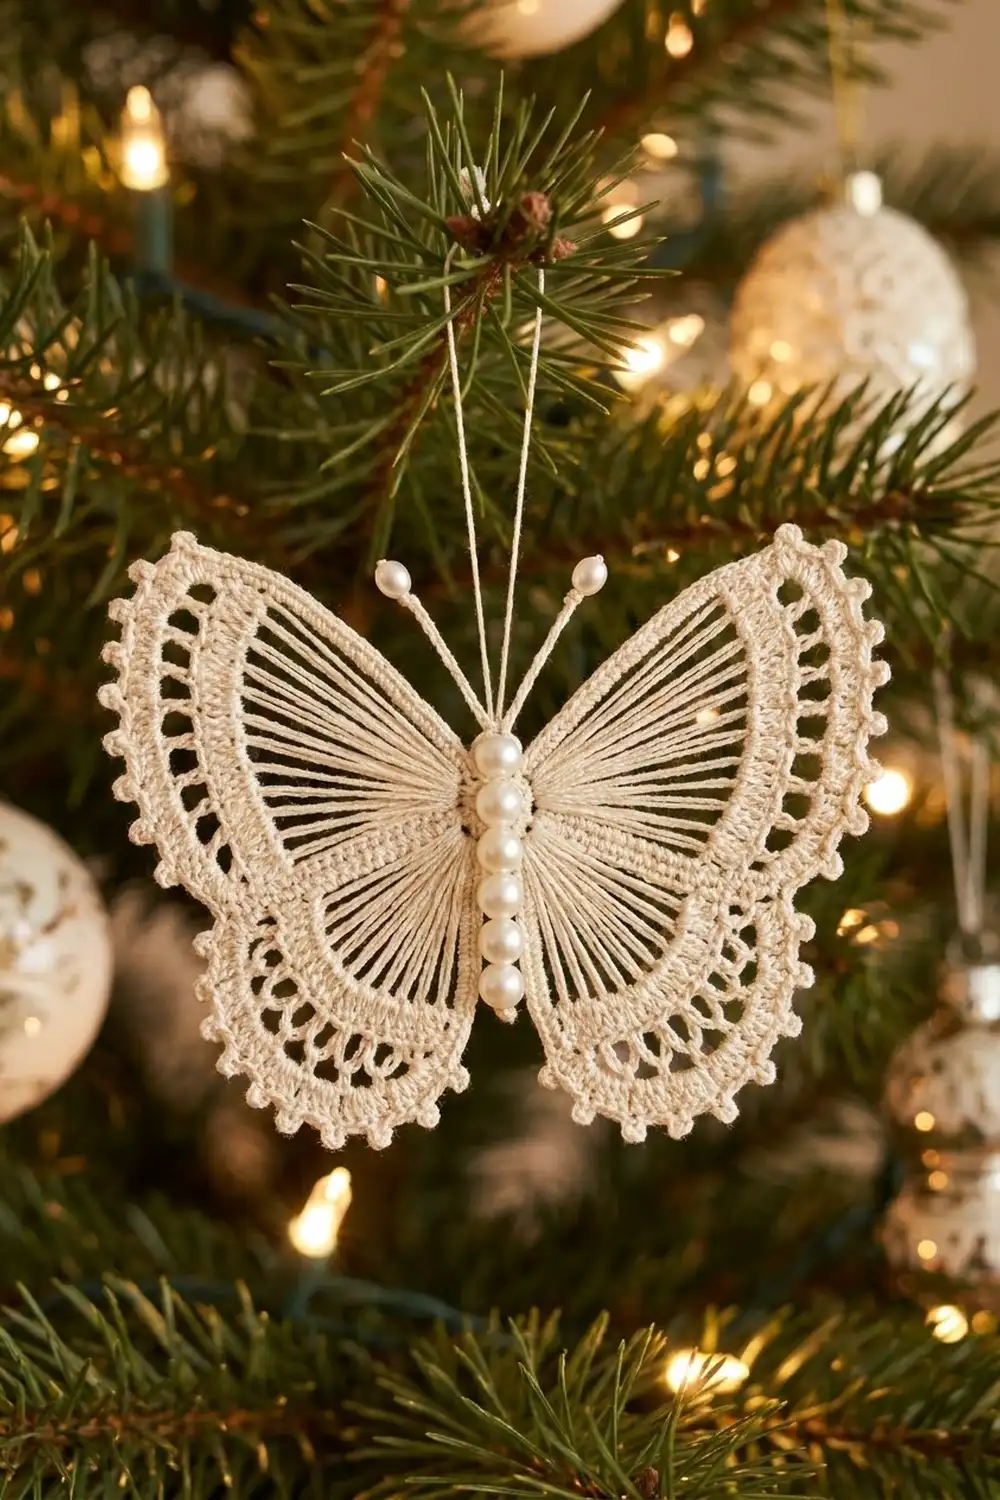
This delicate butterfly is worked in fine ivory cotton thread. Each wing starts with long stitches that fan out from the center and ends in a soft picot edge. A column of five pearls forms the body, and two pearl-tipped antennae finish the look. It makes a lovely Christmas tree ornament, gift topper, or keepsake.
The style is classic and romantic: one neutral color, crisp lace texture, and a little shine from the beads. Stiffened, the butterfly holds its shape and catches the light on the tree beautifully.
This pattern uses US crochet terms. The finished butterfly measures about 3.25 in (8.3 cm) wide and 2.75 in (7.0 cm) tall without the antennae, or 3.5 in (8.9 cm) tall with them.
Construction is simple and logical. First you make a small ring of 24 single crochet. Then you work four wings in short rows, each one on its own 6 stitches of the ring. One continuous picot edging round goes around the whole outline. After that you add the antennae, starch the butterfly, sew on the pearl body, and attach the hanging loop.
Finished Size and Construction
- Finished size: 3.25 in (8.3 cm) wide × 2.75 in (7.0 cm) tall; 3.5 in (8.9 cm) tall including antennae
- Skill level: Intermediate (thread crochet)
- Terminology: US crochet terms
- Yarn weight: Size 10 crochet cotton thread (Lace, weight 0)
- Hook: 1.5 mm steel hook (US steel 7/8)
- Number of pieces: 1
- Layout: Single motif with four wings worked off one center ring
- Piece size: 3.25 in × 2.75 in (8.3 × 7.0 cm)
- Size before edging: 3 in × 2.5 in (7.6 × 6.4 cm)
- Edging depth: about 0.125 in (0.3 cm) on each side
Materials
Thread: Use mercerized size 10 cotton. It gives clean stitch definition and responds well to starch. Avoid fuzzy or acrylic threads, because they blur the lace and won’t hold a stiff shape.
- Ivory/cream: 5 g (about 16 m / 17.5 yd), enough for the butterfly, the antennae and the hanging loop
Beads:
– 5 round ivory glass pearls, 6 mm (body)
– 2 round ivory glass pearls, 4 mm (antenna tips)
Tools:
– 1.5 mm steel crochet hook
– Fine beading needle and a tapestry needle
– Locking stitch markers (4)
– Scissors
– Fabric stiffener or starch
– Foam blocking board and rustproof pins
– Ruler or tape measure
The thread amount includes a margin of about 20% for swatching, weaving in ends, and sewing on the beads.
Abbreviations (US Terms)
- ch – chain
- sl st – slip stitch
- sc – single crochet
- dc – double crochet
- tr – treble crochet
- sk – skip
- sp – space
- st(s) – stitch(es)
- RS / WS – right side / wrong side
- rep – repeat
Special stitches:
- Ch-3 picot: Ch 3, then sl st into the 3rd ch from the hook.
- Ch-5 picot (tip picot): Ch 5, then sl st into the 5th ch from the hook. It makes the slightly larger loop at each wing tip.
- Shell: (2 dc, ch 2, 2 dc) all in the same space.
Gauge and Checkpoints
Gauge in thread crochet is mostly about consistency, but these checkpoints keep the butterfly true to size. Make one test wing first and check it before you commit to the whole piece.
Basic gauge: 10 dc and 4 dc rows = 1 in (2.5 cm) with a 1.5 mm hook.
Checkpoints:
– After the center ring: about 0.5 in (1.3 cm) across.
– Upper wing after Row 1: the treble spokes reach about 0.6 in (1.5 cm) from the ring’s center.
– Upper wing after Row 2: about 0.85 in (2.2 cm) from the center.
– Upper wing after Row 4: about 1.4 in (3.6 cm) from the center.
– Before edging: 3 in (7.6 cm) wide × 2.5 in (6.4 cm) tall.
– After edging: 3.25 in (8.3 cm) wide × 2.75 in (7.0 cm) tall.
If the butterfly is too big: go down to a 1.25 mm hook, or tighten the long chain loops. If it is too small: go up to a 1.75 mm hook. If only the wings ruffle, your chain loops are too long. If the wings cup, your chain loops are too short.
Center Ring
Ch 8 and sl st into the first ch to form a ring.
Rnd 1 (RS): Ch 1, work 24 sc into the ring, then sl st to the first sc to join. (24 sc)
Fasten off. Hold the ring with the join at top center. Number the stitches clockwise from the join and place markers in sc 1, 7, 13 and 19. They divide the ring into four 6-stitch wing sections:
- Wing A (upper right): sc 1–6
- Wing B (lower right): sc 7–12
- Wing C (lower left): sc 13–18
- Wing D (upper left): sc 19–24
Upper Wings (Make on Wing A and Wing D)
With RS facing, join the thread with a sl st in the first sc of the section.
Row 1 (RS) – spokes: Ch 4 (counts as tr), ch 2, tr in the same sc. Ch 2, (tr, ch 2, tr) in the next sc; rep from * 4 more times. Turn. (12 tr, 11 ch-2 sps)*
These long trebles form the radiating spokes that start at the body.
Row 2 (WS) – solid band: Ch 3 (counts as dc). Work 2 dc in the next ch-2 sp, then dc in the next tr; rep from * across, ending with dc in the top of the turning ch. Turn. (34 dc)*
Count check: 12 dc on top of the 12 tr, plus 22 dc in the 11 spaces, makes 34.
Row 3 (RS) – loops: Ch 1, sc in the first dc. Ch 4, sk 2 dc, sc in the next dc; rep from * across. Turn. (11 ch-4 loops, 12 sc)*
Count check: 1 + (3 × 11) = 34 stitches used.
Row 4 (WS) – shells: Sl st into the first 2 ch of the first loop. Ch 3 (counts as dc), then work (dc, ch 2, 2 dc) in the same loop. Ch 1, shell in the next loop; rep from * 9 more times. (11 shells: 44 dc, 11 ch-2 sps, 10 ch-1 sps)*
Fasten off. Each upper wing has 4 rows.
Lower Wings (Make on Wing B and Wing C)
With RS facing, join the thread with a sl st in the first sc of the section.
Row 1 (RS) – spokes: Ch 3 (counts as dc), ch 2, dc in the same sc. Ch 2, (dc, ch 2, dc) in the next sc; rep from * 4 more times. Turn. (12 dc, 11 ch-2 sps)*
Row 2 (WS) – solid band: Ch 3 (counts as dc). Work 2 dc in the next ch-2 sp, then dc in the next dc; rep from * across. Turn. (34 dc)*
Row 3 (RS) – loops: Ch 1, sc in the first dc. Ch 4, sk 2 dc, sc in the next dc; rep from * across. (11 ch-4 loops, 12 sc)*
Fasten off. Each lower wing has 3 rows. Using shorter spokes and one fewer row is what makes the lower wings smaller.
Weave in all the wing ends now, keeping them inside the solid bands so they don’t show through the lace.
Edging
The edging is one continuous RS round around the whole butterfly. The sides of neighboring wings meet at the ring, so the round simply passes from one wing to the next.
Edging gauge: about 14 sc = 1 in (2.5 cm) when worked into the spaces along the edge.
Row-end rule:
– tr row end = 3 sc
– dc row end (including turning chains) = 2 sc
– sc row end = 1 sc
Edging round (RS): Join the thread with a sl st at the inner edge of Wing A’s Row 1, at top center. Ch 1 and work as follows.
- Wing A, top side: 3 sc in the Row 1 end, 2 sc in the Row 2 end, 1 sc in the Row 3 end, 2 sc in the Row 4 end. (8 sc)
- Wing A, arc: In each shell’s ch-2 sp, work (2 sc, ch-3 picot, 2 sc). In each ch-1 sp, work 1 sc. On the 3rd shell from the top, use a ch-5 picot instead; this is the wing tip. (54 sc, 11 picots)
- Wing A, lower side: 2 sc in the Row 4 end, 1 sc in the Row 3 end, 2 sc in the Row 2 end, 3 sc in the Row 1 end. (8 sc)
- Wing B, upper side: 2 sc in the Row 1 end, 2 sc in the Row 2 end, 1 sc in the Row 3 end. (5 sc)
- Wing B, arc: Work (2 sc, ch-3 picot, 2 sc) in each ch-4 loop. On the 3rd loop from the inner (body) side, use a ch-5 picot instead; this is the drop loop. (44 sc, 11 picots)
- Wing B, inner side: 1 sc in the Row 3 end, 2 sc in the Row 2 end, 2 sc in the Row 1 end. (5 sc)
- Wing C: Work it like Wing B, mirrored. That means 5 sc on the inner side, 44 sc and 11 picots on the arc (ch-5 picot on the 3rd loop from the body side), and 5 sc on the upper side. (54 sc)
- Wing D: Work it like Wing A, mirrored. That means 8 sc on the lower side, 54 sc and 11 picots on the arc (ch-5 picot on the 3rd shell from the top), and 8 sc on the top side. (70 sc)
Sl st to the first sc to join.
Totals: Upper wings 70 sc each and lower wings 54 sc each, for 248 sc and 44 picots (40 ch-3 and 4 ch-5).
Why the math works: Each wing’s arc edging uses exactly the spaces the last row created: 11 shells plus 10 gaps on the upper wings, and 11 loops on the lower wings. Because every space gets a fixed number of stitches, the edge can’t stretch or gather. The row-end rule matches stitch height, so the sides lie flat where the wings meet the body. The edging adds about 0.125 in (0.3 cm) all around. That takes the size from 3 × 2.5 in (7.6 × 6.4 cm) to 3.25 × 2.75 in (8.3 × 7.0 cm).
Antennae (Make 2)
Thread one 4 mm pearl onto the working thread and push it down out of the way.
Join with a sl st in the first sc of Wing A’s top side. Ch 10, slide the pearl up against the hook, and ch 1 to lock it in place. Sl st in each of the 10 ch back down, then sl st into the joining st. Fasten off.
Repeat on the last sc of Wing D’s top side. Each antenna is about 0.75 in (1.9 cm) long.
Final Blocking
- Soak the butterfly in fabric stiffener, then gently squeeze out the excess.
- Lay it RS up on the blocking board.
- Pin the ring flat at the center.
- Pin the outer edge of each wing to the measurements: 3.25 in (8.3 cm) wide and 2.75 in (7.0 cm) tall.
- Pin every picot outward with a pin through its loop, starting with the four tip picots.
- Straighten the antennae so they angle outward in a slight V, and pin beside them.
- Let it dry completely, ideally overnight.
- Unpin it. Then use the beading needle to sew the five 6 mm pearls in a vertical column over the center, one at a time, stitching through the ring and the inner wing edges. Knot the thread on the back.
- Pass a 10 in (25.4 cm) length of thread behind the top pearl. Knot it into a hanging loop about 3 in (7.6 cm) tall.
Final Quality-Control Checklist
- Center ring has 24 sc and four 6-stitch wing sections.
- Upper wings have 12 tr, 34 dc, 11 loops and 11 shells.
- Lower wings have 12 dc, 34 dc and 11 loops.
- Edging has 248 sc, 40 ch-3 picots and 4 ch-5 tip picots.
- Size is 3.25 × 2.75 in (8.3 × 7.0 cm).
- Left and right wings mirror each other.
- Pearls sit straight and firm, and no ends show through the lace.
- Hanging loop is centered so the butterfly hangs level.
Troubleshooting
- Wings ruffle: The chain loops are too long. Redo Row 3 with tighter chains, or use a smaller hook.
- Wings cup: The loops are too tight. Loosen the chains, or block with more pins.
- Uneven wing sizes: Count your Row 2 stitches. Each wing must have exactly 34 dc.
- Body gap shows between wings: Make sure each Row 1 starts exactly in its section’s first sc. The pearls should cover the inner edges.
- Pearls tilt: Sew each pearl separately and pass through each one twice.
- Butterfly hangs crooked: Move the hanging loop to sit behind the center of the top pearl.
Care
Dust gently, or spot-clean with a damp cloth. If the butterfly gets wet, re-starch it and re-pin it to shape. Store it flat in tissue paper between seasons.
Final Notes
Here is the full measurement chain at a glance. The 24 sc ring measures 0.5 in (1.3 cm). The wings bring the piece to 3 × 2.5 in (7.6 × 6.4 cm), and the 248 sc picot edging finishes it at 3.25 × 2.75 in (8.3 × 7.0 cm). Check your size at each stage and the butterfly will come out symmetrical, crisp and ready to hang. Make one for a gift tag, or a flutter of them for the tree.
Happy crocheting!