

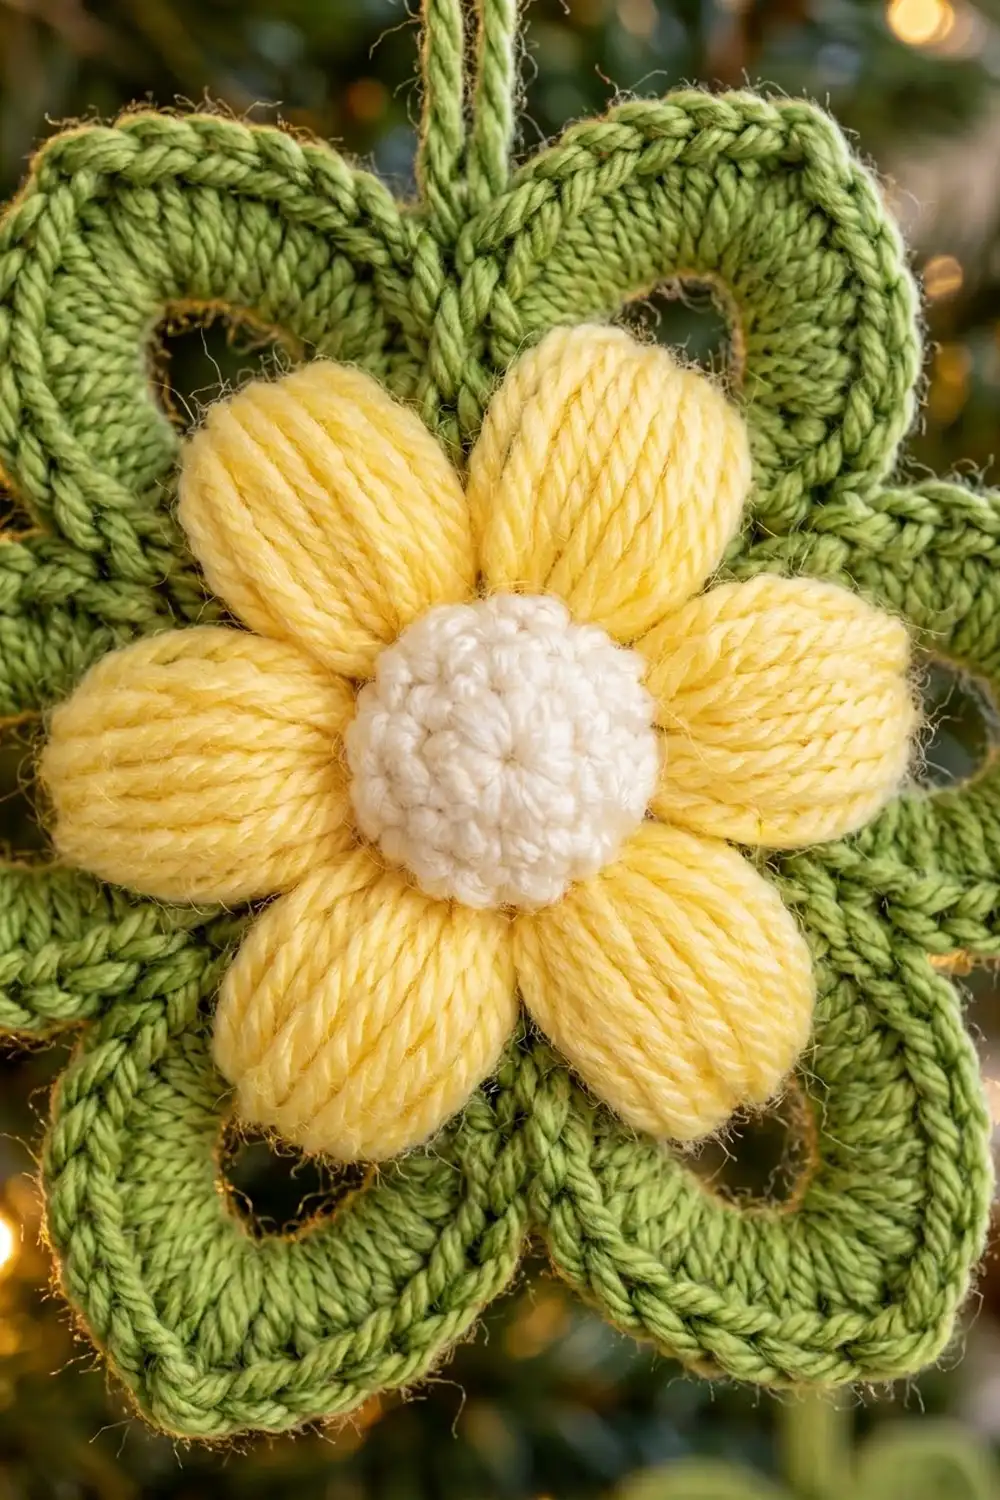
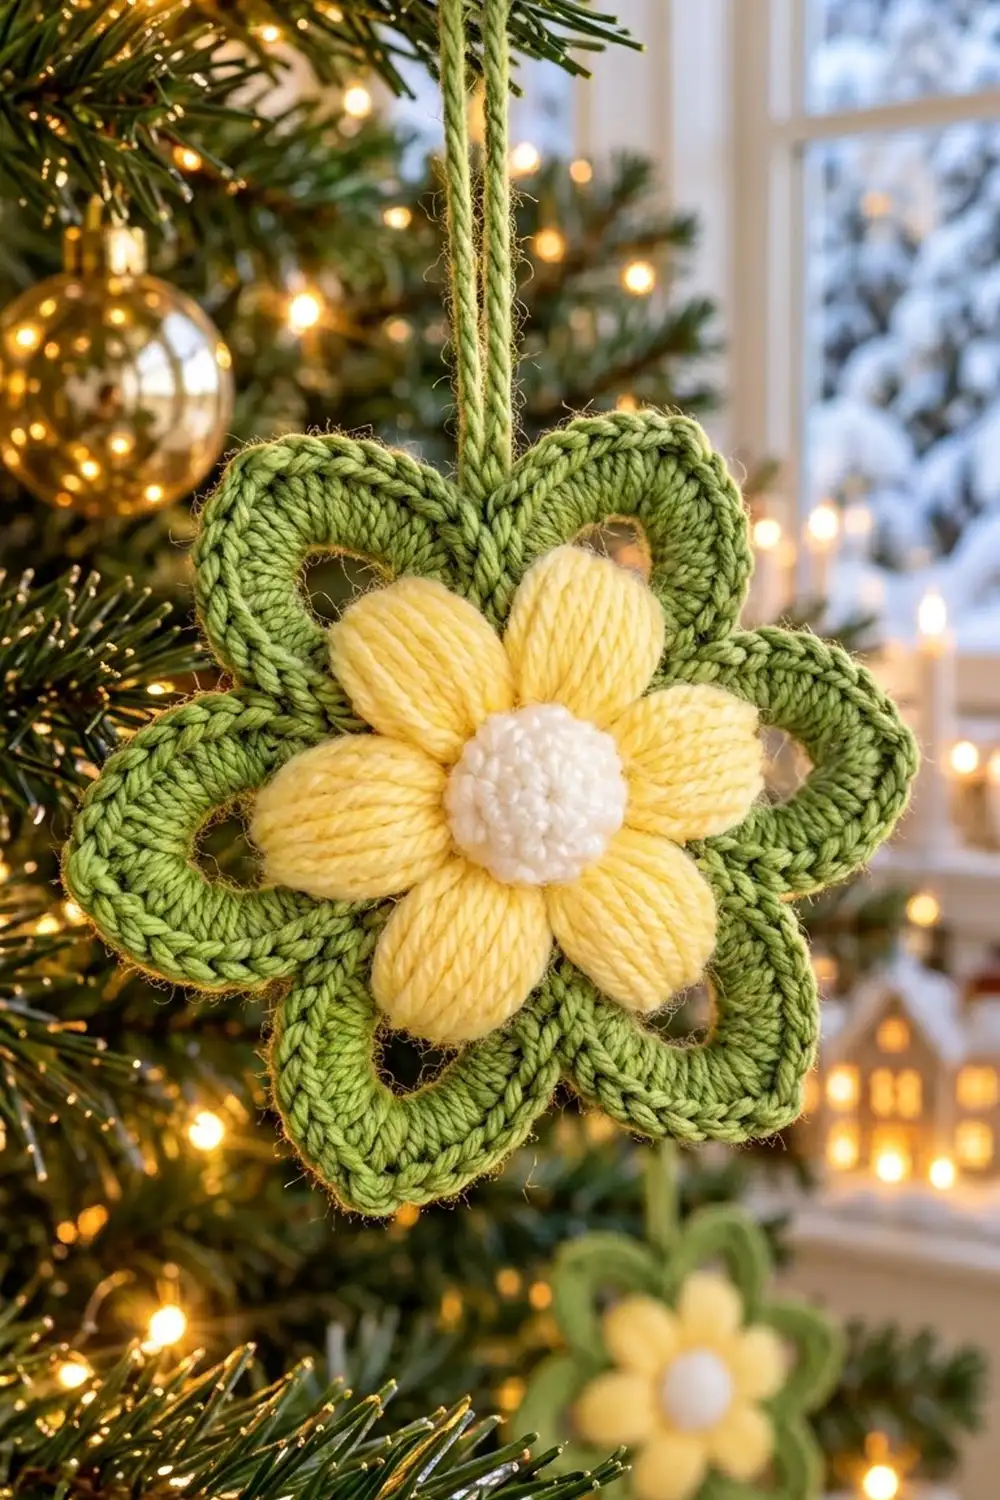
The Winter Primrose is a layered flower ornament for the Christmas tree. A green base with six open, pointed petals sits behind a puffy yellow flower, and a small cream dome finishes the center. A green chain loop at the top lets it hang from a branch.
The colors are soft and natural: leaf green, butter yellow, and creamy white. With pine needles and warm lights behind it, it looks fresh and a little vintage. It goes well with gold, natural, or farmhouse decorations.
The pattern uses US crochet terms. The finished ornament measures 4 in (10.2 cm) from one petal tip to the opposite tip. The yellow flower measures about 2.4 in (6.1 cm) across.
Construction is simple. You crochet the green base in the round, from a chain ring out to six chain-loop petals, then add a single crochet edging. Next, you make a yellow flower with six folded puff petals and a small cream dome. Finally, you stack the three layers, sew them together, and add the hanging loop.
Finished Size and Construction
- Finished size: 4 in (10.2 cm) tip to tip
- Skill level: Easy+ (basic stitches plus a long puff)
- Terminology: US crochet terms
- Yarn weight: DK / light worsted (#3)
- Hook: 3.5 mm (E-4)
- Number of pieces: 1 finished ornament, built from 3 layered parts (green base, yellow flower, cream center)
- Layout: layered appliqué: cream on yellow, yellow on green
- Piece size: green base 4 in (10.2 cm); yellow flower 2.4 in (6.1 cm); cream center 0.9 in (2.3 cm)
- Size before border: 3.75 in (9.5 cm) tip to tip after Round 4
- Border depth: 1/8 in (0.3 cm) on each side
Materials
Choose a smooth cotton or cotton blend in DK weight. Cotton gives the green petals crisp edges and keeps the open holes from closing up. A slightly softer cotton-acrylic blend makes fuller yellow puffs, but plain cotton works too. Avoid fuzzy or very splitty yarns, because the long puff loops need to slide cleanly off the hook.
Yarn (for one ornament):
- Color A, leaf green: 8 g, about 19 m (base, edging, hanging loop)
- Color B, butter yellow: 4 g, about 9 m (puff flower)
- Color C, cream: 2 g, about 5 m (center dome)
These amounts include a margin of about 25% for a test piece, tails, and small differences in tension. To make a set of ornaments, multiply by the number you want.
Tools:
- 3.5 mm (E-4) crochet hook
- Yarn needle
- Scissors
- Stitch marker
- A small pinch of fiberfill or yarn scraps
- Pins, a foam blocking mat, and a spray bottle
- Ruler or tape measure
Abbreviations (US Terms)
- ch – chain
- sl st – slip stitch
- sc – single crochet
- hdc – half double crochet
- dc – double crochet
- sc2tog – single crochet 2 together
- sk – skip
- sp – space
- st(s) – stitch(es)
- yo – yarn over
- MR – magic ring
Special stitch – Folded Puff Petal (FPP): [Yo, insert hook in next sc, yo and pull up a loop to 1 3/4 in (4.4 cm)] 8 times (17 loops on hook). Yo and pull through all 17 loops. Ch 1 firmly to lock. Sl st in the same sc. The puff folds back on itself and makes a plump, rounded petal about 0.9 in (2.3 cm) long.
Petal sequence (green base): Work all of these into one ch-13 sp: 3 sc, 3 hdc, 4 dc, (dc, ch 2, dc), 4 dc, 3 hdc, 3 sc. That gives 22 sts plus a ch-2 tip sp.
Gauge and Checkpoints
Gauge: 20 sc and 22 rows = 4 in (10.2 cm) in DK yarn with a 3.5 mm hook. For an ornament, the overall shape matters more than exact gauge, but the checkpoints below keep the three layers in proportion.
Make one complete green base first and measure it at each checkpoint before you start the yellow and cream layers.
- After Round 1: outer diameter 1.1 in (2.8 cm), center hole about 0.5 in (1.3 cm)
- After Round 2: diameter 1.6 in (4.1 cm), lying flat
- After Round 4: 3.75 in (9.5 cm) tip to tip
- After Round 5 (border): 4 in (10.2 cm) tip to tip
- Yellow flower: 2.4 in (6.1 cm) across
- Cream center: 0.9 in (2.3 cm) across
If your base is too big: go down to a 3.25 mm (D-3) hook and work the whole base again. Keep every stitch count the same.
If your base is too small: go up to a 3.75 mm (F-5) hook. Don’t change the chain lengths, because a bigger hook keeps the petal shape intact.
If Round 2 ruffles or cups: check that Round 1 has exactly 24 sc and that the hdc increases are evenly spaced.
Green Base (Color A)
The base is worked in the round with the right side facing you. Do not turn.
Round 1: Ch 12, sl st in first ch to form a ring. Ch 1 (does not count as a st), work 24 sc into the ring. Sl st in first sc to join. (24 sc)
The ring should be full but not crowded. Push the stitches together as you go so all 24 fit. The open center hole is part of the design.
Round 2: Ch 2 (does not count as a st), hdc in next 3 sts, 2 hdc in next st 6 times. Sl st in first hdc to join. (30 hdc)
Checkpoint: 1.6 in (4.1 cm) across and flat.
Round 3 (petal loops): Ch 1, sc in next st, ch 13, sk next 3 sts, sc in next st 6 times. Sl st in first sc to join. (12 sc and 6 ch-13 loops)
Each repeat uses 5 sts of Round 2: 1 sc, 3 skipped, 1 sc. Six repeats use all 30 sts. Each ch-13 loop and the 3 skipped sts beneath it outline one teardrop-shaped hole. Between petals, 2 sc sit side by side. Keep the chains loose and even, because tight chains shorten the petals and squeeze the holes.
Round 4 (petals): Work the Petal sequence in next ch-13 sp, sl st in each of next 2 sc 6 times. The last sl st lands in the first sc of Round 3 and joins the round. (6 petals of 22 sts each = 132 sts, plus 6 ch-2 tip sps and 12 sl sts)
Work the stitches over the chain, not into the chain stitches. This keeps the stitches standing outward and the hole inside each petal open. The (dc, ch 2, dc) in the middle forms the pointed tip.
Number the stitches of each petal 1 to 22. Stitches 1–10 are the first side (3 sc, 3 hdc, 4 dc). Stitch 11 is the first tip dc, then comes the ch-2 sp. Stitch 12 is the second tip dc. Stitches 13–22 are the second side (4 dc, 3 hdc, 3 sc). The border uses these numbers.
Checkpoint: 3.75 in (9.5 cm) tip to tip. Each petal is about 1.1 in (2.8 cm) long from the ring.
Border (Color A)
The border is one round of sc. It firms up the outline and gives the petals their smooth, rounded edge.
Border gauge: 1 sc per st of Round 4. The border adds 1/8 in (0.3 cm) to each side, so 3.75 in (9.5 cm) becomes 4 in (10.2 cm).
Round 5: Keep working with Color A. Sl st in st 1 of the first petal. Ch 1 (does not count as a st). Sc in next 10 sts (sts 2–11), (sc, ch 2, sc) in ch-2 tip sp, sc in next 10 sts (sts 12–21), sc2tog over st 22 of this petal and st 1 of next petal, skipping the 2 sl sts between them 6 times. On the last repeat, the second leg of the sc2tog goes into st 1 of the first petal, where you started. Sl st in first sc to join. Do not fasten off.
Count per petal: 10 sc + 2 tip sc + 10 sc + 1 sc2tog = 23 sts and 1 ch-2 sp.
Round total: 6 × 23 = 138 sts and 6 ch-2 sps.
Why the math works: Each petal has 22 sts. The border works into sts 2–21 one for one (20 sc), and the sc2tog takes st 22 plus the next petal’s st 1. That means each of the 132 sts gets worked exactly once, so the edge lies flat. The 2 extra sc at each tip give the point room to turn without cupping. The sc2tog at each valley pulls in where the petals meet the ring, and skipping the sl sts keeps the valley neat and tight.
Hanging loop: You are now in the first sc of Round 5. Sl st backward across the last sts to the sc2tog in the valley between petal 6 and petal 1. Ch 40, then sl st in the same sc2tog. Fasten off, leaving an 8 in (20.3 cm) tail. The loop hangs about 3 in (7.6 cm) above the ornament.
Yellow Puff Flower (Color B)
Round 1: MR, ch 1 (does not count as a st), 12 sc in ring. Pull the ring tight. Sl st in first sc to join. (12 sc)
Round 2: FPP in next sc, sl st in next sc 6 times. The last sl st lands in the joining sc. (6 petals and 6 sl sts)
Each repeat uses 2 sc of Round 1, so 6 repeats use all 12. Keep every loop at the same 1 3/4 in (4.4 cm) height. Pinch the loops against the hook with your finger so they don’t shrink as you pull through.
Fasten off, leaving a 12 in (30.5 cm) tail for sewing.
Checkpoint: 2.4 in (6.1 cm) across. Each petal is about 0.9 in (2.3 cm) long with a rounded tip.
Cream Center (Color C)
Round 1: MR, ch 1, 6 sc in ring. Sl st to join. (6 sc)
Round 2: Ch 1, 2 sc in each st. Sl st to join. (12 sc)
Round 3: Ch 1, sc in each st. Sl st to join. (12 sc)
Round 3 has no increases, so the piece cups into a small dome. Fasten off, leaving a 12 in (30.5 cm) tail.
Checkpoint: 0.9 in (2.3 cm) across.
Assembly
- Lay the green base right side up with the hanging loop at the top.
- Center the yellow flower over the green ring. Turn it so each yellow petal lies over a green petal.
- Using the yellow tail, sew Round 1 of the yellow flower to Round 2 of the base, stitching around the outer edge of the yellow ring. Don’t stitch through the green petals.
- Put a small pinch of fiberfill inside the cream dome.
- Center the dome over the yellow ring and sew around its edge with the cream tail.
- Weave in all ends on the back.
Final Blocking
- Lightly mist the green base with water from the back.
- Pin it to the mat at 4 in (10.2 cm) tip to tip, with a pin at each of the 6 tips and each of the 6 valleys.
- Open each petal hole with a fingertip so it forms a clean teardrop.
- Keep the yellow petals and cream dome dry. Just fluff them with your fingers.
- Let the ornament dry completely, for at least 2 hours.
- Unpin it and measure again.
Final Quality-Control Checklist
- The ornament measures 4 in (10.2 cm) tip to tip.
- All 6 green petals are the same length and have clean points.
- Each petal hole is open and shaped like a teardrop.
- Round 5 has 138 sts and 6 ch-2 tip sps.
- The yellow flower is 2.4 in (6.1 cm) across with 6 even petals.
- The cream dome is centered and slightly raised.
- The hanging loop sits in a valley, not at a tip, so the ornament hangs straight.
- No ends show on the front.
Troubleshooting
Petal holes closed up: You worked into the chain stitches instead of the ch-13 sp. Redo Round 4 over the chain.
Center ring won’t fit 24 sc: Your ch 12 is too tight. Chain it again more loosely, or use a hook one size larger for the chain only.
Petals curl forward: The border is too tight. Redo Round 5 with looser tension, or go up half a hook size for that round only.
Tips look blunt: Make sure the (sc, ch 2, sc) in the border went into the ch-2 sp, not into a dc.
Yellow petals are uneven: Your loops weren’t all the same height. Measure the first loop against a ruler and match the rest to it.
Puffs come apart: The locking ch 1 was too loose. Pull it firmly before the sl st.
Ornament hangs crooked: Move the loop to the exact center of a valley sc2tog.
Care
Spot clean with a damp cloth and lay flat to dry. Between seasons, store the ornament flat in a box so the petals keep their shape.
Final Notes
The measurement chain is short. The center is 1.6 in (4.1 cm) after Round 2, 3.75 in (9.5 cm) after the petals, and 4 in (10.2 cm) after the border. Add a 2.4 in (6.1 cm) yellow flower and a 0.9 in (2.3 cm) cream dome, and your Winter Primrose is finished. Make one ornament, check each step, and every one after it will follow the same numbers.
Happy crocheting!