

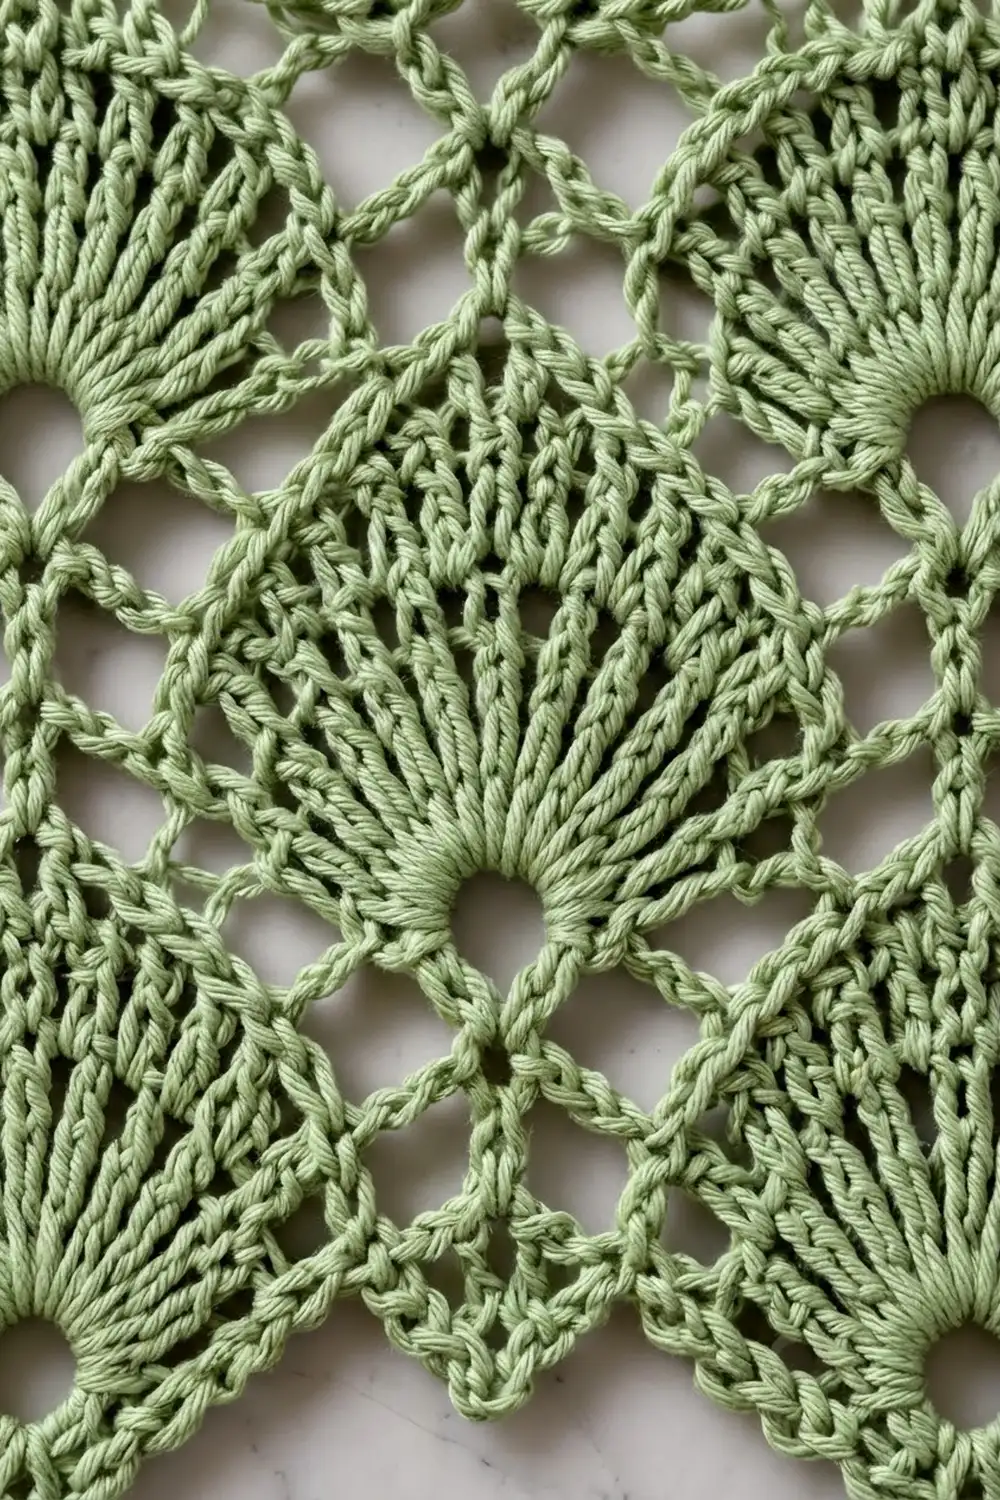
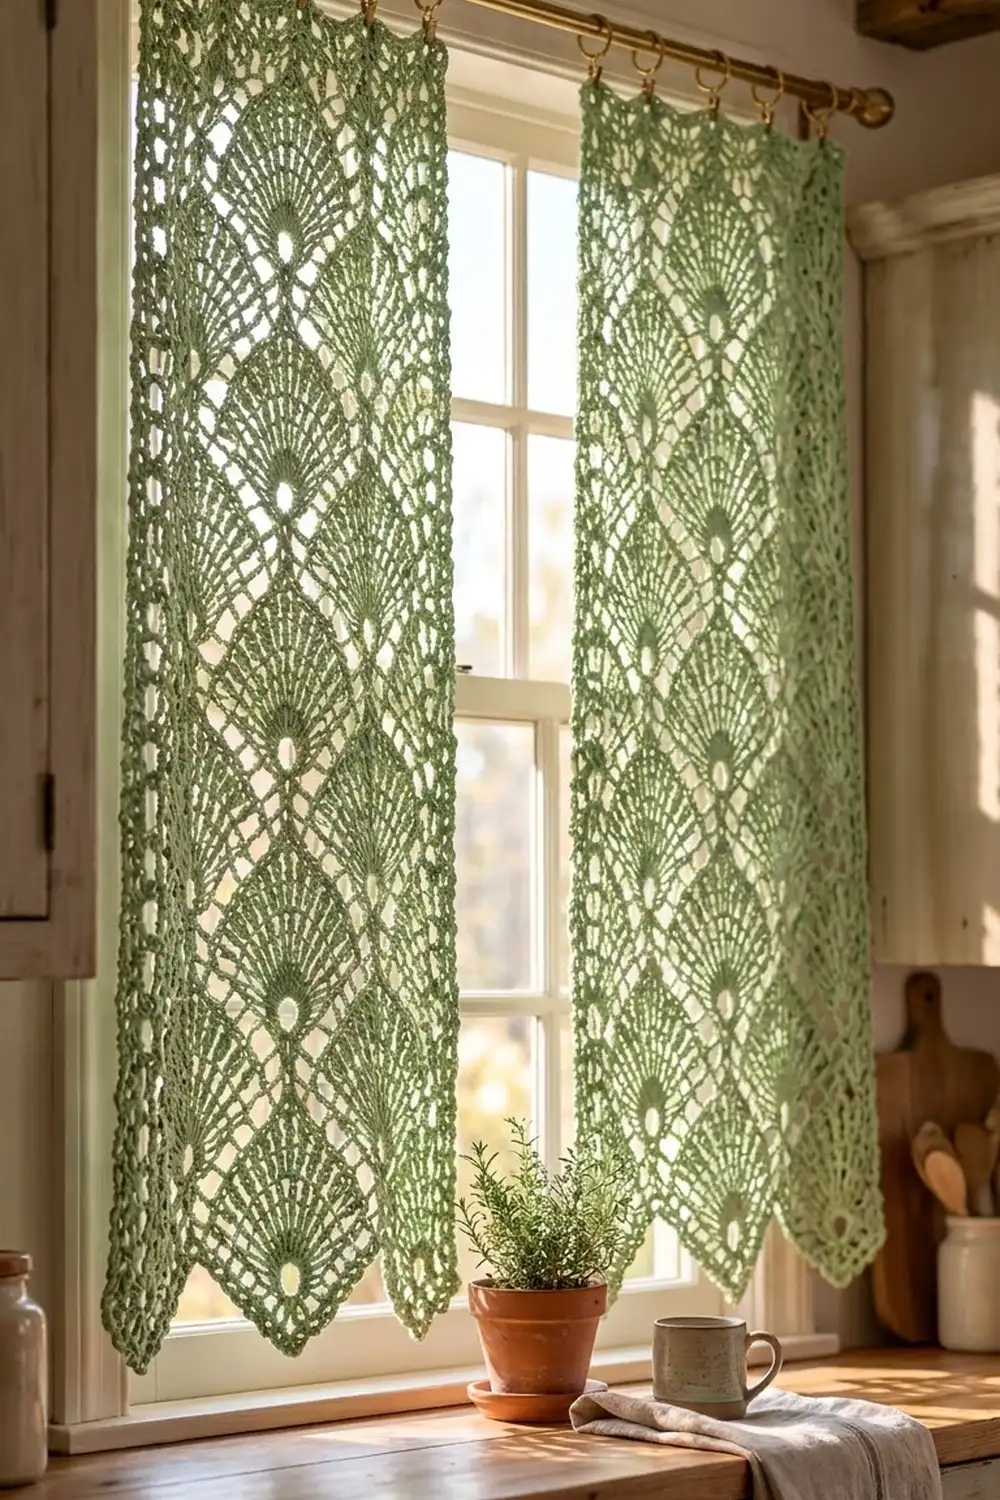
These lace curtain panels are made of rows of staggered fans. Each fan opens upward from a small round hole at its base. A lattice of chains and treble crochet stitches runs between the fans and forms open diamond shapes. When light comes through the window, the fans show clearly against the glass.
The set uses one soft sage green cotton. It suits a kitchen or breakfast nook all year, and it also works as a quiet holiday decoration when you add greenery and fairy lights. The bottom of each panel ends in a row of pointed scallops, one point under each fan. The sides and top have a small chain-loop edge.
The pattern uses US crochet terms. Each finished panel measures 22.25 in (56.5 cm) wide and 57 in (144.8 cm) long, measured from the top edge to the tips of the points. You make two identical panels. They are not joined, so each one hangs from its own clip rings.
You work each panel from the bottom up in rows on a foundation chain. A 4-row fan-and-lattice repeat makes up the body, and a leveling row squares off the top. Then you add a pointed edging into the foundation chain and a two-row border along the sides and top.
Finished Size and Construction
- Finished size (each panel): 22.25 in (56.5 cm) wide x 57 in (144.8 cm) long at the points; 55.75 in (141.6 cm) long at the side corners
- Skill level: Intermediate
- Terminology: US
- Yarn weight: DK / light (#3) cotton
- Hook: 4.0 mm (US G-6)
- Number of pieces: 2 separate, identical panels
- Layout: the panels hang side by side and are not joined
- Panel body before edging and border: 21.25 in (54.0 cm) wide x 54.75 in (139.1 cm) long
- Bottom point depth: 1.75 in (4.4 cm) below the foundation chain
- Side and top border depth: 0.5 in (1.3 cm)
Materials
Yarn: Use a smooth, mercerized or combed DK-weight cotton. Cotton holds the shape of the fans, blocks crisply, and doesn’t stretch much when it hangs. Avoid fuzzy or very drapey yarns, because they blur the lace and get longer over time. A typical ball is 50 g / 115 m (126 yd).
- Sage green: 700 g (1,610 m / 1,761 yd) total, about 350 g (805 m / 880 yd) per panel
These quantities include a margin of about 10% for the gauge swatch and for small differences in tension.
Tools:
- 4.0 mm (US G-6) crochet hook
- Tapestry needle
- 6 locking stitch markers
- Tape measure
- Blocking mats, rustproof pins, and a spray bottle
- 14 curtain clip rings (7 per panel)
Abbreviations (US Terms)
- ch: chain
- sl st: slip stitch
- sc: single crochet
- hdc: half double crochet
- dc: double crochet
- tr: treble crochet
- sk: skip
- sp: space
- st(s): stitch(es)
- tch: turning chain
- RS / WS: right side / wrong side
Special stitch – Fan: 9 dc worked into the same stitch. Number the dc of each fan 1 to 9, starting from the side where you begin the fan. The 5th dc is the center of the fan.
Half fan: 5 dc worked into the same stitch. You use it at the row edges in Row 3.
Gauge and Checkpoints
Gauge: One pattern repeat (12 foundation ch) = 3 in (7.6 cm) wide. 4 rows (Rows 2–5) = 3.5 in (8.9 cm) tall. A fan row is about 0.75 in (1.9 cm) tall and a lattice row about 1 in (2.5 cm).
Test one piece first. Ch 38. Work Rows 1–5, then one more Row 2, then the Leveling Row (Row 63), with 3 repeats in place of 7. The swatch should measure 9.25 in (23.5 cm) wide across the 37 stitches of the Leveling Row. Rows 1–5 should measure 4.25 in (10.8 cm) tall. Block the swatch before you measure it.
Checkpoints while working (unblocked, lightly stretched):
- After Row 1: 21.25 in (54.0 cm) wide
- After Row 5: 4.25 in (10.8 cm) tall
- After Row 21: 18.25 in (46.4 cm) tall
- After Row 41: 35.75 in (90.8 cm) tall
- After Row 61: 53.25 in (135.3 cm) tall
- After Row 63: 54.75 in (139.1 cm) tall and 21.25 in (54.0 cm) wide
If your swatch is too big, go down to a 3.75 mm hook. If it’s too small, go up to a 4.5 mm hook. If only the length is off, check the height of your tr stitches. Tight trebles make the lattice rows shorter, and the difference adds up over 31 lattice rows.
Panel Body (Make 2)
Ch 86.
Row 1 (RS): Sc in 2nd ch from hook, sk 5 ch, Fan in next ch, sk 5 ch, sc in next ch; repeat from * 6 more times. Turn. (7 Fans, 8 sc = 71 sts)*
Each Fan grows out of a single chain. This gathers the base of the fan and makes the small round hole at its bottom.
Row 2 (WS): Ch 6 (counts as tr + ch 2), sk dc 1–3 of next Fan, sc in dc 4, ch 3, sk dc 5, sc in dc 6, ch 2, tr in next sc, ch 2; repeat from * across, ending the last repeat at . Turn. (8 tr including tch, 14 sc, 7 ch-3 loops, 14 ch-2 sps)*
The ch-3 loop sits on top of each Fan’s center dc. The ch-2 spaces and tr stitches make the sides of the diamonds.
Row 3 (RS): Ch 3 (counts as dc), 4 dc in first tr (half fan made), sc in next ch-3 loop, Fan in next tr; repeat from * 5 more times, sc in last ch-3 loop, 5 dc in 4th ch of tch (half fan made). Turn. (6 Fans, 2 half fans, 7 sc = 71 sts)*
The new Fans sit between the Fans of Row 1, which makes the staggered layout.
Row 4 (WS): Ch 1, sc in first dc, ch 2, tr in next sc, ch 2, sc in dc 4 of next Fan, ch 3, sk dc 5, sc in dc 6; repeat from * 5 more times, ch 2, tr in last sc, ch 2, sc in top of tch. Turn. (7 tr, 14 sc, 6 ch-3 loops, 14 ch-2 sps)*
Skip the rest of the dc in each half fan. The sc at each end keeps the side edges straight.
Row 5 (RS): Ch 1, sc in first sc, Fan in next tr, sc in next ch-3 loop; repeat from * 5 more times, Fan in last tr, sc in last sc. Turn. (7 Fans, 8 sc = 71 sts)*
Row 5 matches Row 1, so its fans line up above the Row 1 fans.
Rows 6–61: Repeat Rows 2–5 fourteen more times, for 15 repeats in total. Row 61 is a RS Fan row with 71 sts. To make counting easier, place a marker after Rows 21 and 41.
Row 62 (WS): Repeat Row 2. (8 tr, 7 ch-3 loops)
Row 63 – Leveling Row (RS): Ch 3 (counts as dc), (2 dc, hdc) in next ch-2 sp, sc in next sc, 3 sc in ch-3 loop, sc in next sc, (hdc, 2 dc) in next ch-2 sp, dc in next tr; repeat from * across, working the last dc in the 4th ch of the tch. (1 + 12 x 7 = 85 sts)*
This row puts tall stitches beside the trebles and short stitches over the fan tops, so the top edge comes out straight. Its 85 sts match the 85 foundation chains used in Row 1, so the top and bottom are the same width: 21.25 in (54.0 cm). Fasten off.
Pointed Bottom Edging
Turn the panel upside down. You’ll work into the free loops of the foundation chain.
Edging Row A (WS): With the WS facing, join yarn with a sl st in the free loop under the first sc of Row 1. Ch 1, sc in same ch, ch 3, sk 2 ch, dc in next ch, ch 3, sk 2 ch, (tr, ch 3, tr) in the ch at the base of the Fan, ch 3, sk 2 ch, dc in next ch, ch 3, sk 2 ch, sc in the ch at the base of the next sc; repeat from * 6 more times. Turn. (8 sc, 14 dc, 14 tr, 35 ch-3 sps)*
The stitches get taller toward each fan base, from sc to dc to tr. This makes a downward V under every Fan.
Edging Row B (RS): Ch 1, sc in first sc, 3 sc in next ch-3 sp, sc in dc, 3 sc in next ch-3 sp, sc in tr, (sc, ch 4, sc) in point ch-3 sp, sc in tr, 3 sc in next ch-3 sp, sc in dc, 3 sc in next ch-3 sp, sc in next sc; repeat from * across. Fasten off. (1 + 19 x 7 = 134 sc, 7 ch-4 points)*
The ch-4 loop sharpens the tip of each point. The finished points hang 1.75 in (4.4 cm) below the foundation chain.
Make Both Panels
Make two complete panels, each with its own body, bottom edging, and border.
- Sage green: 2 panels, about 350 g (805 m / 880 yd) each
Layout at the window (side by side, not joined):
[ Panel 1 ]   [ Panel 2 ]
  7 fans        7 fans
The two panels are identical, so either one can hang on the left. No joining is needed, because each panel hangs from its own 7 clip rings.
Border
Border gauge: 4 sc = 1 in (2.5 cm) along the side edges and the top.
The border runs up the right side, across the top, and down the left side. The bottom edging is already finished. The side counts below do not include corner stitches. The corner groups are listed separately.
Border Row 1 (RS): With the RS facing, join yarn at the bottom right corner. Ch 1, then work up the right side:
- 1 sc in the end of each edging row (2 sc)
- 3 sc in the end of each Fan row (31 rows = 93 sc)
- 4 sc in the end of each lattice row (31 rows = 124 sc)
- 2 sc in the end of the Leveling Row
Right side total: 221 sc. To check: 2 + 93 + 124 + 2 = 221, and 55.25 in (140.3 cm) x 4 sc per inch = 221.
Work 3 sc in the first st of Row 63 for the corner. Sc in each of the next 83 sts, then work 3 sc in the last st for the second corner. Top: 83 sc between the corners. Together with the 2 corner sts, this uses all 85 Leveling Row sts.
Work down the left side in the reverse order: 2 sc in the Leveling Row end, 4 sc per lattice row, 3 sc per Fan row, and 1 sc per edging row. Left side total: 221 sc.
(Row total: 221 + 3 + 83 + 3 + 221 = 531 sc.) Fasten off.
Border Row 2 (RS): With the RS facing, rejoin yarn in the first sc at the bottom right.
- Right side: Ch 1, sc in first sc, ch 3, sk 1 sc, sc in next sc; repeat from * 109 more times. (110 ch-3 loops; 1 + 220 = 221 sc used)*
- Corner: Ch 3, sk first corner sc, (sc, ch 3, sc) in center corner sc, ch 3, sk last corner sc.
- Top: Sc in first top sc, ch 3, sk 1 sc, sc in next sc; repeat from * 40 more times. (41 loops; 1 + 82 = 83 sc used)*
- Corner: Repeat the corner instructions.
- Left side: Sc in first side sc, then work as for the right side. (110 loops)
Fasten off. (267 ch-3 loops in total: 110 + 3 + 41 + 3 + 110)
Why the math works: Each run starts with 1 sc, and each loop after that uses 2 more stitches. That means every run needs an odd count. Both 221 and 83 are odd, so each side ends exactly on its last stitch. The 3-sc corner groups turn the corners with no extra adjustment. The border adds 0.5 in (1.3 cm) to each side and to the top. The width is 21.25 + 0.5 + 0.5 = 22.25 in (56.5 cm), and the length at the points is 1.75 + 54.75 + 0.5 = 57 in (144.8 cm).
Final Blocking
- Weave in all ends through the sc or dc stitches, never across the open lattice.
- Soak the panel in cool water with a little wool wash for 15 minutes. Press out the water without wringing.
- Roll the panel in a towel to remove more water.
- Lay it flat on blocking mats with the RS facing up. Pin the side edges straight, 22.25 in (56.5 cm) apart.
- Pin the top edge straight and check that the side corners are 55.75 in (141.6 cm) below it.
- Pin each of the 7 points to a sharp tip 57 in (144.8 cm) from the top edge.
- Open each Fan with your fingers so the base hole is round and the diamonds are even.
- Let the panel dry completely before you unpin it. Block the second panel the same way and check that the two match.
Final Quality-Control Checklist
- Every full Fan row has 7 Fans, and there are 31 Fan rows in total.
- Row 63 has 85 sts.
- Edging Row B has 134 sc and 7 points.
- Border Row 1 has 221 sc on each side and 83 sc across the top, plus the 3-sc corners.
- Border Row 2 has 267 ch-3 loops.
- Both panels measure 22.25 in (56.5 cm) x 57 in (144.8 cm).
- All ends are secure, and no knots show on the RS.
- Each point lines up with the fan base directly above it.
Troubleshooting
- Fans cup or ruffle: Your dc are too loose compared with the lattice. Use a hook one size smaller for the Fan rows only.
- Diamonds look squashed: Your tr are too short. Pull up the first loop of each tr to the full height of the hook.
- Panel is narrower at the top: Check that every Leveling Row repeat has 12 sts.
- Side edges ripple after the border: Take out 1 sc per Fan row on both sides. Remove the same number from each side, and keep each side’s total odd for Border Row 2.
- Side edges pull in: Add 1 sc to every fourth lattice row end. Again, keep each side’s count odd.
- Points curl: Steam them lightly and pin them again. Check that the ch-4 loops aren’t too tight.
- Panels hang at different lengths: Block the longer panel again, with the pins set at 57 in (144.8 cm).
Care
Hand wash the panels in cool water and dry them flat, reshaping the points while they’re damp. Don’t hang them on the rod while they’re wet, because the weight of the water will stretch the lace.
Final Notes
Here’s how the measurements build up for each panel. One 12-chain repeat measures 3 in (7.6 cm), so the 85-stitch body is 21.25 in (54.0 cm) wide. Fifteen 4-row repeats, plus Row 1 and the two top rows, make the body 54.75 in (139.1 cm) long. The pointed edging adds 1.75 in (4.4 cm) below the body. The 0.5 in (1.3 cm) border brings each finished panel to 22.25 in (56.5 cm) x 57 in (144.8 cm). If your swatch matches the gauge, the full panels will match these numbers.
Happy crocheting!