

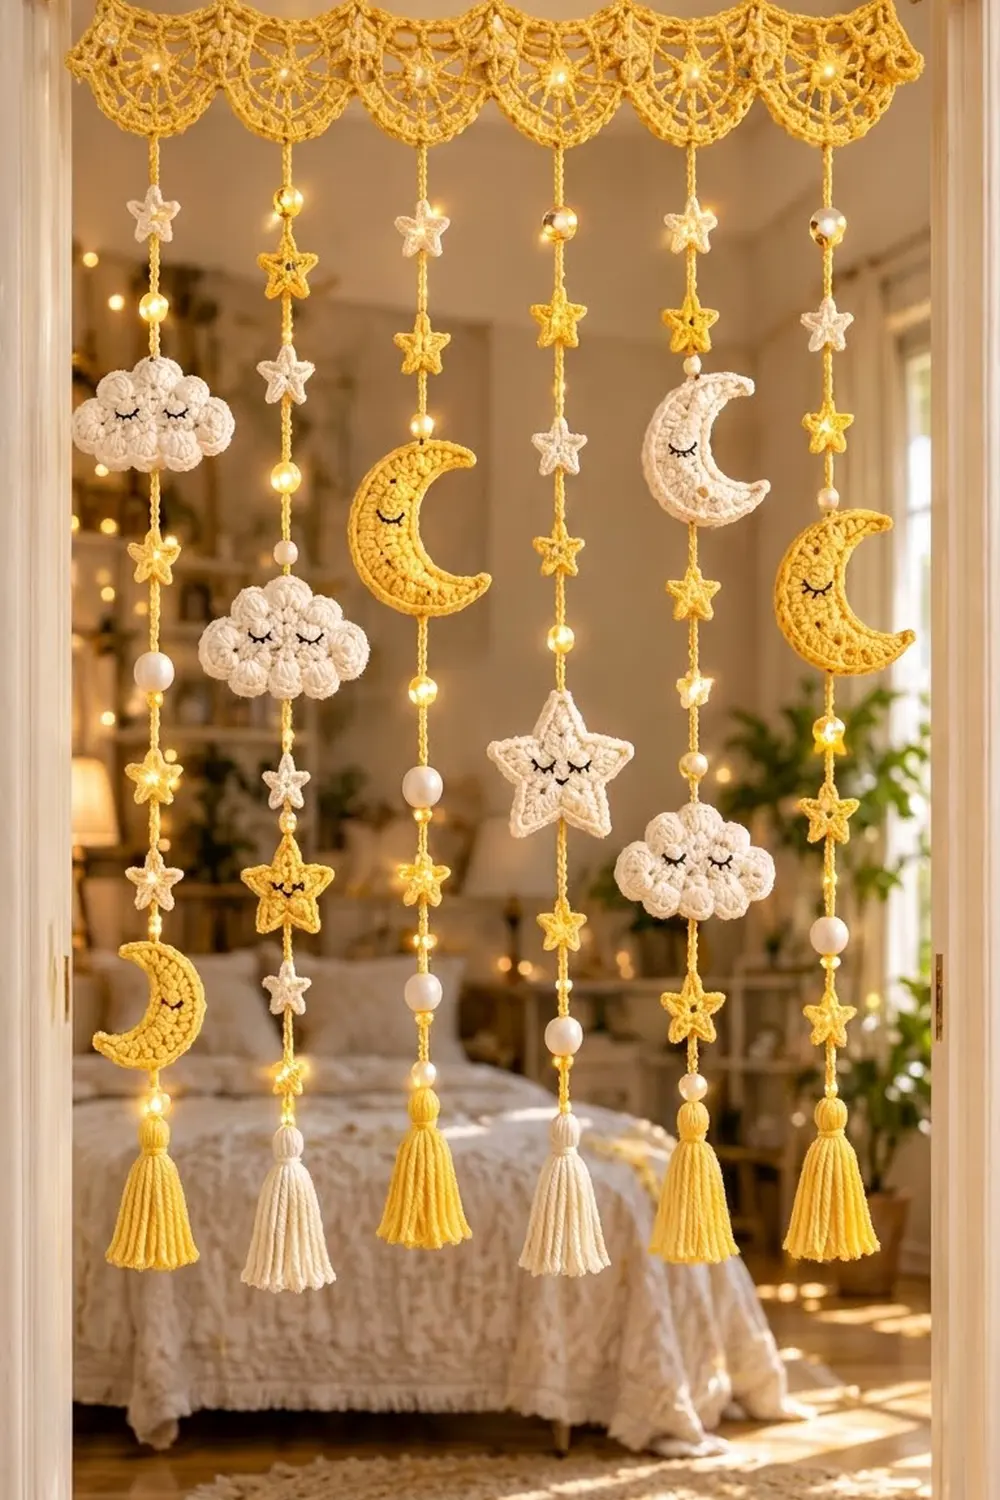
This curtain brings a soft night sky into a doorway. A row of lacy yellow scallops forms the header. Below it, six cords hold small stars, white beads, puffy clouds, crescent moons and two larger stars. The large motifs have embroidered sleepy faces, and every cord ends in a full tassel.
The palette is warm and calm: buttery yellow, creamy ivory, black for the faces and white beads. The style suits a nursery or bedroom, and a string of fairy lights wound through the cords is an optional extra.
All instructions use US crochet terms. The finished curtain is 35 in (88.9 cm) wide and 34 in (86.4 cm) long from the top of the band to the tassel tips, not counting the hanging loops.
Construction: you crochet seven half-circle scallops in rows, tack them together at their tips and work a straight band with hanging loops across the top. Then you chain six cords from the scallop joins and sew on the motifs and tassels.
Finished Size and Construction
- Finished size: 35 in (88.9 cm) wide × 34 in (86.4 cm) long
- Skill level: Intermediate
- Terminology: US
- Yarn weight: DK / light worsted (#3) cotton
- Hook: 3.5 mm (E-4)
- Number of pieces: 7 scallops, 6 cords, 40 small stars, 9 large motifs, 6 tassels
- Layout: 7 scallops in one row; 6 cords hang from the 6 joins
- Scallop size: 5 in (12.7 cm) wide × 2.5 in (6.4 cm) deep
- Size before border: 35 in (88.9 cm) × 2.5 in (6.4 cm)
- Border depth: 0.75 in (1.9 cm), plus loops that stand 1.8 in (4.6 cm) high
Materials
Use a smooth mercerized or matte cotton DK. Cotton holds the picots and star points crisply, and it hangs straight without stretching. The amounts below assume about 115 m per 50 g.
- Yellow: 120 g (about 276 m) for the scallops, band, cords, 21 small stars, 3 moons, 1 large star and 4 tassels
- Cream: 50 g (about 115 m) for 3 clouds, 19 small stars, 1 moon, 1 large star and 2 tassels
- Black: 2 g (about 8 m) of fingering yarn or embroidery floss for the faces
Tools and extras:
– 3.5 mm (E-4) hook
– Yarn needle and stitch markers
– 17 white beads, 10 mm, with holes at least 3 mm wide (buy 20)
– Cardboard strip 3.5 in (8.9 cm) wide for the tassels
– Rod or dowel 40 in (101.6 cm) long and up to 1 in (2.5 cm) thick, plus optional curtain rings
– Rustproof pins and a blocking mat
– Optional: battery LED fairy lights, 120 in (304.8 cm) long
All quantities include a margin of about 15%.
Abbreviations (US Terms)
- ch: chain
- sl st: slip stitch
- sc: single crochet
- hdc: half double crochet
- dc: double crochet
- tr: treble crochet
- sp: space
- st(s): stitch(es)
- RS: right side
- MR: magic ring
Picot: Ch 3, sl st in the 3rd ch from the hook.
Gauge and Checkpoints
Gauge:
– 20 sc and 22 rows = 4 in (10.2 cm)
– 9 dc rows = 4 in (10.2 cm)
– Chain: 25 ch = 5 in (12.7 cm), lightly stretched
Make one complete scallop before anything else.
Checkpoints:
– After Row 3, the scallop is 2.75 in (7.0 cm) wide.
– After Row 5, it is 4.5 in (11.4 cm) wide and 2.25 in (5.7 cm) deep.
– The finished scallop is 5 in (12.7 cm) wide, and its 25 top sc measure 5 in (12.7 cm).
If the scallop is too big, go down 0.5 mm in hook size. If it is too small, go up 0.5 mm. Don’t add or skip stitches to fix the size; the border math depends on exactly 25 sc per scallop.
Scallop (make 7, yellow)
Row 1: MR, ch 3 (counts as dc), 6 dc in the ring, pull the ring tight. Turn. (7 dc)
Row 2: Ch 3 (counts as dc), dc in the same st, 2 dc in each of the remaining 6 sts. Turn. (14 dc)
Row 3: Ch 3 (counts as dc), dc in the same st, dc in the next st, [2 dc in the next st, dc in the next st] 6 times. Turn. (21 dc)
Row 4 (spokes): Ch 5 (counts as dc + ch 2), skip the next st, dc in the next st, [ch 2, skip the next st, dc in the next st] 9 times. Turn. (11 dc, 10 ch-2 sps)
Row 5: Ch 3 (counts as dc), [3 dc in the next ch-2 sp] 10 times, dc in the 3rd ch of the turning ch-5. Turn. (32 dc)
Row 6 (picot edge): Ch 1, sc in the first 2 sts, [picot, sc in the next 3 sts] 10 times. Do not turn. (32 sc, 10 picots)
Row 7 (top edge): Ch 1 and rotate to work along the straight edge. Work 2 sc in each of the 6 row ends down to the ring (12 sc), 1 sc in the ring center, then 2 sc in each of the 6 row ends on the other side (12 sc). (25 sc)
Fasten off and leave a 6 in (15.2 cm) tail. The 25 sc are the scallop’s complete top-edge count, including both end stitches.
Small Star (make 21 yellow, 19 cream)
Rnd 1: MR, ch 1, 5 sc in the ring, sl st to the first sc. (5 sc)
Rnd 2: [Ch 4, sl st in the 2nd ch from the hook, sc in the next ch, hdc in the next ch, sl st in the next sc of Rnd 1] 5 times. (5 points)
Fasten off and leave an 8 in (20.3 cm) tail for sewing. The star measures 1.5 in (3.8 cm) across.
Large Star (make 1 yellow, 1 cream)
Rnd 1: MR, ch 3 (counts as dc), 9 dc in the ring, sl st to the top of the ch-3. (10 dc)
Rnd 2: Ch 3 (counts as dc), dc in the same st, 2 dc in each remaining st, sl st to the top of the ch-3. (20 dc)
Rnd 3: [Ch 5, sl st in the 2nd ch from the hook, sc in the next ch, hdc in the next ch, dc in the next ch, skip the next 3 dc of Rnd 2, sl st in the next dc] 5 times. (5 points; each point uses 4 sts of Rnd 2, 5 × 4 = 20)
Rnd 4: Work around each point: 4 sc up the first side, [sc, ch 1, sc] in the tip, 4 sc down the other side, sl st in the sl st between points. (50 sc, 5 ch-1 tips)
The star measures 3.5 in (8.9 cm) tip to tip and keeps its small center hole.
Crescent Moon (make 3 yellow, 1 cream)
Row 1: Ch 17. Work in the back bumps, starting in the 2nd ch from the hook: sl st, sc, hdc, dc, 2 dc in the next ch, [2 tr in the next ch] 6 times, 2 dc in the next ch, dc, hdc, sc, sl st in the last ch. (16 ch worked; 24 sts)
Rnd 2: Ch 1. Do not turn. Sc in each of the 16 free loops along the foundation chain, then sc in each of the 24 sts of Row 1. Sl st to the first sc. (40 sc)
The increases curve the outer edge, and the foundation chain becomes the inner curve. The moon measures 3.25 in (8.3 cm) tip to tip.
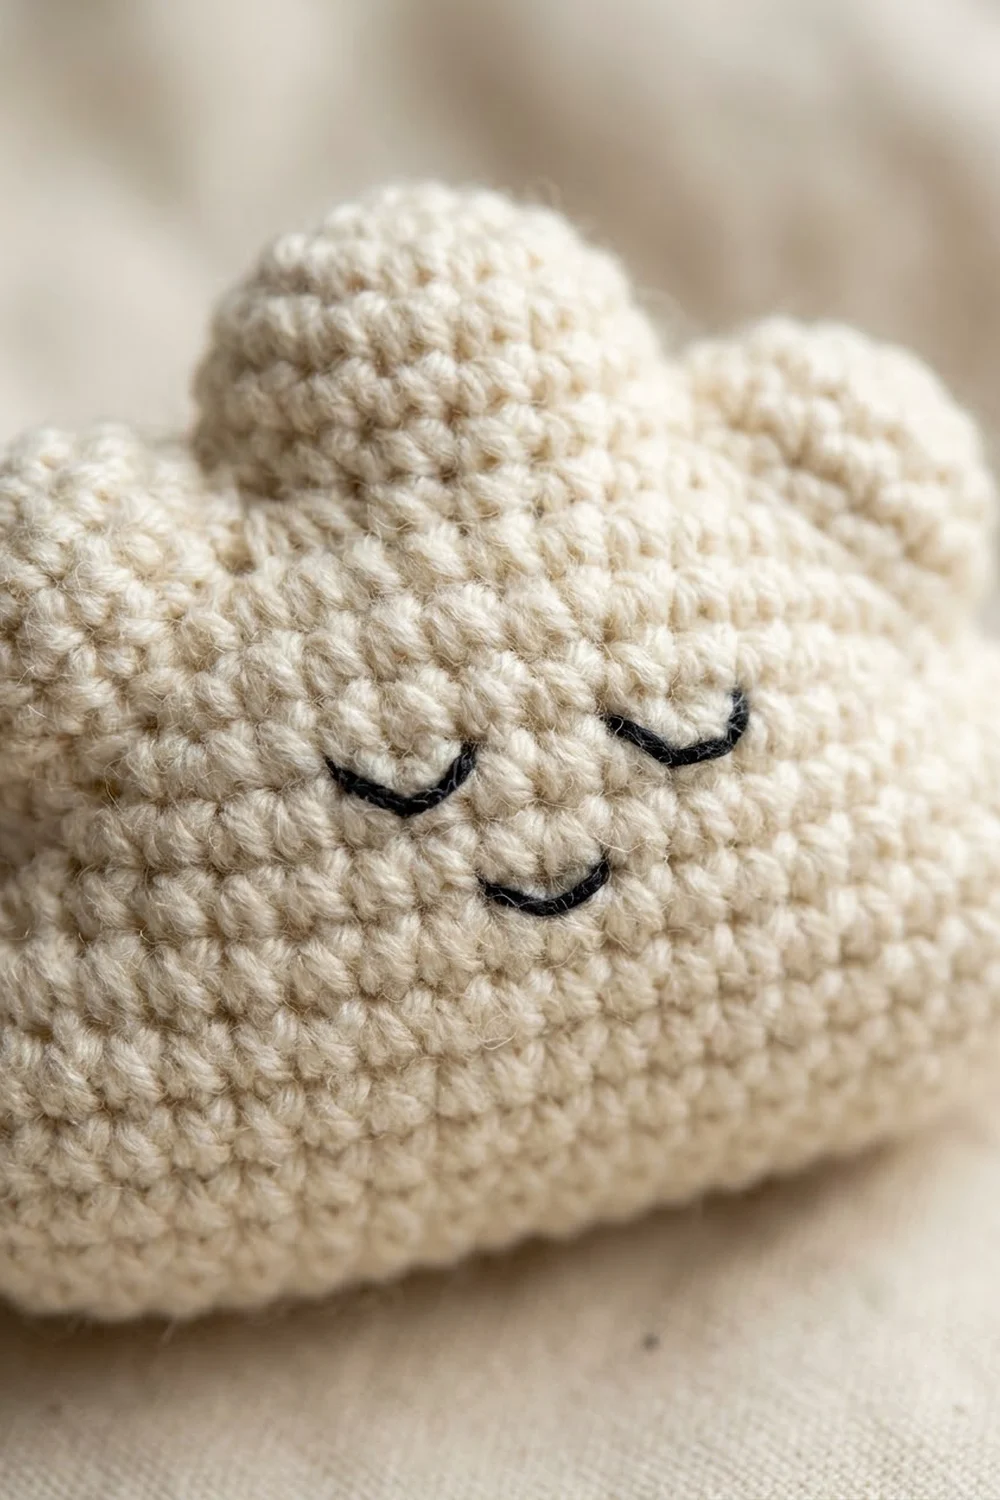
Cloud (make 3, cream)
Row 1: Ch 14, sc in the 2nd ch from the hook and in each ch across. Turn. (13 sc)
Rows 2–4: Ch 1, sc in each st across. Turn. (13 sc)
Rnd 5 (puffs): Work all the way around in one round:
1. Ch 1, rotate and sc in each of the 13 foundation-chain loops.
2. Work 9 dc in the side, between the ends of Rows 2 and 3.
3. Along the top of Row 4: sc in the first st, skip 1, 9 dc in the next st, skip 1, sc in the next st, skip 1, 9 tr in the next st, skip 1, sc in the next st, skip 1, 9 dc in the next st, skip 1, sc in the last st.
4. Work 9 dc in the other side, between the ends of Rows 3 and 2.
5. Sl st to the first sc.
(13 + 9 + 31 + 9 = 62 sts)
The middle bump is worked in tr, so it stands tallest. The cloud measures 3.5 in (8.9 cm) wide × 2 in (5.1 cm) tall.
Faces and Tassels
Faces: Use black yarn or floss on all 9 large motifs. Backstitch each closed eye as a downward curve 0.25 in (0.6 cm) wide, using 3 short stitches, and add a tiny smile underneath. Moons get one eye, placed on the widest part.
Tassels (4 yellow, 2 cream):
1. Wrap yarn 30 times around the 3.5 in (8.9 cm) card.
2. Tie the top with a 12 in (30.5 cm) strand and leave the ends long.
3. Cut the bottom loops.
4. Wrap the neck 0.5 in (1.3 cm) below the top.
5. Trim the tassel to 3.25 in (8.3 cm).
Make All Pieces
| Piece | Yellow | Cream |
|---|---|---|
| Scallops | 7 | — |
| Small stars | 21 | 19 |
| Large stars | 1 | 1 |
| Moons | 3 | 1 |
| Clouds | — | 3 |
| Tassels | 4 | 2 |
Layout grid. Each cord has a marker point every 2 in (5.1 cm), numbered from the top. Codes: sY/sC = small star (yellow/cream), B = bead, – = empty cord.
Pt  in (cm)       S1      S2      S3      S4      S5      S6
1   2 (5.1)       sC      sY      sC      sY      sC      sY
2   4 (10.2)      sY      sC      sY      B       sY      sC
3   6 (15.2)      B       sY      B       sC      –       sY
4   8 (20.3)      –       –       sC      sY      MOON-C  B
5   10 (25.4)     CLOUD   CLOUD   –       sC      –       –
6   12 (30.5)     –       –       MOON-Y  B       sY      MOON-Y
7   14 (35.6)     sY      B       –       sY      B       –
8   16 (40.6)     B       sC      sY      –       sC      sC
9   18 (45.7)     sC      –       B       STAR-C  –       sY
10  20 (50.8)     sY      STAR-Y  sC      –       CLOUD   B
11  22 (55.9)     –       –       sY      sY      –       sC
12  24 (61.0)     MOON-Y  sC      B       B       sY      sY
13  26 (66.0)     –       B       sC      sC      B       B
14  28 (71.1)     B       sY      sY      B       sC      sC
Tassel            Y       C       Y       C       Y       Y
Every large motif has an empty point directly above and below it, which leaves room for its 2 in to 3.5 in (5.1–8.9 cm) height.
Joining
- Lay the scallops in a row with the RS up and the top edges in a straight line.
- Using the yellow tails, whipstitch the side edges of Rows 6 and 7 of each scallop to the matching edges of the next scallop, with 3 snug stitches.
This only tacks the scallop tips together; it adds no stitches to the top edge. Keep your tension firm enough that the tips meet flat, without bunching.
Checkpoint: The joined strip measures 35 in (88.9 cm) × 2.5 in (6.4 cm). That is 7 scallops × 5 in (12.7 cm).
Border (Top Band)
Border gauge: 5 sc = 1 in (2.5 cm)
Row 1: With the RS facing, join yellow in the first sc of Row 7 on scallop 1. Ch 1, then sc in each sc across all 7 scallops. Turn. (7 × 25 = 175 sc)
Row 2: Ch 1, sc in each st across. Turn. (175 sc)
Row 3: Ch 1, [sc in the next 12 sts, ch 18, sc in the next 13 sts] 7 times. Turn. (175 sc, 7 ch-18 loops)
Row 4: Ch 1, sc in each sc, and work 22 sc into each ch-18 loop. (175 sc + 154 loop sc = 329 sc)
Fasten off.
Why the math works: Each scallop gives exactly 25 sc. At 5 sc per inch, 25 sc = 5 in (12.7 cm), so 175 sc = 35 in (88.9 cm), the same width as the joined strip. No stitches are added at the seams. Each loop is centered over its own scallop, and the 18 ch measure 3.6 in (9.1 cm), enough to go around a rod up to 1 in (2.5 cm) thick.
Cords (make 6, yellow)
- Thread the beads for that cord onto the yarn (2, 3 or 4 beads, per the grid). The beads are identical, so the order doesn’t matter.
- With the RS facing, insert your hook through both tacked tips at one join, pull up a loop and ch 1 (the ch 1 doesn’t count).
- Ch 10 for each point. The 10th chain is the marker chain; place a marker in it. At a B point, slide a bead up to the hook and work the 10th chain around it.
- After point 14 (140 ch), ch 10 more. (150 ch = 30 in / 76.2 cm)
- Fasten off and tie the tassel to the last chain.
Checkpoint: The first 50 ch measure 10 in (25.4 cm).
Attaching motifs: Center each small star over its marker chain and sew through the star center around the chain with 2–3 stitches. For large motifs, run the cord behind the motif and tack it at the top and bottom edges.
Final Blocking
- Pin the header flat on the mat, with each scallop curve round and the picots opened.
- Pin the band straight to 35 in (88.9 cm).
- Mist with water until damp and leave to dry completely.
- Lightly steam the large motifs from above, without pressing.
- Hang the curtain and let the cords straighten for 24 hours.
- Smooth the tassels with damp fingers and trim them evenly.
- If you’re using fairy lights, wind them loosely around the cords now. Use LED lights only.
Final Quality-Control Checklist
- 7 scallops, each 5 in (12.7 cm) wide
- 175 sc in border Rows 1–3 and 329 sc in Row 4
- 7 loops, each centered over a scallop
- 6 cords, each 30 in (76.2 cm) long
- 40 small stars, 9 large motifs, 17 beads and 6 tassels placed as in the grid
- All faces embroidered and all tails woven in
- Total length 34 in (86.4 cm)
Troubleshooting
- The scallop cups: Your Row 3 or Row 5 tension is too tight. Go up a hook size.
- The scallop ruffles: The dc are too loose. Go down a hook size.
- The band waves: Count Row 1 again; it must be exactly 175 sc.
- The cords twist: Steam the cord and hang it with the tassel weighted overnight.
- Motifs flip over: Add a tack stitch at the bottom edge of the motif.
- A bead won’t fit: Use a beading needle and a fine loop of thread to pull the yarn through.
Care
Hand wash in cool water with mild soap, press out the water in a towel and dry flat. Remove the fairy lights before washing.
Final Notes
The measurement chain is simple: gauge gives a 5 in (12.7 cm) scallop with 25 sc on top, seven scallops give 35 in (88.9 cm) and 175 border stitches, and 150-chain cords plus tassels give a 34 in (86.4 cm) curtain. Check each link before moving on, and the curtain will hang straight and even.
Happy crocheting!