

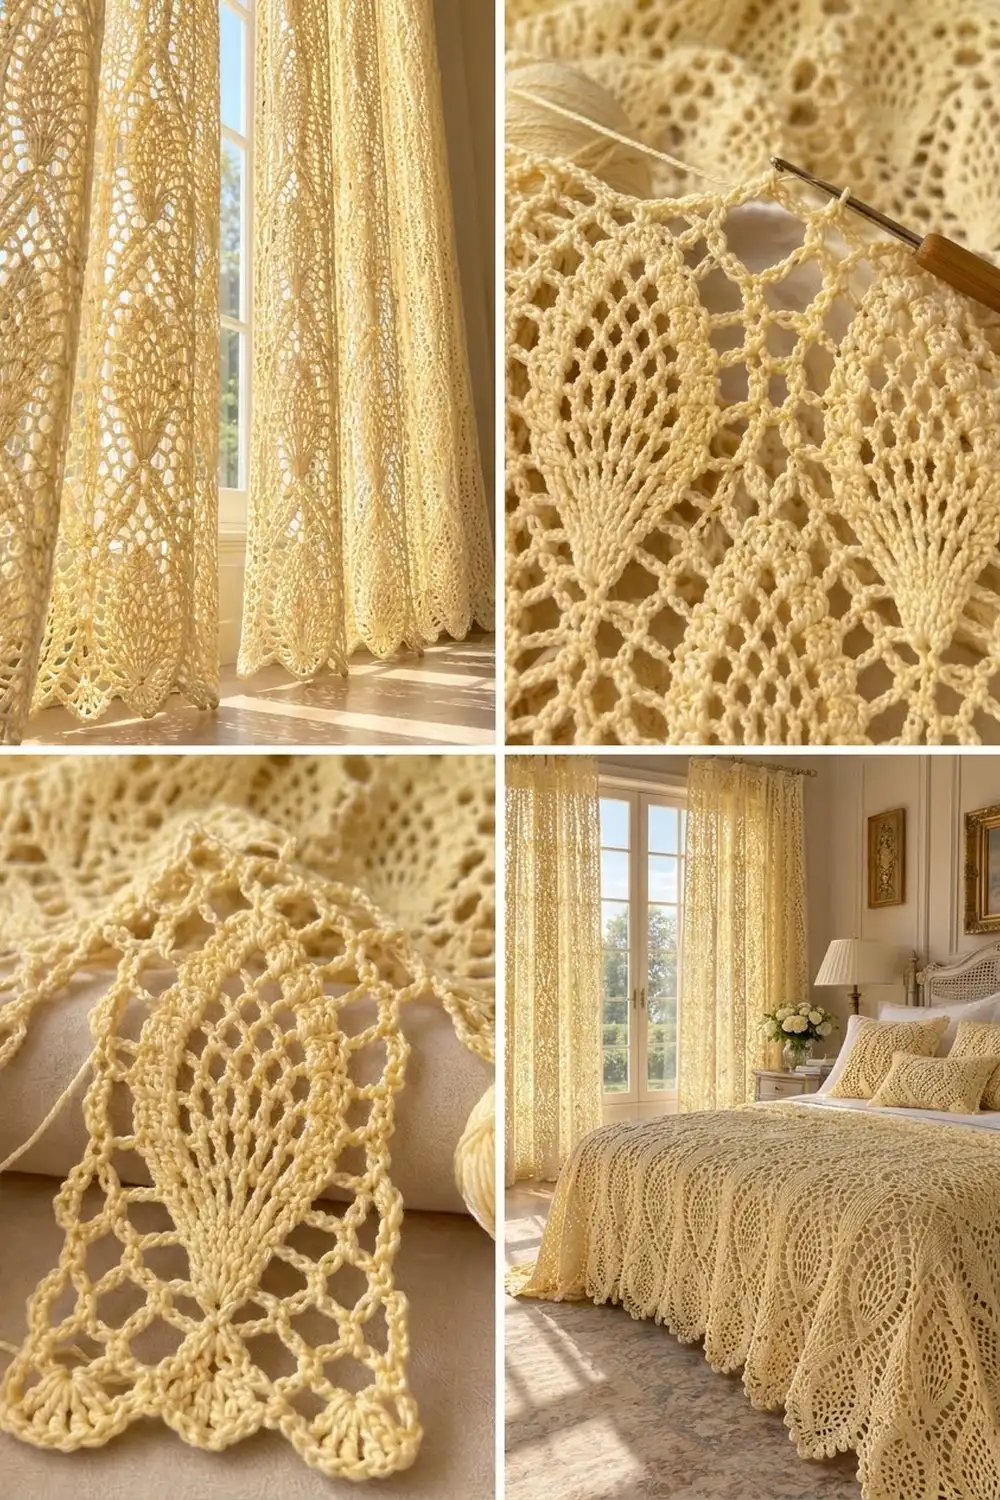
This curtain panel uses vintage pineapple lace in a soft butter-yellow cotton. Columns of pineapples stack from the top of the panel to the hem, with lacy shell columns and open diamond mesh between them. In a sunny window the lace throws patterned shadows across the floor.
The panel is one color and one piece. You don’t make or join any motifs. The bottom hem ends in pointed scallops, one under each pineapple column, and a firm single crochet border frames the sides and top so the panel hangs straight from clip rings.
The pattern uses US crochet terms. One finished panel is 42.25 in (107.3 cm) wide and 80 in (203.2 cm) long along the side edges, or 81.5 in (207.0 cm) measured to the scallop points. For a pair, make two identical panels.
You start at the top with a single crochet foundation row and two mesh rows. Then you work twelve 12-row pineapple tiers, one final pineapple tier and a two-row scalloped hem. Last, you add a top heading and side borders.
Finished Size and Construction
- Finished size: 42.25 in × 80 in (107.3 cm × 203.2 cm) at the side edges; 81.5 in (207.0 cm) long at the points
- Skill level: Intermediate
- Terminology: US
- Yarn weight: DK (3), cotton
- Hook: 4.0 mm (G-6)
- Number of pieces: 1 per panel (make 2 for a pair)
- Layout: 9 pineapple columns across, worked top to bottom in rows
- Pattern repeat: 16 sts = 4 in (10.2 cm) wide; one 12-row tier = 6 in (15.2 cm) tall
- Size before border: 40.25 in × 79 in (102.2 cm × 200.7 cm) at the edges
- Border depth: 1 in (2.5 cm) at the top and on each side
Materials
Yarn: Use a smooth mercerized or combed DK cotton, about 110 m per 50 g. Cotton gives crisp stitch definition and holds the pineapple shape after blocking. Avoid fuzzy or very stretchy blends, because the long panel will grow under its own weight.
- Butter Yellow: 1,100 g (about 2,420 m) per panel; 2,200 g (about 4,840 m) for a pair
Tools:
– 4.0 mm (G-6) crochet hook
– Tapestry needle
– Stitch markers
– Measuring tape
– Rust-proof pins and blocking space (a bed or clean floor covered with towels)
– Spray bottle
– 10–12 curtain clip rings per panel
Yarn quantities include a margin of about 10%. Buy all yarn from one dye lot.
Abbreviations (US Terms)
- ch – chain
- sc – single crochet
- dc – double crochet
- sl st – slip stitch
- sk – skip
- sp – space
- st(s) – stitch(es)
- tch – turning chain
- RS / WS – right side / wrong side
Special stitches:
– Shell: (2 dc, ch 2, 2 dc) all in the same sp. “Shell in shell” means you work the new shell into the ch-2 sp of the shell below.
– Fan: 9 dc in the same sp.
Gauge and Checkpoints
Base gauge: 16 sc and 16 rows of sc = 4 in (10.2 cm).
Pattern gauge: one 16-st repeat = 4 in (10.2 cm) wide; one 12-row tier = 6 in (15.2 cm) tall, lightly blocked.
Test a swatch first. Ch 50 and work the pattern with 2 repeats: Foundation Rows 1–3, then one full tier. The swatch has 49 sc in Row 1, 12 loops in Row 2 and 11 loops in Row 3. In the tier, use 2 repeats instead of 9 (3 shells, 2 fans).
- After Row 1, the swatch is 12.25 in (31.1 cm) wide.
- One tier measures 6 in (15.2 cm) tall after you pin and mist it.
Panel checkpoints:
– Foundation Row 1: 161 sc = 40.25 in (102.2 cm)
– After Foundation Rows 1–3: 1.25 in (3.2 cm) long
– After 6 tiers: 37.25 in (94.6 cm)
– After 12 tiers: 73.25 in (186.1 cm)
– After the final tier: 78.25 in (198.8 cm)
– After the hem, at the edges: 79 in (200.7 cm)
If your swatch is too big, go down one hook size. If it is too small, go up one size. If only the height is off, check the chain loops: they should be loose and rounded, not snug.
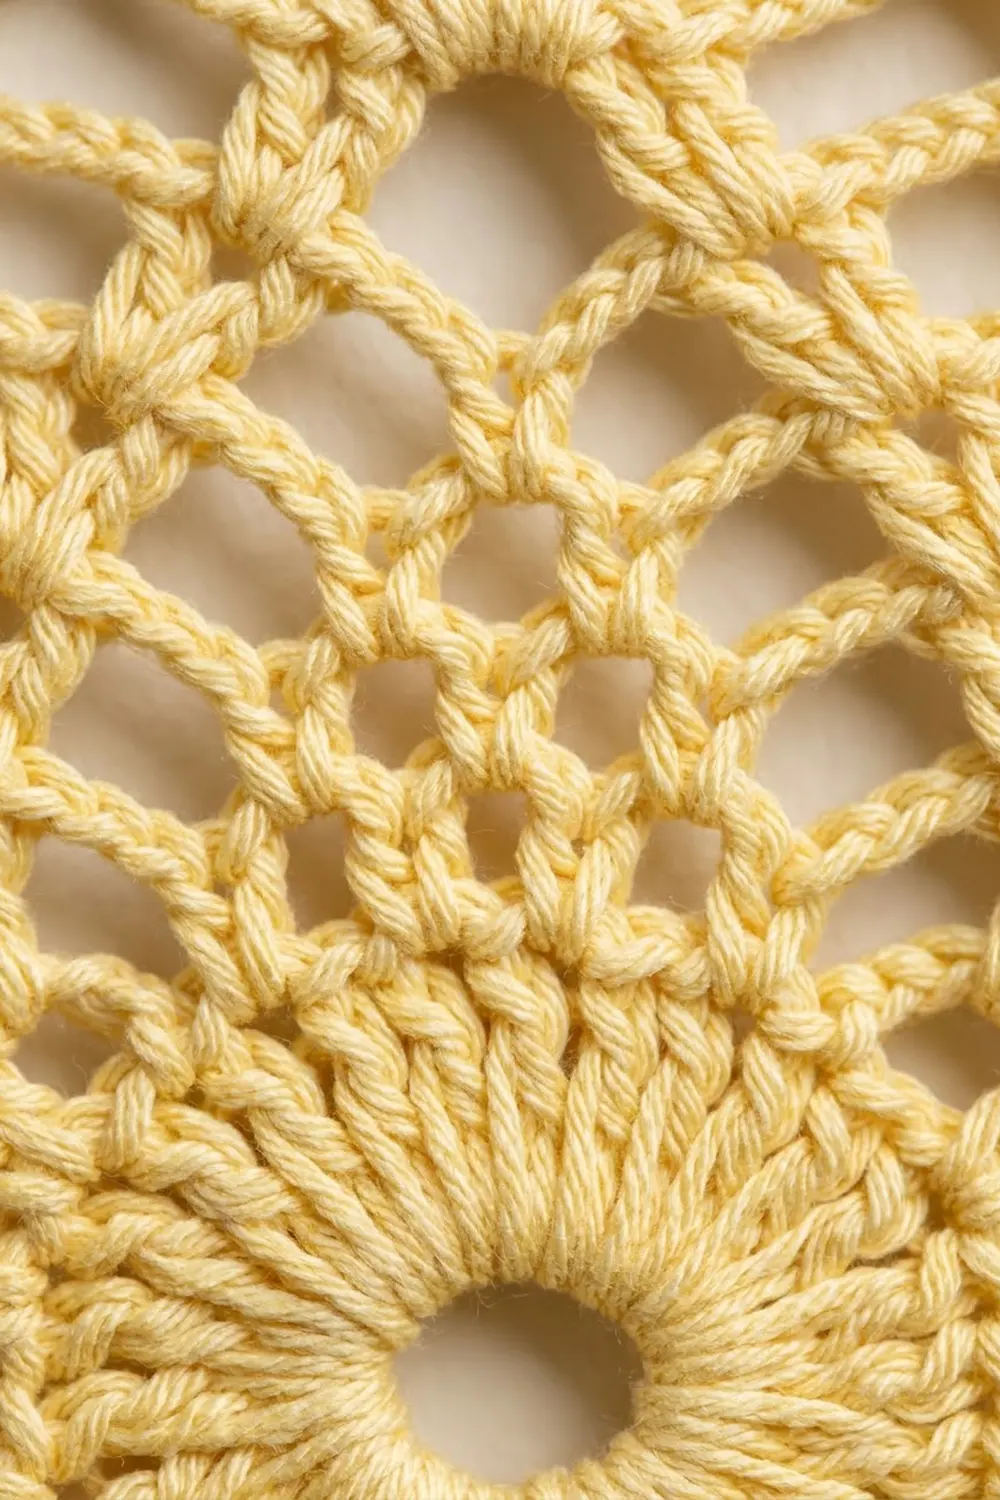
Foundation (Top Edge)
Ch 162.
Row 1 (RS): Sc in 2nd ch from hook and in each ch across, turn. (161 sc)
Row 2: Ch 1, sc in first sc, ch 5, sk 3 sc, sc in next sc; rep from * across, turn. (40 ch-5 loops, 41 sc)*
The math: 1 + (40 × 4) = 161 sts used.
Row 3: Ch 5 (counts as dc + ch 2), sc in first loop, (ch 5, sc in next loop) 39 times, ch 2, dc in last sc, turn. (39 full ch-5 loops plus a half loop at each edge)
Every pineapple tier starts on a row like this one, with 39 full loops.
Pineapple Tier (12 Rows)
Work Rows 1–12 a total of 12 times. In each tier you work 9 repeats, which makes 9 fans and 10 shells.
Row 1: Ch 5 (counts as dc + ch 2), sc in first loop, ch 3, shell in next loop, ch 3, sc in next loop, ch 3, fan in next loop, ch 3, sc in next loop, ch 3, shell in next loop; rep from * 8 more times, ch 3, sc in last loop, ch 2, dc in 3rd ch of tch, turn. (10 shells, 9 fans of 9 dc)*
Loops used: 1 + 1 + (9 × 4) + 1 = 39. Each fan sits in the center of its column, which is where that pineapple starts.
Row 2: Ch 5 (counts as dc + ch 2), shell in first shell, ch 3, dc in first dc of fan, (ch 1, dc in next dc) 8 times, ch 3, shell in next shell; rep from * across, ch 2, dc in 3rd ch of tch, turn. (Each pineapple: 9 dc with 8 ch-1 sps)*
All remaining pineapple rows start with ch 5 (counts as dc + ch 2) and shell in first shell. They all end with shell in last shell, ch 2, dc in 3rd ch of tch, turn. The bracketed part below is worked across each repeat.
Row 3: [ch 3, sc in first ch-1 sp, (ch 3, sc in next ch-1 sp) 7 times, ch 3, shell in next shell] (7 ch-3 loops per pineapple)
Row 4: [ch 4, sc in first ch-3 loop, (ch 3, sc in next loop) 6 times, ch 4, shell in next shell] (6 loops)
Row 5: [ch 4, sc in first loop, (ch 3, sc in next loop) 5 times, ch 4, shell] (5 loops)
Row 6: [ch 5, sc in first loop, (ch 3, sc in next loop) 4 times, ch 5, shell] (4 loops)
Row 7: [ch 5, sc in first loop, (ch 3, sc in next loop) 3 times, ch 5, shell] (3 loops)
Row 8: [ch 6, sc in first loop, (ch 3, sc in next loop) 2 times, ch 6, shell] (2 loops)
Row 9: [ch 6, sc in first loop, ch 3, sc in next loop, ch 6, shell] (1 loop)
Row 10: [ch 7, sc in last ch-3 loop, ch 7, shell] (pineapple point: 1 sc between two ch-7 sps)
The pineapple loses one loop in each row from Row 3 to Row 9. Meanwhile, the side chains grow from ch 3 to ch 7, so the panel stays the same width while the pineapples narrow.
Row 11 (mesh): Ch 1, sc in first dc, ch 5, sc in edge ch-2 sp, ch 5, sc in first shell ch-2 sp, ch 5, sc in next ch-7 sp, ch 5, sc in point sc, ch 5, sc in next ch-7 sp, ch 5, sc in next shell ch-2 sp; rep from * across, ch 5, sc in edge ch-2 sp, ch 5, sc in 3rd ch of tch, turn. (40 loops, 41 sc)*
The math: 2 edge loops + (9 × 4) + 2 edge loops = 40.
Row 12 (mesh): Ch 5 (counts as dc + ch 2), sc in first loop, (ch 5, sc in next loop) 39 times, ch 2, dc in last sc, turn. (39 full loops)
The 39 full loops of Row 12 line up over the shell and pineapple columns. Because of this, the next tier’s fans sit directly below the previous points, and the pineapples stack in straight columns.
After 12 tiers, the panel measures 73.25 in (186.1 cm).
Final Tier and Scalloped Hem
Final tier: Work Rows 1–10 once more and stop after Row 10. Do not work the mesh rows. The panel now measures 78.25 in (198.8 cm).
Hem Row 1: Ch 1, sc in first dc, 4 dc in edge ch-2 sp, sc in first shell ch-2 sp, 9 dc in next ch-7 sp, (dc, ch 3, dc) in point sc, 9 dc in next ch-7 sp, sc in next shell ch-2 sp; rep from * 8 more times, 4 dc in edge ch-2 sp, sc in 3rd ch of tch, turn. (9 scallops of 20 dc each, plus a ch-3 point; 10 valley sc; 4 dc + 1 sc at each edge; 188 dc and 12 sc in total)*
Hem Row 2: Ch 1, sc in first sc, sc in next 4 dc, sl st in valley sc, sc in next 10 dc, (sc, ch 3, sc) in ch-3 point, sc in next 10 dc, sl st in next valley sc; rep from * 8 more times, sc in next 4 dc, sc in last sc. Fasten off. (9 scallops of 22 sc each, with a ch-3 picot point; 10 sl sts; 5 sc at each edge; 208 sc in total)*
Each scallop hangs about 1.5 in (3.8 cm) below the edge line. The panel measures 79 in (200.7 cm) at the edges.
Border
Border gauge: 16 sc and 16 rows = 4 in (10.2 cm). Each border is 4 rows, which makes it 1 in (2.5 cm) deep.
Top heading: With the RS facing, join yarn at the top right corner, in the free loop of the foundation chain.
- Row 1: Ch 1, sc in each free ch loop across, turn. (161 sc)
- Rows 2–4: Ch 1, sc in each sc across, turn. (161 sc)
Fasten off. The heading keeps the full panel width of 40.25 in (102.2 cm) and gives the clip rings a firm edge to grip.
Side borders: Work each side the same way. Join yarn at the hem corner (right side) or the top corner (left side).
Row 1: Work along the row ends as follows:
– 1 sc in each plain sc row end: 4 heading rows, Foundation Row 1 and Hem Row 2 = 6 sc
– 2 sc in every other row end: Foundation Rows 2–3 (4), 12 tiers × 12 rows (288), final tier Rows 1–10 (20) and Hem Row 1 (2) = 314 sc
(320 sc per side)
Rows 2–4: Ch 1, sc in each sc, turn. (320 sc) Fasten off.
Why the math works:
– Sc rows are 0.25 in (0.6 cm) tall and get 1 sc each.
– Lace rows are 0.5 in (1.3 cm) tall and get 2 sc each.
– Both match the border gauge of 4 sc per inch, so 320 sc = 80 in (203.2 cm), the exact edge length.
– Across the width, 161 sc plus 1 in (2.5 cm) of border on each side gives 42.25 in (107.3 cm).
Final Blocking
- Weave in all ends along the solid sc borders, where they stay hidden.
- Soak the panel in cool water for 15 minutes, then press out the water. Don’t wring it.
- Roll the panel in towels to remove more water.
- Lay the panel flat on towels on a bed or the floor.
- Pin the side borders straight at 42.25 in (107.3 cm) apart.
- Pin the edge length to 80 in (203.2 cm).
- Pin out each scallop point and picot so the points sit 1.5 in (3.8 cm) below the edge line.
- Gently open each pineapple and the diamond mesh with your fingers.
- Let the panel dry completely before you unpin it.
Final Quality-Control Checklist
- Foundation Row 1 has 161 sc, and the mesh rows alternate between 40 loops and 39 full loops.
- Every tier has 10 shells and 9 pineapples.
- Each pineapple narrows from a 9-dc fan to a single sc point over Rows 1–10.
- All 9 pineapple columns are straight and line up vertically.
- The hem has 9 scallops, each with a picot point.
- The heading has 161 sc, and each side border has 320 sc in every row.
- The panel measures 42.25 in × 80 in (107.3 cm × 203.2 cm), or 81.5 in (207.0 cm) to the points.
- Both panels of a pair match in length within 0.5 in (1.3 cm).
Troubleshooting
Pineapples lean or drift sideways: You missed a loop in Row 1. Count 39 loops used before you turn.
The panel narrows over many tiers: Your side chains are too tight. Loosen the ch-4 to ch-7 chains, or go up a hook size for the chains only.
Tiers are shorter than 6 in (15.2 cm): Make your dc stitches taller by pulling up the first loop fully.
The side border ruffles: Recount the row ends, and keep to the 1-sc and 2-sc rule exactly.
The side border puckers: Your border tension is too tight. Work it with a hook one size larger.
Scallops curl up: Block them firmly. If they still curl, rework Hem Row 2 more loosely.
The panel grows when hung: Cotton relaxes over time. Pin it to the target length and let it dry flat before hanging.
Care
Hand wash in cool water with a mild detergent, then dry flat and reshape the scallops while damp. Don’t hang the panel wet, because the weight of the water will stretch it.
Final Notes
Each measurement in this pattern builds on the one before it:
- The 16 sc gauge sets the 4 in (10.2 cm) repeat.
- Nine repeats plus the edges give a 161-st body, 40.25 in (102.2 cm) wide.
- Twelve tiers of 6 in (15.2 cm) each, the foundation, the final tier and the hem bring the edge length to 79 in (200.7 cm).
- The heading adds 1 in (2.5 cm) for a total edge length of 80 in (203.2 cm).
- The side borders add 1 in (2.5 cm) on each side for a width of 42.25 in (107.3 cm).
- The scallop points add another 1.5 in (3.8 cm) for a length of 81.5 in (207.0 cm) at the points.
Check your gauge, count each mesh row, and block both panels to the same measurements.
Happy crocheting!