

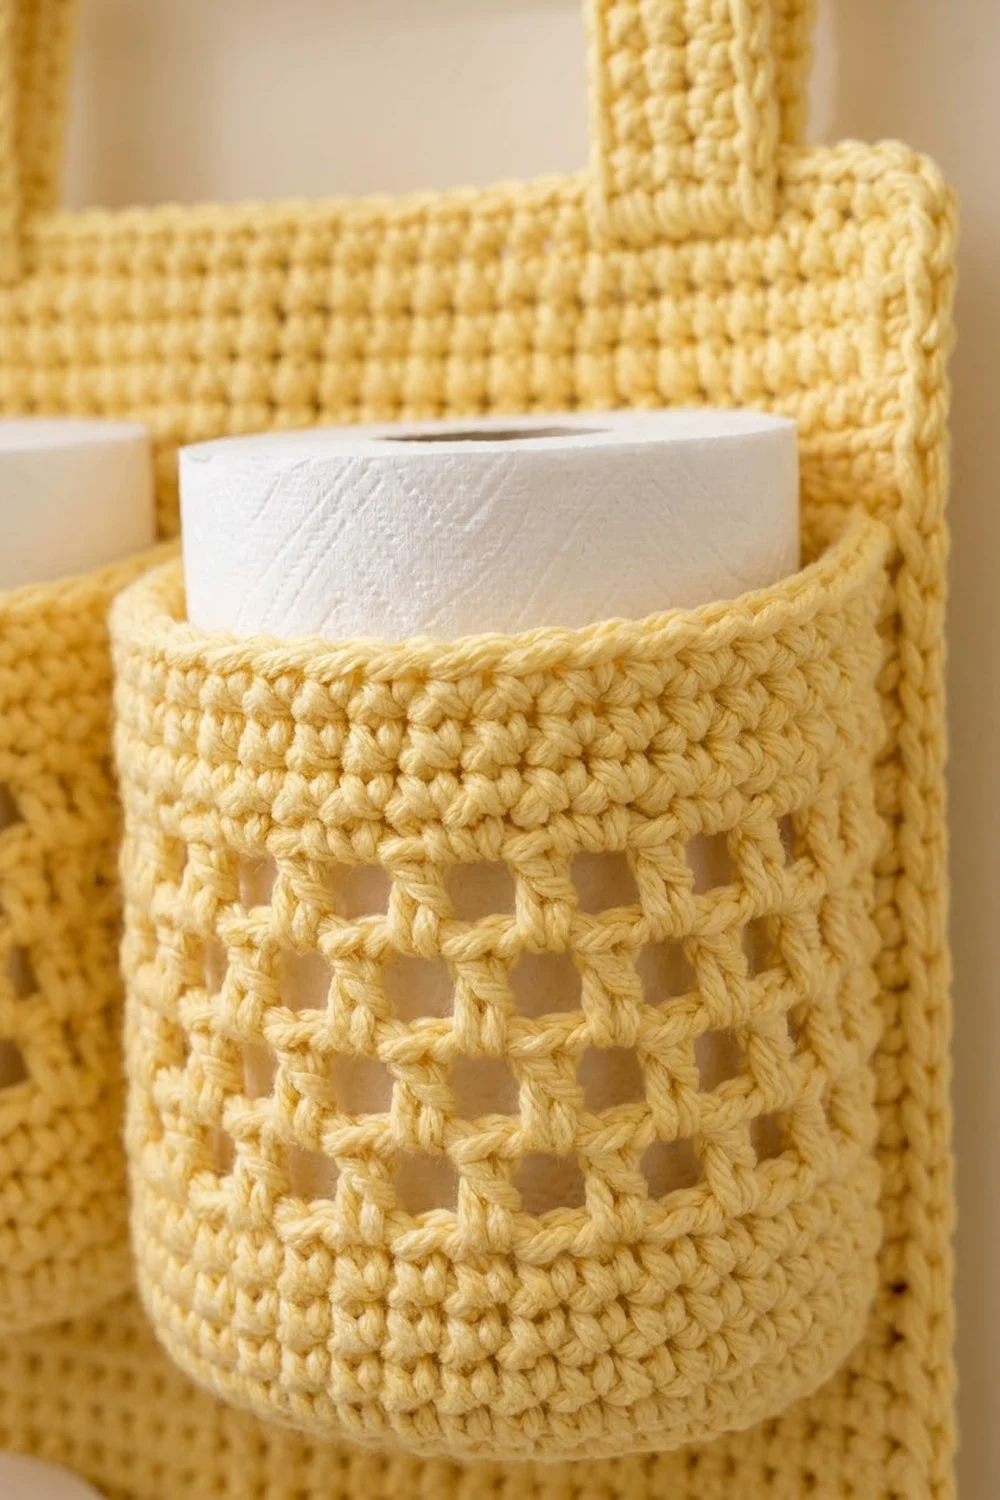
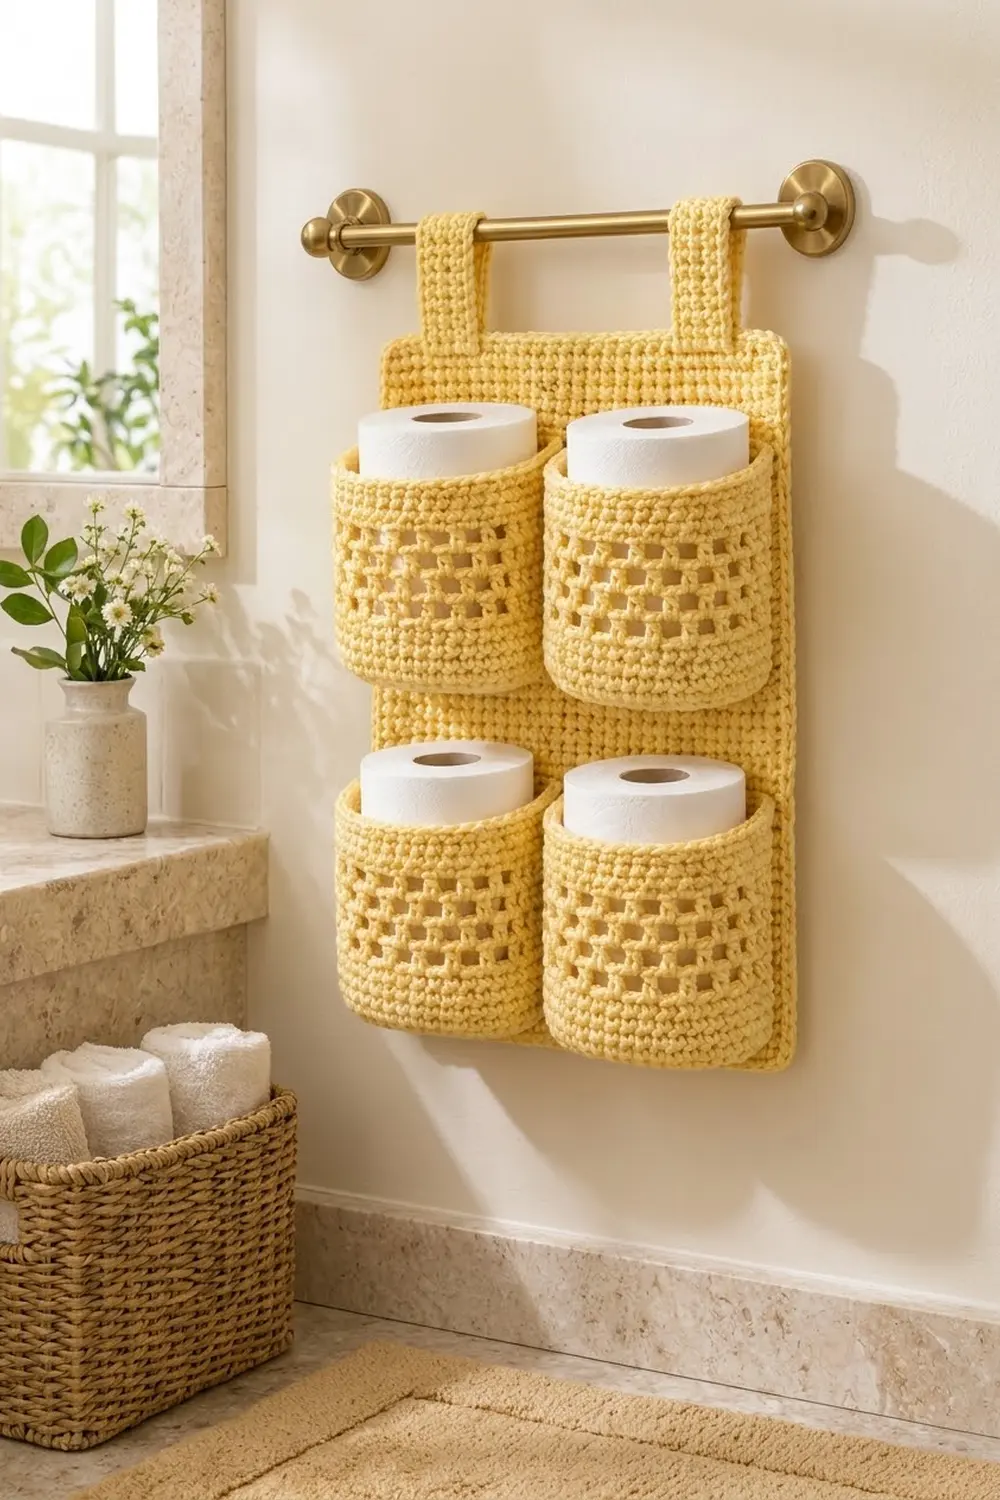
The Buttercup Mesh Toilet Paper Holder is a wall organizer that hangs from a towel rod and stores four spare rolls where you can reach them. It’s made in soft butter-yellow cotton. A solid single-crochet back panel carries four round pockets, and each pocket has a band of open filet-style mesh between two solid bands.
The look is simple and practical. The solid panel keeps everything stiff, the mesh windows let you see when a roll is running low, and the firm rolled rims help the pockets keep their shape when they’re empty.
This pattern uses US crochet terms throughout. The finished panel is 12.5 x 15 in (31.8 x 38.1 cm), not counting the hanging loops. Each pocket is about 4.75 in (12.1 cm) across and 3.75 in (9.5 cm) deep.
Construction is modular. You work the back panel in rows and add a two-round border. Then you work four pockets in the round from a flat circular base, make two straps, and sew everything together.
Finished Size and Construction
- Finished panel size: 12.5 x 15 in (31.8 x 38.1 cm)
- Skill level: Easy / Advanced Beginner
- Terminology: US crochet terms
- Yarn weight: Worsted (#4) cotton
- Hook: 5.0 mm (H-8)
- Number of pieces: 7 (1 back panel, 4 pockets, 2 hanging tabs)
- Layout: 2 x 2 pockets on one panel
- Pocket size: 4.75 in (12.1 cm) diameter, 3.75 in (9.5 cm) tall
- Panel size before border: 11.5 x 14 in (29.2 x 35.6 cm)
- Border depth: 0.5 in (1.3 cm), 2 rounds
- Hanging loops: 2 in (5.1 cm) wide, rising about 2 in (5.1 cm) above the panel
Materials
Yarn: Use a worsted-weight 100% cotton or a cotton blend. Cotton keeps its shape, doesn’t stretch much under the weight of the rolls, and copes well with bathroom humidity. Acrylic works too, but the pockets will be softer and may sag.
- Butter Yellow: 400 g, about 620 m (678 yd), based on 100 g balls of about 155 m (170 yd)
Estimated use is about 130 g for the panel, 45 g per pocket, and 10 g per tab, for roughly 330 g in total. The quantity above includes a margin of about 20% for gauge swatching and seaming.
Tools:
- 5.0 mm (H-8) crochet hook
- Tapestry needle
- Stitch markers (at least 8)
- Scissors
- Measuring tape
- Rust-proof pins and a blocking mat
- 4 standard toilet paper rolls for test fitting
Abbreviations (US Terms)
- ch – chain
- sc – single crochet
- dc – double crochet
- sl st – slip stitch
- sk – skip
- st(s) – stitch(es)
- sp – space
- BLO – back loop only
- rnd – round
- rep – repeat
- rev sc – reverse single crochet
Special stitch – reverse single crochet (crab stitch): Working from left to right (right to left for left-handers), insert the hook into the next stitch to the right, yarn over, pull up a loop, yarn over, and draw through both loops. This makes the rounded, cord-like rim on each pocket.
Gauge and Checkpoints
Gauge: 16 sc x 16 rows = 4 in (10.2 cm) in sc worked in rows.
That works out to 4 sc and 4 rows per inch. Because the two numbers match, one border sc per row end lies flat later on.
Mesh gauge: 1 round of dc mesh = 0.5 in (1.3 cm) tall.
Test one piece first: Make one pocket before you start the panel. It’s the quickest way to check both gauges.
- After pocket Rnd 10, the base should measure 4.75 in (12.1 cm) across.
- After Rnd 15, the solid wall should be 1.25 in (3.2 cm) tall from the turning ridge.
- After Rnd 18, the wall should be 2.75 in (7.0 cm) tall.
- The finished pocket should be 3.75 in (9.5 cm) tall, and a roll should slide in with a little ease.
Panel checkpoints:
- After Row 20: 11.5 in (29.2 cm) wide and 5 in (12.7 cm) tall.
- After Row 56: 11.5 x 14 in (29.2 x 35.6 cm).
If your pieces are too big, go down to a 4.5 mm hook. If they’re too small, go up to a 5.5 mm hook. Don’t change the stitch counts, because the pocket placement and border depend on them.
Back Panel
Ch 47.
Row 1: Sc in the 2nd ch from the hook and in each ch across. (46 sc)
Rows 2–56: Ch 1 (does not count as a st), turn, sc in each st across. (46 sc)
Check the size: 11.5 x 14 in (29.2 x 35.6 cm). Don’t fasten off. Go straight on to the border below. I’ve put the border after the joining notes so the order of the article follows the order of assembly.
Pockets (Make 4)
Each pocket is worked in joined rounds with the right side facing out. Ch 1 at the start of a sc round does not count as a stitch. Join each round with a sl st to the first st.
Base
Rnd 1: Make a magic ring. Ch 1, 6 sc in the ring, join. (6 sc)
Rnd 2: Ch 1, 2 sc in each st, join. (12 sc)
Rnd 3: Ch 1, sc in next st, 2 sc in next st; rep 6 times, join. (18 sc)
Rnd 4: Ch 1, sc in next 2 sts, 2 sc in next st; rep 6 times, join. (24 sc)
Rnd 5: Ch 1, sc in next 3 sts, 2 sc in next st; rep 6 times, join. (30 sc)
Rnd 6: Ch 1, sc in next 4 sts, 2 sc in next st; rep 6 times, join. (36 sc)
Rnd 7: Ch 1, sc in next 5 sts, 2 sc in next st; rep 6 times, join. (42 sc)
Rnd 8: Ch 1, sc in next 6 sts, 2 sc in next st; rep 6 times, join. (48 sc)
Rnd 9: Ch 1, sc in next 7 sts, 2 sc in next st; rep 6 times, join. (54 sc)
Rnd 10: Ch 1, sc in next 8 sts, 2 sc in next st; rep 6 times, join. (60 sc)
Checkpoint: the base should be flat and 4.75 in (12.1 cm) across. 60 stitches at 4 per inch gives a 15 in (38.1 cm) circumference.
Lower Solid Band
Rnd 11 (turning round): Ch 1, sc in BLO of each st, join. (60 sc)
This round leaves a ridge that turns the wall up from the base.
Rnds 12–15: Ch 1, sc in each st, join. (60 sc)
Mesh Band
Rnd 16: Ch 4 (counts as dc + ch 1). Sk next st, dc in next st, ch 1, sk next st; rep from * 29 times. Join with a sl st to the 3rd ch of the beginning ch-4. (30 dc + 30 ch-1 sps = 60 sts)
Rnds 17–18: Sl st into the first ch-1 sp, then sl st into the next dc. Ch 4 (counts as dc + ch 1). Sk the ch-1 sp, dc in next dc, ch 1, sk next ch-1 sp; rep from * 29 times, join to the 3rd ch of the ch-4. (30 dc + 30 ch-1 sps = 60 sts)
Stacking dc on dc makes the square windows, three holes high. If you’d rather avoid the slip-stitch shift, you can work Rnds 17–18 as “ch 4, dc in next dc” starting from the joining dc. Either way, keep the posts lined up.
Upper Solid Band and Rim
Rnd 19 (conversion round): Ch 1, sc in each dc and sc in each ch-1 sp, join. (30 sc worked into dc + 30 sc worked into spaces = 60 sc)
Rnds 20–22: Ch 1, sc in each st, join. (60 sc)
Rnd 23: Ch 1, rev sc in each st around, join. (60 rev sc) Fasten off and leave a 40 in (101.6 cm) tail for sewing.
Pocket height is 9 sc rounds × 0.25 in (2.25 in / 5.7 cm) plus 3 mesh rounds × 0.5 in (1.5 in / 3.8 cm), for 3.75 in (9.5 cm). The rim sits on top of that and adds no measurable height.
Mark the back: Place a marker at the join, then count 10 sts to the right and 10 sts to the left of it and mark those too. These 20 stitches are the flat back of the pocket. Because the joins sit here, any seam drift ends up hidden against the panel.
Hanging Tabs (Make 2)
Ch 9.
Row 1: Sc in the 2nd ch from the hook and in each ch across. (8 sc)
Rows 2–28: Ch 1, turn, sc in each st. (8 sc)
Fasten off and leave a 20 in (50.8 cm) tail. Each tab measures 2 x 7 in (5.1 x 17.8 cm).
Make All Pieces
All pieces are Butter Yellow:
- Back panel: 1
- Pockets: 4
- Hanging tabs: 2
Layout grid (front view):
     [Tab]            [Tab]
+------------------------------+
|                              |
|   [Pocket B1]  [Pocket B2]   |  Upper row: base seam on Row 31
|                              |
|   [Pocket A1]  [Pocket A2]   |  Lower row: base seam on Row 5
|                              |
+------------------------------+
Joining
Sew the pockets to the bordered panel with a whipstitch and the matching yarn tail. Count rows from Row 1 at the bottom of the panel, and count stitches 1–46 within each row. Ignore the border stitches when counting.
Horizontal placement (all rows): 2 sts margin + 20 sts pocket + 2 sts gap + 20 sts pocket + 2 sts margin = 46 sts. The left pockets cover sts 3–22 and the right pockets cover sts 25–44.
Lower pockets (A1, A2):
- Pin the 20 marked back stitches of the Rnd 11 ridge along Row 5, over the stitches given above.
- Whipstitch them one to one: 20 pocket stitches to 20 panel stitches. Both pieces have 4 sts per inch, so they match exactly.
- Sew up both sides of the flat back. Pocket column 1 goes up panel column 3 (or 25), and pocket column 20 goes up panel column 22 (or 44), from Row 5 to Row 19. That’s 15 pocket rounds to 15 panel rows, since 3.75 in × 4 rows per inch = 15 rows.
Upper pockets (B1, B2): Repeat steps 1–3 with the base seam on Row 31 and the side seams from Row 31 to Row 45.
The front 40 stitches of each pocket stay free and curve forward. The round base pulls gently into a D-shape. That’s expected, and a roll fills it out.
Tabs: On the top edge of the border, count across the 48 sc: 7 sts margin + 8 sts tab + 18 sts gap + 8 sts tab + 7 sts margin = 48. Lay each tab over its 8 stitches and fold it toward the back. Sew 1.5 in (3.8 cm), which is 6 rows, of each tab end flat to the back of the panel. That leaves a 4 in (10.2 cm) loop, rising 2 in (5.1 cm) above the panel.
Tension advice: Pull each whipstitch just snug. If it’s too tight, the panel puckers. If it’s too loose, the pockets tip forward under the weight of a roll.
Size checkpoint: After joining, the panel should still lie flat at 12.5 x 15 in (31.8 x 38.1 cm). The pocket rows are 2.75 in (7.0 cm) apart (Rows 20–30), and there’s 3.25 in (8.3 cm) above the upper pockets including the border.
Border
Work the border right after Row 56 and before you attach the pockets and tabs.
Border gauge: 4 sc per inch along every edge. On the sides, 1 sc per row end works because the row gauge is also 4 per inch. Corners are ch-2 spaces and aren’t counted in the stitch totals.
Rnd 1: With the right side facing and continuing from Row 56, ch 1, turn so the right side faces you.
- Top: Sc in each of the 46 sts.
- First corner: Ch 2.
- Side: Work 1 sc in each of the 56 row ends.
- Second corner: Ch 2.
- Bottom: Sc in each of the 46 free loops of the foundation chain.
- Third corner: Ch 2.
- Second side: Sc in each of the 56 row ends.
- Fourth corner: Ch 2, then sl st to the first sc.
Count: top 46, sides 56 each, bottom 46, for 204 sc plus 4 ch-2 corner spaces.
Rnd 2: Ch 1. Sc in each sc around, and work (sc, ch 2, sc) in each corner space. Join and fasten off.
Count: top 48 (46 + 1 from each corner), bottom 48, sides 58 each (56 + 2), for 212 sc plus 4 ch-2 corner spaces.
Why the math works: 48 sc ÷ 4 = 12 in. Add about 0.25 in (0.6 cm) for the two corner turns and you get 12.5 in (31.8 cm). Likewise, 58 sc ÷ 4 = 14.5 in, plus 0.5 in (1.3 cm) of corners, gives 15 in (38.1 cm). Each round adds 0.25 in (0.6 cm) per side, so two rounds make a 0.5 in (1.3 cm) border.
Final Blocking
- Weave in all ends except the pocket and tab sewing tails before you sew. Weave in those tails after joining.
- Lightly mist the whole organizer with water.
- Pin the panel flat on a blocking mat at 12.5 x 15 in (31.8 x 38.1 cm), keeping the corners square.
- Put a toilet paper roll in each pocket so the walls dry round and upright.
- Pin each tab loop around a cardboard tube so it dries open.
- Let it dry completely, usually 12–24 hours. Cotton dries slowly.
- Remove the pins, check the measurements again, and hang it on the rod.
Final Quality-Control Checklist
- Panel is 12.5 x 15 in (31.8 x 38.1 cm) and lies flat.
- Border has 48 sc on the top and bottom and 58 sc on each side.
- All four pockets are 4.75 in (12.1 cm) across and 3.75 in (9.5 cm) tall.
- Each pocket has 3 rows of square mesh windows with the posts lined up.
- Pocket rims are smooth rev sc with no gaps.
- The 20-stitch backs are sewn one to one, and the side seams run 15 rows.
- Pockets are level side to side and evenly spaced.
- Tabs are centered over the correct 8 border stitches and are the same height.
- No loose tails show on the front.
- A full roll slides into and out of each pocket easily.
Troubleshooting
Base curls up like a bowl: Your increase rounds are too tight. Go up a hook size for the base only, or check that each round has exactly 6 increases.
Base ruffles: You’ve added extra stitches. Count again, and make sure Rnd 10 has 60.
Mesh posts slant: You aren’t working dc into dc. Check the start of each mesh round and keep every dc stacked on the dc below.
Pocket too tight for a roll: Check the circumference, which should be 15 in (38.1 cm). If it’s short, remake the pocket with a larger hook.
Panel edges wave: Too many border stitches on the sides. Work exactly 1 sc per row end.
Panel edges pull in: Too few border stitches, or your border tension is too tight. Count again, and relax your hand.
Pockets droop forward: Tighten the side seams, and add a second line of whipstitches along the base.
Hanging loops stretch: Sew the tab ends with two passes, or work the tabs with a smaller hook.
Care
Hand wash or machine wash cold on a gentle cycle, reshape while damp, and dry flat. Avoid hot tumble drying, which can shrink cotton unevenly.
Final Notes
Everything in this pattern follows from one gauge: 4 sc and 4 rows per inch (10.2 cm). That gives a 60-stitch pocket base of 4.75 in (12.1 cm) and a pocket wall of 3.75 in (9.5 cm). The panel is 46 stitches by 56 rows, or 11.5 x 14 in (29.2 x 35.6 cm), and two border rounds bring it to 12.5 x 15 in (31.8 x 38.1 cm). The 20-stitch pocket backs fit the 46-stitch rows exactly, and the 15-round pocket walls match 15 panel rows. Check your gauge on one pocket first, count at each checkpoint, and the organizer will come out flat and square.
Happy crocheting!