

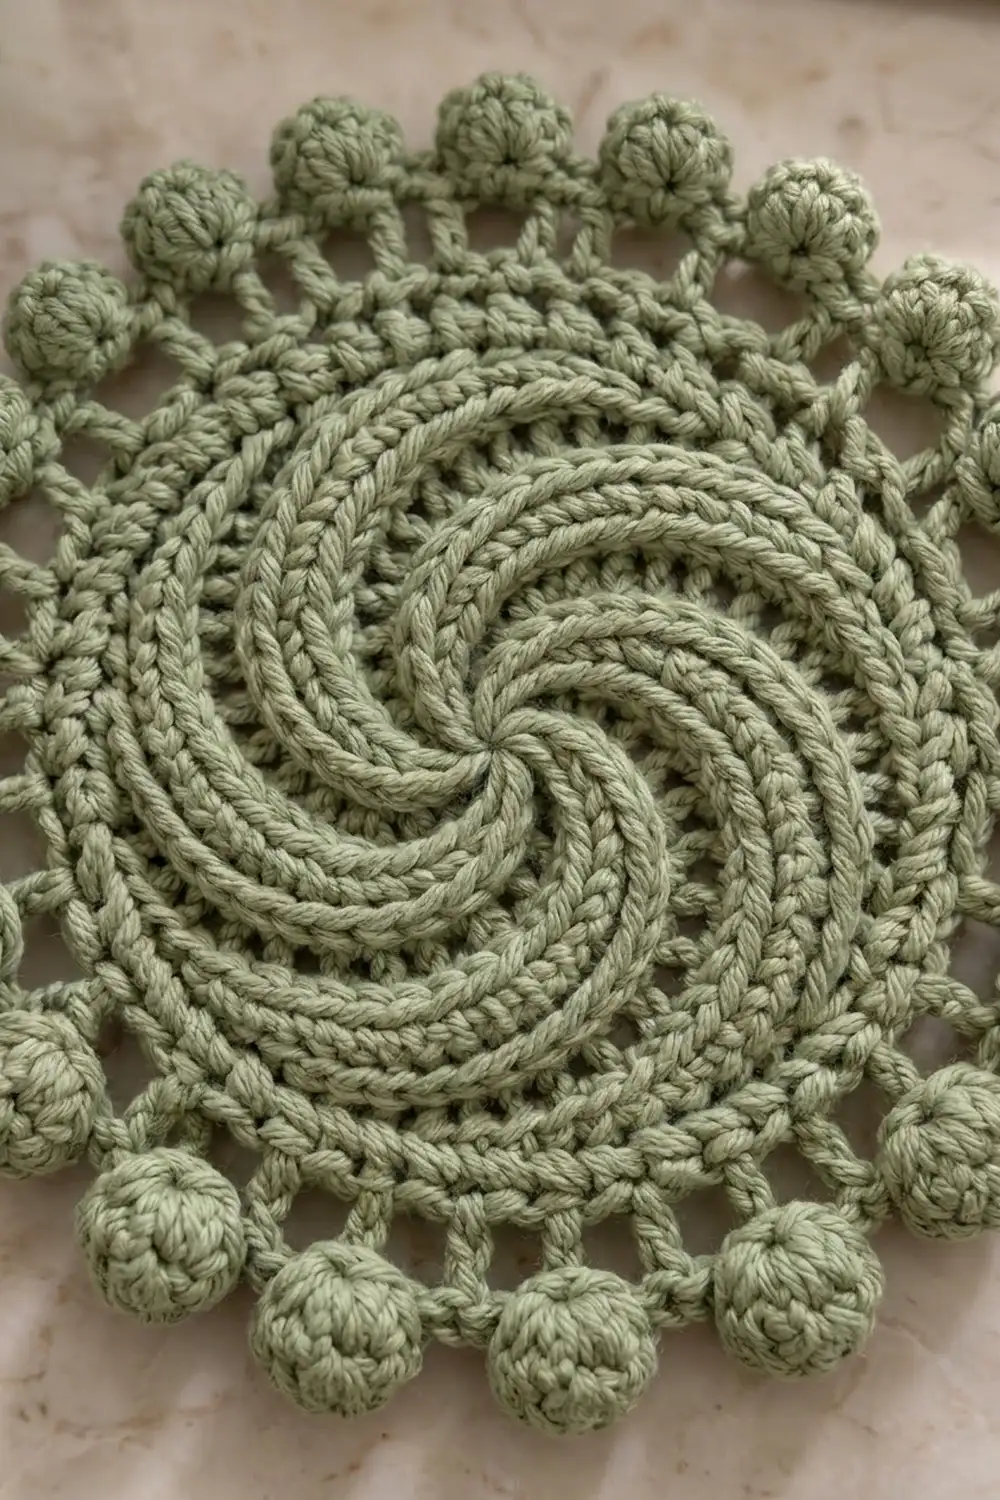
The Sage Pinwheel is a round crochet motif with a swirling center and a ring of puffy bobbles around the edge. Six curved arms spin out from the middle, and the edge is a light, airy ring of bobbles on short chain links.
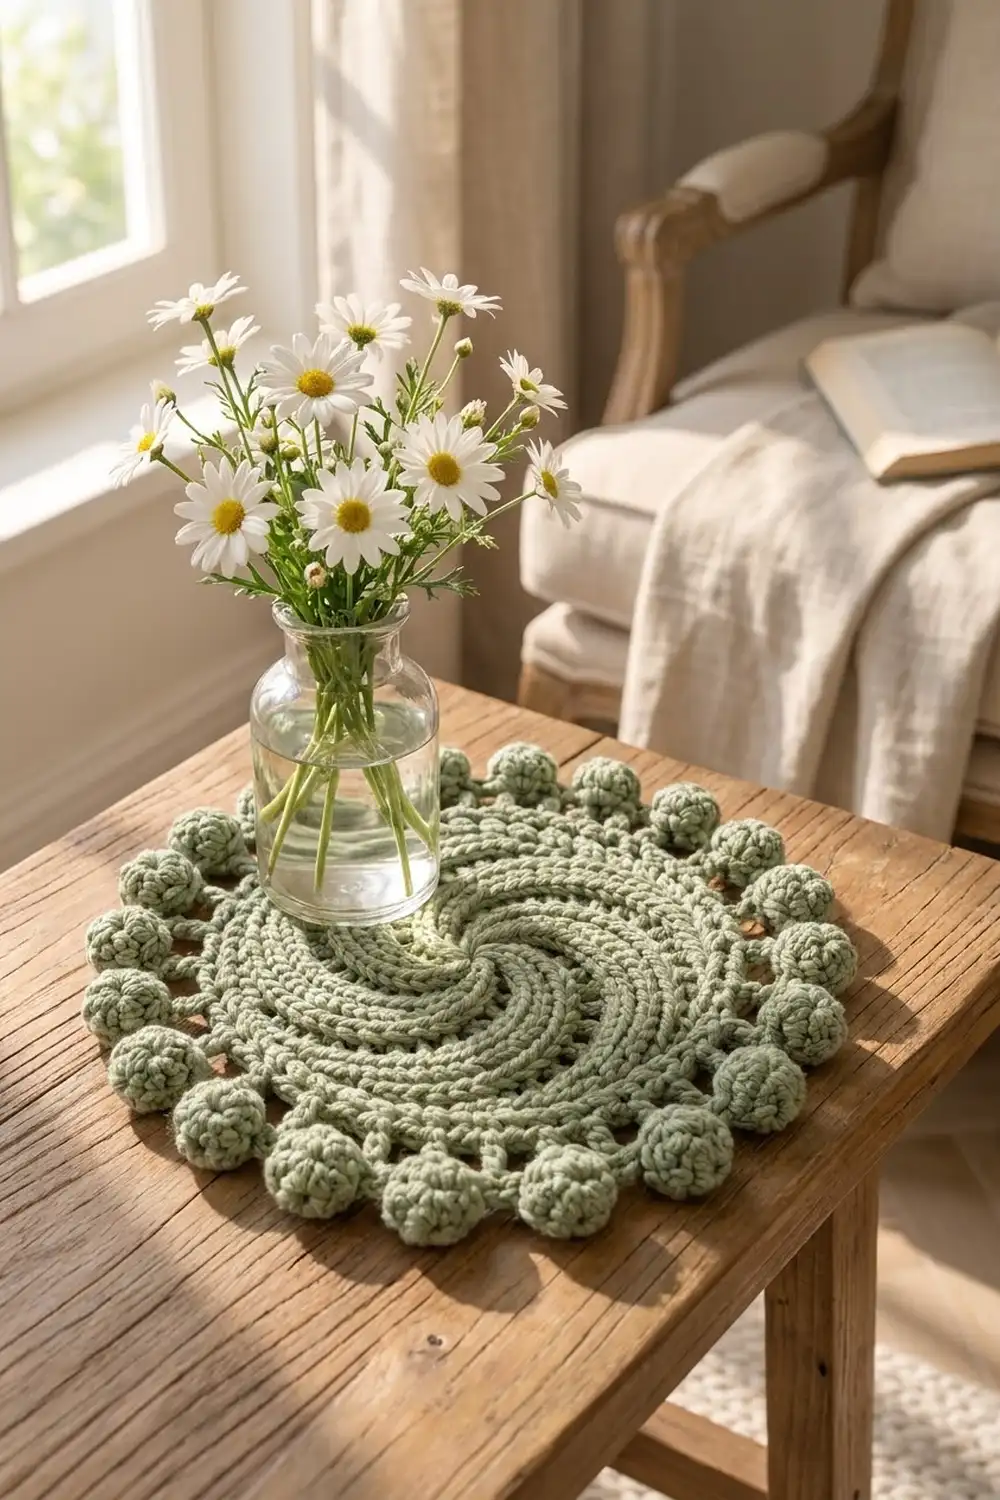
This sample is in a soft sage green, a muted, calm color that fits a cottage or neutral bedroom. The whole motif is one color, so the texture does all the work: the back-loop ridges catch the light and the bobbles stand out clearly. You can use it as a doily, a table centerpiece, a dresser mat or a decorative appliqué.
The pattern uses US crochet terms. The finished motif measures 8 in (20.3 cm) across, bobbles included. The solid swirl center measures 6 in (15.2 cm) across before the border.
You work it in joined rounds from a magic ring. Rounds 1–12 are single crochet through the back loop only. Each new increase lands one stitch past the one below it, which turns the increase lines into a swirl. Round 13 is an open double crochet ring, and Round 14 adds 18 bobbles. There’s no sewing and there are no separate pieces.
Finished Size and Construction
- Finished size: 8 in (20.3 cm) diameter
- Skill level: Easy–Intermediate
- Terminology: US crochet terms
- Yarn weight: Worsted (#4)
- Hook: 5.0 mm (US H-8)
- Number of pieces: 1
- Layout: One round motif, worked in the round
- Piece size: 8 in (20.3 cm) diameter
- Size before border: 6 in (15.2 cm) diameter after Round 12
- Border depth: 1 in (2.5 cm) all the way around (Rounds 13–14)
Materials
Yarn: Use a smooth worsted-weight cotton or cotton blend. Cotton shows each stitch clearly, so the swirl ridges and bobbles keep their shape. Fuzzy or heavily brushed yarns will hide the spiral. A matte yarn shows the ridges best, and a mercerized cotton adds a soft sheen.
- Sage green: 40 g, about 75 m (82 yd)
The quantity includes about 15% extra to cover a gauge swatch and some ripping back. If you use a different yarn, buy by length rather than weight, because cotton and acrylic weigh different amounts per meter.
Tools:
- 5.0 mm (US H-8) crochet hook
- 1 locking stitch marker
- Tapestry needle
- Scissors
- Measuring tape or ruler
- Blocking mat, rust-proof pins and a spray bottle
Abbreviations (US Terms)
- ch – chain
- sl st – slip stitch
- sc – single crochet
- dc – double crochet
- BLO – back loop only
- st(s) – stitch(es)
- sp – space
- beg – beginning
- rep – repeat
Special stitch – Bobble: *Yarn over, insert hook into the indicated space, yarn over and pull up a loop, yarn over and pull through 2 loops; rep from * 4 more times in the same space (6 loops on hook). Yarn over and pull through all 6 loops, then ch 1 to lock. The locking ch 1 belongs to the bobble. Don’t count it as a separate stitch or as part of the chain spaces.
Gauge and Checkpoints
Flat gauge: 15 sc and 16 rows = 4 in (10.2 cm) in sc BLO with a 5.0 mm hook. Each sc round adds about 0.25 in (0.6 cm) to the radius, so the motif grows by 0.5 in (1.3 cm) in diameter per round.
As you make the motif, stop at each checkpoint below before going on. Lay it flat and measure straight across the center without stretching:
- After Round 4: 2 in (5.1 cm) diameter
- After Round 8: 4 in (10.2 cm) diameter
- After Round 12: 6 in (15.2 cm) diameter
- After Round 13: 7 in (17.8 cm) diameter
- After Round 14: 8 in (20.3 cm) diameter
Too big? If you’re more than 0.25 in (0.6 cm) over at Round 8, go down to a 4.5 mm hook. Too small? Go up to a 5.5 mm hook. Restarting at Round 8 is much faster than finding the problem at the bobble round.
Cupping or ruffling? If the center cups into a bowl, your stitches are tighter than this pattern expects, so go up a hook size. If it waves, go down a hook size. Don’t change the stitch counts, because the border math depends on ending with exactly 72 stitches.
Swirl Center (Rounds 1–12)
All sc stitches in Rounds 2–12 go into the back loop only. To join each round, sl st into both loops of the first sc of the round. The ch 1 at the start of each round doesn’t count as a stitch. Put the locking marker in the first sc of each round and move it up as you go.
Tip on the joins: Always work the first sc of a new round into the same stitch you joined into. Never work into the sl st or the ch 1. If you skip that stitch or work into the join, you’ll lose or gain a stitch every round, and the swirl will drift off-center.
Round 1: Make a magic ring. Ch 1, 6 sc into the ring. Pull the ring closed tightly, then sl st to the first sc. (6 sts)
Round 2: Ch 1, 2 sc BLO in each st around, sl st to the first sc. (12 sts)
Round 3: Ch 1, sc BLO in next st, 2 sc BLO in next st; rep from * 5 more times, sl st to the first sc. (18 sts)
Round 4: Ch 1, sc BLO in next 2 sts, 2 sc BLO in next st; rep from * 5 more times, sl st to the first sc. (24 sts)
Check the size here: 2 in (5.1 cm).
How the swirl forms: Every round from Round 3 on follows the same rule: work 1 more plain sc before each increase than you did in the round below. That puts each new increase into the second stitch of the increase pair below it, so the increase line moves 1 stitch over every round. The 6 increase lines move together and curve into the 6 pinwheel arms. The unused front loops sit on the surface as raised ridges, which gives the arms their braided texture.
Round 5: Ch 1, sc BLO in next 3 sts, 2 sc BLO in next st; rep from * 5 more times, sl st to the first sc. (30 sts)
Round 6: Ch 1, sc BLO in next 4 sts, 2 sc BLO in next st; rep from * 5 more times, sl st to the first sc. (36 sts)
Round 7: Ch 1, sc BLO in next 5 sts, 2 sc BLO in next st; rep from * 5 more times, sl st to the first sc. (42 sts)
Round 8: Ch 1, sc BLO in next 6 sts, 2 sc BLO in next st; rep from * 5 more times, sl st to the first sc. (48 sts)
Check the size here: 4 in (10.2 cm). By now all 6 arms should clearly curve in the same direction.
Round 9: Ch 1, sc BLO in next 7 sts, 2 sc BLO in next st; rep from * 5 more times, sl st to the first sc. (54 sts)
Round 10: Ch 1, sc BLO in next 8 sts, 2 sc BLO in next st; rep from * 5 more times, sl st to the first sc. (60 sts)
Round 11: Ch 1, sc BLO in next 9 sts, 2 sc BLO in next st; rep from * 5 more times, sl st to the first sc. (66 sts)
Round 12: Ch 1, sc BLO in next 10 sts, 2 sc BLO in next st; rep from * 5 more times, sl st to the first sc. (72 sts)
Check the size here: 6 in (15.2 cm). Lay the disc flat. It should sit level, with no bowl and no waves. Don’t fasten off.
Bobble Border (Rounds 13–14)
Border gauge: The dc ring adds about 0.5 in (1.3 cm) all the way around. The bobble round adds another 0.5 in (1.3 cm). Together they make a 1 in (2.5 cm) border all around.
A circle has no straight sides, so the border counts are given for 6 segments, one per swirl arm. Each segment starts with 12 stitches from Round 12 (72 ÷ 6 = 12).
Round 13 (dc ring): Ch 5 (counts as dc + ch 2). Skip the next st. Dc in the next st through both loops, ch 2, skip the next st; rep from * 34 more times. Sl st to the 3rd ch of the beg ch-5. (36 dc, 36 ch-2 sps)
Each segment has 6 dc and 6 ch-2 sps and uses exactly 12 stitches from Round 12. Each dc uses 2 stitches (1 worked, 1 skipped), and 36 × 2 = 72, which matches Round 12 exactly.
Keep the chains the same size as your dc stitches. If they’re too tight, the ring pulls the edge inward. If they’re too loose, the border flares.
Check the size here: 7 in (17.8 cm).
Round 14 (bobble round): Sl st into the first ch-2 sp. Ch 1, sc in the same sp, ch 2, Bobble in the next ch-2 sp, ch 2. Sc in the next ch-2 sp, ch 2, Bobble in the next ch-2 sp, ch 2; rep from * 16 more times. Sl st to the first sc. Fasten off. (18 sc, 18 bobbles, 36 ch-2 sps)
Each segment has 3 bobbles and 3 sc, worked over that segment’s 6 ch-2 sps. Each repeat uses 2 spaces from Round 13, and 18 × 2 = 36, which matches Round 13 exactly. With 3 bobbles per arm, they line up evenly with the swirl.
Check the final size: 8 in (20.3 cm) from bobble tip to bobble tip.
Weave in both tails on the wrong side. Run the center tail through the Round 1 stitches once more so the ring stays closed.
Final Blocking
- Soak the motif in lukewarm water and squeeze gently. Don’t wring it.
- Roll it in a towel and press to remove the extra water.
- Lay it on the blocking mat, right side up, with the swirl arms curving the same way they did as you worked.
- Pin the center gently so Round 12 lies flat and measures 6 in (15.2 cm) across.
- Pin each bobble outward so the outer edge measures 8 in (20.3 cm) across. Pin opposite bobbles in pairs (1 and 10, then 2 and 11, and so on) to keep the circle round.
- Use your fingertips to open each ch-2 space in Round 13 evenly.
- For a crisper doily, mist it lightly with fabric stiffener or spray starch while it’s pinned.
- Let it dry completely before unpinning, usually 12–24 hours.
Final Quality-Control Checklist
- [ ] Round 12 has exactly 72 stitches.
- [ ] Six swirl arms are visible, all curving in the same direction.
- [ ] Front-loop ridges are even, and no round was worked through both loops by mistake.
- [ ] The center ring is pulled fully closed, with no hole.
- [ ] Round 13 has 36 dc and 36 ch-2 sps.
- [ ] Round 14 has 18 bobbles and 18 sc, 3 bobbles per arm.
- [ ] All bobbles are the same size and puff out on the right side.
- [ ] Diameter is 6 in (15.2 cm) at Round 12 and 8 in (20.3 cm) overall.
- [ ] The motif lies flat after blocking.
- [ ] All tails are woven in invisibly.
Troubleshooting
The swirl looks like a hexagon instead of a spiral. You’re probably working each increase into the first stitch of the previous pair. Count the plain sc carefully: each round needs 1 more plain sc before each increase than the round before.
The arms are faint. Check that every sc from Round 2 on goes through the back loop only. A tightly twisted cotton also makes the ridges sharper.
There’s a visible line where the rounds join. That’s normal with joined rounds. Keep the sl st joins snug, and always work the first sc into the same stitch as the join.
The stitch count is off by one or two. You most likely worked into the joining sl st or missed the last stitch before it. Use the marker and recount before you join.
The center hole won’t close. Leave a 6 in (15.2 cm) tail on the magic ring, and pull it tight again before weaving it in.
The disc cups. Your tension is tight. Go up a hook size, or work your increases a little looser.
The disc ruffles. Your tension is loose, or you’ve added stitches. Recount each round against the totals, and go down a hook size if needed.
The bobbles lean or flatten. Pull each loop up to the same height, and always finish with the locking ch 1. If a bobble faces the wrong way, push it through to the right side before blocking.
The border ripples. Round 13 probably has more than 36 dc. Make sure you skip exactly 1 st between each dc.
Care
Hand wash in cool water with a mild detergent, reshape, and dry flat. Don’t tumble dry, because the heat can flatten the bobbles.
Final Notes
The measurement chain is simple. A 2 in (5.1 cm) disc at Round 4 grows to 4 in (10.2 cm) at Round 8 and 6 in (15.2 cm) at Round 12. The 1 in (2.5 cm) border then brings it to 8 in (20.3 cm). The stitch counts work the same way: 72 sc become 36 dc and 36 spaces, and those become 18 bobbles, 3 for each of the 6 swirl arms. If your size matches at Rounds 4, 8 and 12, the border will come out right.
Happy crocheting!