

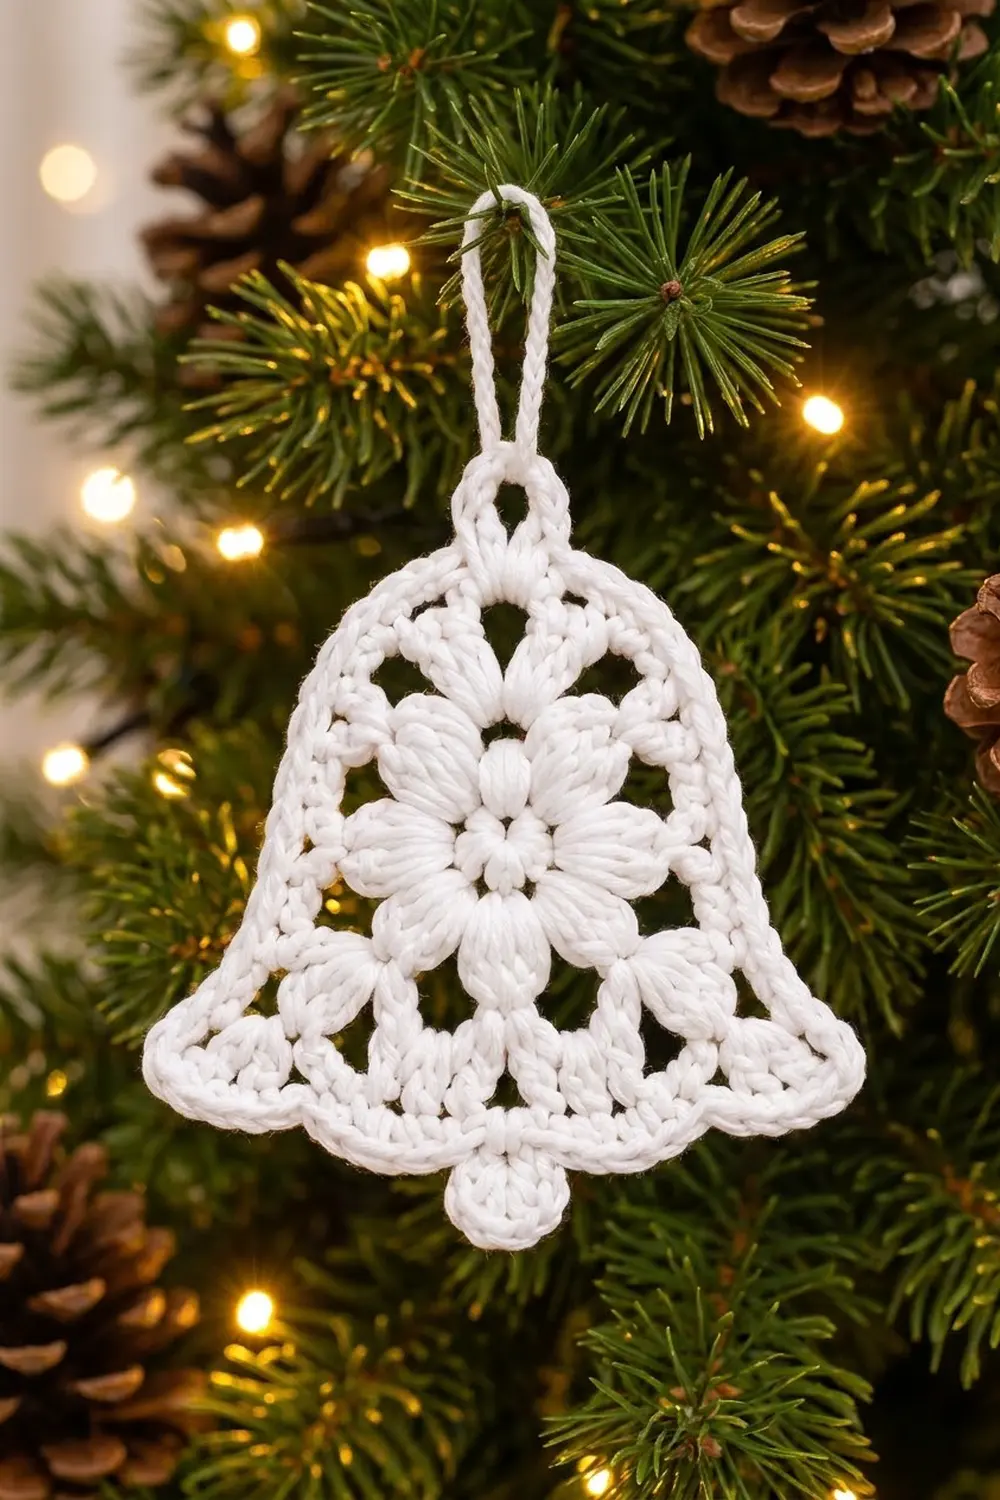
The Snowdrift Bell is a lacy, flat bell ornament in crisp white cotton. A puffy eight-petal flower sits at its heart. A ring of open chain windows surrounds the flower, and a firm, rope-like outline gives the bell its classic shape: a rounded dome, gently flared corners, and a little round clapper hanging from the bottom.
It looks delicate but works up quickly. One bell takes under an hour once you know the rounds. That makes it a good make for tree ornaments, gift toppers, or a wintery wedding table. The pattern uses US crochet terms throughout.
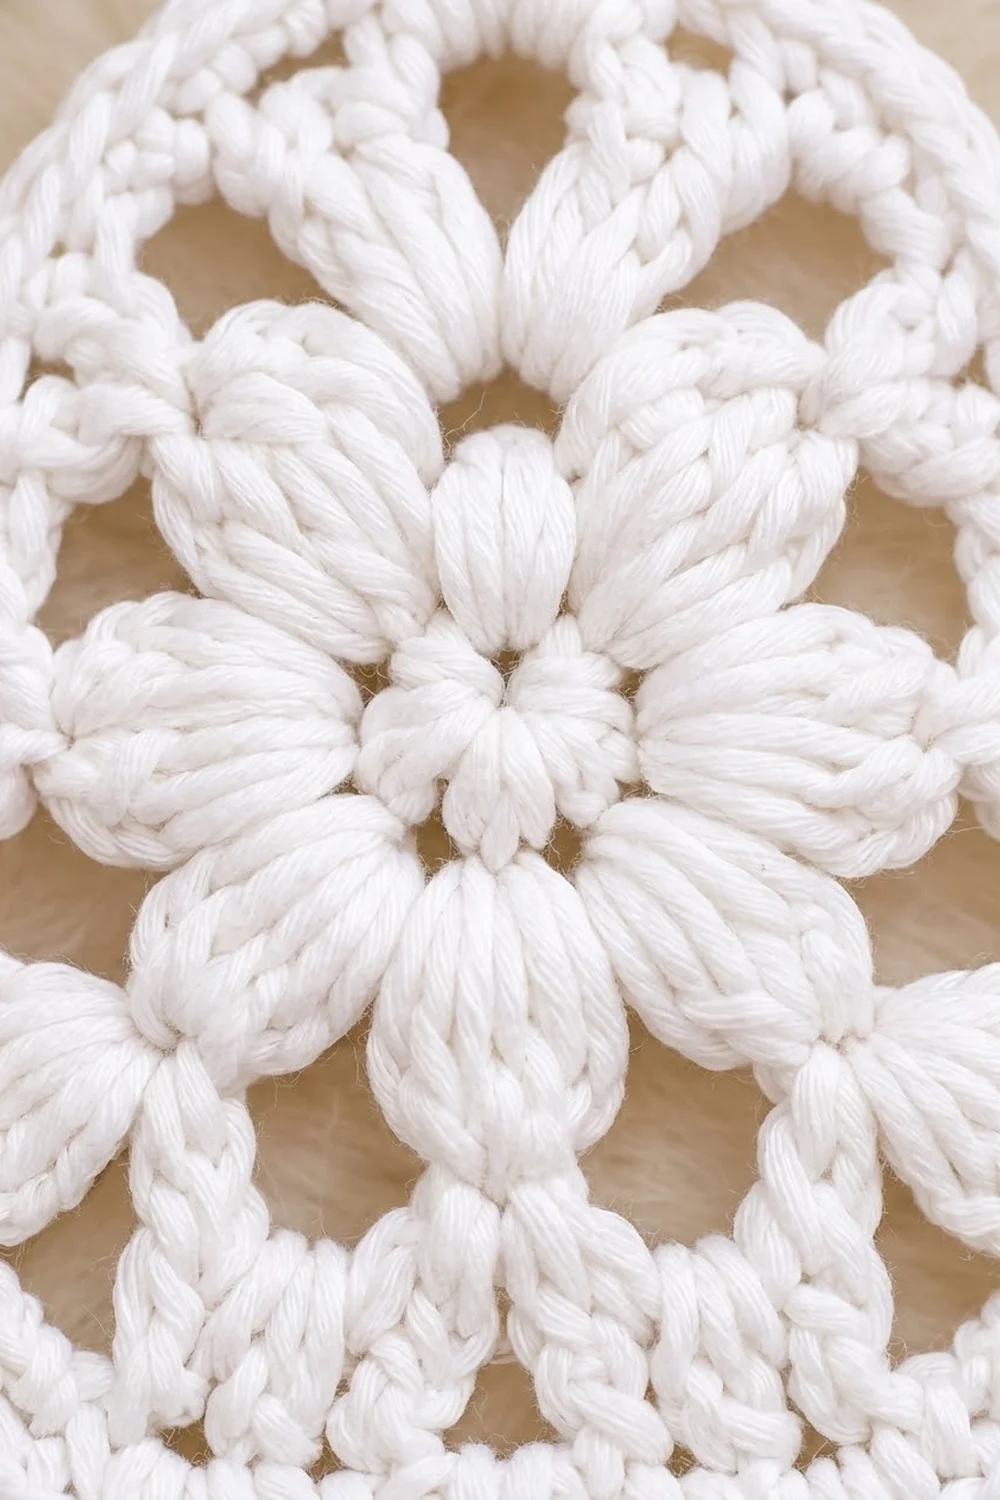
The finished bell measures 4 in (10.2 cm) wide at the flare and 3.75 in (9.5 cm) tall in the body. Including the hanging loop and clapper, it is 5.5 in (14.0 cm) tall.
Construction is simple and all in one piece. You work a puff-stitch flower in the round, add a solid ring of single crochet, then a round of chain loops. Next comes one shaping round that turns the circle into a bell by using taller stitches as it moves down the sides. A final single crochet round smooths the outline, and you make the hanging loop and clapper as part of that last round. There is nothing to sew on except your yarn tails.
Finished Size and Construction
- Finished size (body): 4 in (10.2 cm) wide × 3.75 in (9.5 cm) tall
- Total height with loop and clapper: 5.5 in (14.0 cm)
- Skill level: Easy to intermediate (you need to be comfortable with puff stitches)
- Terminology: US crochet terms
- Yarn weight: Light / DK (#3) cotton
- Hook: 3.5 mm (US E-4)
- Number of pieces: 1 (single motif, no joining)
- Layout: Worked in joined rounds from the center out
- Flower circle (after Round 3): 2.25 in (5.7 cm) across
- Size before border (after Round 5): 3.75 in (9.5 cm) wide × 3.5 in (8.9 cm) tall
- Border depth: 0.125 in (0.3 cm) per edge (1 round of sc)
Materials
Yarn: Choose a smooth, tightly plied mercerized or milk cotton in light/DK weight. Cotton holds the bell’s shape well, shows the puff texture clearly, and takes starch nicely if you want a stiff ornament. Avoid fuzzy or very splitty yarns, because the puffs will lose their definition.
- White: 12 g, about 45 m (49 yd) per bell
These quantities include a margin of about 25% for your gauge swatch, yarn tails, and small differences in tension. If you plan to make a set of six bells, one 50 g ball of a typical DK cotton (about 115–125 m per 50 g) is enough for two bells, so plan on three balls.
Tools:
- 3.5 mm (US E-4) crochet hook
- Tapestry needle
- Scissors
- Rust-proof pins and a foam blocking mat
- Spray bottle with water
- Optional: fabric stiffener or spray starch
- Optional: stitch marker
Abbreviations (US Terms)
- ch – chain
- sl st – slip stitch
- sc – single crochet
- hdc – half double crochet
- dc – double crochet
- tr – treble crochet
- st(s) – stitch(es)
- sp – space
- mr – magic ring
- puff – puff stitch (see below)
Special stitch – Puff stitch (puff): Yarn over, insert hook in the stitch or space indicated, yarn over and pull up a loop to about 0.375 in (1.0 cm) tall. Repeat from * to * 2 more times (7 loops on hook). Yarn over and pull through all 7 loops. Chain 1 tightly to close the puff. This closing ch-1 is not counted as a stitch.
Gauge and Checkpoints
This is a single motif, so the bell itself is your swatch. Make one complete bell first, measure it at each checkpoint, and only then make more.
Checkpoint 1 – after Round 3: The flower circle should measure 2.25 in (5.7 cm) across.
Checkpoint 2 – after Round 4: Measure from the tip of one chain loop to the tip of the opposite loop. It should be 3 in (7.6 cm).
Checkpoint 3 – after Round 5: The bell should be 3.75 in (9.5 cm) wide from flare corner to flare corner and 3.5 in (8.9 cm) tall from the top center to the bottom center.
Checkpoint 4 – after Round 6: The body should be 4 in (10.2 cm) wide × 3.75 in (9.5 cm) tall.
If your piece is too big at Checkpoint 1, go down to a 3.25 mm hook and start again. If it is too small, go up to a 3.75 mm or 4 mm hook. A difference of 0.25 in (0.6 cm) at Checkpoint 1 grows to roughly 0.5 in (1.3 cm) by the end. Fix it early.
If the circle is the right size but cups (curls into a bowl), your puffs are probably too short. Pull the puff loops up a little taller. If it ruffles, your chain-5 loops in Round 4 are too loose, so chain more firmly.
Pattern
Orientation: Round 2 makes 8 puff petals. The first puff marks the top center of the bell, and the 5th puff marks the bottom center. Place a stitch marker in the first puff so you always know where the top is.
Round 1 – Flower Center
Make a mr. Ch 1, work 8 sc into the ring. Pull the ring closed and sl st to the first sc to join.
Count: 8 sc.
Round 2 – Puff Petals
Ch 1. Work a puff in the next sc, ch 3. Repeat from * to * 7 more times. Sl st to the top of the first puff to join.
Count: 8 puffs, 8 ch-3 sps.
The puffs make the 8 raised petals of the flower. The ch-3 sps between them let the circle lie flat.
Round 3 – Flower Ring (conversion round)
Ch 1. Work 1 sc in the top of the next puff, 4 sc in the next ch-3 sp. Repeat from * to * 7 more times. Sl st to the first sc to join.
Count: 8 sc (1 per puff) + 32 sc (4 per ch-3 sp) = 40 sc.
The first sc sits on top of the first puff (top center). This is the solid ring that frames the flower.
Checkpoint 1: 2.25 in (5.7 cm) across.
Round 4 – Openwork Loops
Ch 1. Work 1 sc in the first sc (top center). Ch 5, skip 4 sts, sc in the next st. Repeat from * to * 6 more times. Ch 5, skip the last 4 sts, and sl st to the first sc to join.
Count: 8 sc + 8 ch-5 loops.
Each sc sits directly above a puff petal, and each ch-5 loop spans the space between two petals. These loops make the open windows around the flower.
For the next round, name the loops by position. Go clockwise from the top center with the right side of the work facing you:
- L1 – top right (dome)
- L2 – upper right side (shoulder)
- L3 – lower right side (flare corner)
- L4 – bottom right
- L5 – bottom left
- L6 – lower left side (flare corner)
- L7 – upper left side (shoulder)
- L8 – top left (dome)
The sc between L4 and L5 is the bottom-center sc.
Checkpoint 2: 3 in (7.6 cm) across, loop tip to loop tip.
Round 5 – Bell Shaping
This round changes the circle into a bell. It uses short stitches for the dome, medium stitches for the shoulders, and tall stitches for the flared corners. Puff clusters go along the bottom.
Ch 1, sc in the first sc (top center).
- L1: 6 sc in the loop. Sc in the next sc.
- L2: 7 hdc in the loop. Sc in the next sc.
- L3: (2 dc, 2 tr, ch 3, 2 tr, 2 dc) in the loop. Sc in the next sc.
- L4: (puff, ch 2, puff, ch 2, puff) in the loop. Sc in the bottom-center sc.
- L5: (puff, ch 2, puff, ch 2, puff) in the loop. Sc in the next sc.
- L6: (2 dc, 2 tr, ch 3, 2 tr, 2 dc) in the loop. Sc in the next sc.
- L7: 7 hdc in the loop. Sc in the next sc.
- L8: 6 sc in the loop.
Sl st to the first sc to join.
Count, loop by loop: L1 6 + L2 7 + L3 8 + L4 3 + L5 3 + L6 8 + L7 7 + L8 6 = 48 sts in loops. Add the 8 sc worked into the Round 4 sc: 56 sts total, plus 2 corner ch-3 sps and 4 ch-2 sps.
The ch-3 sp in the middle of each tr group is the point of a flared corner. The tr groups push those corners outward and downward. Meanwhile the puffs along the bottom curve sit between the corners, which gives the bottom edge its gentle wave.
Checkpoint 3: 3.75 in (9.5 cm) wide × 3.5 in (8.9 cm) tall.
Round 6 – Border, Hanging Loop, and Clapper
See the Border section below for this round.
Border
Border gauge: 22 sc = 4 in (10.2 cm) along the outer edge, after blocking. That is about 5.5 sc per inch (2.2 sc per cm).
The border is Round 6. It is 1 round of sc that firms up the outline, with the hanging loop and clapper made along the way.
Round 6:
Ch 1. Work 1 sc in the first sc (top center).
Hanging loop: Ch 12, sl st in the same top-center sc. Work 18 sc over the ch-12 loop, then sl st in the same top-center sc again.
Right side: Sc in each of the next 19 sts. In the corner ch-3 sp work (2 sc, ch 2, 2 sc).
Bottom: Sc in each of the next 4 sts. Sc in the next sc. Then sc in the next puff, 2 sc in the ch-2 sp, sc in the next puff, 2 sc in the ch-2 sp, and sc in the next puff.
In the bottom-center sc, make the clapper: sc in that sc, then ch 5. Sl st in the 4th ch from the hook to form a small ring, which leaves 1 ch as a stem. Work 10 sc into the ring and sl st to the first ring sc. Sl st in the stem ch, then sl st in the same bottom-center sc.
Continue: sc in the next puff, 2 sc in the ch-2 sp, sc in the next puff, 2 sc in the ch-2 sp, sc in the next puff. Sc in the next sc. Sc in each of the next 4 sts. In the corner ch-3 sp work (2 sc, ch 2, 2 sc).
Left side: Sc in each of the next 19 sts. Sl st to the first sc to join. Fasten off.
Counts per side:
- Top center: 1 sc
- Right side: 19 sc + 2 corner sc = 21 sc
- Bottom: 2 corner sc + 4 + 1 + 7 (L4) + 1 (bottom center) + 7 (L5) + 1 + 4 + 2 corner sc = 29 sc
- Left side: 2 corner sc + 19 sc = 21 sc
Total: 1 + 21 + 29 + 21 = 72 sc around the edge. The 18 sc on the hanging loop, the 10 sc on the clapper, and the 2 corner ch-2 sps are extra and not part of that count.
Why the math works: Round 6 is a conversion round. It works 56 sc, 1 into each of the 56 Round 5 sts. It adds 8 sc into the four ch-2 sps (2 each) and 8 sc into the two corners (4 each). That gives 56 + 8 + 8 = 72 sc. The side-by-side count above gives the same total. Each corner’s 4 sc are counted only once: 2 with the side and 2 with the bottom. With 72 sc at 5.5 sc per inch, the outline measures about 13 in (33.0 cm) around. That is the right perimeter for a 4 in × 3.75 in (10.2 cm × 9.5 cm) bell outline, so the edge lies flat without pulling or rippling.
Checkpoint 4: 4 in (10.2 cm) wide × 3.75 in (9.5 cm) tall in the body, 5.5 in (14.0 cm) tall overall.
Final Blocking
- Weave in ends first. Sew each tail through the back of solid sc stitches for at least 1 in (2.5 cm), then go back in the opposite direction. Do not weave through the chain loops, because the tails will show.
- Dampen. Spray the bell until it is evenly damp but not dripping, or soak it briefly in cool water and press it gently in a towel.
- Pin the frame. On your blocking mat, pin the top center, the two flare corners, and the bottom center first. The corners should be 4 in (10.2 cm) apart. The top center to the bottom center should be 3.75 in (9.5 cm).
- Open the windows. Pin each ch-5 window open so the flower sits centered and round. Ease each puff petal outward with your fingertip.
- Shape the details. Pin the hanging loop into a neat teardrop and the clapper into a round circle.
- Stiffen (optional). For a firm ornament, brush or spray on fabric stiffener or starch while the bell is still pinned.
- Dry completely. Leave it pinned for at least 12 hours, or until it is fully dry, before you remove the pins.
Final Quality-Control Checklist
- [ ] The flower has 8 even puff petals and the center ring is closed tightly.
- [ ] The flower circle is 2.25 in (5.7 cm) across.
- [ ] All 8 openwork windows are open and roughly the same size on the left and right.
- [ ] The dome is smooth and rounded, with no point at the top.
- [ ] Both flare corners match in size and angle.
- [ ] The bottom edge has a gentle, even wave with 3 puffs on each side of the clapper.
- [ ] The border has 72 sc: 21 on each side, 29 on the bottom, and 1 at the top center.
- [ ] The hanging loop is centered, fully covered with 18 sc, and firm.
- [ ] The clapper is round, centered, and attached securely.
- [ ] The body is 4 in (10.2 cm) × 3.75 in (9.5 cm).
- [ ] All ends are woven in invisibly and trimmed.
Troubleshooting
The puffs look flat or uneven. Pull each loop up to the same height before you finish the puff, and make the closing ch-1 snug.
The center hole won’t close. Pull the magic ring tail firmly before you start Round 2, then weave the tail around the ring once more when you finish.
The bell looks lopsided. Count Round 5 loop by loop. The most common mistake is putting 6 hdc in L7 instead of 7.
The corners don’t flare. Make sure you used tr (not dc) in the middle of L3 and L6, and that you kept the ch-3 between them.
The edge ruffles. Your border is too loose. Go down a hook size for Round 6 only.
The edge pulls in or cups. Check that you worked 2 sc in each ch-2 sp and (2 sc, ch 2, 2 sc) in each corner.
The hanging loop is floppy. Work the 18 sc tightly so they cover the chain completely. A stiffener helps too.
The clapper twists sideways. Keep the stem to 1 ch, and block the clapper so it points straight down.
Care
Hand wash in cool water with mild soap, press out the water in a towel, and dry flat, pinned to shape. If you used stiffener, add a fresh coat after washing.
Final Notes
The Snowdrift Bell relies on a short, reliable measurement chain. The flower is 2.25 in (5.7 cm) across after Round 3. It grows to 3 in (7.6 cm) after the Round 4 loops, and to 3.75 in × 3.5 in (9.5 cm × 8.9 cm) after shaping. It finishes at 4 in × 3.75 in (10.2 cm × 9.5 cm) after the border, and 5.5 in (14.0 cm) tall with its loop and clapper.
The stitch counts follow the same steps: 8, then 8 puffs, then 40, then 8 loops, then 56, then 72. Check each one as you go, and every bell you make will match the first. Make one for a gift tag, or a whole set for the tree.
Happy crocheting!