

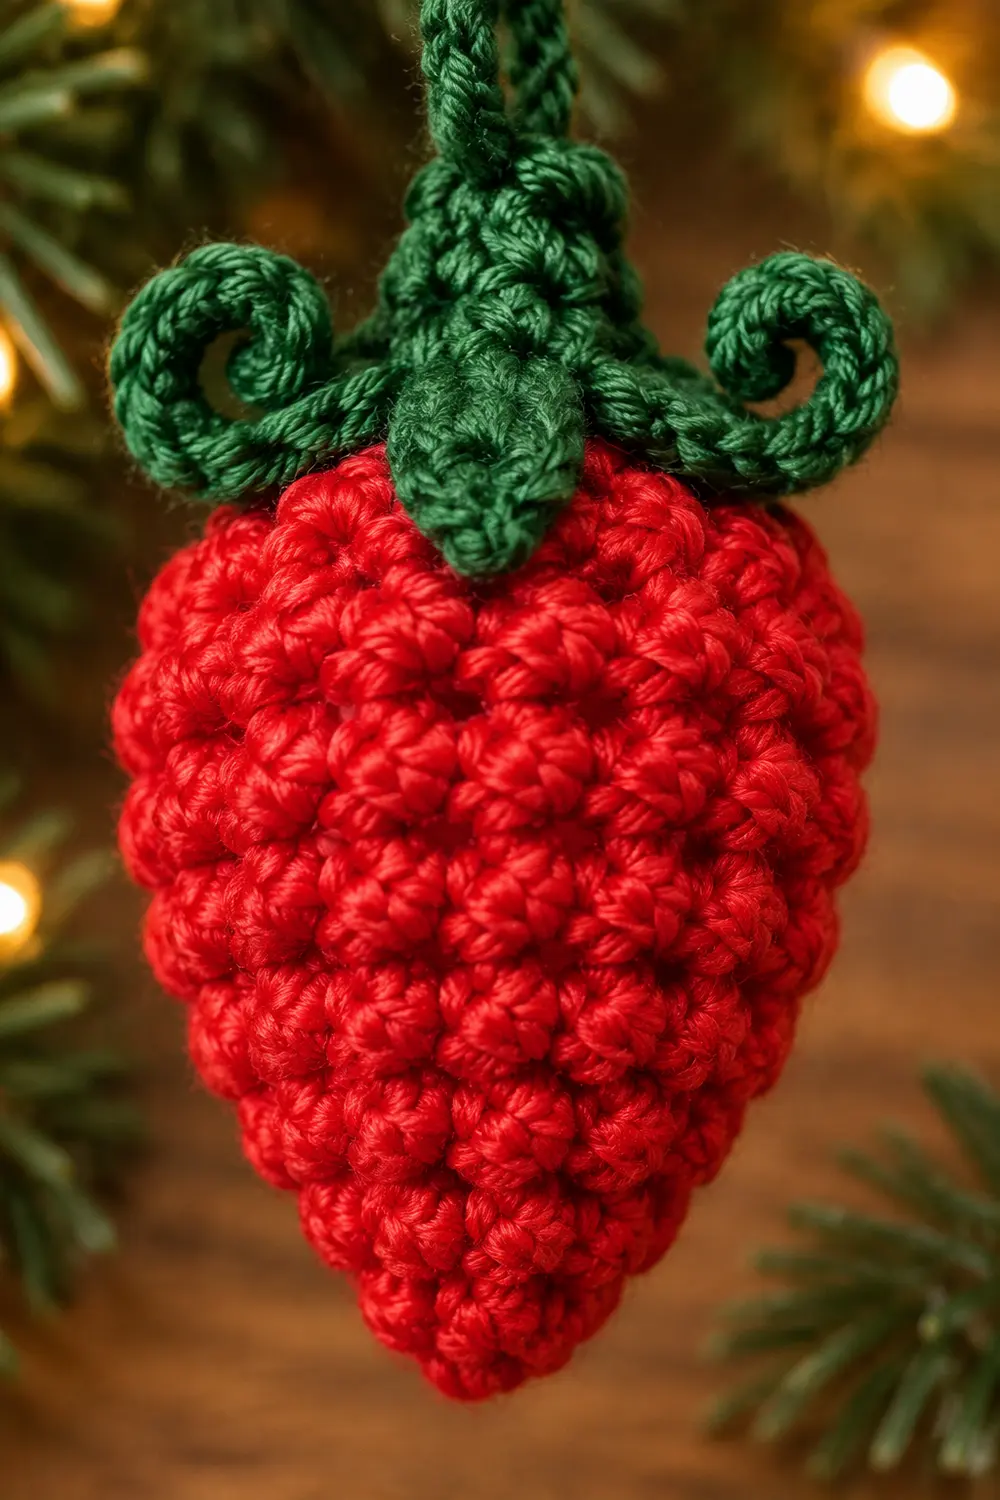
This little strawberry ornament is a single 3D motif with a bright red berry body and a small green crown on top. The body is covered in mini popcorn stitches, which give it the bumpy, seeded surface of a real strawberry. The green calyx has five spiral leaves that curl as you work them.
The palette is simple: one bright red and one leaf green. The finished piece suits a tree branch, a gift tag, or a holiday basket, especially against natural wood and evergreen styling.
This pattern uses US crochet terms throughout. The finished ornament is about 2.5 in (6.4 cm) tall from the berry tip to the top of the leaves. It is about 1.75 in (4.4 cm) wide at its widest point.
You crochet the berry body in continuous spiral rounds from the pointed tip up to the rounded top. Popcorn rounds alternate with plain single crochet rounds, and you stuff the body before closing it. Then you work a small flat green calyx, add a spiral leaf edge, and sew the calyx over the closed top.
Finished Size and Construction
- Finished size: 2.5 in (6.4 cm) tall × 1.75 in (4.4 cm) wide
- Skill level: Easy-intermediate (magic ring, spiral rounds, popcorn stitch)
- Terminology: US crochet terms
- Yarn weight: Worsted (#4), cotton or acrylic
- Hook: 3.5 mm (US E-4)
- Number of pieces: 1 ornament, made from 2 components (berry body + calyx) sewn together
- Layout: Single motif, no assembly grid
- Berry body size: 2.25 in (5.7 cm) tall × 1.75 in (4.4 cm) wide
- Calyx before leaf edge: 0.6 in (1.5 cm) across
- Leaf edge depth: about 0.4 in (1.0 cm) per curled leaf, for a calyx span of about 1.5 in (3.8 cm)
Materials
Yarn advice: Choose a smooth, tightly plied worsted yarn. Cotton gives crisp popcorns and holds its shape well. Acrylic is softer and slightly fuzzier, which also works. Avoid fuzzy or brushed yarns, because they hide the popcorn texture.
- Red (berry body): 8 g, about 16 m
- Green (calyx and leaves): 3 g, about 6 m
These quantities include a margin of roughly 30% for gauge swatching and sewing tails.
Tools:
- 3.5 mm (US E-4) crochet hook
- 1 stitch marker
- Tapestry needle
- Scissors
- Polyester fiberfill, about 3 g
- Optional: a few pins for shaping the leaves
Abbreviations (US Terms)
- MR – magic ring
- ch – chain
- sl st – slip stitch
- sc – single crochet
- dc – double crochet
- inc – 2 sc in the same stitch
- dec – single crochet 2 together (invisible decrease recommended)
- st(s) – stitch(es)
- Rnd – round
- ( ) x N – repeat the bracketed sequence N times
Special stitch – mini popcorn (mpc): Work 3 dc in the same stitch. Remove the hook from the loop. Insert the hook from front to back into the top of the first dc of the group, pick up the dropped loop, and pull it through. One mpc counts as 1 stitch.
The popcorn naturally pushes toward the side facing you. Keep the right side of the work facing outward for the whole body so that every bump sits on the outside.
Gauge and Checkpoints
Gauge: 6 sc and 7 rounds = 1 in (2.5 cm) in plain sc spiral rounds. Gauge must be tight enough that stuffing does not show between stitches.
Test before committing. Work Rnds 1–8 of the body as your swatch, then measure. If those rounds match the checkpoint below, keep going. You only need to make one ornament, so the test rounds simply become the real piece.
Checkpoints:
- After Rnd 4 (12 sts): about 0.6 in (1.5 cm) across the opening, and about 0.5 in (1.3 cm) tall
- After Rnd 8 (18 sts): about 1 in (2.5 cm) across, and about 1.25 in (3.2 cm) tall
- After Rnd 14 (30 sts): about 1.75 in (4.4 cm) across including popcorns, and about 2 in (5.1 cm) tall
- Closed body: 2.25 in (5.7 cm) tall
- Calyx after Rnd 2: 0.6 in (1.5 cm) across
If your piece is too big, go down to a 3.25 mm hook. If it is too small or very stiff, go up to a 3.75 mm hook. If you can see gaps between sc stitches, go down a size regardless of the measurements.
Part 1: Berry Body (Red)
The body is worked in continuous spiral rounds. Do not join, and do not turn. Place the marker in the first stitch of each round and move it up as you go.
The increases are spread slowly near the tip and faster in the middle. This gives the berry its narrow point and wide shoulders.
Rnd 1: In red, MR, 6 sc in ring. Pull the ring closed. (6)
Rnd 2: (sc, inc) x3. (9)
Rnd 3: (sc 2, inc) x3. (12)
Rnd 4 (texture): (mpc, sc) x6. (12), including 6 popcorns.
Rnd 5: (sc 3, inc) x3. Work each sc into the top of the popcorn or sc below. (15)
Rnd 6 (texture): (sc, mpc, sc) x5. (15), including 5 popcorns.
Rnd 7: (sc 4, inc) x3. (18)
Rnd 8 (texture): (mpc, sc 2) x6. (18), including 6 popcorns.
Checkpoint: the piece measures about 1 in (2.5 cm) across.
Rnd 9: (sc 2, inc) x6. (24)
Rnd 10 (texture): (sc, mpc, sc) x8. (24), including 8 popcorns.
Rnd 11: (sc 3, inc) x6. (30)
Rnd 12 (texture): (mpc, sc 2) x10. (30), including 10 popcorns.
Begin stuffing now. Firmly fill the pointed tip first, using the back of your hook to push the fiberfill down.
Rnd 13: sc in each st around. (30)
Rnd 14 (texture): (sc, mpc, sc) x10. (30), including 10 popcorns.
Checkpoint: the piece measures about 1.75 in (4.4 cm) across and 2 in (5.1 cm) tall.
Rnd 15: (sc 3, dec) x6. (24)
Rnd 16: (sc 2, dec) x6. (18)
Top up the stuffing so the shoulders are firm and rounded, but not stretched.
Rnd 17: (sc, dec) x6. (12)
Rnd 18: dec x6. (6)
Fasten off, leaving a 6 in (15.2 cm) tail. Thread the tail onto the tapestry needle. Weave it through the front loops of the 6 remaining stitches and pull tight to close the top. Push the needle down through the body and out near the tip, then trim the tail close so it disappears inside.
Count check: Each increase round adds one stitch per repeat: 6 → 9 → 12 → 15 → 18 → 24 → 30. Texture rounds and Rnd 13 keep the count unchanged. Each decrease round removes one stitch per repeat: 30 → 24 → 18 → 12 → 6. There are 45 popcorns in total (6 + 5 + 6 + 8 + 10 + 10).
Why the popcorns sit in a staggered pattern: The popcorn rounds alternate between starting with mpc and placing mpc in the middle of a repeat. This offsets the bumps from round to round, the way strawberry seeds sit.
Part 2: Calyx Base (Green)
The calyx is a small flat disc. In the Border section, you will add a spiral leaf edge to this disc.
Rnd 1: In green, MR, 5 sc in ring. Pull the ring closed. (5)
Rnd 2: inc in each st around. (10)
Checkpoint: the disc measures 0.6 in (1.5 cm) across and lies flat.
Do not fasten off. Continue directly with the leaf edge.
Border: Spiral Leaf Edge
On this ornament, the “border” is the calyx’s leaf edge. It is worked once, around the 10 stitches of calyx Rnd 2.
Border gauge: The leaf chains are worked at about 6 ch per 1 in (2.5 cm). Each leaf starts as 7 chains. Working 2 sc into each of 4 chains packs 8 sc into about 0.6 in (1.5 cm) of chain. That crowding forces the leaf to twist into a curl roughly 0.4 in (1.0 cm) long.
Rnd 3 (leaf edge): sl st in next st, ch 7. Starting in the 2nd ch from hook, work 2 sc in each of the next 4 ch, then sl st in each of the last 2 ch. Sl st in next st of Rnd 2. Repeat from * to * 4 more times. (5 leaves)
Sl st into the first sl st of the round. Fasten off, leaving a 12 in (30.5 cm) tail for sewing.
Counts per side: Treat each leaf as one “side” of the calyx.
- Each side uses exactly 2 stitches of Rnd 2: one sl st before the leaf and one sl st after it.
- Each leaf contains 8 sc and 2 sl st, worked into 6 chains.
Why the math works: The 5 leaves each use 2 base stitches, so 5 × 2 = 10. That equals Rnd 2’s count exactly, so no stitches are skipped or doubled. The leaves end up spaced evenly at about one every 72 degrees.
The two sl sts at the base of each leaf keep the leaf stem flat. The doubled sc near the tip make the leaf curl.
Attach the calyx: Center the calyx over the closed top of the berry, with the curled leaves pointing outward. Use the long green tail to whipstitch around the edge of Rnd 2, catching the red stitches of Rnds 17–18. Pass the needle behind each leaf base rather than through it, so the leaves stay free to curl. Hide the tail inside the body and trim.
Optional hanging loop: Join green at the center of the calyx, ch 12, and sl st in the same spot. This makes a loop about 1.5 in (3.8 cm) long. Fasten off and weave in the ends.
Final Blocking
Amigurumi needs only light shaping, not wet blocking.
- Shape the body. Roll the berry gently between your palms to even out the stuffing. Then pinch the tip lightly to sharpen the point.
- Seat the popcorns. Run a fingertip over each popcorn. If any bump has sunk inward, push it out from the side with the hook tip.
- Set the leaves. Twist each leaf in the direction it already curls. If a leaf is lying flat, wrap it around a pin or toothpick.
- Steam the leaves only. For acrylic, hold a steam iron 1 in (2.5 cm) above the leaves and never touch them. Cotton can take a slightly closer pass. Let the leaves cool completely on the pin before you remove it.
- Check final size. The ornament should measure 2.5 in (6.4 cm) from the berry tip to the top of the leaves, and 1.75 in (4.4 cm) across the widest round.
Final Quality-Control Checklist
- Body stitch counts match: 6, 9, 12, 12, 15, 15, 18, 18, 24, 24, 30, 30, 30, 30, 24, 18, 12, 6.
- All 45 popcorns face outward.
- No stuffing is visible between stitches.
- The tip is pointed and the shoulders are rounded.
- The top hole is fully closed and covered by the calyx.
- The calyx has 5 evenly spaced, curled leaves.
- The ornament is 2.5 in (6.4 cm) tall and 1.75 in (4.4 cm) wide.
- All tails are hidden inside the body.
Troubleshooting
Popcorns are on the inside. The work was turned inside out. Push the body right side out. Before the next texture round, check that the bumps on the previous texture rounds face you as you work.
Popcorns look flat. Make sure you close each popcorn by inserting the hook from front to back. You can also work 4 dc instead of 3 in each popcorn, which still counts as 1 stitch.
Body looks lumpy or uneven. Use smaller tufts of stuffing, and add them a little at a time.
Body is too round, not pointed. You likely increased too early. Recheck Rnds 2–7, then pinch the tip firmly during blocking.
Leaves don’t curl. Make sure you are working 2 sc in each of the 4 chains. For a tighter spiral, work 3 sc in each of those chains.
Calyx ruffles. Your Rnd 2 is likely over-increased. Recount it; it should have 10 stitches.
Gaps are showing. Go down one hook size and keep your tension even.
Care
Spot clean with a damp cloth and mild soap, then reshape the ornament and let it air dry. Do not machine wash, because the stuffing can clump and the leaves can lose their curl.
Final Notes
The measurement chain for this ornament runs as follows:
- Gauge of 6 sc and 7 rounds = 1 in (2.5 cm)
- Rnd 8 at 1 in (2.5 cm) across
- Rnd 14 at 1.75 in (4.4 cm) across
- Closed body at 2.25 in (5.7 cm) tall
- Calyx disc at 0.6 in (1.5 cm), with five leaves of about 0.4 in (1.0 cm) each
- Finished strawberry at 2.5 in (6.4 cm) tall
If each checkpoint matches, the finished ornament will too.
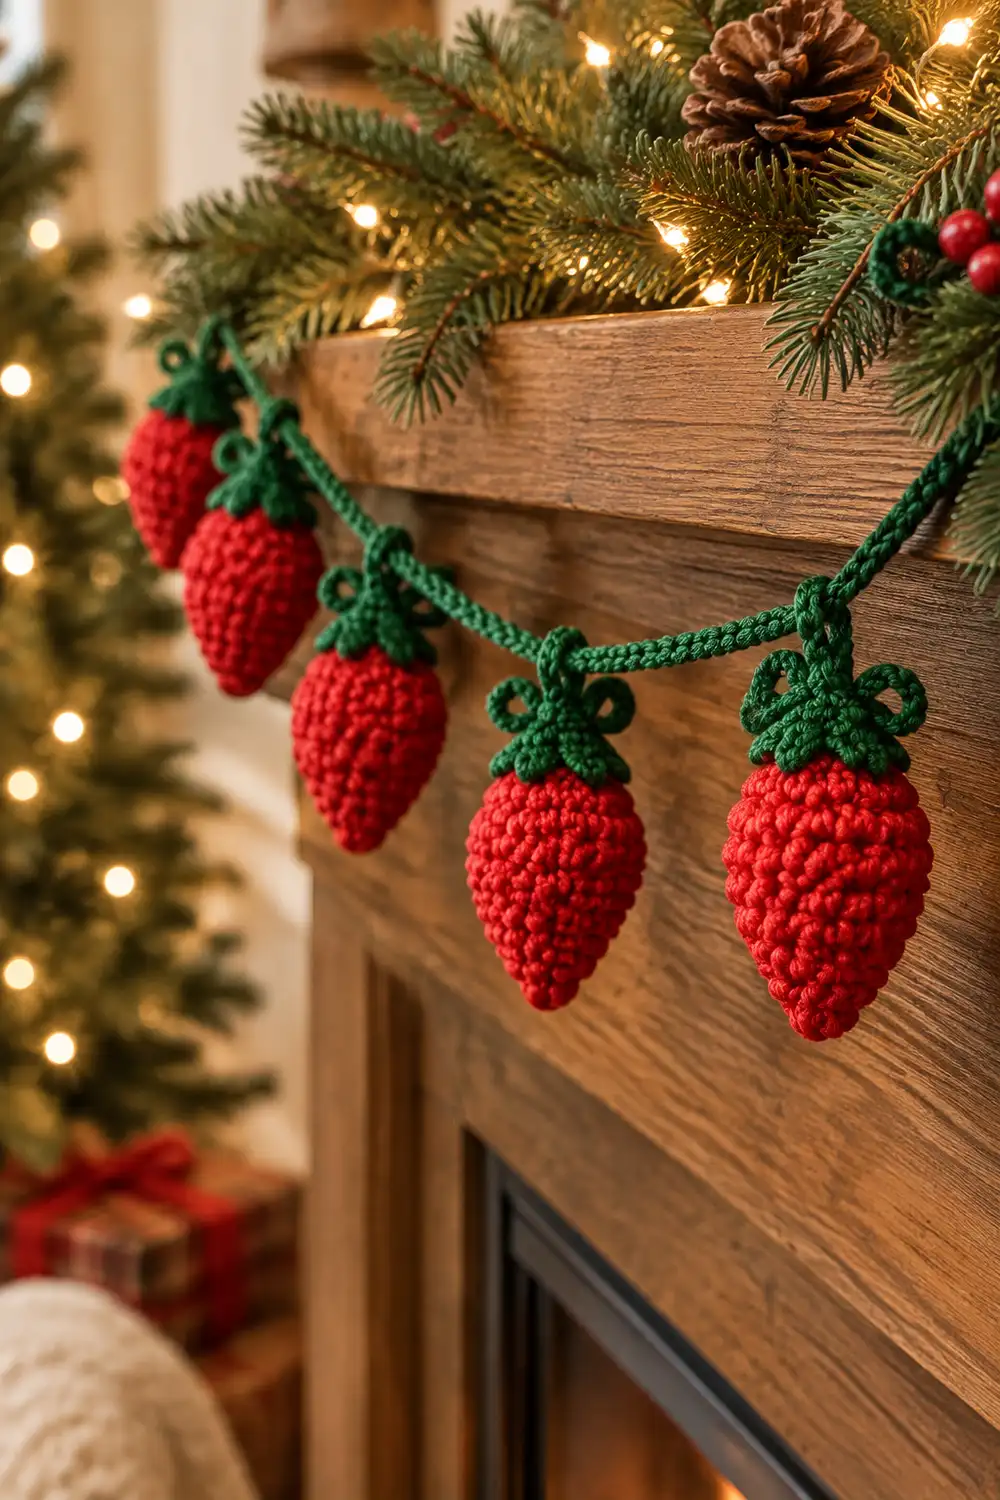
Optional: To make a garland, crochet several strawberries and thread their hanging loops onto a long green chain.
Happy crocheting!