
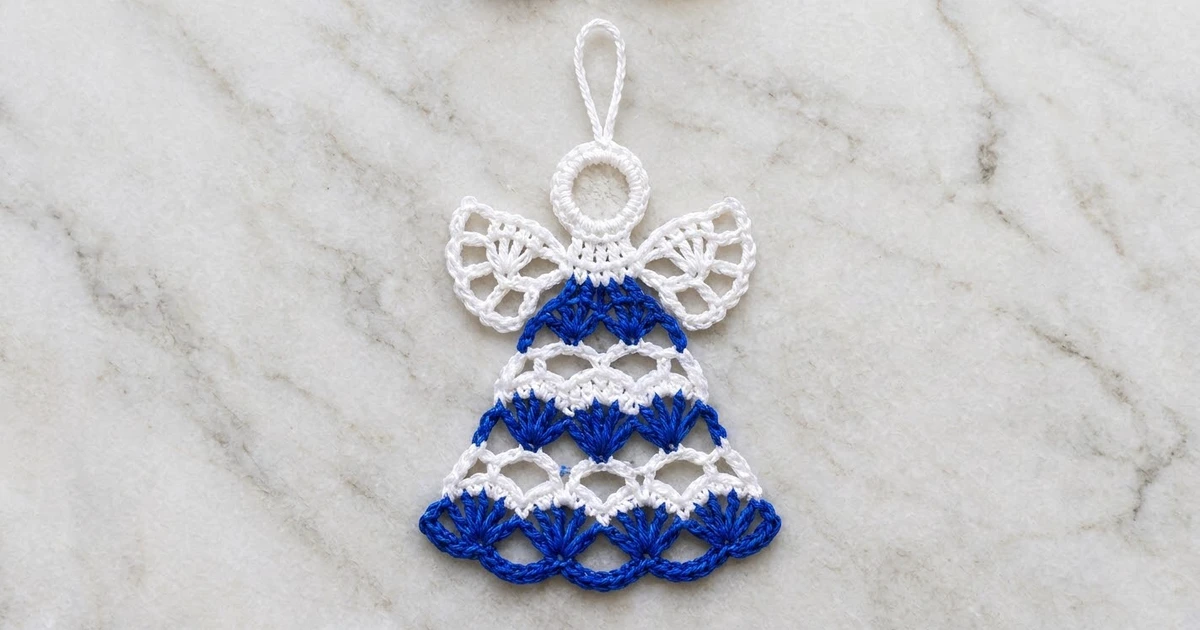
The Bluebell Angel is a lacy thread-crochet ornament with a bell-shaped skirt in cobalt blue and white stripes. Rows of blue fans alternate with airy white chain-arch rows. The skirt is topped by a white yoke, an open ring for the head and two small fan wings.
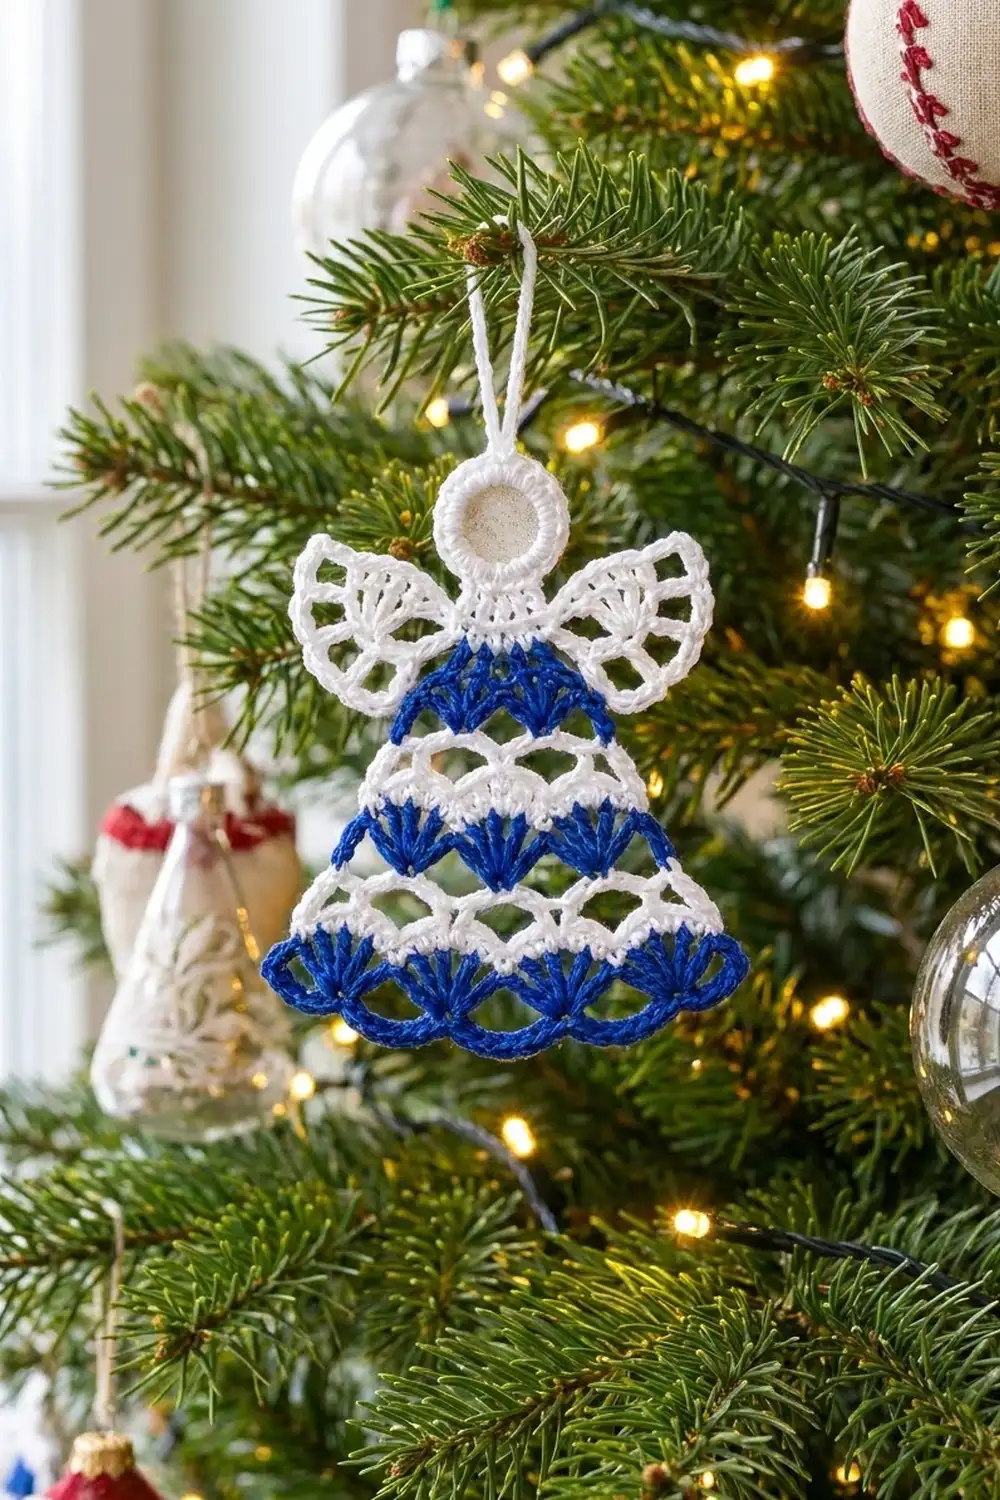
The look is crisp and traditional, like blue-and-white porcelain. Hang one on the tree, tie it to a gift, or make a few for a window. Each angel takes an evening or less once you know the rows.
This pattern uses US crochet terms. The finished angel measures 3.25 in (8.3 cm) wide at the hem and 3.5 in (8.9 cm) tall from the hem to the top of the head. The hanging loop adds about 1.5 in (3.8 cm).
Construction is bottom-up, all in one piece. You start with a foundation of single crochet, work the striped skirt upward and decrease to a yoke. Then you add the head ring and hanging loop, work a wing off each side of the yoke, and finish with a blue scallop border along the hem.
Finished Size and Construction
- Finished size: 3.25 in (8.3 cm) wide x 3.5 in (8.9 cm) tall, plus a 1.5 in (3.8 cm) hanging loop
- Skill level: Intermediate (thread crochet, color changes, working into row ends)
- Terminology: US
- Yarn weight: Size 10 cotton crochet thread (Lace, 0)
- Hook: 1.75 mm steel hook
- Number of pieces: 1
- Layout: Single ornament, no joining
- Piece size: 3.25 in (8.3 cm) wide x 3.5 in (8.9 cm) tall
- Size before border: 3.25 in (8.3 cm) wide x 3.25 in (8.3 cm) tall
- Border depth: 0.25 in (0.6 cm), along the hem only
Materials
Use a mercerized cotton thread in size 10. Mercerized thread shows stitch definition well and holds its shape after stiffening. Pick a saturated blue so the fans stand out clearly against the white. Avoid fuzzy or acrylic threads, because they blur the open lace and don’t take stiffener well.
- Color A, cobalt blue: 6 g, about 34 m
- Color B, white: 6 g, about 34 m
Both amounts include a margin for swatching and weaving in ends. A standard 50 g ball (about 280 m) is enough for several angels.
Tools:
- 1.75 mm steel crochet hook
- Fine tapestry needle
- Small sharp scissors
- Blocking board or foam mat and rust-proof pins
- Fabric stiffener, or a starch solution
- Ruler marked in inches and cm
Abbreviations (US Terms)
- ch – chain
- sl st – slip stitch
- sc – single crochet
- dc – double crochet
- sc2tog – single crochet 2 together
- sp – space
- st(s) – stitch(es)
- tch – turning chain
- RS / WS – right side / wrong side
Special stitches:
- Shell: 7 dc in the same st or sp.
- V-st: (dc, ch 2, dc) in the same st.
- Center sc: an sc worked in the 4th dc of a shell.
Gauge and Checkpoints
Gauge is 10 sc and 11 sc rows = 1 in (2.5 cm). One shell is about 0.625 in (1.6 cm) wide at its top and 0.25 in (0.6 cm) tall.
Gauge is not critical for an ornament, but proportions are. Make one complete angel before you start a batch, and check it against these measurements:
- After Row 1: foundation 3.1 in (7.9 cm) wide
- After Row 2: 3.25 in (8.3 cm) across the fans
- After Row 6: skirt 1.75 in (4.4 cm) tall
- After Row 9: body 2.25 in (5.7 cm) tall
- After the head: 3.25 in (8.3 cm) tall
- After the border: 3.5 in (8.9 cm) tall
If your angel is too big, go down to a 1.5 mm hook. If it’s too small or the fans look crowded, go up to a 2.0 mm hook. Change the hook size, not the stitch counts, because the decreases depend on the exact counts.
Measure the angel before blocking, laid flat with no stretching. Stiffened thread can add about 0.125 in (0.3 cm) in each direction, so an angel that is slightly under size before blocking is fine.
Skirt
Cut each color at the end of its row and join the next color fresh. Joining fresh keeps the edges neat; carrying thread up the sides would show through the lace. Turn at the end of every row. Leave 4 in (10.2 cm) tails.
Row 1 (RS, Color A): Ch 32. Sc in 2nd ch from hook and in each ch across. Turn. (31 sc)
Row 2 (Color A): Ch 1, sc in first st, skip 2 sts, shell in next st, skip 2 sts, sc in next st; repeat from * 4 more times. Fasten off. (5 shells, 6 sc)*
Each shell sits on a single stitch, so the fans open upward from a point. Check: 1 + (6 x 5) = 31 stitches used.
Row 3 (Color B): Turn. Join B with sl st in the first sc. Ch 1, sc in the same st, ch 3, center sc in the next shell, ch 3, V-st in the next sc, ch 3, center sc in the next shell; repeat from * 3 more times. Ch 3, sc in the last sc. Fasten off. (7 sc, 4 V-sts, 10 ch-3 sps)*
The 7 sc are 2 edge sc plus 5 center sc. There are V-sts only between the shells, not at the edges, so the next row has one fan fewer.
Row 4 (Color A): Turn. Join A with sl st in the first center sc (2nd sc of the row). Ch 1, sc in the same st, shell in the ch-2 sp of the next V-st, sc in the next center sc; repeat from * 3 more times. Leave the edge ch-3 sp and edge sc unworked. Fasten off. (4 shells, 5 sc)*
The ch-3 sps of Row 3 stay visible below the new fans and form the white arches of the lace stripe.
Row 5 (Color B): Turn. Join B with sl st in the first sc. Ch 1, sc in the same st, ch 3, center sc in the next shell, ch 3, V-st in the next sc, ch 3, center sc in the next shell; repeat from * 2 more times. Ch 3, sc in the last sc. Fasten off. (6 sc, 3 V-sts, 8 ch-3 sps)*
Row 6 (Color A): Turn. Join A with sl st in the first center sc. Ch 1, sc in the same st, shell in the ch-2 sp of the next V-st, sc in the next center sc; repeat from * 2 more times. Fasten off. (3 shells, 4 sc)*
Checkpoint: the skirt is 1.75 in (4.4 cm) tall, with stripes reading blue, white, blue, white, blue from the bottom up.
Yoke
Row 7 (Color B): Turn. Join B with sl st in the first sc. Ch 1, sc in the same st, sc in the 2nd, 4th and 6th dc of the next shell, sc in the next sc; repeat from * 2 more times. Turn. (13 sc)*
This is a conversion row. It has the 4 sc worked one per existing sc, plus 9 sc worked into the shells (3 per shell): 4 + 9 = 13.
Row 8: Ch 1, sc2tog, sc in the next 9 sts, sc2tog. Turn. (11 sc)
Row 9: Ch 1, sc2tog, sc in the next 7 sts, sc2tog. Fasten off. (9 sc)
Checkpoint: the yoke tapers from 1.3 in (3.3 cm) to about 0.9 in (2.3 cm) wide, and the body is 2.25 in (5.7 cm) tall.
Head and Hanging Loop
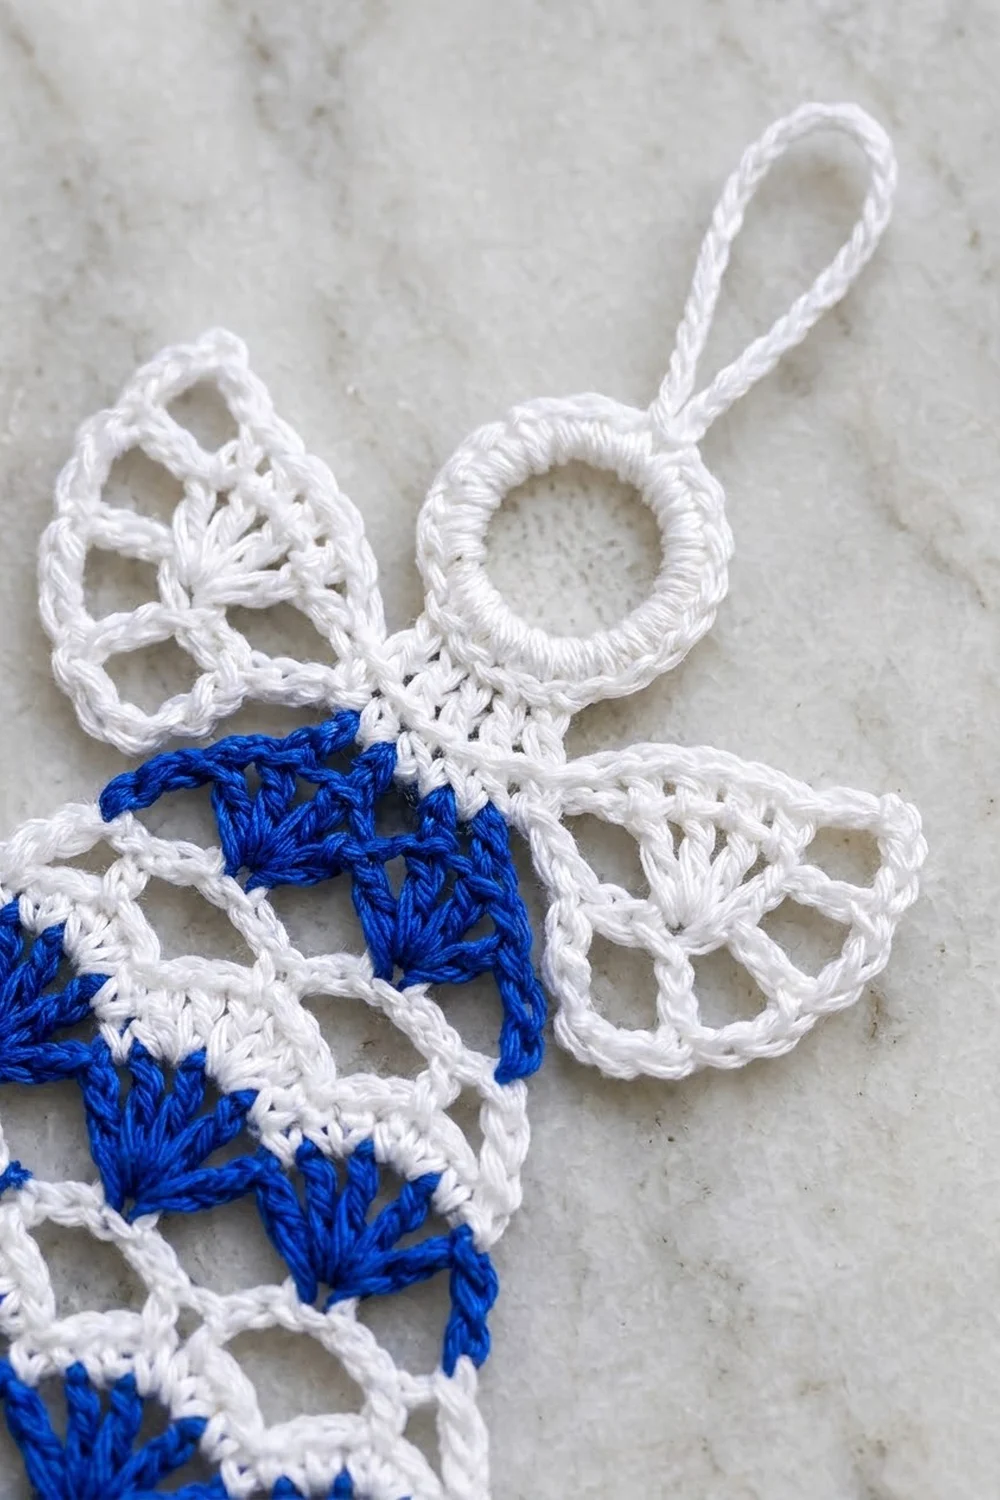
Head ring: With RS facing, join B with sl st in the 5th (center) sc of Row 9. Ch 16, then sl st in the same sc to form a ring that stands upward.
Head round: Ch 1, work 26 sc over the ch-16 ring, then sl st in the first sc. (26 sc)
Push the sc together so they cover the chain completely. The center stays open.
Hanging loop: Sl st in each of the next 13 sc to reach the top of the head (the 14th sc). Ch 30, then sl st in the same sc to form a loop. Ch 1, work 36 sc over the loop and sl st in the base sc. Fasten off.
The sc covering makes the loop firm and cord-like, so the ornament hangs straight.
Checkpoint: the head ring is about 1 in (2.5 cm) tall. The angel now measures 3.25 in (8.3 cm) from the foundation to the top of the head.
Wings (Make 2)
Work each wing directly onto one side of the yoke.
Row 1: With RS facing, join B with sl st in the row end of Row 8. Ch 3 (counts as dc), work 6 dc in the same row end, then sl st in the row end of Row 9 to anchor. Turn. (7 dc)
Row 2: Ch 5 (counts as dc + ch 2), dc in the next dc, ch 2; repeat from * 4 more times. Dc in the top of the beginning ch-3. Turn. (7 dc, 6 ch-2 sps)*
Row 3: Ch 1, sc in the first dc, ch 4, sc in the next ch-2 sp, ch 4, sc in the next dc; repeat from * 5 more times, placing the last sc in the 3rd ch of the tch. Fasten off. (13 sc, 12 ch-4 arches)*
Repeat on the opposite side, joining at the other row end of Row 8.
Each wing is about 1.1 in (2.8 cm) across. The wingspan is about 3.25 in (8.3 cm), the same as the hem width.
Border: Hem Scallops
The border runs only along the hem, worked into the free loops of the foundation chain. The border gauge is 1 ch-5 arch over 5 skipped chains, with 1 arch under each blue fan.
Border Row (Color A): With RS facing, rotate the angel so the foundation chain is on top. Join A with sl st in the first free loop at the right corner. Ch 1, sc in the same loop, ch 5, skip 5 loops, sc in the next loop; repeat from * 4 more times. Fasten off. (6 sc, 5 ch-5 arches)*
Count along the hem side: 31 foundation loops. This side is 31 loops, which includes both end loops; no extra corner stitches are added.
Why the math works: 1 + (6 x 5) = 31, the same formula as Row 2. The border sc land on the same loops as the Row 2 sc, so each ch-5 arch sits directly under one shell. Five ch over five skipped loops lies flat and dips slightly to form a scallop. The border adds 0.25 in (0.6 cm) of height and no width.
Final Blocking
- Weave in all tails through stitches of the same color, so no white thread crosses a blue fan.
- Soak the angel in fabric stiffener, or in a 1:1 white glue and water mix. Squeeze out the excess gently.
- Pin it flat, RS up, on a covered foam board.
- Pin the hem to 3.25 in (8.3 cm) wide, with one pin at the tip of each of the 5 scallops.
- Pin the head to a round shape, about 1 in (2.5 cm) tall.
- Open each wing: pin the 12 arches into a smooth fan, and pin the ch-3 sps in the white rows open.
- Pull the hanging loop straight up and pin it to 1.5 in (3.8 cm).
- Let it dry completely, at least 12 hours, before unpinning.
Final Quality-Control Checklist
- The hem measures 3.25 in (8.3 cm) and the body 3.5 in (8.9 cm) tall
- The fan counts from the bottom are 5, 4 and 3
- The white rows have 4 V-sts and then 3 V-sts
- The yoke ends with 9 sc and the head is centered on the 5th sc
- The head has 26 sc and an open center
- The loop is centered at the top of the head and covered with 36 sc
- Both wings have 12 arches and match in size
- The border has 5 scallops, one under each bottom fan
- All tails are hidden in stitches of the same color
Troubleshooting
The skirt curls upward: Your foundation chain is too tight. Chain with a hook one size larger, then switch back for Row 1.
The fans ruffle: Your dc are too loose. Go down a hook size, or pull each dc snug.
The fans don’t line up: Count the skips in Row 2 (2 sts on each side of every shell).
The skirt looks lopsided: In Rows 4 and 6, make sure you joined in the first center sc, not the edge sc.
The head tilts: The ring was joined off-center. Count the 9 Row 9 sc again and use the 5th.
The head ring looks gappy: Add 1 or 2 sc to the head round. Don’t change the ring chain.
The wings droop: Re-stiffen them and pin each arch outward while drying.
The scallops pucker: Use ch 6 instead of ch 5 for each arch.
White fibers show in the blue rows: Weave the tails along stitches of the same color only, and trim close.
Care
Spot clean only with a damp cloth, and reshape while it’s damp. Store flat in tissue so the stiffened wings and loop keep their shape.
Final Notes
Here is the full measurement chain. The 31-st foundation measures 3.1 in (7.9 cm), and the fans spread it to 3.25 in (8.3 cm). The shell rows go from 5 fans to 4 to 3, with the skirt reaching 1.75 in (4.4 cm). The yoke decreases from 13 to 11 to 9 sc and brings the body to 2.25 in (5.7 cm). The head adds 1 in (2.5 cm), and the border adds 0.25 in (0.6 cm), for a finished angel 3.5 in (8.9 cm) tall plus its 1.5 in (3.8 cm) loop.
If the first angel matches these checkpoints, every angel in your batch will match too.
Happy crocheting!