
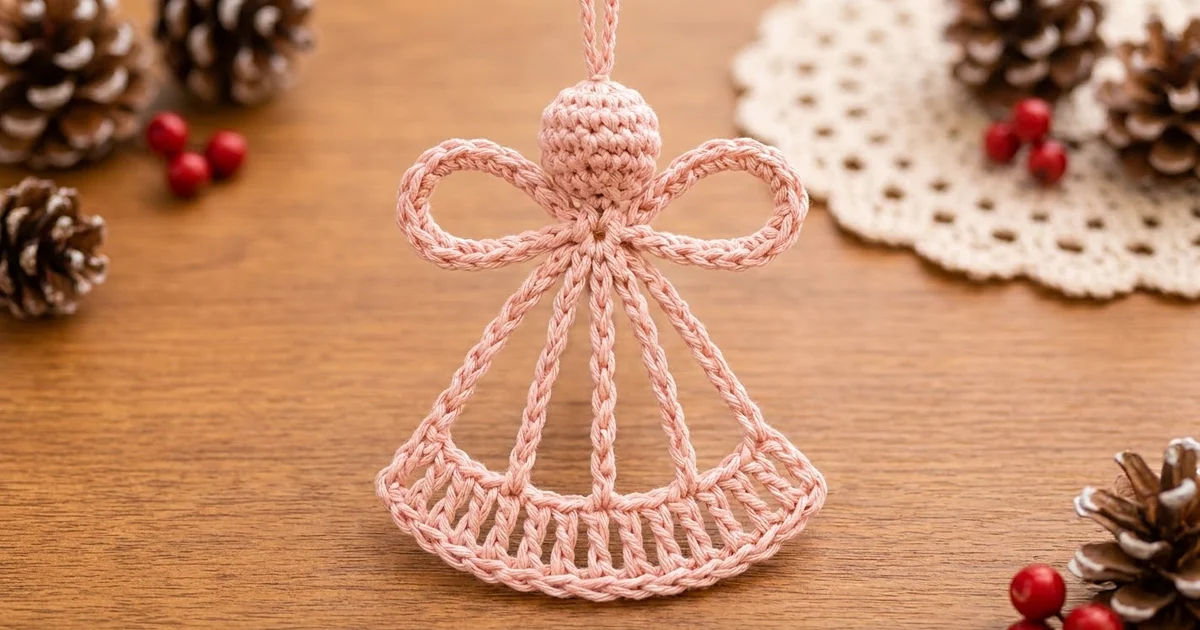
This little angel is a light, open ornament made almost entirely of corded lines. It has a round stuffed head, two looped wings, a fan-shaped skirt of four corded spokes and a hem band of short posts with a thick corded edge. A slim chain loop on top makes it ready to hang.
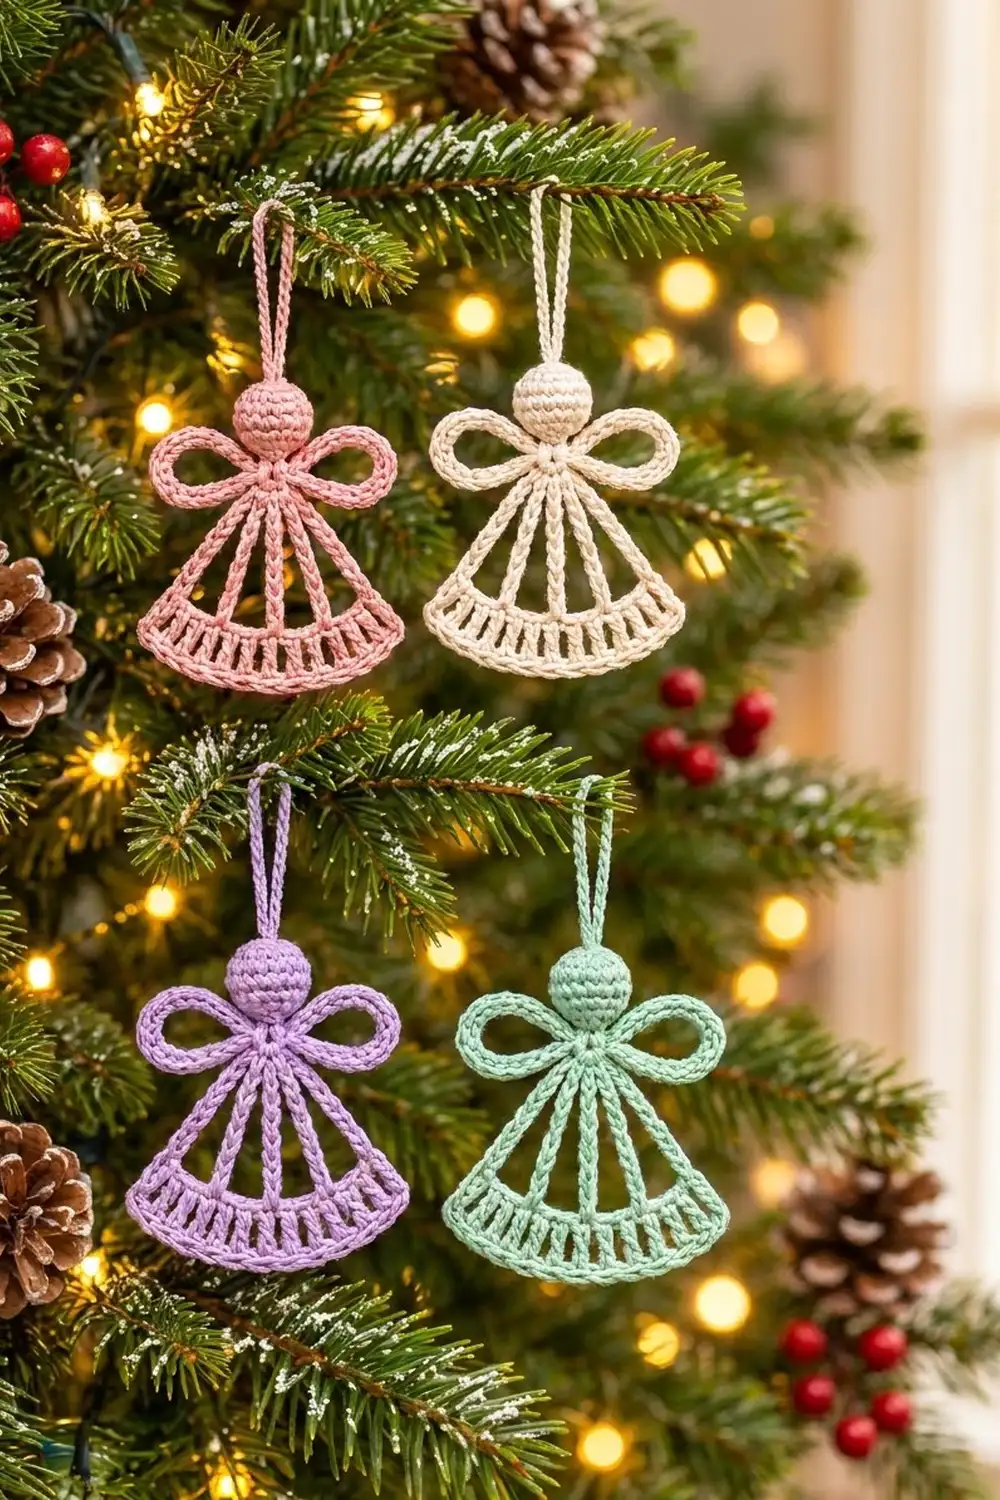
The sample is made in soft blush pink cotton. The same pattern also looks lovely in cream, lilac or mint. The style is airy and graphic, more outline than fabric, so it stands out well against a busy Christmas tree.
The pattern uses US crochet terms. The finished angel is about 5.5 in (14.0 cm) tall without the hanging loop and 5.5 in (14.0 cm) wide at the hem.
The construction is simple:
– Make a small ring and work four spokes and two wing loops directly off it.
– Connect the spoke tips with a chain arc.
– Add a two-row hem band and a slip stitch cord edge.
– Make the head as a tiny amigurumi ball with a hanging loop, and sew it over the top of the ring.
Finished Size and Construction
- Finished size: 5.5 in (14.0 cm) tall x 5.5 in (14.0 cm) wide at the hem, plus a 2.5 in (6.4 cm) hanging loop
- Skill level: Easy / advanced beginner
- Terminology: US terms
- Yarn weight: DK (#3) cotton
- Hook: 3.5 mm (E/4)
- Number of pieces: 1 ornament (the body is worked in one piece, and the head is sewn on)
- Layout: a single ornament on its own; no motifs to join
- Body size before the hem band: spokes 3.8 in (9.7 cm) long; arc 4.7 in (11.9 cm) wide from tip to tip
- Hem band (border) depth: 0.6 in (1.5 cm)
Materials
Choose a smooth mercerized or combed cotton in DK weight. Cotton gives crisp, clear cord lines and holds its shape on the tree. Avoid fuzzy or very soft acrylic: the cord lines will look blurry and the wings may droop.
- Blush pink (main color): 10 g, about 21 m (23 yd)
- Optional colors: cream, lilac or mint, 10 g / about 21 m (23 yd) per angel
Quantities include a margin of about 25 percent for testing and yarn tails.
Each angel uses only one color, so you can use up leftovers from other cotton projects. For a matching set, pick colors of similar value (pastels with pastels) so no single angel stands out from the rest.
Tools:
- 3.5 mm (E/4) crochet hook
- A small pinch of polyester fiberfill
- Tapestry needle
- Stitch markers (2 or 3)
- Scissors
- Rust-proof pins and a foam blocking mat
- Spray bottle; fabric stiffener (optional)
Abbreviations (US Terms)
- ch: chain
- sl st: slip stitch
- sc: single crochet
- dc: double crochet
- inc: 2 sc in the same stitch
- dec: sc2tog (invisible decrease recommended)
- MR: magic ring
- sk: skip
- sp: space
- st(s): stitch(es)
- rep: repeat
Special stitch: Cord. Ch the number given, then sl st into the back bump of each chain, working back toward where you started. The sl sts sit on top of the chain and make the raised, braided-looking line on the spokes, wings and loop. Keep your sl st tension even and medium so the cord lies straight without curling.
Gauge and Checkpoints
Gauge: 5 ch = 1 in (2.5 cm); 5 sc = 1 in (2.5 cm).
Make one complete angel first. It takes under an hour and tells you more than a gauge swatch would. Check these measurements as you go:
- Ring (Round 1): about 0.5 in (1.3 cm) across
- Head: about 1.1 in (2.8 cm) across
- Each spoke: 3.8 in (9.7 cm) from the ring to the tip
- Arc: 4.7 in (11.9 cm) straight across, from one outer tip to the other
- Hem band: 0.6 in (1.5 cm) deep and 5.5 in (14.0 cm) across the bottom
- Each wing loop: about 2.4 in (6.1 cm) long
If your angel comes out too big, go down to a 3.25 mm or 3.0 mm hook, or relax your grip so the chains aren’t stretched. If it’s too small, go up to a 3.75 mm or 4.0 mm hook. Change the hook, not the stitch counts. The counts set the angle of the skirt and the odd/even spacing of the hem posts.
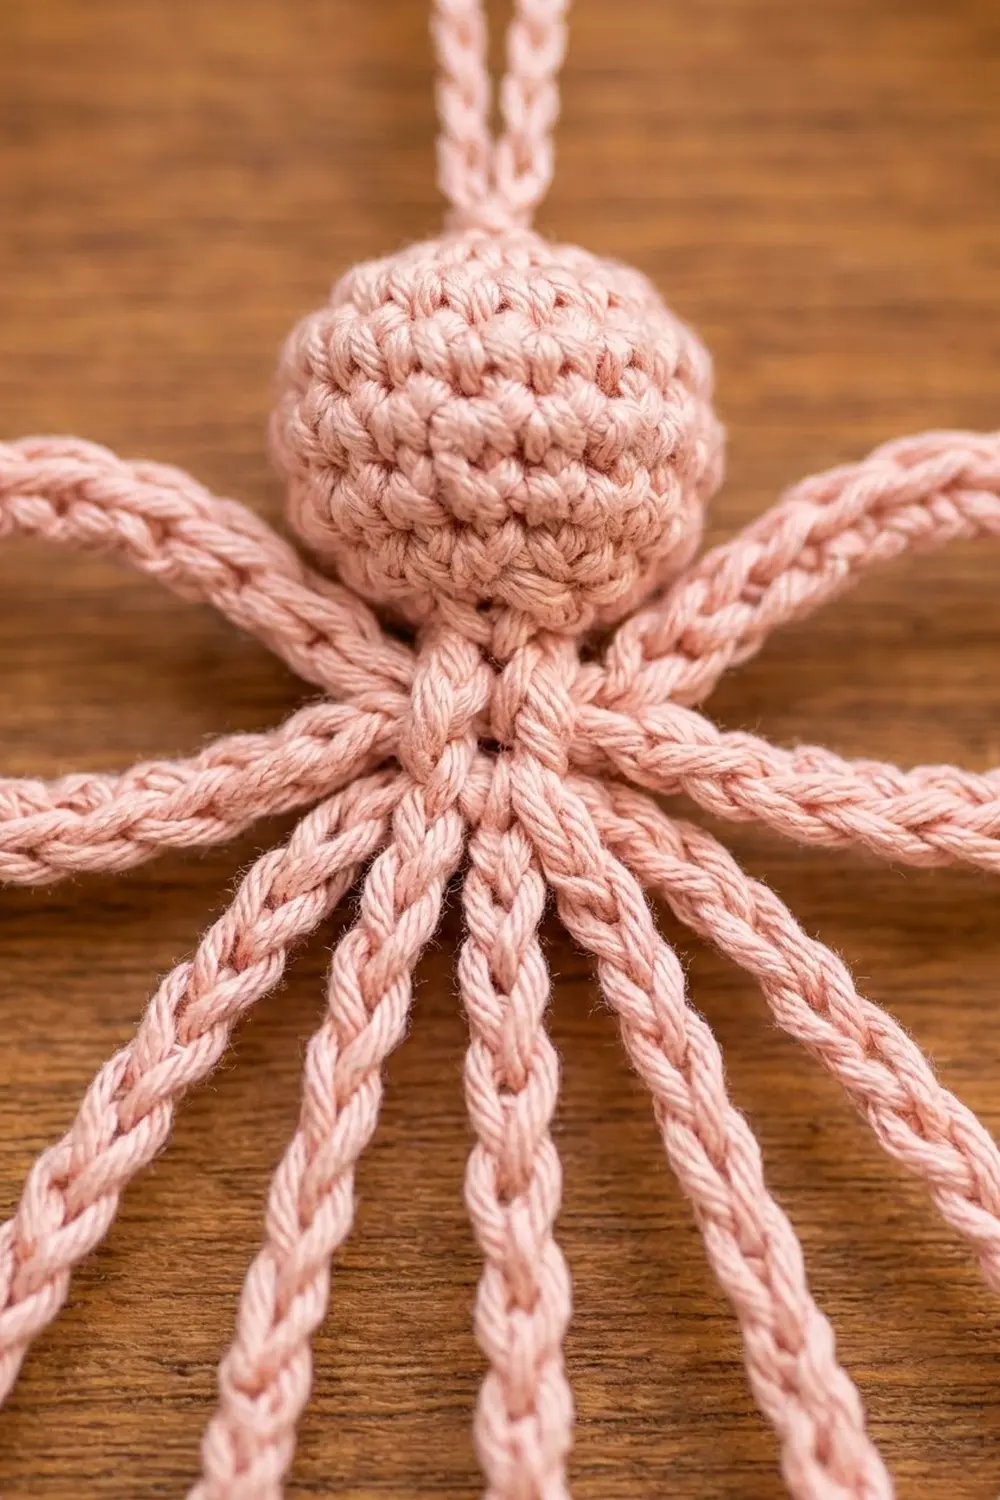
Part 1: Head
Work in continuous spirals. Mark the first stitch of each round.
Round 1: 6 sc in MR. (6 sts)
Round 2: Inc in each st around. (12 sts)
Round 3: [Sc in next st, inc] 6 times. (18 sts)
Rounds 4–6: Sc in each st around. (18 sts in each round)
Round 7: [Sc in next st, dec] 6 times. (12 sts)
Stuff firmly with fiberfill. Keep the ball round, not egg-shaped.
Round 8: Dec 6 times. (6 sts)
Fasten off, leaving a long tail. Thread the tail through the front loops of the last 6 sts and pull it closed. Keep the tail for sewing.
Checkpoint: the head should be about 1.1 in (2.8 cm) across.
Hanging Loop
Join the yarn with a sl st into the center of Round 1 at the top of the head.
Ch 26, then sl st into the same st at the top of the head to close the loop. Now work the cord: sl st into the back bump of each of the 26 ch around the loop (26 sl sts), then sl st into the starting st. Fasten off and weave in the end.
Checkpoint: the loop hangs about 2.5 in (6.4 cm) above the head.
Part 2: Body (Ring, Spokes and Wings)
Neck Ring
Ch 5, then sl st into the first ch to form a ring.
Round 1: Ch 1, work 12 sc into the ring, sl st into the first sc. (12 sc)
Number the sc 1 to 12 in the order you worked them:
– Sc 1–4 hold the spokes.
– Sc 6 and sc 11 hold the wings.
– Sc 7–10 sit under the head.
This layout puts the skirt directly opposite the head, with a wing balanced on each side.
Skirt Spokes
You are now at sc 1.
Spoke 1: Cord of 19. Ch 19, then sl st into the back bump of the 2nd ch from the hook and of each ch back to the ring (18 sl sts). The chain you skipped is the tip. Sl st into sc 1.
Spokes 2–4: Sl st into the next sc. Work a cord of 19 as for Spoke 1, then sl st into the same sc. Spokes 2, 3 and 4 sit in sc 2, 3 and 4.
Each spoke is 18 sl sts worked on 19 ch, with 1 tip ch.
Tension tip: work every chain at the same size. If one spoke is chained tighter than the others, it will be shorter and the hem will tilt. Hold all four spokes side by side before you go on. They should match within a stitch.
Wings
Sl st into sc 5, then sl st into sc 6.
Right wing: Ch 30, then sl st into sc 6 to close a loop. Sl st into the back bump of each of the 30 ch around the loop (30 sl sts), then sl st into sc 6.
Sl st into sc 7, 8, 9, 10 and 11. These sl sts strengthen the area under the head.
Left wing: Work as for the right wing, into sc 11. (30 sl sts)
Sl st into sc 12 and then into the first sc. Fasten off and weave in the end.
Checkpoint: each spoke measures 3.8 in (9.7 cm) and each wing loop is about 2.4 in (6.1 cm) long.
Skirt Arc
Lay the body flat with the spokes fanned downward, in order from 1 to 4.
Arc row: Join the yarn with a sl st into the tip of Spoke 1. [Ch 7, sl st into the tip of the next spoke] 3 times, ending in the tip of Spoke 4.
Count: 4 tip sl sts + 21 ch = 25 sts.
The arc sets how far the skirt spreads. All four spokes are the same length, so every tip ends on the same circle. That’s why the hem curves evenly instead of forming a flat triangle.
Checkpoint: measure straight across from the tip of Spoke 1 to the tip of Spoke 4. It should be 4.7 in (11.9 cm). Do not fasten off.
Border: Hem Band
The hem band is the angel’s only border. It runs along the bottom arc. The sloped sides of the skirt are the outer spokes themselves and don’t get a border.
Border gauge: the dc posts are about 0.45 in (1.1 cm) tall, and the finished band is 0.6 in (1.5 cm) deep.
After you turn, number the 25 arc sts as positions 1 to 25, starting from the tip of Spoke 4. The four tips fall on positions 1, 9, 17 and 25. All four are odd numbers, which matters in Row 1.
Row 1 (posts): Turn so the spokes point away from you. The posts grow downward, away from the skirt. Ch 4 in position 1 (counts as the first dc + ch 1), sk position 2, [dc in next st, ch 1, sk next st] 11 times, dc in the last st (position 25).
Count: 13 dc + 12 ch-1 sps = 25 sts.
Every odd position gets a dc, so a post lands exactly on each spoke tip. This visually locks each spoke into the hem.
Row 2 (outline): Ch 1, turn. Sc in the first dc, then [sc in the next ch-1 sp, sc in the next dc, 2 sc in the next ch-1 sp, sc in the next dc] 6 times. The last sc goes into the 3rd ch of the turning ch-4.
Count: 13 sc in dc + 12 sc in sps (1 in each) + 6 extra sc = 31 sc.
Row 3 (cord edge): Ch 1, do not turn. Sl st loosely into each sc across. (31 sl sts)
Fasten off and weave in the end.
Why the math works: the hem sits on a bigger circle than the arc. The arc is 25 sts and sits 3.8 in (9.7 cm) from the neck. The bottom edge sits about 4.4 in (11.2 cm) from the neck. Adding 6 sts (25 up to 31) lets the outer edge grow by about the same proportion. The band fans out gently and lies flat, without ruffling or cupping.
Checkpoint: the bottom edge measures 5.5 in (14.0 cm) straight across.
Assembly: Attaching the Head
Place the head so its base covers sc 7–10 of the ring, with the hanging loop pointing straight up. The head should line up directly with the gap between Spokes 2 and 3.
Use the head’s long tail to whipstitch its lower rounds to the sc and sl sts of the ring. Take 8–10 small stitches through the back of the head only, so nothing shows on the front. Weave the tail into the head and trim it.
Checkpoint: the angel now measures 5.5 in (14.0 cm) from the top of the head to the hem.
Final Blocking
- Mist the angel evenly with water until it’s damp but not dripping. For a stiffer ornament, use diluted fabric stiffener instead.
- Lay it face up on the blocking mat.
- Pin the head and ring in place first.
- Pin each spoke in a straight line from the ring to the tip. Check that all four are 3.8 in (9.7 cm) long.
- Pin the four tips so the arc makes a smooth curve 4.7 in (11.9 cm) across.
- Pin the hem band at every third or fourth post, easing the bottom edge out to 5.5 in (14.0 cm).
- Shape each wing into a rounded oval about 2.4 in (6.1 cm) long and pin it at the outer point.
- Let it dry completely, at least 12 hours, before you remove the pins.
Final Quality-Control Checklist
- The head is round, firmly stuffed and about 1.1 in (2.8 cm) across
- The hanging loop is centered and about 2.5 in (6.4 cm) tall
- There are four spokes, each 18 sl sts on 19 ch and 3.8 in (9.7 cm) long
- The arc row has 25 sts, with tips on positions 1, 9, 17 and 25
- Hem Row 1 has 13 dc and 12 ch-1 sps, with a post on every tip
- Hem Row 2 has 31 sc and Row 3 has 31 sl sts
- Each wing has 30 sl sts, and the two wings match in size
- The angel measures 5.5 in (14.0 cm) tall x 5.5 in (14.0 cm) wide
- All tails are woven in and nothing shows on the front
Troubleshooting
Spokes curl or twist. Your sl sts are too tight. Use a hook one size larger for the cord sl sts only, or lift each loop a little higher on purpose.
The skirt looks like a flat triangle. The arc chains are too tight. Rework the arc with looser chains until it measures 4.7 in (11.9 cm).
The hem ruffles. Your sc are loose. In Row 2, add 4 extra sc instead of 6 (leave out the extra sc in the first and last repeats) for a total of 29 sc.
The hem cups upward. Your dc are short or tight. Pull the dc loops up higher, or work Row 3 with a larger hook.
The wings don’t match. Count the chains: both wings need exactly 30. Block the wings together and measure each one.
The head leans. Add 2–3 extra sewing stitches at the base on the side that tips forward.
Care
Hand wash in cool water with mild soap. Press the water out in a towel and reshape the angel flat to dry. Store it flat in tissue paper so the wings and loop keep their shape.
Final Notes
The whole angel relies on a short chain of measurements:
1. The 12-sc ring sets the layout.
2. Four 19-ch spokes give the skirt a 3.8 in (9.7 cm) radius.
3. The 25-st arc spreads the spokes to 4.7 in (11.9 cm) across.
4. The 13-post hem, spaced on odd positions, puts a post on every spoke tip.
5. The 31-st outline widens the bottom to 5.5 in (14.0 cm).
6. The 1.1 in (2.8 cm) head brings the total height to 5.5 in (14.0 cm).
Check each step against its number and the angel will come out flat and symmetrical every time. Make one in blush pink, then try cream, lilac and mint for a matching set on the tree.
Happy crocheting!