

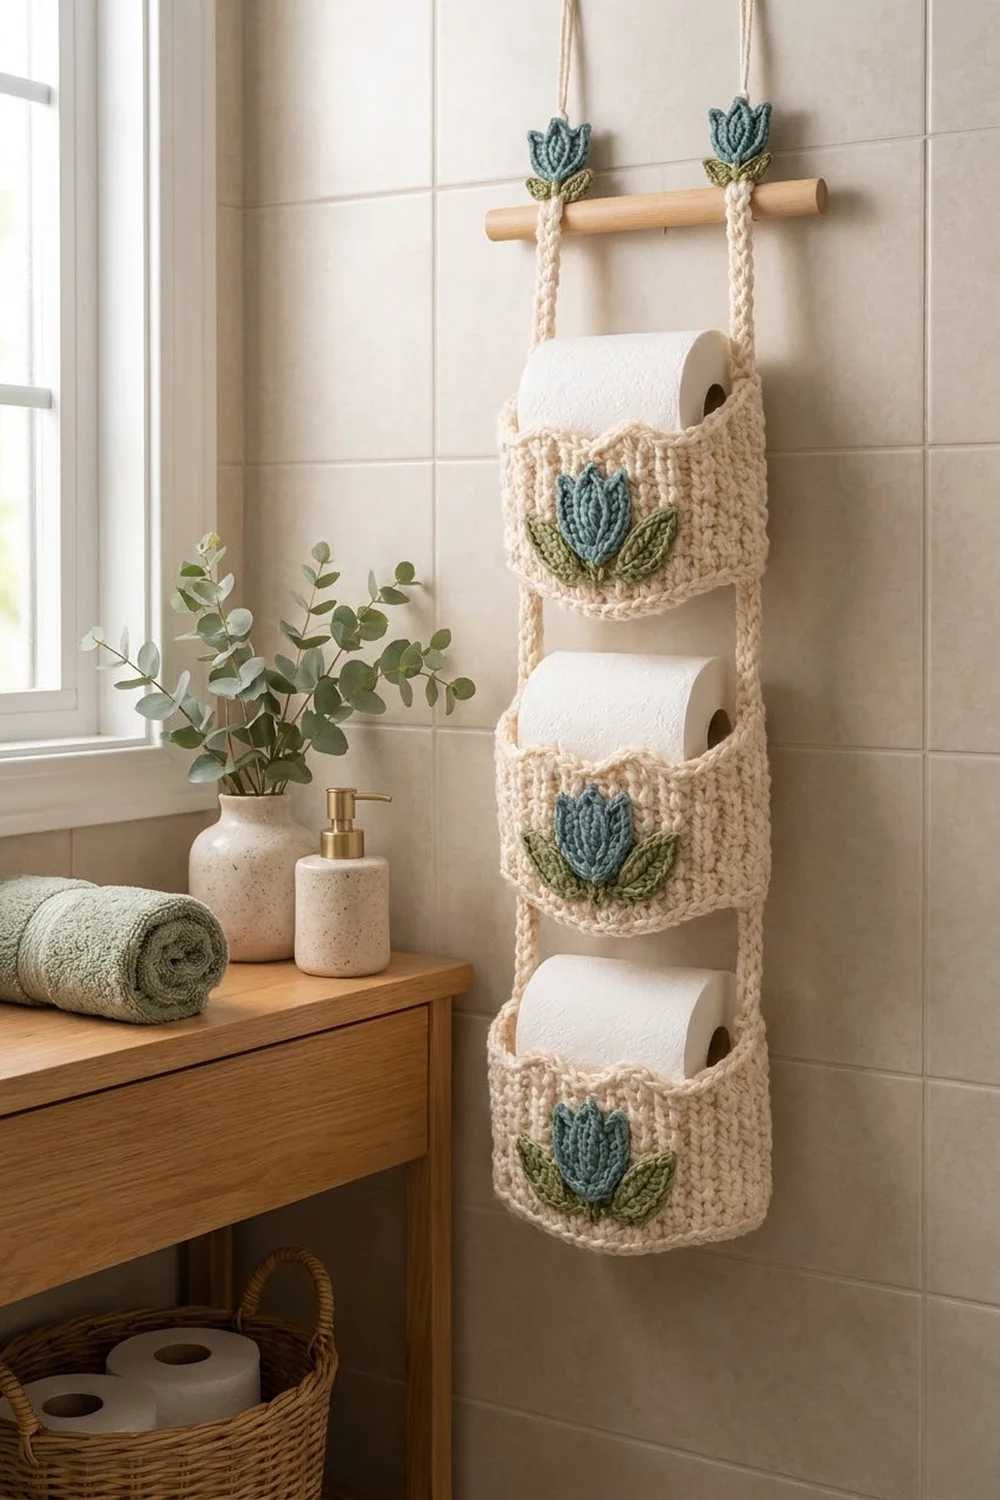
This hanging toilet paper holder adds soft, cottage-style storage to a bathroom wall. Three cream pockets hang one above the other from a short wooden dowel, and each holds a spare roll lying on its side. A teal-blue tulip with two sage-green leaves sits on the front of every pocket. Two mini tulips sit on top of the dowel where the straps fold over it.
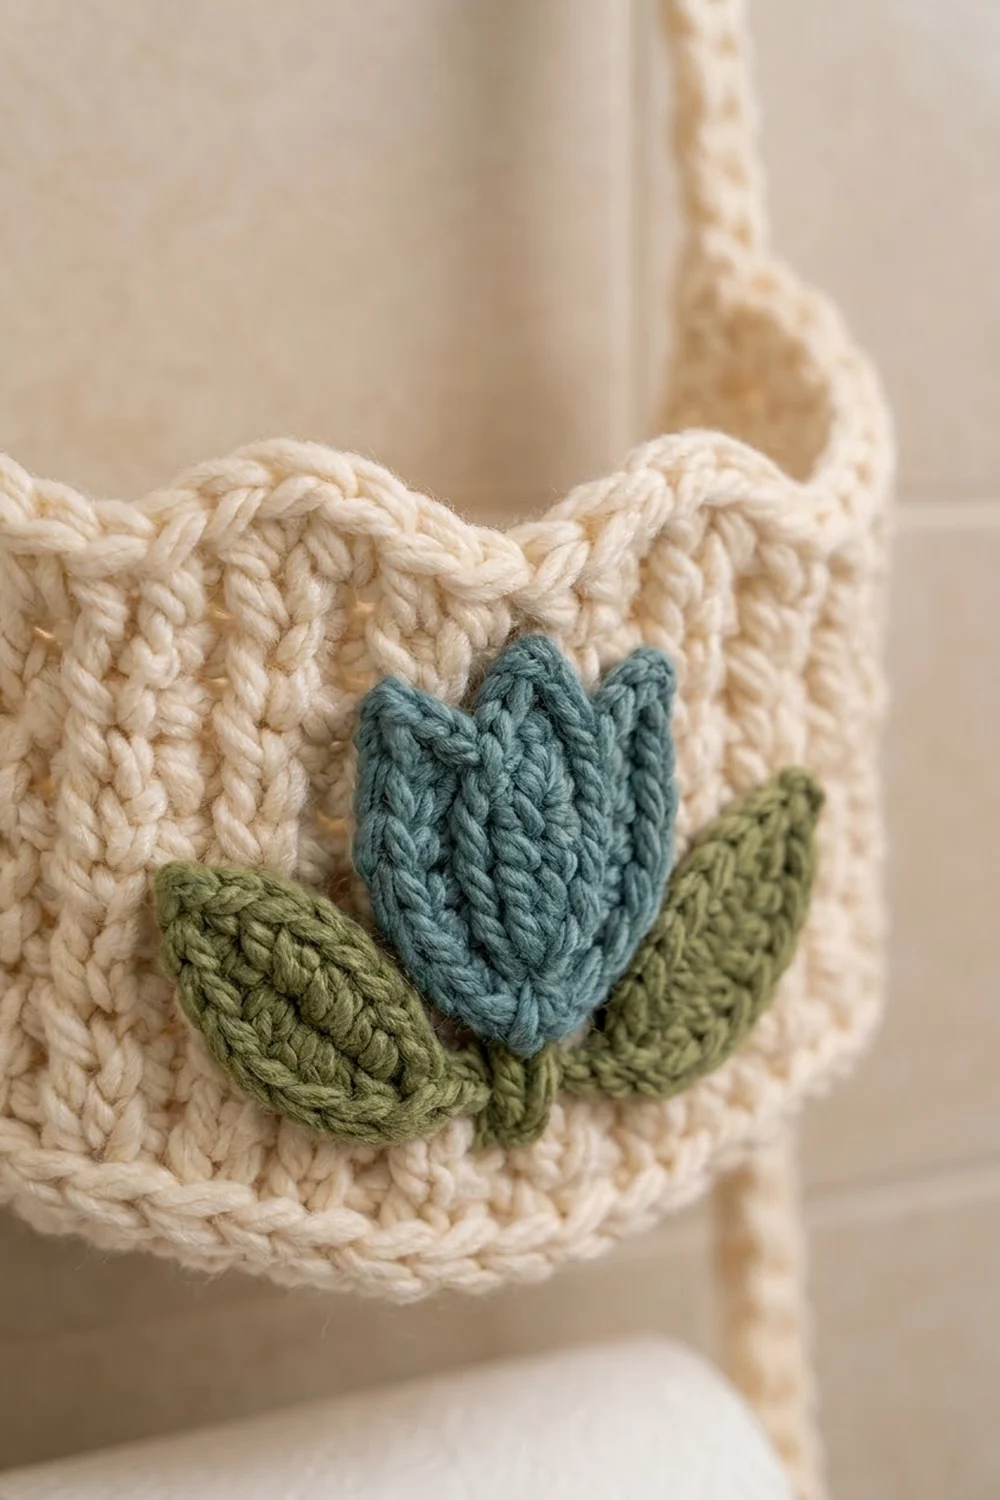
The pockets are worked in waistcoat stitch, which makes a dense, knit-look texture of stacked V columns. Each front rim has a gentle wave, with two shallow crests and a dip at center front, and is finished with a rolled reverse single crochet edge. The back rim is straight.
The pattern uses US crochet terms. Each pocket base measures about 6 1/4 x 3 1/4 in (15.9 x 8.3 cm), and the back of the pocket is 3 3/4 in (9.5 cm) tall. The holder hangs about 21 1/4 in (54.0 cm) below a 10 in (25.4 cm) dowel.
To make it, you crochet three oval-based pockets in joined rounds, add a rim to each one, and make two straps and the appliqués. Then you sew the flowers on, sew the pockets to the straps, and wrap the strap tops around the dowel.
Finished Size and Construction
- Finished size: about 6 1/2 in (16.5 cm) wide at the pockets and 21 1/4 in (54.0 cm) long below the dowel
- Skill level: easy to intermediate
- Terminology: US crochet terms
- Yarn weight: bulky (#5)
- Hook: 6 mm (J-10)
- Number of pieces: 3 pockets, 2 straps, 3 large tulips, 6 large leaves, 2 mini tulips, 4 mini leaves and 2 hanging loops
- Layout: 3 pockets stacked in 1 vertical column on 2 parallel straps
- Pocket size: base 6 1/4 x 3 1/4 in (15.9 x 8.3 cm); wall perimeter 15 1/4 in (38.7 cm)
- Wall height before the rim: about 3 in (7.6 cm)
- Rim (border) depth: about 3/4 in (1.9 cm) at the back and about 1 in (2.5 cm) at the front crests
Materials
Choose a smooth bulky cotton or cotton blend. Cotton holds the pocket shape and handles bathroom humidity well. The amounts below assume about 120 m per 100 g.
- Cream: 200 g (about 240 m) for the pockets, straps and hanging loops
- Teal blue: 30 g (about 36 m) for the tulips
- Sage green: 25 g (about 30 m) for the leaves
All quantities include a margin of about 20 percent.
Tools:
- 6 mm (J-10) crochet hook
- Wooden dowel, 3/4 in (1.9 cm) across and 10 in (25.4 cm) long
- Tapestry needle
- 4 stitch markers
- Scissors and tape measure
- Pins and blocking mat
Abbreviations (US Terms)
- ch: chain
- sl st: slip stitch
- sc: single crochet
- hdc: half double crochet
- dc: double crochet
- tr: treble crochet
- sc2tog / sc3tog: single crochet 2 / 3 stitches together
- BLO: back loop only
- rev sc: reverse single crochet (crab stitch), worked from left to right
- st(s): stitch(es)
- RS: right side
Waistcoat stitch (wst): Insert the hook through the center of the V of the stitch below, between its two front legs and not under the top loops. Yarn over and pull up a loop, then yarn over and pull through both loops on the hook. Each wst counts as one stitch, and the stitches stack into neat columns.
Gauge and Checkpoints
Gauge: 12 sts and 13 rnds = 4 in (10.2 cm) in waistcoat stitch worked in joined rounds. Single crochet in the base works up to about the same gauge.
Waistcoat stitch is tight. If your hook barely fits through the V, go up half a hook size.
Make one complete pocket before you start the others, and check it at these points:
- After Rnd 5: the base measures 6 1/4 x 3 1/4 in (15.9 x 8.3 cm) and lies flat.
- After Rnd 15: the wall is about 3 in (7.6 cm) tall from the base fold, and the perimeter is 15 1/4 in (38.7 cm).
- After the rim: the back is 3 3/4 in (9.5 cm) tall, and a standard roll fits snugly with about half of it showing.
If the pocket is too big, use a hook 0.5 mm smaller. If it is too small, use a hook 0.5 mm larger. Keep the stitch counts the same, because the rim and strap math depends on 46 sts.
Pocket (Make 3, Cream)
Join each round with a sl st to the first sc. The ch 1 at the start of a round does not count as a stitch.
Oval Base
Ch 11.
Rnd 1: Sc in 2nd ch from hook and in next 8 ch, 3 sc in last ch. Working along the underside of the chain, sc in next 8 ch, 2 sc in same ch as first sc. Join. (22 sts)
Rnd 2: Ch 1, 2 sc in first st, sc in next 8, 2 sc in each of next 3, sc in next 8, 2 sc in each of last 2. Join. (28 sts)
Rnd 3: Ch 1, sc in first st, 2 sc in next, sc in next 8, [sc in next, 2 sc in next] 3 times, sc in next 8, [sc in next, 2 sc in next] 2 times. Join. (34 sts)
Rnd 4: Ch 1, sc in next 2, 2 sc in next, sc in next 8, [sc in next 2, 2 sc in next] 3 times, sc in next 8, [sc in next 2, 2 sc in next] 2 times. Join. (40 sts)
Rnd 5: Ch 1, sc in next 3, 2 sc in next, sc in next 8, [sc in next 3, 2 sc in next] 3 times, sc in next 8, [sc in next 3, 2 sc in next] 2 times. Join. (46 sts)
Each round adds 3 sts at each curved end and none along the two 8-st straight sides, so the oval stays flat.
Walls
Rnd 6: Ch 1, sc in BLO of each st around. Join. (46 sts) This round turns the work upward and makes a crisp fold between the base and the wall.
Rnds 7-15: Ch 1, wst in each st around. Join. (46 sts in each round)
Check the wall height and perimeter now.
Rim (Border)
The rim is the border of each pocket. It has the same gauge as the body: 3 sts per inch along the edge.
Rnd R1: Ch 1, sc in each st around. Join. (46 sts) Fasten off.
Flatten the pocket so the long sides of the base become the front and back. Put a marker at each side fold so there are exactly 23 sts on the front and 23 sts on the back. Use the neater side as the front.
Rnd R2 (wave): With the RS facing, join cream with a standing sc in the first front st at the right fold.
- Front (23 sts): The standing sc counts as the first st. Sc in next, hdc in next 2, dc in next 3, hdc in next 2, sc in next (first crest, 9 sts). Sc in next 3 (center dip). Repeat from * to * once (second crest, 9 sts). Sc in the st at the left fold. (1 + 9 + 3 + 9 + 1 = 23 sts)
- Back (23 sts): Sc in each of next 23 sts.
Join to the standing sc. (46 sts)
Rnd R3 (rolled edge): Ch 1, rev sc in each st around. Join. (46 sts: 23 front, 23 back) Fasten off.
Why the math works: Each rim round works one stitch into each stitch below, so the 46-st wall stays at 46 sts and the rim doesn’t ruffle or pull in. The wave comes from stitch height only, not from extra stitches. The dc groups rise about 1/4 in (0.6 cm) above the sc sections, which creates the two crests and the shallow center dip.
Large Tulip (Make 3, Teal)
Row 1: Ch 4, sc in 2nd ch from hook and in next 2 ch. (3 sts)
Row 2: Ch 1, turn, 2 sc in first st, sc in next, 2 sc in last. (5 sts)
Row 3: Ch 1, turn, 2 sc in first st, sc in next 3, 2 sc in last. (7 sts)
Row 4: Ch 1, turn, sc in each st. (7 sts)
First petal (sts 1-2): Ch 1, turn, sc in next 2. Ch 1, turn, sc2tog. (1 st) Fasten off.
Center petal (sts 3-5): Join teal in st 3 of Row 4. Ch 1, sc in same st and next 2 (3 sts). Ch 1, turn, sc in each st (3 sts). Ch 1, turn, sc3tog. (1 st) Fasten off.
Last petal (sts 6-7): Join teal in st 6. Ch 1, sc in same st and next (2 sts). Ch 1, turn, sc2tog. (1 st) Do not fasten off.
Edging: Ch 1, 3 sc in tip of last petal, 1 sc in its outer row end, 1 sc in each of 4 row ends down the side, 3 sc across the bottom of the foundation chain, and 1 sc in each of 4 row ends up the other side. On the first petal, work 1 sc in its outer row end, 3 sc in the tip and 1 sc in the inner row end. Sl st into the valley. On the center petal, work 2 sc down the row ends, 3 sc in the tip and 2 sc in the row ends. Sl st into the valley. Work 1 sc in the inner row end of the last petal and join. (30 sts: 28 sc + 2 sl st) Fasten off, leaving a 12 in (30.5 cm) tail.
The tulip is about 2 1/2 in (6.4 cm) tall and wide, with a taller center petal between two side petals.
Large Leaf (Make 6, Green)
Ch 8.
Rnd 1: Sc in 2nd ch from hook, hdc in next, dc in next 2, hdc in next, sc in next, (sc, ch 2, sc) in last ch for the tip. Working along the underside, sc in next, hdc in next, dc in next 2, hdc in next, sc in last ch, ch 2, sl st to first sc. Fasten off, leaving a tail.
If you like, work a line of surface sl sts along the foundation chain to make a midrib. Each leaf is about 2 1/2 in (6.4 cm) long and 1 in (2.5 cm) wide, with a point at each end.
Mini Tulip (Make 2, Teal) and Mini Leaf (Make 4, Green)
Mini tulip Row 1: Ch 4, sc in 2nd ch from hook and in next 2 ch. (3 sts)
Row 2: Ch 1, turn, 2 sc in first st, sc in next, 2 sc in last. (5 sts)
Row 3 (petals): Ch 1, turn, (hdc, dc) in first st, sl st in next, (dc, tr, ch 2, sl st in top of tr, tr, dc) in next, sl st in next, (dc, hdc) in last. Fasten off. The mini tulip is about 1 1/2 in (3.8 cm) wide.
Mini leaf: Ch 5. Sc in 2nd ch from hook, hdc in next 2, (sc, ch 1, sc) in last ch. Working along the underside, hdc in next 2, sc in last, ch 1, sl st to first sc. The mini leaf is about 1 1/4 in (3.2 cm) long.
Straps and Hanging Loops (Cream)
Strap (make 2): Ch 76. Sc in 2nd ch from hook and in each ch across. (75 sts) Fasten off. Each strap is 25 in (63.5 cm) long and about 1/2 in (1.3 cm) wide.
Mark each strap starting from the top: 11 sts for the dowel loop, 9 sts of drop, then 11 sts for a pocket, 11 sts of gap, 11 sts for a pocket, 11 sts of gap and 11 sts for a pocket. (11 + 9 + 11 + 11 + 11 + 11 + 11 = 75 sts) At 3 sts per inch, 11 sts is about 3 2/3 in (9.3 cm) and 9 sts is 3 in (7.6 cm).
Hanging loop (make 2): Ch 10, then sl st in the first ch to make a ring about 1 1/2 in (3.8 cm) tall. Fasten off, leaving a long tail.
Make All Pieces
- Cream: 3 pockets, 2 straps, 2 hanging loops
- Teal: 3 large tulips, 2 mini tulips
- Green: 6 large leaves, 4 mini leaves
Layout (front view, top to bottom):
 [loop]              [loop]
 [mini tulip]        [mini tulip]
 ====== dowel 10 in (25.4 cm) ======
   | strap                strap |
 [ Pocket 1 + tulip + 2 leaves ]
   |   gap 3 2/3 in (9.3 cm)    |
 [ Pocket 2 + tulip + 2 leaves ]
   |   gap 3 2/3 in (9.3 cm)    |
 [ Pocket 3 + tulip + 2 leaves ]
Joining
Appliqués first: Sew on the appliqués before you attach the straps, while the pockets are easy to handle. On each pocket, pin two leaves behind the base of a large tulip, angled outward and slightly down. Center the group on the pocket front, with the tulip base about 1/2 in (1.3 cm) above the base fold. Whipstitch the leaves first and then the tulip, going through the edging stitches only.
Method: Whipstitch the straps on with cream yarn. Lay the pockets face down. Place each strap on the back wall about 3/4 in (1.9 cm) in from the side fold, so the straps are 5 in (12.7 cm) apart, center to center.
Stitch-to-stitch logic: Each 11-st pocket section of a strap covers the 12 rounds between the base fold and the bottom of the rolled edge (Rnds 6-15 plus R1-R2). Make one whipstitch through each strap st and the matching wall round. Skip one wall round near the middle so the 11 strap sts spread evenly over the 12 rounds. Then tack the strap to R3.
Tension: Keep your sewing firm but not tight. If a strap puckers the wall, loosen the stitches.
Size checkpoint: Lay the piece flat. Each gap should measure 3 2/3 in (9.3 cm), and the distance from the top of Pocket 1 to the base of Pocket 3 should be 18 1/3 in (46.6 cm).
Dowel: Wrap the top 11 sts of each strap over the dowel from front to back, then sew the end to the back of the strap. Sew a hanging loop to the top of each strap fold. Sew a mini tulip and two mini leaves over the front of each fold so the flower sits on the dowel.
Final Blocking
- Mist each pocket lightly with water.
- Wrap a roll in a plastic bag and put it in each pocket to set the oval shape.
- Shape the two front crests with your fingers.
- Pin the tulip petals and leaves open.
- Lay the holder flat with the straps straight, and pin the gaps to 3 2/3 in (9.3 cm).
- Let everything dry completely before you hang it.
Final Quality-Control Checklist
- Every wall and rim round has 46 sts.
- Each base measures 6 1/4 x 3 1/4 in (15.9 x 8.3 cm).
- Each front rim has two crests and a center dip, and each back rim is straight.
- Each large tulip has 30 edging sts and three clear petals.
- Each strap has 75 sts and is 25 in (63.5 cm) long.
- The straps are parallel and 5 in (12.7 cm) apart.
- All pockets hang level.
- All yarn ends are woven in on the inside.
Troubleshooting
- Base curls up: Your tension is tight. Use a hook 0.5 mm larger for the base only.
- Base ruffles: Recount the increases. Each round adds exactly 6 sts.
- Walls lean outward: Your waistcoat stitch is loose. Use a smaller hook.
- Crests look flat: Make sure the 3 dc sit at the center of each crest.
- Pockets tilt: Re-sew the straps so both sit the same distance from the folds.
- Holder twists: Check that both straps follow the same 11-9-11-11-11-11-11 marking.
Care
Hand wash in cool water and lay flat to dry, reshaping each pocket around a roll. Take the dowel out before washing.
Final Notes
Each stage sets the next measurement. Gauge gives the 46-st perimeter of 15 1/4 in (38.7 cm), and the oval base sets the 6 1/4 x 3 1/4 in (15.9 x 8.3 cm) footprint. The wall and rim rounds make a 3 3/4 in (9.5 cm) back while keeping all 46 sts. The 75-st straps then set the 3 2/3 in (9.3 cm) gaps and the 21 1/4 in (54.0 cm) hanging length. If each stage matches its checkpoint, the finished holder will match too.
Happy crocheting!