
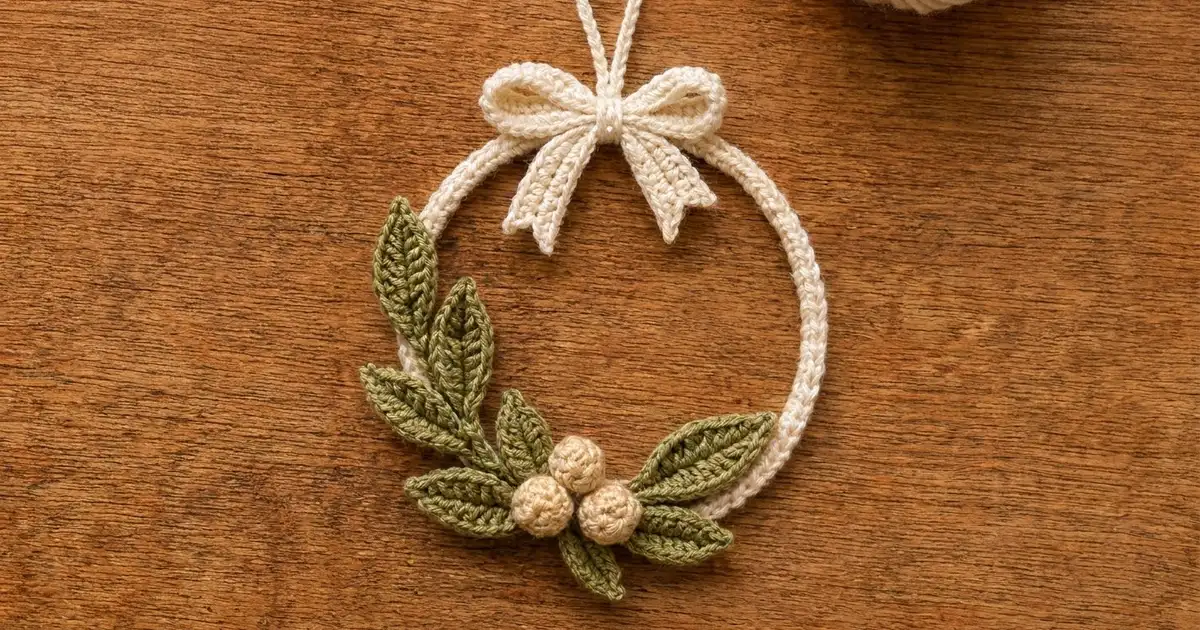
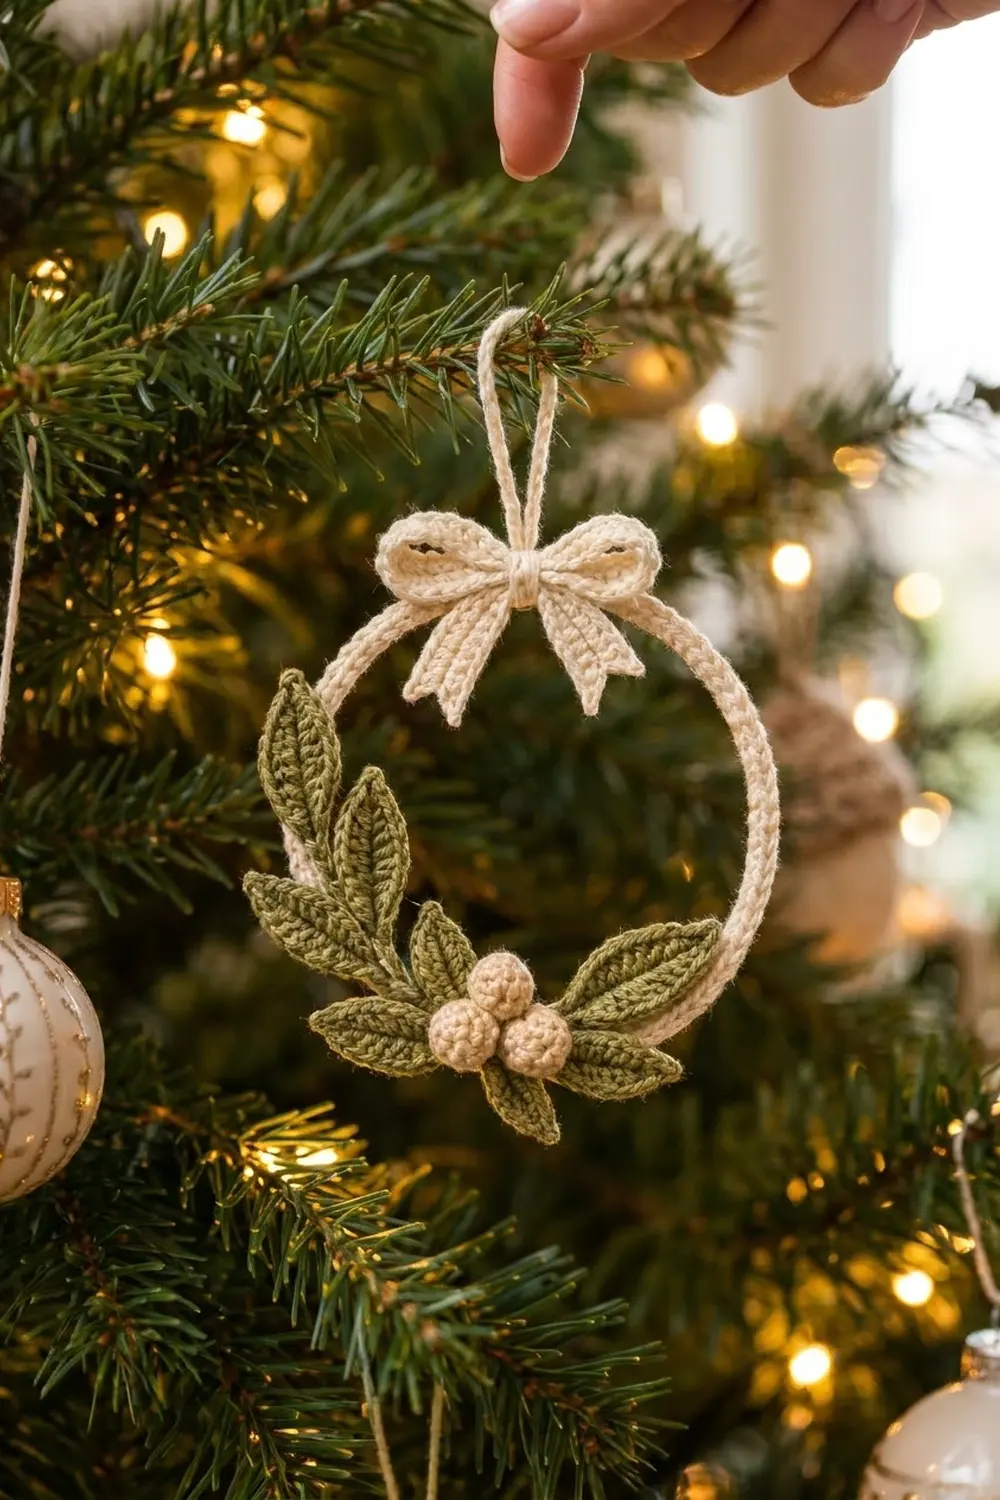
This little wreath ornament is a cream crocheted ring with a spray of olive-green leaves, three tan berries and a cream bow at the top. A slim cream loop lets you hang it. It looks quiet, natural and a little rustic, so it suits a farmhouse or Scandinavian tree and also works as a gift topper.
There are three colors: cream for the ring, bow and hanging loop, olive green for the leaves, and light tan for the berries. Every part is worked in smooth sport-weight cotton, so each stitch shows clearly.
The pattern uses US crochet terms. The finished ornament is about 4 in (10.2 cm) wide and 4.5 in (11.4 cm) tall, measured from the lowest leaf tip to the top of the bow. With the hanging loop it is 6.25 in (15.9 cm) tall.
Construction is simple. You cover a 3 in (7.6 cm) ring with single crochet and add a slip-stitch edge. Then you make 7 leaves, 3 berries, a 3-part bow and a hanging loop, and sew them all onto the ring.
Finished Size and Construction
- Finished size: 4 in (10.2 cm) wide x 4.5 in (11.4 cm) tall; 6.25 in (15.9 cm) tall with loop
- Skill level: Easy-intermediate
- Terminology: US crochet terms
- Yarn weight: Sport weight (#2) cotton
- Hook: 2.75 mm (C-2)
- Number of pieces: One ornament made from 15 small components (1 ring, 7 leaves, 3 berries, 3 bow parts, 1 loop)
- Layout: Leaf spray from 9 o’clock to 5 o’clock along the lower left of the ring, berries at 6:30–7 o’clock, bow at 12 o’clock
- Covered ring before border: 3.4 in (8.6 cm) outside diameter
- Covered ring after border: 3.5 in (8.9 cm) outside diameter
- Border depth: about 1/16 in (0.2 cm) on the outer edge
Materials
Choose a smooth sport-weight cotton. Cotton keeps leaf points and bow edges crisp, and it doesn’t fuzz when you sew parts together. Avoid fluffy acrylics, which blur the small details.
- Cream: 5 g, about 15 m (16 yd): ring, border, bow, hanging loop
- Olive green: 5 g, about 15 m (16 yd): leaves
- Light tan: 2 g, about 6 m (7 yd): berries
These amounts include extra for long sewing tails and one test leaf.
Tools:
- 2.75 mm (C-2) crochet hook
- 3 in (7.6 cm) metal or plastic ring (outside diameter)
- Tapestry needle
- Tan yarn scraps or fiberfill for the berries
- Scissors
- Stitch markers (4)
- Pins and a foam blocking mat
- Spray bottle with water
Abbreviations (US Terms)
- ch: chain
- sl st: slip stitch
- sc: single crochet
- hdc: half double crochet
- dc: double crochet
- BLO: back loop only
- sc2tog: single crochet 2 together
- st(s): stitch(es)
- MR: magic ring
Special stitch: picot point. Ch 2, then sl st in the 2nd ch from the hook. This makes the sharp tip on each leaf.
Gauge and Checkpoints
Gauge: 24 sc and 26 rows = 4 in (10.2 cm) in sc worked in rows.
Gauge isn’t critical for an ornament, but it controls how the leaves and bow look next to the ring. Test one piece first: make one large leaf before anything else. It should measure 1.75 in (4.4 cm) long and 0.75 in (1.9 cm) wide at its widest point.
Checkpoints:
- Ring, after 20 sc: the stitches cover one quarter of the ring, about 2.4 in (6.1 cm) along the curve.
- Ring, after Round 1: 80 sc cover the ring completely; outside diameter is 3.4 in (8.6 cm).
- Large leaf: 1.75 in (4.4 cm) x 0.75 in (1.9 cm).
- Small leaf: 1.25 in (3.2 cm) x 0.6 in (1.5 cm).
- Berry: 0.6 in (1.5 cm) across.
- Bow loop strip: 0.5 in (1.3 cm) wide x 4 in (10.2 cm) long.
If your test leaf is too big, switch to a 2.5 mm hook. If it is too small, switch to a 3 mm hook. On the ring, the stitch count matters more than the hook size. If 80 sc leave gaps, add 4 sc (1 per quarter). If they crowd and twist, remove 4 sc.
Ring
Use cream.
Round 1: Make a slip knot on the hook and hold the ring in your left hand. Insert the hook through the center of the ring, yarn over, pull up a loop, yarn over and pull through both loops (one sc made around the ring). Repeat from * 79 more times, placing a marker after every 20th sc. (80 sc)
Push the stitches together as you go so they sit tightly side by side. Roll the tops of the stitches to the outer edge of the ring so they form a neat ridge. Join with a sl st in the first sc.
The ring now has 4 quarters of 20 sc each. Treat these quarters as the ring’s “sides” for the border and for placing parts.
Do not fasten off. Go straight to the Border section, then come back here to make the components.
Large Leaves (Make 5)
Use olive green. Leave an 8 in (20.3 cm) starting tail for sewing.
Foundation: Ch 12.
Side 1: Sl st in 2nd ch from hook, sc in next ch, hdc in next 2 ch, dc in next 4 ch, hdc in next ch, sc in next ch, 3 sc in last ch. (10 sts + 3 sc at base = 13 sts)
Side 2: Rotate the piece and work along the opposite loops of the foundation chain. Sc in next ch, hdc in next ch, dc in next 4 ch, hdc in next 2 ch, sc in next ch, sl st in next ch. (10 sts)
Tip: Work a picot point, then sl st in the first sl st of Side 1. Fasten off and weave in this end.
Total: 23 sts + 1 picot point.
The two sides meet along the foundation chain, which forms the raised center vein. The dc make the widest part of the leaf, and the sl st and sc taper it to the tip.
Small Leaves (Make 2)
Use olive green. Leave an 8 in (20.3 cm) starting tail.
Foundation: Ch 9.
Side 1: Sl st in 2nd ch from hook, sc in next ch, hdc in next ch, dc in next 2 ch, hdc in next ch, sc in next ch, 3 sc in last ch. (7 sts + 3 sc at base = 10 sts)
Side 2: Working in the opposite loops, sc in next ch, hdc in next ch, dc in next 2 ch, hdc in next ch, sc in next ch, sl st in next ch. (7 sts)
Tip: Work a picot point, then sl st in the first sl st. Fasten off.
Total: 17 sts + 1 picot point.
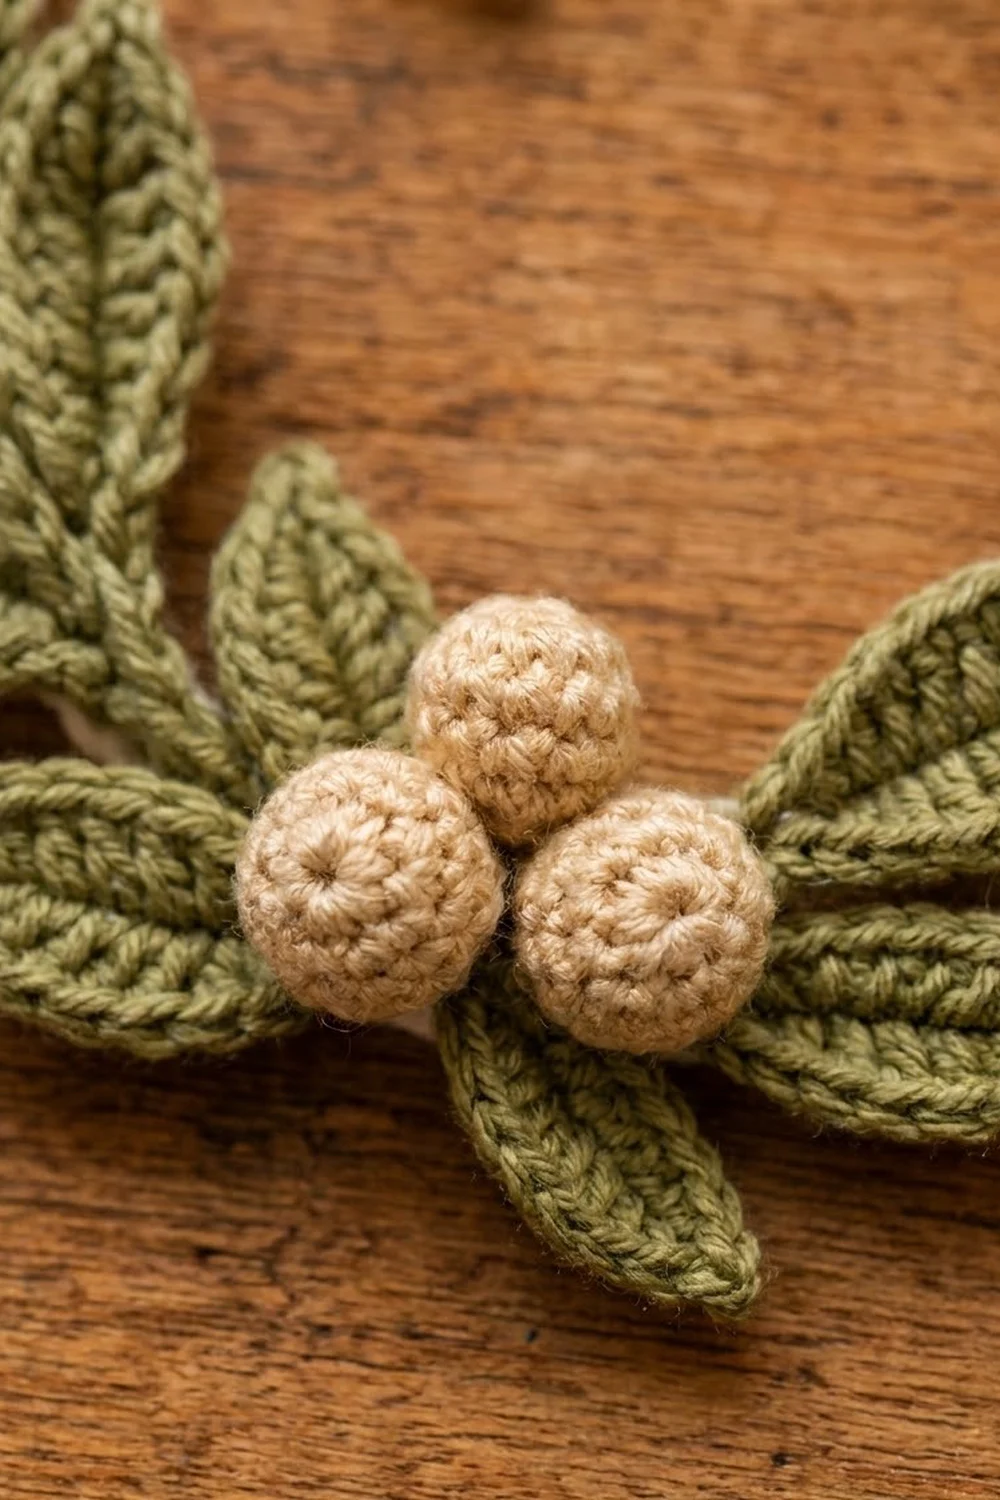
Berries (Make 3)
Use light tan. Leave an 8 in (20.3 cm) ending tail.
Round 1: 6 sc in MR. (6 sts)
Round 2: 2 sc in each st around. (12 sts)
Round 3: Sc in each st around. (12 sts)
Round 4: Sc2tog 6 times. (6 sts)
Stuff the berry firmly with tan scraps before the hole closes. Fasten off, thread the tail through the front loops of the last 6 sts and pull tight. Keep the tail for sewing.
Bow
Use cream. The bow has 3 parts, all worked in sc BLO rows to give a fine ridged texture.
Bow loop strip:
Ch 4.
Row 1: Sc in 2nd ch from hook and in each ch across. (3 sc)
Rows 2–26: Ch 1, turn, sc BLO in each st across. (3 sc)
Fasten off. The strip measures 0.5 in (1.3 cm) x 4 in (10.2 cm).
Tail strip:
Ch 4. Work Rows 1–16 as for the loop strip. (3 sc per row)
Notched end: Ch 3, sl st in 2nd ch from hook and in next ch, then sl st in first st (first point). Sl st in center st (notch). Sl st in last st, ch 3, sl st in 2nd ch from hook and in next ch, then sl st in same last st (second point). Fasten off.
Rejoin at the foundation-chain end and work a second notched end the same way. The strip is about 2.5 in (6.4 cm) long.
Center wrap:
Ch 4. Work Rows 1–7 as for the loop strip. (3 sc per row) Fasten off, leaving a 6 in (15.2 cm) tail. The wrap measures 0.5 in (1.3 cm) x 1.1 in (2.8 cm).
Assemble the bow: Fold both ends of the loop strip to the center, overlapping them by 0.25 in (0.6 cm), and tack them in place. Fold the tail strip in half into an upside-down V and place it behind the loops. Pinch the center, wrap the center wrap around all the layers and sew its short ends together at the back. The bow measures 2 in (5.1 cm) wide.
Hanging Loop
Use cream.
Ch 26, then sl st in the back bump of the 2nd ch from the hook and in each ch across. (25 sl st) Fasten off. The cord is about 4 in (10.2 cm) long.
Make All Components
Before you start assembling, check that you have:
- Cream: 1 covered ring with border, 1 bow (3 parts), 1 hanging loop
- Olive green: 5 large leaves, 2 small leaves
- Light tan: 3 berries
Placement layout (front view, clock positions):
              [ loop ]
              [ BOW  ]        12 o'clock
          .--- ring ---.
       L1               .
      L2                 .
   L3        (open)       .
      L4               L5
          S1 B B  S2
              B
- L1: large leaf at 9 o’clock, tip pointing up
- L2: large leaf at 8:30, tip pointing up and slightly left
- L3: large leaf at 8 o’clock, tip pointing out to the left
- L4: large leaf at 7 o’clock, tip pointing down and left
- L5: large leaf at 5 o’clock, tip pointing up and right
- S1, S2: small leaves at 6:30 and 6 o’clock, under the berries
- B: 3 berries in a triangle at 6:30–7 o’clock
Joining
Method: Whipstitch each piece on with its own tail, using a tapestry needle.
Stitch-to-stitch logic: Sew each leaf base across 2 sc of the ring. Catch the leaf’s 3 base sc and pass through both loops of the ring stitches. Then tack the leaf at its widest point to 1 more ring stitch so it can’t flip. Use the quarter markers to place the parts: L1–L4 go in the lower-left quarter, L5 goes in the lower-right quarter, and the berries sit on the marker between those two quarters.
Sew on the small leaves first, then the large leaves. Add the berries last so they cover the leaf bases, sewing each one with 3–4 stitches through its base and the leaf layers below.
Sew the bow centered over the 12 o’clock marker, stitching through the center wrap and 2 ring stitches. Fold the hanging loop in half and sew both ends behind the bow, tucking 0.25 in (0.6 cm) of each end behind it. The loop should rise 1.75 in (4.4 cm) above the bow.
Tension: Pull each stitch just snug. Stitches that are too tight pucker the leaf bases and pull the ring out of round.
Size checkpoint: The ornament should measure 4 in (10.2 cm) wide and 4.5 in (11.4 cm) tall, or 6.25 in (15.9 cm) tall with the loop.
Border
Work this border on the ring right after Round 1, before you sew on any parts.
Border gauge: 80 sl st around the 3.5 in (8.9 cm) outside diameter, which is about 7.3 sl st per inch (2.9 per cm) of outer edge.
Round 2: Working along the outer ridge of Round 1, sl st in the BLO of each sc around. (80 sl st: 20 per quarter) Join with a sl st in the first sl st. Fasten off and weave in the ends.
Per side: Each of the 4 quarters starts with 20 sc and ends with 20 sl st.
Why the math works: The border is worked one stitch into each stitch, so it adds no stitches. It makes the rope-like ridge on the outer edge without ruffling or cupping the ring. It adds about 1/16 in (0.2 cm) on each side, so the outside diameter grows from 3.4 in (8.6 cm) to 3.5 in (8.9 cm). Because 80 divides evenly into 4 quarters of 20, the 12 o’clock and 6 o’clock positions fall exactly on markers, ready for the bow and berries.
Final Blocking
- Lightly mist the leaves and bow with water. Don’t soak the berries.
- Lay the ornament face up on the blocking mat.
- Pin the ring into a true circle 3.5 in (8.9 cm) across.
- Pin each leaf tip into a sharp point and flatten the leaf along its vein.
- Shape the bow loops so they’re round, and pin the tail points apart.
- Let it dry completely, at least 6 hours, before removing the pins.
Final Quality-Control Checklist
- The ring is fully covered, with none of the metal or plastic showing.
- The ring has 80 sc and 80 sl st, 20 of each per quarter.
- The covered ring measures 3.5 in (8.9 cm) across.
- There are 5 large leaves and 2 small leaves, each with a sharp tip.
- There are 3 firm, round berries, each 0.6 in (1.5 cm) across.
- The bow is centered at 12 o’clock and measures 2 in (5.1 cm) wide.
- The hanging loop rises 1.75 in (4.4 cm) above the bow and is sewn on securely.
- All ends are woven in and hidden on the back.
Troubleshooting
- Ring shows through: Push the sc closer together, or add 1 sc per quarter (84 total, with 21 per quarter in the border).
- Ring stitches twist to the inside: Turn them so all the tops face outward before you work the border.
- Leaves curl: Your foundation chain is too tight. Make the chain only with a hook one size larger.
- Leaf tip is rounded: Pull the picot point snug and pin it sharp when you block.
- Berries look flat: Add more stuffing before you finish Round 4.
- Bow droops: Add a tack stitch from the back of each bow loop to the ring.
- Ornament hangs crooked: Move the hanging loop so it is centered over the 12 o’clock marker.
Care
Spot clean with cool water and mild soap, then reshape and dry flat. Between seasons, store the ornament flat in tissue paper.
Final Notes
Each size depends on the step before it, so it’s easy to check as you go. A gauge of 24 sc = 4 in (10.2 cm) gives a large leaf 1.75 in (4.4 cm) long. Eighty sc cover the 3 in (7.6 cm) ring at 3.4 in (8.6 cm) across, and the 80-stitch border brings it to 3.5 in (8.9 cm). The leaves, berries and bow then bring the ornament to 4 in (10.2 cm) wide and 4.5 in (11.4 cm) tall, or 6.25 in (15.9 cm) with the loop. If you check each step, your wreath will come out neat, balanced and ready for the tree.
Happy crocheting!