

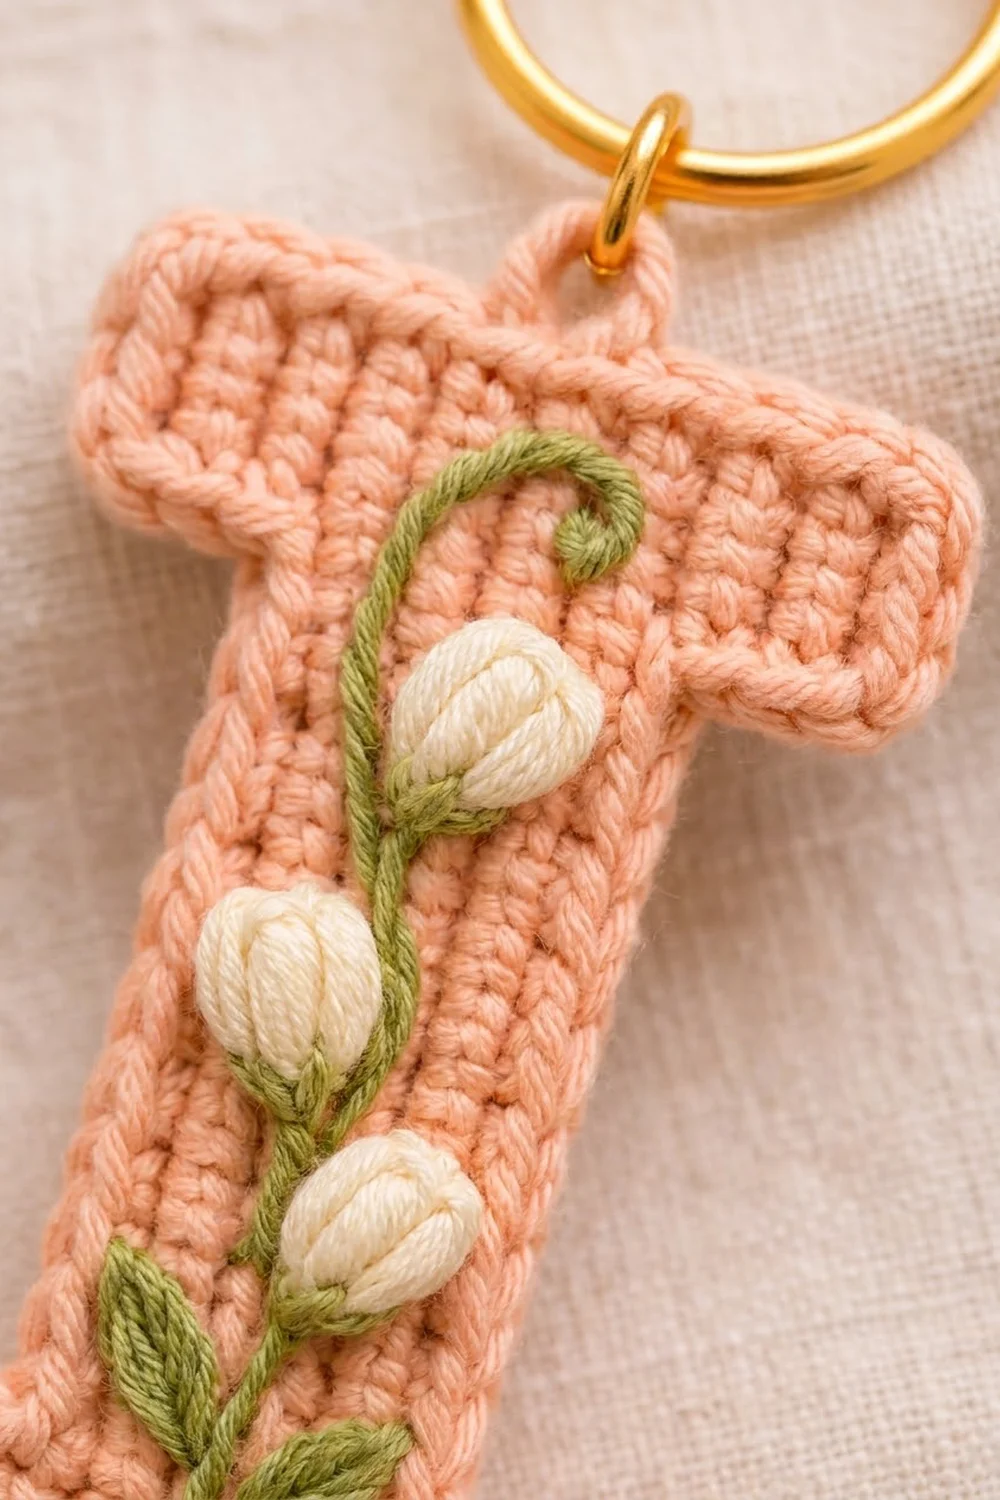
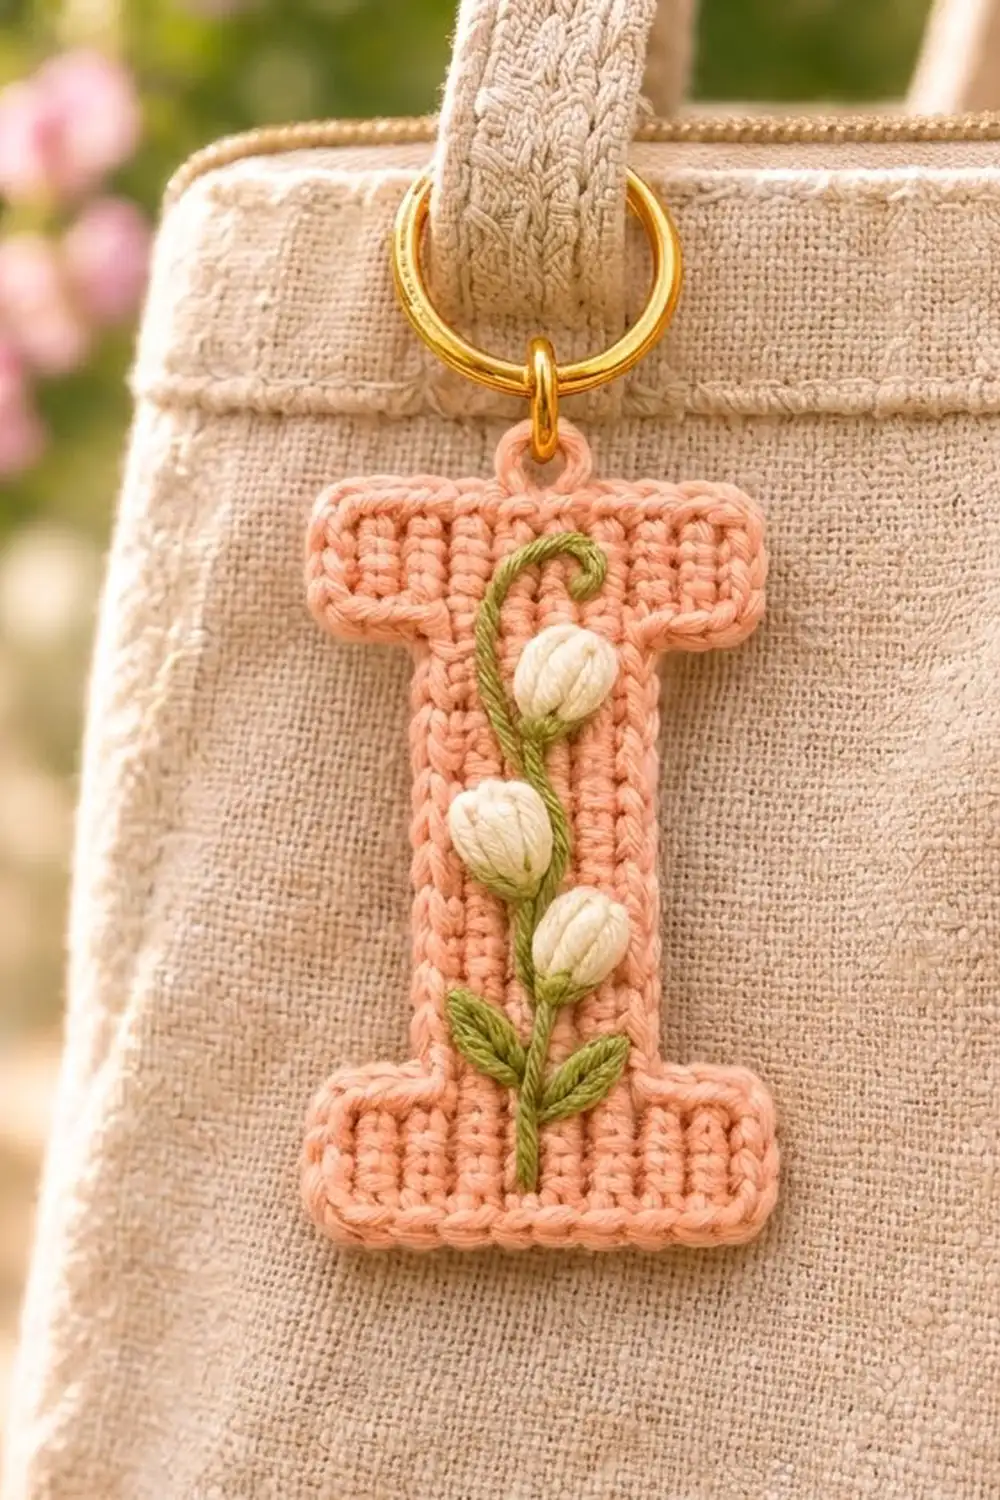
This little keychain is a crocheted capital letter “I” in soft peach, with a slender green stem, three creamy tulip buds, and a few small leaves stitched across the front. It hangs from a gold split ring and looks lovely clipped to a tote bag, a pencil case, or a set of house keys.
The letter has classic block serifs at the top and bottom and a narrow upright stem. Rows of double crochet stack into neat vertical columns, which give the fabric its fine ribbed look. Two border rounds, single crochet and then reverse single crochet, finish the edge with a smooth, rope-like rim.
The finished piece measures 2.9 in (7.4 cm) wide by 4.5 in (11.4 cm) tall, not counting the ring. This pattern uses US crochet terms throughout.
Construction is simple. You work the letter flat in one piece from the bottom serif up, narrowing for the stem and widening again for the top serif. Next you embroider the flowers onto the body. Then you add two border rounds, with a small hanging loop worked into the second round. Blocking and the hardware finish it off.
Finished Size and Construction
- Finished size: 2.9 in (7.4 cm) wide x 4.5 in (11.4 cm) tall, ring not included
- Skill level: Intermediate (shaping, foundation double crochet, bullion stitches)
- Terminology: US crochet terms
- Yarn weight: DK (#3 light) cotton
- Hook: 3.5 mm (E-4)
- Number of pieces: 1 (a single letter worked flat)
- Layout: Not applicable, as this is a single piece
- Piece size before border: 2.4 in (6.1 cm) wide x 4.0 in (10.2 cm) tall
- Stem width before border: 1.2 in (3.0 cm)
- Border depth: 0.25 in (0.6 cm) per side, 2 rounds
Materials
Choose a smooth, mercerized or combed DK cotton. Cotton holds the crisp letter shape, shows the vertical double crochet columns clearly, and stands up to life on a key ring. Avoid fuzzy or very stretchy yarns, because the serifs will lose their sharp corners.
Yarn:
- Peach (main color): 6 g, about 13 m
- Sage green (stem and leaves): 2 g, about 4 m
- Cream (tulip buds): 1 g, about 2 m
These quantities include a margin for your gauge swatch and weaving in ends.
Tools:
- 3.5 mm (E-4) crochet hook
- Blunt tapestry needle with an eye large enough for DK yarn
- Embroidery needle with a sharp tip (optional, makes bullions easier)
- 1 gold split key ring, 1 in (2.5 cm) diameter
- 1 gold jump ring, 0.3 in (0.8 cm) diameter
- 2 pairs of flat-nose pliers
- Blocking mat and rustproof pins
- Spray bottle, scissors, and a ruler or tape measure
Abbreviations (US Terms)
- ch: chain
- st(s): stitch(es)
- sl st: slip stitch
- sc: single crochet
- sc2tog: single crochet 2 together
- dc: double crochet
- tch: turning chain
- fdc: foundation double crochet (see below)
- rev sc: reverse single crochet (see below)
- RS: right side
Foundation double crochet (fdc), worked off the end of a row: Yo, insert hook into the base of the last stitch made, yo and pull up a loop, yo and pull through 1 loop (this makes the chain base), [yo and pull through 2 loops] twice. For each following fdc, insert the hook into the chain base of the fdc just made.
Reverse single crochet (rev sc): Working from left to right (right to left if you crochet left-handed), insert hook into the next stitch to the right, yo and pull up a loop, yo and pull through both loops on hook.
Bullion stitch: Bring the needle up at point A and take it down at point B, then back up at A without pulling it through. Wrap the yarn around the needle 8 times. Hold the wraps gently and pull the needle through, then lay the coil flat and go down at B again.
Lazy daisy: Come up at the base, form a loop, go back down in the same hole, and come up at the tip inside the loop. Anchor the loop with one tiny stitch over it.
Gauge and Checkpoints
Gauge: 20 dc and 10 rows = 4 in (10.2 cm), which is 5 sts and 2.5 rows per inch. Each dc row is 0.4 in (1.0 cm) tall.
Make Rows 1 and 2 first as your test piece. The test piece should measure 2.4 in (6.1 cm) wide and 0.8 in (2.0 cm) tall. If it does, carry on with Row 3. Otherwise, rip back and change hooks.
Checkpoints:
- After Row 2: 2.4 in (6.1 cm) wide x 0.8 in (2.0 cm) tall
- After Row 8: stem 1.2 in (3.0 cm) wide; total height 3.2 in (8.1 cm)
- After Row 10: 2.4 in (6.1 cm) wide x 4.0 in (10.2 cm) tall
- After border: 2.9 in (7.4 cm) wide x 4.5 in (11.4 cm) tall
Too big? Go down 0.25 mm in hook size. Too small? Go up 0.25 mm. If your width is right but your rows are too tall, try pulling up the first loop of each dc a little lower rather than changing hooks.
Letter Body
Worked flat in peach, bottom to top. The ch-3 at the start of a row counts as 1 dc throughout.
Bottom serif
Row 1 (RS): Ch 14. Dc in the 4th ch from the hook (the skipped ch count as the first dc) and in each remaining ch. (12 sts)
Row 2: Ch 3, turn. Dc in each st across, finishing in the top of the tch. (12 sts)
Checkpoint: 2.4 in (6.1 cm) wide x 0.8 in (2.0 cm) tall.
Stem
Row 3: Turn, do not chain. Sl st in each of the first 4 sts. Ch 3 (counts as a dc in st 4). Dc in the next 5 sts (sts 5 to 9). Leave the last 3 sts unworked. (6 sts)
This centers the stem: 3 sts stay uncovered on each side of the bottom serif, forming two shoulders.
Rows 4–8: Ch 3, turn. Dc in each st across, finishing in the top of the tch. (6 sts per row)
Checkpoint: stem width is 1.2 in (3.0 cm) and total height is 3.2 in (8.1 cm).
Top serif
Row 9: Ch 5, turn. Dc in the 4th and 5th ch from the hook (the skipped ch count as a dc; 3 new sts made). Dc in each of the 6 stem sts, finishing in the top of the tch (9 sts). Work 3 fdc off the end of the row, the first one into the base of the last dc. (12 sts)
The row now extends 3 sts past the stem on each side, mirroring the bottom serif exactly.
Row 10: Ch 3, turn. Dc in each st across, finishing in the top of the tch. (12 sts) Fasten off and weave in the ends.
Checkpoint: 2.4 in (6.1 cm) x 4.0 in (10.2 cm). Body total: 24 serif sts at the bottom, 36 stem sts, and 24 serif sts at the top, for 84 dc.
Embroidery
Work the embroidery now, before the border, so the motif stays inside the frame and the tails hide under the border stitches. Lay the body RS up with Row 1 at the bottom. Use a single strand of DK yarn.
Stem (green): Bring the yarn up at the top center of Row 2. Using stem stitch with stitches about 0.2 in (0.5 cm) long, work a gentle S-curve up the stem, a little left of center, to Row 9. Finish with a small clockwise curl about 0.3 in (0.8 cm) across, reaching into Row 10.
Buds (cream): Each bud is 3 bullion stitches, each 0.3 in (0.8 cm) long, laid side by side and pointing upward. Make the center bullion slightly taller so the bud has a rounded tulip tip. Each finished bud is about 0.35 in (0.9 cm) wide.
- Bud 1: Row 8, sitting just right of the stem below the curl
- Bud 2: Rows 6 to 7, sitting on the stem line
- Bud 3: Row 5, slightly right of the stem
Leaves (green): Work 4 lazy daisy leaves, each 0.3 in (0.8 cm) long. Place one pair angled outward at Row 4 and a second pair at Row 3. Add a single straight stitch at the base of each bud to link it to the stem.
Border
Border gauge: Each border round adds about 0.125 in (0.3 cm) per side, so 2 rounds add 0.25 in (0.6 cm). The width grows from 2.4 in (6.1 cm) to 2.9 in (7.4 cm) and the height from 4.0 in (10.2 cm) to 4.5 in (11.4 cm).
Placement rules for Round 1:
- Along stitch tops or bases: 1 sc per st
- Along dc row ends: 2 sc per row end
- At each of the 8 outer corners: 3 sc in the corner st
- At each of the 4 inner corners (where a serif meets the stem): sc2tog, with one leg in the last shoulder st and the second leg in the first stem row end
Round 1: With RS facing, join peach in the bottom-left corner of the foundation chain. Work around the letter as follows, joining to the first sc with a sl st at the end:
- Bottom edge: 3 sc in the corner ch, sc in the next 10 ch, 3 sc in the last ch (16 sc)
- Right side of bottom serif: 2 sc in each of the 2 row ends (4 sc)
- Right bottom shoulder: 3 sc in the outer corner st, sc in the next st, sc2tog over the last shoulder st and the Row 3 end (5 sts)
- Right side of stem: 1 more sc in the Row 3 end, 2 sc in each row end of Rows 4 to 7, 1 sc in the Row 8 end (10 sc)
- Right underside of top serif: sc2tog over the Row 8 end and the first base st, sc in the next base st, 3 sc in the outer corner base st (5 sts)
- Right side of top serif: 2 sc in each of the 2 row ends (4 sc)
- Top edge: 3 sc in the corner st, sc in the next 10 sts, 3 sc in the last st (16 sc)
- Left side: Repeat the right side in reverse order: 4 sc, 5 sts, 10 sc, 5 sts, 4 sc (28 sts)
Work the shoulder stitches into the slip stitches from Row 3 and the underside stitches into the chain or fdc bases from Row 9.
Round 1 total: 88 sts (16 + 4 + 5 + 10 + 5 + 4 + 16 + 28 = 88)
Round 2 (rev sc and hanging loop): Ch 1, do not turn. Rev sc in each st around. When you reach the top edge, work rev sc in the first 8 of its 16 sts. Ch 6 for the hanging loop, then continue with rev sc in the 9th st. Finish the round, then join with a sl st and fasten off. (88 rev sc plus a ch-6 loop) Weave in all ends.
The ch-6 loop sits exactly at the center of the top edge, with 8 sts on each side.
Why the math works: At this gauge, 1 sc is about the same width as 1 dc, so the 1-to-1 edges stay flat. One dc row end is roughly as tall as 2 sc are wide, so the side edges neither ripple nor pull in. Three sc at each outer corner turn the 90° corner. At the inner corners, the sc2tog removes the extra stitch a concave corner would otherwise collect, so the shoulders stay square and the round adds the same 0.125 in (0.3 cm) all the way around.
Final Blocking
- Mist the letter evenly with water until damp, not soaked.
- Lay it face down on a folded towel over your blocking mat. This protects the raised bullions and leaves.
- Pin the 4 outer corners first to 2.9 in (7.4 cm) wide and 4.5 in (11.4 cm) tall.
- Pin each inner corner so the stem measures 1.7 in (4.3 cm) wide including the border.
- Check that both serifs are the same width and that the hanging loop sits centered.
- Let it dry completely, at least 4 hours.
- Unpin it. Using pliers, open the jump ring, slide it through the ch-6 loop and the split ring, and close it tightly.
Final Quality-Control Checklist
- Body has 84 dc: 12 sts in each serif row and 6 sts in each stem row
- Shoulders are 3 sts wide on both sides at the top and bottom
- Border Round 1 has 88 sts, with 16 on the top edge and 16 on the bottom edge
- Finished letter measures 2.9 in (7.4 cm) x 4.5 in (11.4 cm)
- Hanging loop is centered, with 8 sts on each side
- Embroidery stays inside the border, with 3 buds, 4 leaves, and a curl at the top
- Jump ring is fully closed, with no gap for the yarn to slip through
- All tails are woven in and trimmed
Troubleshooting
Stem leans to one side: Check Row 3. You should slip stitch into 4 sts and leave 3 sts unworked at the end.
Top serif is uneven: Make sure Row 9 has 3 sts on the chain side and 3 fdc on the other side, with 12 sts in total.
Border ripples along the stem: Use 2 sc per row end, not 3. If the border still ripples, drop down a hook size for the border only.
Inner corners look rounded: Work the sc2tog firmly and pin the corners sharply during blocking.
Bullions are loose or lumpy: Keep the wraps even and snug before you pull the needle through, and keep the wrap count consistent at 8.
Letter curls: Block it again face down, and let it dry fully before you unpin it.
Care
Hand wash in cool water with mild soap, press out the water in a towel, and dry flat. Remove the metal ring first if you want to avoid any chance of tarnish.
Final Notes
The measurement chain is short and reliable. Each dc is 0.2 in (0.5 cm) wide and each row is 0.4 in (1.0 cm) tall. The 12-st serifs come to 2.4 in (6.1 cm), the 6-st stem to 1.2 in (3.0 cm), and the 10 rows to 4.0 in (10.2 cm). The two border rounds add 0.25 in (0.6 cm) per side, bringing the finished letter to 2.9 in (7.4 cm) x 4.5 in (11.4 cm). If your gauge swatch matches and your stitch counts match, the letter will come out the right size.
Happy crocheting!