

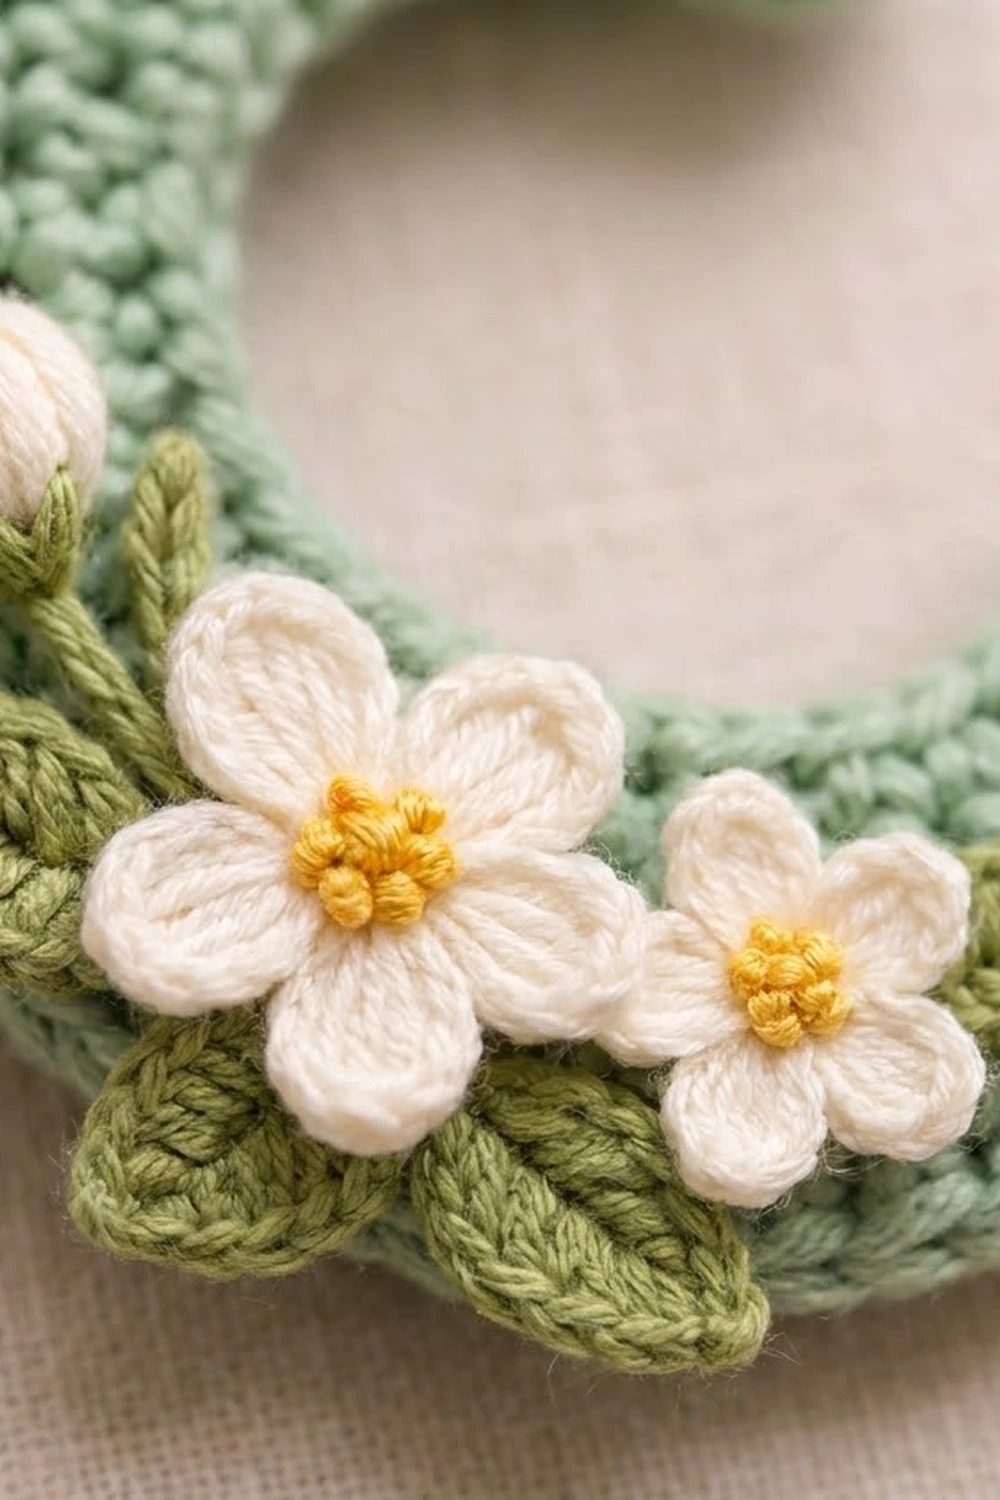
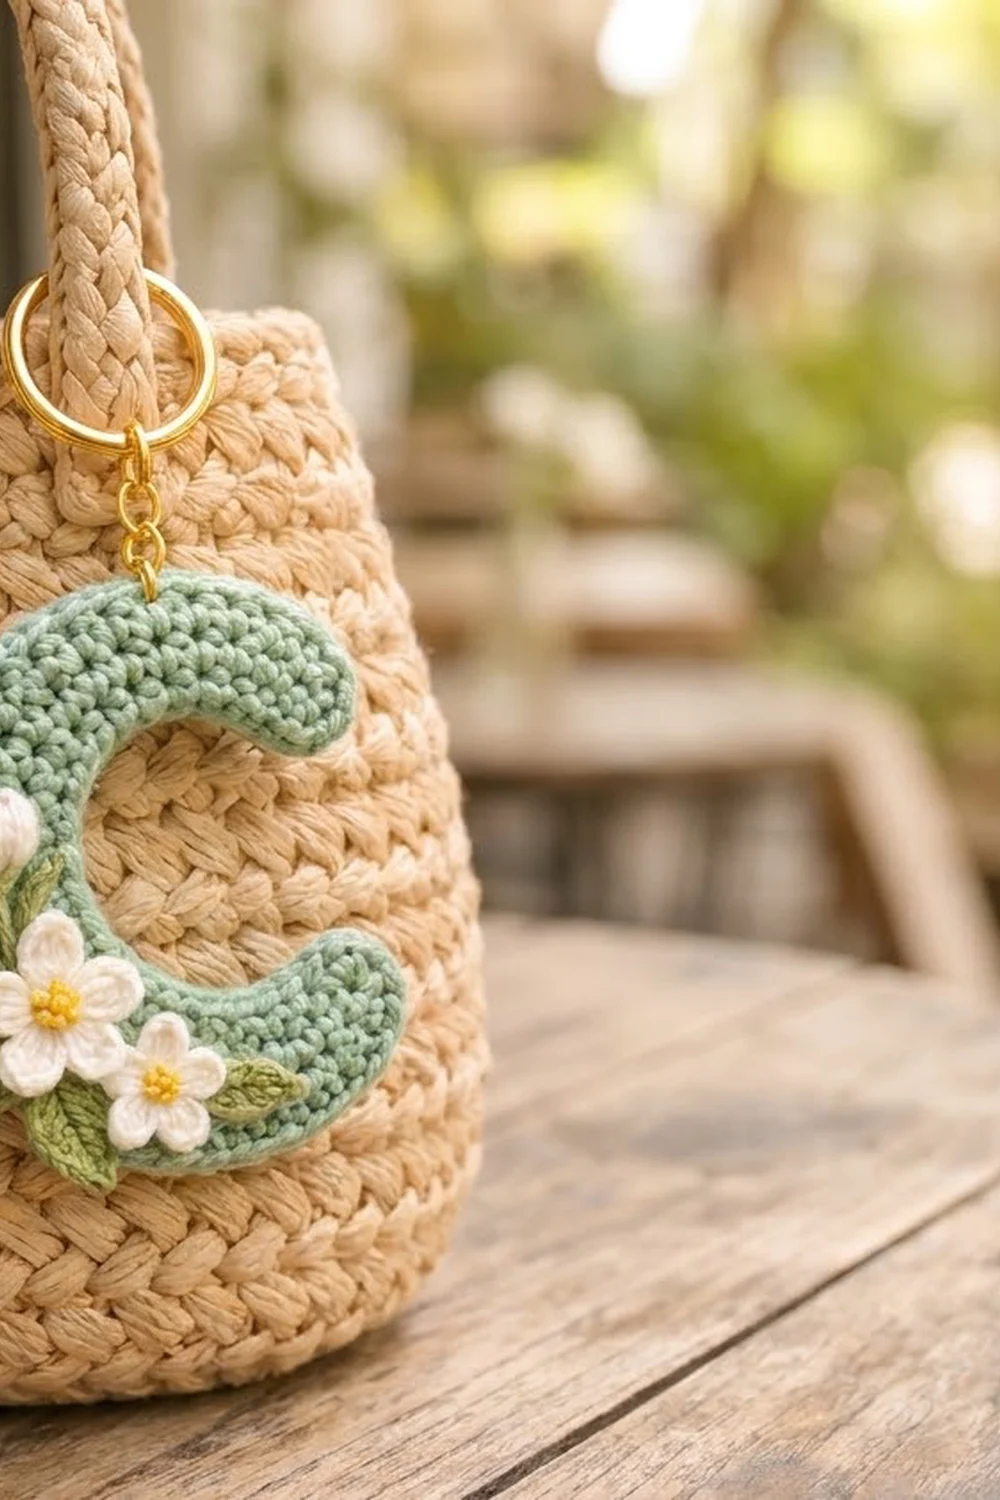
This letter C keychain is a small, sturdy piece worked in soft sage green. It is topped with a tiny spring bouquet: two cream five-petal flowers with yellow French-knot centers, a closed cream bud on a short green stem, and three moss-green leaves. A gold split ring lets you clip it onto a bag handle, a zipper pull, or a set of keys.
The look is neat and gentle. Dense single crochet lets the letter keep its shape without stiffener, and one edging round gives it a smooth, rounded outline. The flowers sit together on the lower-left curve, so the open shape of the C is still easy to read.
This pattern uses US crochet terms. The finished letter is about 3.5 in (8.9 cm) tall and 3.25 in (8.3 cm) wide, and the strip is about 1.25 in (3.2 cm) wide.
The construction is simple. You chain along the inner curve of the C and work 4 rows of single crochet. Every row has increases, which bend the strip into three-quarters of a circle. Then you work one edging round all the way around. You make the flowers, bud, and leaves separately, sew them on in layers, and add the hardware last.
Finished Size and Construction
- Finished size: 3.5 in (8.9 cm) tall x 3.25 in (8.3 cm) wide
- Skill level: Easy (advanced beginner)
- Terminology: US crochet terms
- Yarn weight: DK / light (#3) cotton
- Hook: 3.0 mm
- Number of pieces: 1 letter body plus 6 appliqués (2 flowers, 1 bud, 3 leaves)
- Layout: one single letter, with the appliqués grouped on the lower-left curve
- Body size before edging: 3 in (7.6 cm) tall x 2.75 in (7.0 cm) wide, strip width 0.75 in (1.9 cm)
- Edging depth: about 0.25 in (0.6 cm) on every edge
Materials
Choose a smooth combed or mercerized cotton in DK weight. Cotton shows the stitches clearly, keeps the letter flat, and holds up well on a keychain that gets handled every day. Avoid fuzzy or very stretchy yarns, which blur the stitches and let the letter sag.
Yarn
- Color A, sage green (letter body): 10 g, about 24 m
- Color B, cream (flowers and bud): 4 g, about 10 m
- Color C, moss green (leaves and bud stem): 3 g, about 7 m
- Color D, golden yellow (flower centers): 1 g, about 2.5 m
These amounts include extra for gauge testing and sewing tails.
Tools
- 3.0 mm crochet hook
- Tapestry needle
- Scissors and a stitch marker
- 25 mm gold split key ring
- 6 mm gold jump ring (plus a short chain link, optional)
- 2 pairs of flat-nose jewelry pliers
- Blocking mat, rust-proof pins, and a spray bottle
- Ruler or tape measure
Abbreviations (US Terms)
- ch – chain
- sl st – slip stitch
- sc – single crochet
- hdc – half double crochet
- dc – double crochet
- st(s) – stitch(es)
- inc – 2 sc in the same stitch
- RS – right side
- rep – repeat
Magic ring: Wrap the yarn around two fingers, insert the hook, pull up a loop, and ch 1. Work the first-round stitches into the loop, then pull the tail to close the center.
French knot: Bring the needle up through the fabric and wrap the yarn twice around the needle. Insert the needle back down right next to where it came up, holding the wraps snug as you pull through.
Gauge and Checkpoints
Gauge: 20 sc and 22 rows = 4 in (10.2 cm) in single crochet with a 3.0 mm hook.
The letter is small, so the body itself is your test piece. Make it first and measure it before you start any appliqués.
Checkpoints:
- After Row 1, the strip measures about 4 in (10.2 cm) along the chain edge.
- After Row 2, the strip is about 0.375 in (1.0 cm) wide and has started to curve.
- After Row 4, the strip is 0.75 in (1.9 cm) wide and the outer edge measures about 6.75 in (17.1 cm) along the curve. The piece lies flat as an open three-quarter ring 3 in (7.6 cm) tall.
- After the edging, the letter is 3.5 in (8.9 cm) tall x 3.25 in (8.3 cm) wide.
If your letter is too big, switch to a 2.75 mm hook. If it is too small, switch to a 3.25 mm hook. If the strip ruffles, try a smaller hook. If it cups into a bowl shape, try a larger hook and make sure you worked every increase.
Letter C Body
Use Color A. The foundation chain becomes the inner edge of the C. Each row adds stitches, so the outer edge gets longer than the inner edge, and that difference bends the strip into a C.
Chain loosely. If your chains are tight, make the chain with a 3.5 mm hook and switch back to 3.0 mm for Row 1.
Ch 21.
Row 1: Sc in 2nd ch from hook and in each ch across, turn. (20 sc)
Row 2: Ch 1 (does not count as a st here and throughout), *sc in next 3 sts, inc in next st; rep from * 4 more times, turn. (25 sc)
Row 3: Ch 1, sc in next 2 sts, *inc in next st, sc in next 5 sts; rep from * 2 more times, inc in next st, sc in last 4 sts, turn. (29 sc)
Row 4: Ch 1, *sc in next 5 sts, inc in next st; rep from * 3 more times, sc in next 4 sts, inc in last st. (34 sc)
Don’t fasten off. The increases are staggered so they don’t stack up into visible corners. Lay the piece flat. It should form an even arc of about three-quarters of a circle, with an opening about 90 degrees wide.
Border (Edging Round)
The edging is one round of sc worked all the way around the letter. It rounds off the four corners, covers the row ends, and gives the outline a smooth, slightly raised edge.
Border gauge: Same as the body, 20 sc = 4 in (10.2 cm). The round adds about 0.25 in (0.6 cm) to every edge.
Round 5: Ch 1 and turn, so you are working back across the top of Row 4.
- Outer edge: 3 sc in first st, sc in next 32 sts, 3 sc in last st. (34 sts worked 1-per-stitch + 4 extra = 38 sc)
- First end: Working down the row ends, sc in end of Row 4, 2 sc in end of Row 3, 2 sc in end of Row 2, sc in end of Row 1. (4 row ends + 2 extra = 6 sc)
- Inner edge: Working in the unused loops of the foundation chain, sc in each of the 20 loops. (20 worked 1-per-loop + 0 extra = 20 sc)
- Second end: Working up the row ends, sc in end of Row 1, 2 sc in end of Row 2, 2 sc in end of Row 3, sc in end of Row 4. (4 row ends + 2 extra = 6 sc)
Sl st to the first sc to join. (62 sts worked 1-per-stitch + 8 extra = 70 sc total: 38 + 6 + 20 + 6)
Fasten off. Weave in the ends on the back, through the stitches, so they stay hidden.
Why the math works: The outer edge curves outward, so its two corners need extra stitches to turn smoothly. Working 3 sc in each corner adds 4 stitches in total. Each end is only 4 rows (0.75 in / 1.9 cm) deep, and the 2 extra stitches in the middle row ends round the tip instead of leaving it square. The inner edge curves inward, so the edging sits on a slightly shorter curve than the chain. Working exactly 1 sc per loop keeps it flat, and any extra stitches there would make the inner curve ripple.
The side facing you during Round 5 is the RS. Turn the letter so the opening faces right and it reads as a C.
Flowers
Use Color B. Make 1 large flower and 1 small flower.
Large Flower (make 1)
Round 1: Make a magic ring, ch 1, 5 sc in ring, sl st to first sc. Pull the ring tightly closed. (5 sc)
Round 2: *(Sl st, ch 2, 3 dc, ch 2, sl st) all in next sc; rep from * 4 more times. (5 petals, each with 3 dc)
Fasten off, leaving a 10 in (25.4 cm) tail for sewing. The flower is about 1 in (2.5 cm) across.
Small Flower (make 1)
Round 1: Make a magic ring, ch 1, 5 sc in ring, sl st to first sc. (5 sc)
Round 2: *(Sl st, ch 1, hdc, dc, hdc, ch 1, sl st) all in next sc; rep from * 4 more times. (5 petals, each with hdc, dc, hdc)
Fasten off, leaving a 10 in (25.4 cm) tail. The flower is about 0.75 in (1.9 cm) across.
Centers: Cut a 12 in (30.5 cm) length of Color D. Work 5 French knots in a tight cluster over the center of the large flower and 3 over the center of the small flower. Tie the ends on the back and trim.
Bud
Use Color B. The bud is a flat teardrop that is narrow at the base and rounded at the top.
Ch 5.
Round 1: Sc in 2nd ch from hook, hdc in next ch, dc in next ch, 5 dc in last ch. Rotate to work in the unused loops on the other side of the chain: dc in next ch, hdc in next ch, sc in next ch. Sl st to first sc. (11 sts)
Fasten off, leaving a 10 in (25.4 cm) tail. The bud is about 0.5 in (1.3 cm) wide and 0.75 in (1.9 cm) tall.
Calyx and stem: After you sew the bud on, use Color C to embroider 2 short straight stitches in a V at its narrow base for the sepals. Then work a line of backstitch about 0.5 in (1.3 cm) long below it for the stem.
Leaves
Use Color C. Make 3.
Ch 7.
Round 1: Sl st in 2nd ch from hook, sc in next ch, hdc in next ch, dc in next ch, hdc in next ch, 3 sc in last ch. Rotate to work in the unused loops on the other side: hdc in next ch, dc in next ch, hdc in next ch, sc in next ch, sl st in last ch. Ch 2, sl st in same ch to form the pointed tip. (13 sts plus ch-2 tip)
Fasten off, leaving an 8 in (20.3 cm) tail. Each leaf is about 1 in (2.5 cm) long and 0.5 in (1.3 cm) wide.
Assembly
Lay the letter RS up with the opening facing right. All the appliqués go on the lower-left curve, between about 9 o’clock and 5 o’clock. Pin everything in place before you sew.
- Leaves first. Place one leaf at about 9 o’clock with the tip pointing up and to the left. Place the second at about 7 o’clock with the tip pointing down and to the left. Place the third on the lower arm with the tip pointing right along the curve.
- Bud. Place it at about 9 o’clock, pointing straight up, with its base touching the first leaf.
- Large flower. Place it at about 8 o’clock so its petals overlap the bases of the first two leaves and the bottom of the bud.
- Small flower. Place it at about 6 o’clock, just below and to the right of the large flower, overlapping the base of the third leaf.
Sew each piece on with its own tail, using small whipstitches through its edge stitches. Catch only the front layer of the letter so nothing shows on the back. Embroider the bud’s calyx and stem last.
Hardware: Find the top stitch of the outer edge (12 o’clock). It is about the 8th edging stitch counted from the center of the upper tip. Open the jump ring sideways with the two pliers and pass it through both loops of that stitch. Add the split ring (and the chain link, if using), then twist the jump ring closed.
Final Blocking
- Lightly mist the finished letter until it is damp, not soaked.
- Lay it RS up on the blocking mat.
- Shape the arc so the opening is even and both tips are rounded.
- Pin the outer edge every 0.75 in (1.9 cm), then pin the inner curve and both ends.
- Check that it measures 3.5 in (8.9 cm) tall and 3.25 in (8.3 cm) wide.
- Press the petals and leaves flat with your fingertips.
- Let it dry completely before removing the pins.
Final Quality-Control Checklist
- The letter measures 3.5 in (8.9 cm) x 3.25 in (8.3 cm).
- The strip is an even 1.25 in (3.2 cm) wide all the way around.
- The outer edge doesn’t ruffle and the inner edge doesn’t ripple.
- The edging round has exactly 70 sc, with rounded tips at both ends.
- All ends are woven in on the back.
- Both flowers have 5 even petals and tidy yellow centers.
- All appliqués are firmly sewn, with no loose edges.
- The jump ring is fully closed and holds the split ring securely.
Troubleshooting
The strip ruffles: Your stitches are too loose for the increases. Use a smaller hook.
The letter closes into a full ring: The foundation chain is too tight. Chain with a larger hook.
The opening is too wide: Your rows are taller than gauge. Check your row gauge and go down a hook size.
The inner edge ripples: You added stitches along the foundation chain. Work exactly 20 sc there.
The tips look square: Make sure you worked 2 sc in the ends of Rows 2 and 3 at both ends.
The petals look uneven: Pull the magic ring tighter and keep each petal in its own stitch.
The jump ring slips out: Pass it through both loops of the edging stitch, not just one.
Care
Hand wash in cool water with mild soap, press the water out in a towel, and dry flat. If the letter has bent, reshape it while it is damp.
Final Notes
The whole piece follows one chain of measurements. A 20-stitch chain sets the inner curve, and 4 increasing rows bring the body to 3 in (7.6 cm) tall with a 0.75 in (1.9 cm) strip. The 70-stitch edging round then adds 0.25 in (0.6 cm) on every side, for a finished letter 3.5 in (8.9 cm) by 3.25 in (8.3 cm). Check gauge on the body before you make the flowers, and the rest will fall into place.
Happy crocheting!