

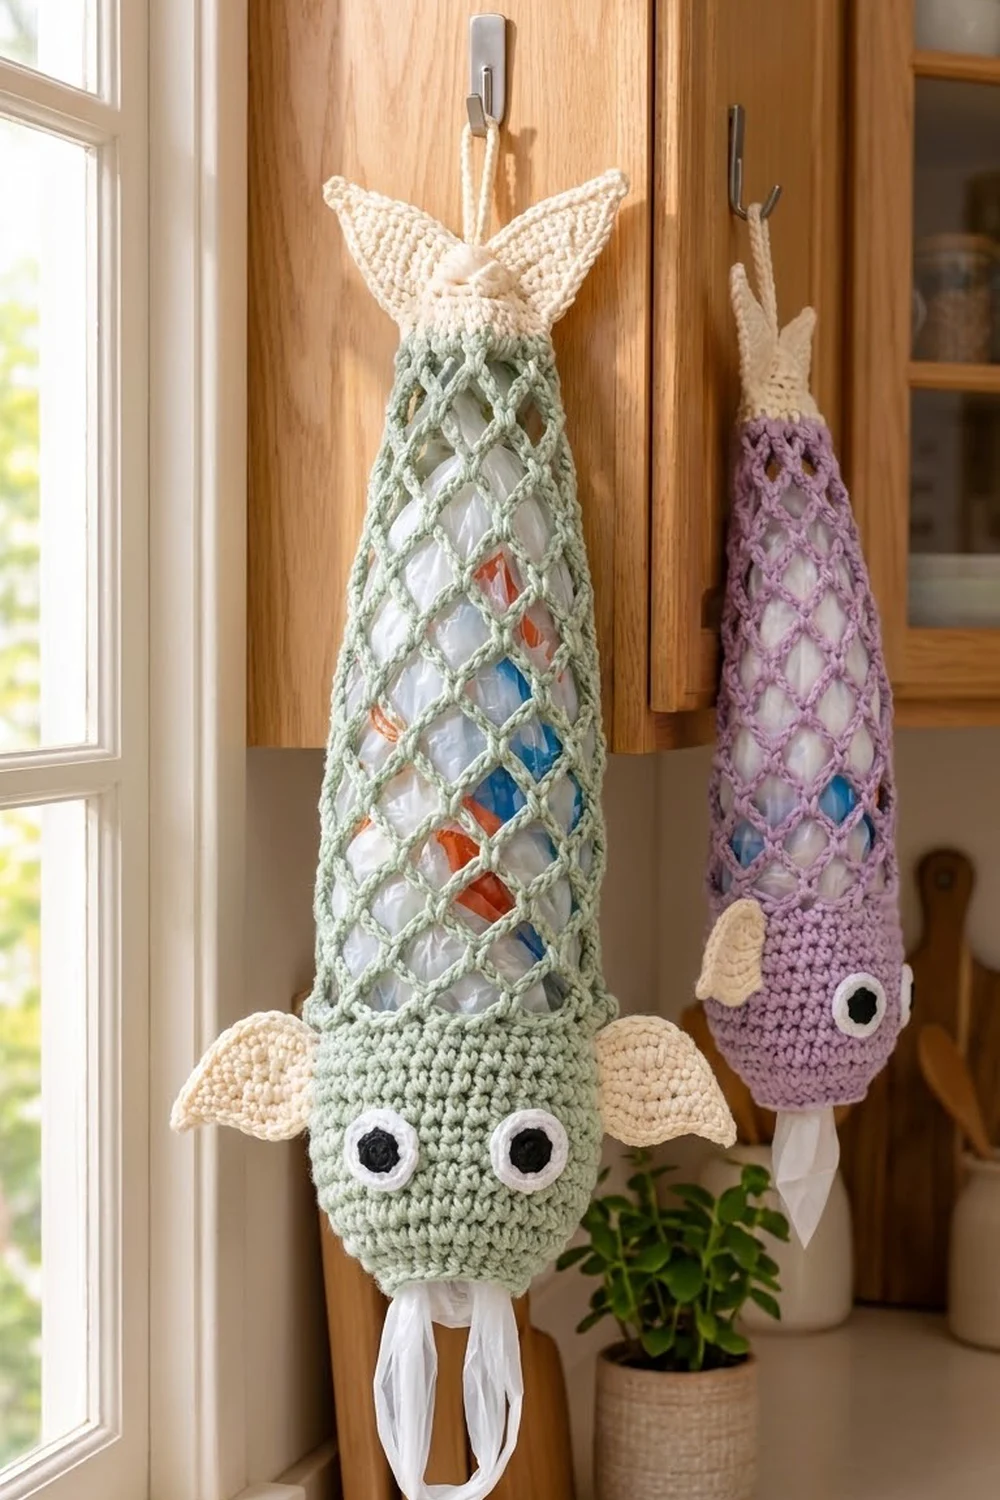
Bubbles is a fish-shaped bag holder that hangs on a cabinet door hook. You stuff used grocery bags into the open top of the mesh body and pull them out one at a time through the round mouth at the bottom. The solid head keeps the bags from falling out. The mesh body lets you see how many bags are left.
The main color is soft sage green. The tail, the side fins and the top band are cream, and the eyes are white with black centers. For a second holder, swap the sage for lavender and keep the other colors the same.
This pattern uses US crochet terms. The finished holder measures about 19.25 in (48.9 cm) from the mouth to the top of the band and about 22 in (55.9 cm) to the tail tips. With the hanging loop it is about 23.5 in (59.7 cm) long. The head is 6.9 in (17.5 cm) wide when flattened.
Construction is simple. You work the body in one piece from the mouth upward: a solid single-crochet head, then a chain-loop mesh that tapers, then a cream band that you close flat. After that you make four identical leaf shapes (two for fins and two for the tail) and two eyes, and sew them on.
Finished Size and Construction
- Finished size: 19.25 in (48.9 cm) body; 22 in (55.9 cm) with tail; 23.5 in (59.7 cm) with loop
- Skill level: Easy
- Terminology: US
- Yarn weight: Worsted (#4), cotton or cotton blend
- Hook: 5.0 mm (H-8)
- Number of pieces: 1 body, plus 4 leaf appliqués and 2 eyes
- Layout: a single hanging holder (no assembly grid)
- Head size: 6.9 in (17.5 cm) flat width × 3.5 in (8.9 cm) tall
- Size before border: 18 in (45.7 cm), from the foundation to the end of the mesh
- Border depth: top band 1.25 in (3.2 cm); mouth edging under 0.25 in (0.6 cm)
Materials
Use a smooth worsted-weight cotton. It holds its shape, doesn’t stretch much under the weight of the bags, and can be washed. Acrylic also works, but the mesh will droop more.
- Sage green (main color): 65 g / 100 m
- Cream (contrast color): 25 g / 40 m
- White (eyes): 5 g / 8 m
- Black (eyes): 2 g / 3 m
These quantities include a margin of about 20% for gauge differences and tails.
Tools:
– 5.0 mm (H-8) crochet hook
– Locking stitch marker
– Tapestry needle
– Sewing pins
– Scissors
– Measuring tape
Abbreviations (US Terms)
- ch – chain
- sl st – slip stitch
- sc – single crochet
- hdc – half double crochet
- dc – double crochet
- tr – treble crochet
- inc – 2 sc in the same stitch
- sc2tog – single crochet 2 together
- sk – skip
- sp – space
- BLO – back loop only
- MR – magic ring
Special stitch – mesh closing loop: At the end of each mesh round, you replace the last chain loop with a short chain plus a taller stitch worked into the first sc of the round: “ch 2, dc in first sc” in ch-5 rounds, or “ch 1, hdc in first sc” in ch-4 rounds. This leaves your hook at the top center of the last loop, ready to start the next round.
Gauge and Checkpoints
Gauge: 14 sc × 16 rounds = 4 in (10.2 cm) in the round, which is 3.5 sc per inch.
Work the head first and use it as your gauge piece. It is the most important measurement because the eyes and fins are sized to fit it.
- After Round 1: the mouth measures 8 in (20.3 cm) around, or 4 in (10.2 cm) flat.
- After Round 6: the head measures 13.7 in (34.8 cm) around, or 6.9 in (17.5 cm) flat.
- After Round 14: the head is 3.5 in (8.9 cm) tall.
- After Round 24: the ch-5 mesh section hangs at about 10 in (25.4 cm).
- After Round 30: the whole body measures about 18 in (45.7 cm).
If the head is too big, go down to a 4.5 mm (7) hook. If it is too small, go up to a 5.5 mm (I-9) hook. Mesh length varies more than solid fabric. If your mesh is short, add one more ch-5 round. If it is long, leave one out. Either way the loop count stays at 12.
Body
Work the body in joined rounds unless the pattern says otherwise. The head is worked from the mouth upward.
Head (Sage)
Foundation: Ch 28 and sl st to the first ch to form a ring. Don’t twist the chain.
Rnd 1: Ch 1, sc in each ch around, sl st to the first sc. (28 sc)
Rnd 2: Ch 1, (sc 6, inc) 4 times, sl st to join. (32 sc)
Rnd 3: Ch 1, (sc 7, inc) 4 times, sl st to join. (36 sc)
Rnd 4: Ch 1, (sc 8, inc) 4 times, sl st to join. (40 sc)
Rnd 5: Ch 1, (sc 9, inc) 4 times, sl st to join. (44 sc)
Rnd 6: Ch 1, (sc 10, inc) 4 times, sl st to join. (48 sc)
Rnds 7–14: Ch 1, sc in each st around, sl st to join. (48 sc in each round)
Rounds 2–6 shape the rounded bowl, and Rounds 7–14 form the full part of the head. Place a marker at the joining seam. This line is the back of the fish.
Mesh Body (Sage)
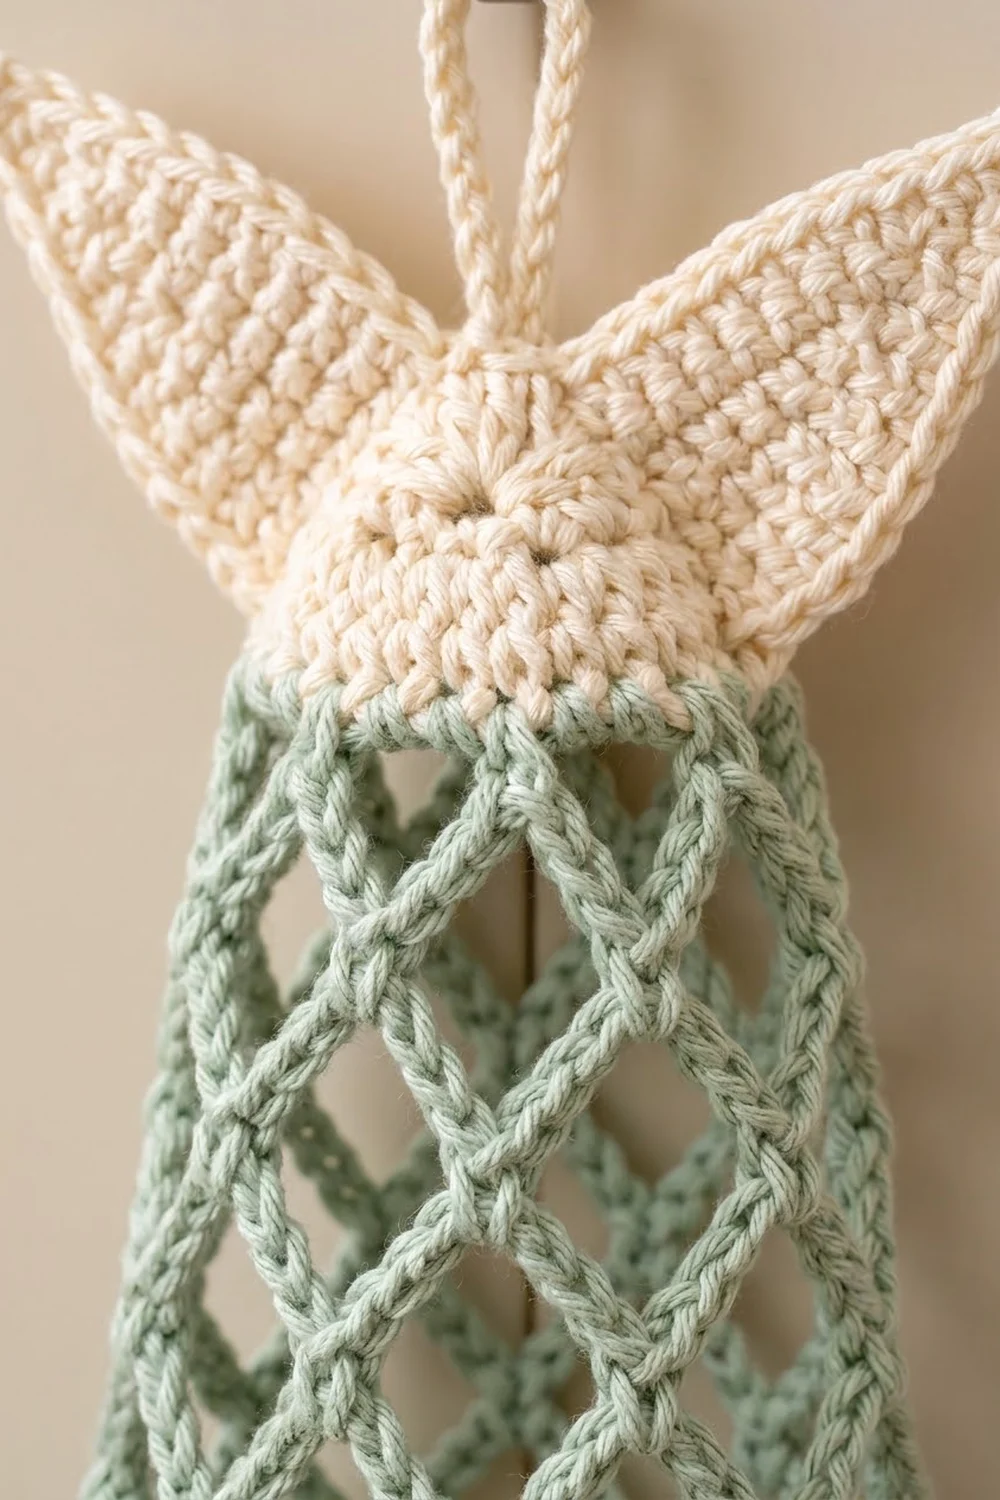
Rnd 15 (transition): Ch 1, sc in the first st. *Ch 5, sk 3 sts, sc in the next st; repeat from * 10 more times. Ch 2, sk the last 3 sts, dc in the first sc. (12 loops)
Check: 1 sc plus 11 repeats of 4 stitches uses 45 sts, and the final skip of 3 uses the last 3. That accounts for all 48 sts.
Rnds 16–24: Ch 1, sc around the post of the closing dc. *Ch 5, sc in the next ch-5 sp; repeat from * 10 more times. Ch 2, dc in the first sc. (12 loops in each round)
Rounds 15–24 give you 10 ch-5 rounds. Each one adds about 1 in (2.5 cm) when the holder hangs.
Rnds 25–30 (taper): Ch 1, sc around the post of the closing stitch. *Ch 4, sc in the next sp; repeat from * 10 more times. Ch 1, hdc in the first sc. (12 loops in each round)
These 6 shorter-loop rounds add about 4.5 in (11.4 cm). Because the chains are shorter, the tube narrows to about 4.5 in (11.4 cm) flat, compared with about 6.5 in (16.5 cm) in the ch-5 section. Fasten off the sage.
The mesh section totals about 14.5 in (36.8 cm). Together with the head, the body measures 18 in (45.7 cm).
Leaf Pieces (Cream – Make 4)
You need four identical leaves: two for the side fins and two for the tail lobes.
Rnd 1: Ch 10. Start in the 2nd ch from the hook (this end is the tip) and work across the chain: sl st, sc, hdc, dc, dc, tr, tr, dc. Then work 3 hdc in the last ch to turn around the base. Now work along the other side of the chain into the free loops: dc, tr, tr, dc, dc, hdc, sc, sl st. Ch 2 and sl st into the first sl st. (19 sts, plus a ch-2 sp at the tip)
Rnd 2 (BLO ridge round): Ch 1. Work 1 sc in the BLO of each st around, but work 2 sc in the center hdc at the base. At the tip, work (sc, ch 2, sc) in the ch-2 sp. Sl st to join. (19 sts worked one per stitch + 1 extra at the base + 2 sc in the tip sp = 22 sc, plus a ch-2 point)
Working in the BLO leaves a raised ridge around the outline, which gives the fins their texture.
Each leaf should measure 3 in (7.6 cm) long and 2 in (5.1 cm) wide. Leave a 12 in (30.5 cm) tail for sewing.
Eyes (Make 2)
Rnd 1 (black): Work 6 sc in a MR and sl st to join. (6 sc) Change to white.
Rnd 2 (white): Ch 1, inc in each st around, sl st to join. (12 sc)
Rnd 3 (white): Ch 1, (sc, inc) 6 times, sl st to join. (18 sc)
Each eye measures 1.5 in (3.8 cm) across, with a black center about 0.5 in (1.3 cm) wide. Leave a long white tail for sewing.
Border: Top Band and Mouth Edging
Border gauge: the same as the head, 3.5 sc per inch. When you flatten a round, half of its stitches fall on each side.
Top Band (Cream)
Rnd 31: Join cream in any ch-4 sp. Ch 1, work 2 sc in each of the 12 sps, sl st to join. (24 sc, or 12 per side when flattened)
Rnds 32–33: Ch 1, sc in each st around, sl st to join. (24 sc in each round)
Rnd 34: Ch 1, (sc 2, sc2tog) 6 times, sl st to join. (18 sc, or 9 per side)
Row 35 (closing): Flatten the band so the joining seam sits on one fold. Ch 1, then work through both layers at once: sc 9. (9 sc) Don’t fasten off.
Why the math works: 12 loops × 2 sc gives 24 sts, which is 6.9 in (17.5 cm) around and 3.4 in (8.6 cm) flat. That width gathers the 4.5 in (11.4 cm) mesh neatly without puckering. The decrease round takes out 6 sts, 3 per side, which leaves 18 sts measuring 5.1 in (13.0 cm) around and 2.6 in (6.6 cm) flat. Because 9 sts sit on each side, Row 35 joins exactly 9 front sts to 9 back sts with nothing left over.
Hanging loop: Sl st back to the 5th sc of Row 35, which is the center stitch. Ch 12 and sl st into the same st. Work 18 sc over the chain loop and sl st to the base. The loop stands about 1.5 in (3.8 cm) tall. Fasten off.
Mouth Edging (Sage)
Edging round: Join sage at the back seam in the free loops of the foundation chain. Loosely sl st in each of the 28 loops and join. (28 sl sts, or 14 per side when flattened)
Why the math works: The edging has exactly the same number of stitches as the foundation, so the mouth stays 4 in (10.2 cm) wide flat. It won’t flare or tighten. That opening is wide enough to pull a bag through but narrow enough to hold the bundle in.
Assembly
- Eyes: Flatten the head with the seam marker at the center back. Pin the eyes on the front over Rounds 7–11, with their centers 3 in (7.6 cm) apart. Whipstitch around Round 3 of each eye.
- Fins: Pin one leaf to each side fold of the head over Rounds 8–12. Angle the tips outward and slightly upward so each fin reaches about 2 in (5.1 cm) beyond the head. The span across both fins is about 11 in (27.9 cm). Sew along the base for about 1 in (2.5 cm).
- Tail: Overlap the bases of the remaining two leaves at the top closure, one on each side of the hanging loop. Spread the tips into a V about 90 degrees apart and sew the bases securely through the band. The tail adds about 2.75 in (7.0 cm) above the band.
Final Blocking
- Wet the finished holder and roll it in a towel to press out the excess water.
- Lay it flat with the seam at the back and the eyes facing up.
- Shape the head into a smooth curve and pin it to 6.9 in (17.5 cm) wide.
- Pull the mesh gently so the diamonds open evenly. Pin it to 19.25 in (48.9 cm) from the mouth to the top of the band.
- Pin the fins and tail lobes flat, and sharpen the tips by pinning each ch-2 point.
- Let it dry completely before you hang it.
Final Quality-Control Checklist
- The head has 48 sts, measures 6.9 in (17.5 cm) flat and is 3.5 in (8.9 cm) tall.
- Every mesh round has exactly 12 loops.
- The top band is 24 sts going down to 18, and the closing row is 9 sc.
- The mouth edging has 28 sts and the mouth is 4 in (10.2 cm) flat.
- The four leaves match: 22 sc each and 3 in (7.6 cm) long.
- The eyes are level and the fins are mirror images of each other.
- The hanging loop is centered and firmly anchored.
- All yarn ends are woven in through solid stitches, not through the mesh.
Troubleshooting
- The mesh twists in a spiral: Always start each round around the post of the closing stitch, and count 12 loops every round.
- The mesh is too long or droopy: Leave out one ch-5 round, or use a firmer cotton.
- The head ruffles: You may have added extra stitches. Recount Rounds 2–6.
- The mouth is too tight: Work the edging slip stitches more loosely, or use a hook one size larger for that round only.
- The leaves curl: Pin them flat while blocking. Steam acrylic lightly.
- There are gaps at the top closure: Work Row 35 through both loops of both layers.
Care
Hand wash or machine wash cold on a gentle cycle, then reshape and dry flat. Don’t hang the holder up while it’s wet, because the weight will stretch the mesh.
Final Notes
The measurements follow one chain. Your gauge of 14 sc per 4 in (10.2 cm) sets the 48-stitch head at 6.9 in (17.5 cm) flat. That stitch count divides evenly into 12 mesh loops. The ch-5 rounds and then the ch-4 rounds bring the body to 18 in (45.7 cm). The 24- and 18-stitch band closes evenly with 9 stitches per side, which brings the body to 19.25 in (48.9 cm), or 22 in (55.9 cm) with the tail. Check each stage before you move on and your fish will hang straight, hold plenty of bags and hand them out one at a time.
Happy crocheting!