

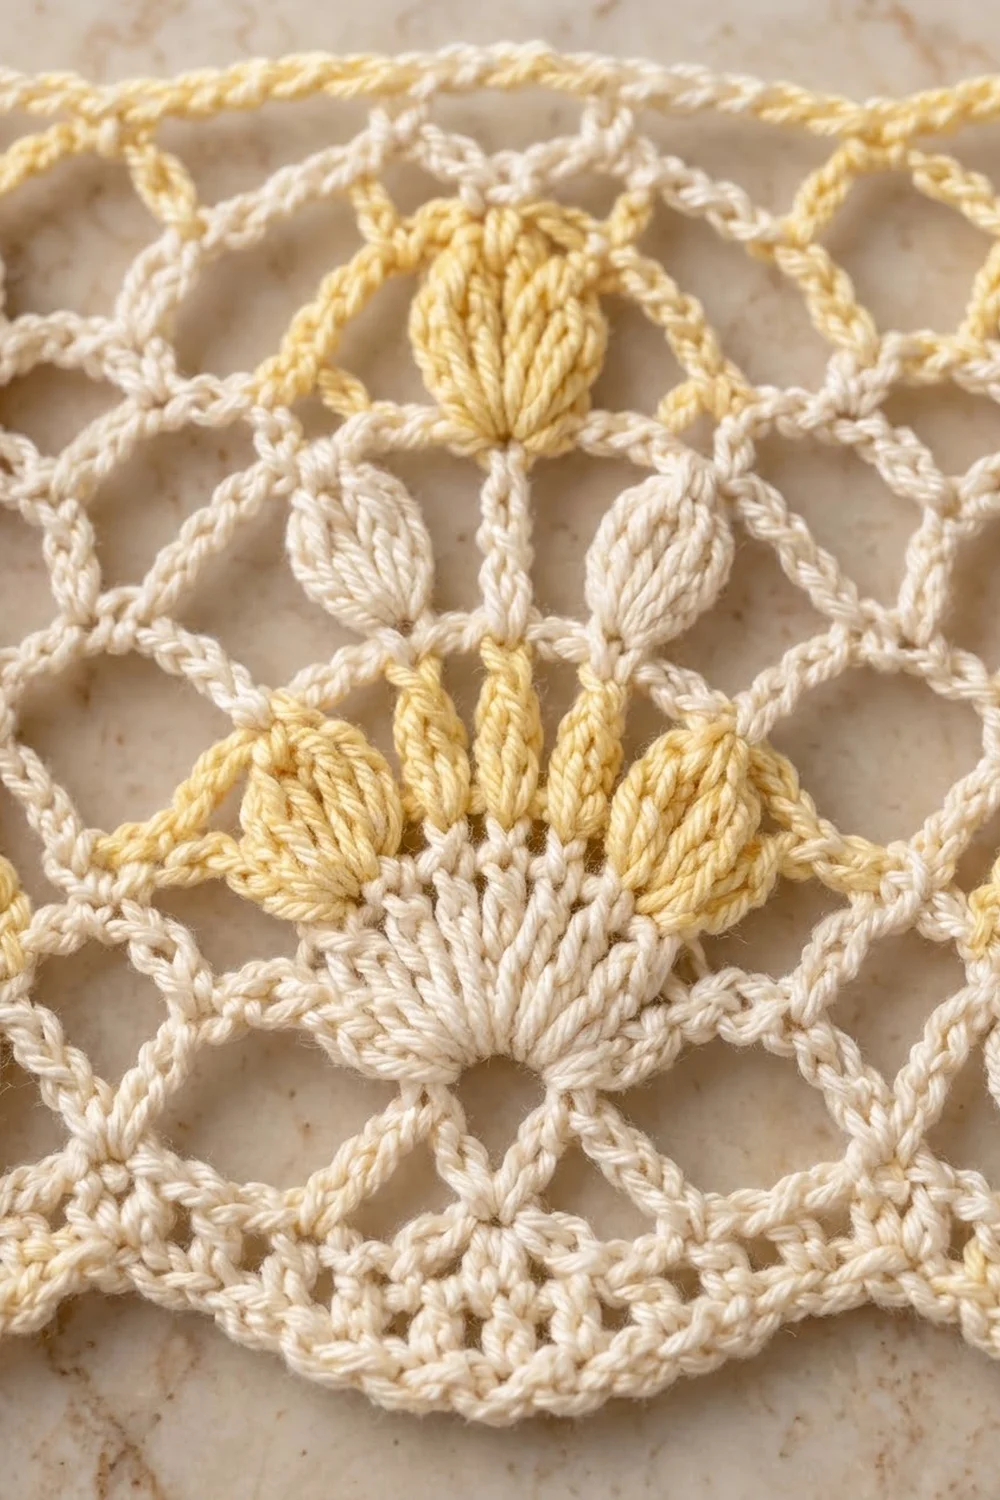
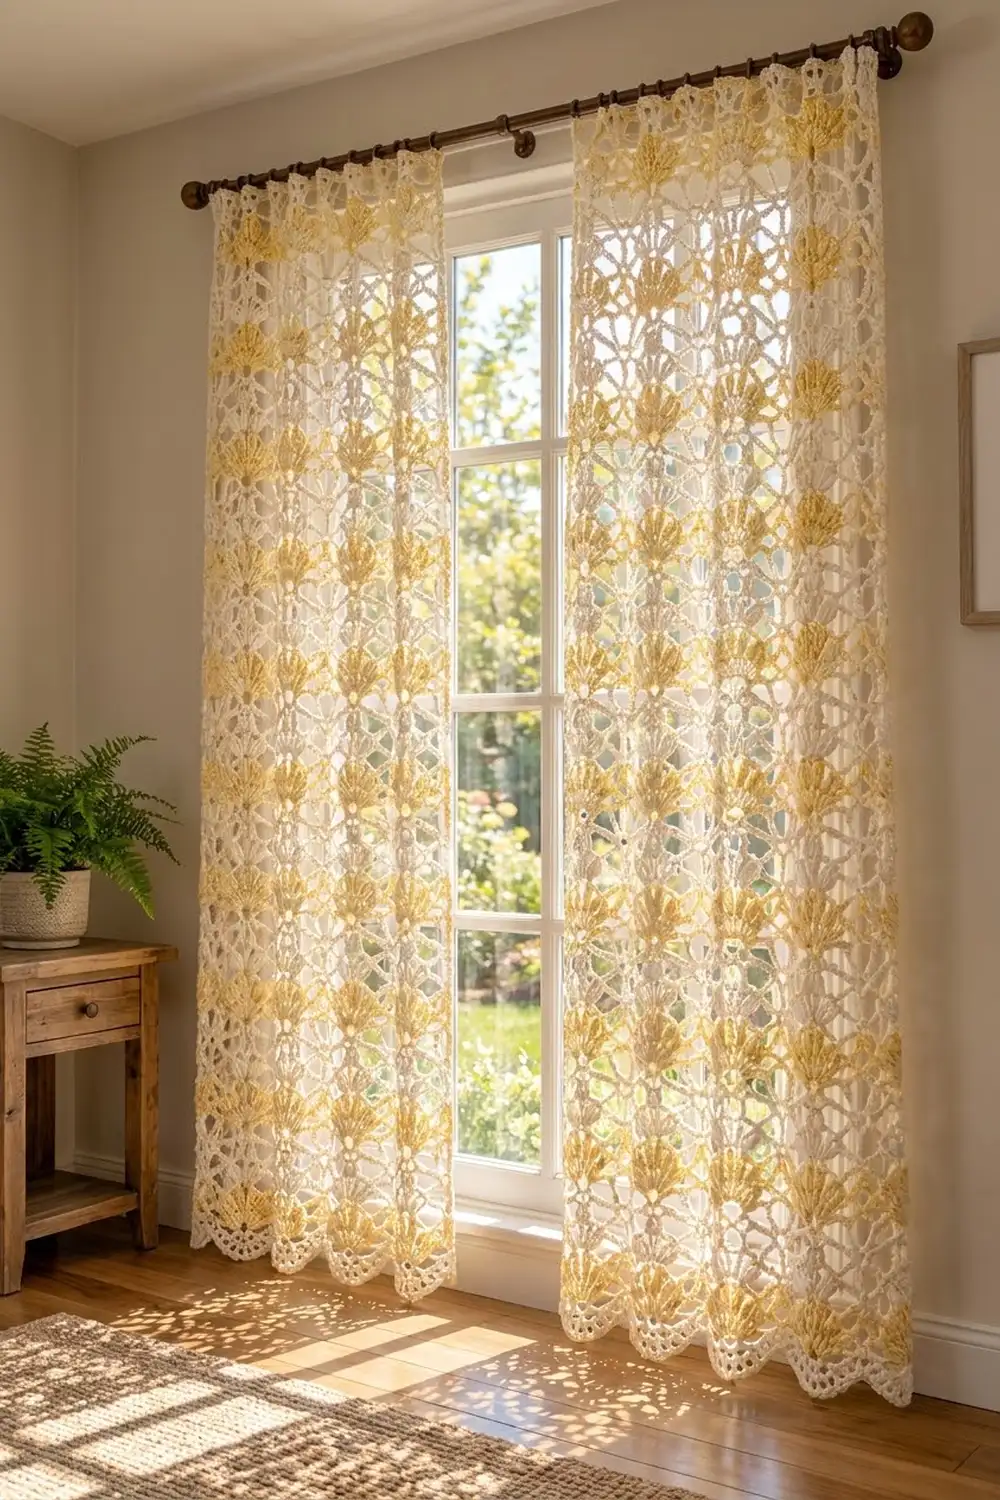
These lace curtain panels let in lots of sunlight while still giving a room some privacy. The chain-arch mesh forms an open net, and columns of cream fans topped with butter-yellow puff stitches climb the full height of each panel. When light comes through, the yellow puffs look like small blossoms against the cream.
The pattern makes one panel. Most windows need two, so the instructions cover a matching pair. The panels are hung side by side and never joined. Each finished panel measures 40 in (101.6 cm) wide and 84 in (213.4 cm) long, including the scalloped bottom edge and a fold-over rod pocket.
All instructions use US crochet terms. The panel is worked flat in rows from the bottom up, starting from a foundation chain. The pattern changes color in 2-row stripes, so you can carry both yarns up the right-hand edge instead of cutting at every change.
When the lace body is done, you add two rounds of single crochet around the whole panel. Then you work a scalloped edge along the bottom and a hdc band along the top that folds over to make the rod pocket.
Finished Size and Construction
- Finished size (one panel): 40 in x 84 in (101.6 cm x 213.4 cm)
- Skill level: Intermediate
- Terminology: US
- Yarn weight: Sport (#2), mercerized cotton
- Hook: 3.5 mm (E-4)
- Number of pieces: 2 identical panels, made separately
- Layout: Each panel hangs on its own, side by side on one rod (not joined)
- Piece size (lace body): 39 in x 78.5 in (99.1 cm x 199.4 cm)
- Size before border: 39 in x 78.5 in (99.1 cm x 199.4 cm)
- Border depth: 0.5 in (1.3 cm) on each side; 2.5 in (6.4 cm) at the bottom; 3 in (7.6 cm) at the top, including the folded pocket
Materials
Use a smooth, mercerized sport-weight cotton or cotton blend. The crisp stitch definition shows off the fans, and cotton hangs straight without stretching. Avoid fuzzy yarns, which fill in the mesh. The quantities below assume about 155 m per 50 g ball.
For a pair of panels:
- Cream (Color C): 1,150 g, about 3,565 m
- Butter yellow (Color Y): 300 g, about 930 m
Tools:
- 3.5 mm (E-4) crochet hook
- Tapestry needle
- Stitch markers (at least 4)
- Measuring tape at least 60 in (152.4 cm) long
- Rustproof pins, blocking mats or a large clean sheet, and a spray bottle
These amounts include a margin of about 10% for swatching and differences in tension.
Abbreviations (US Terms)
- ch – chain
- sl st – slip stitch
- sc – single crochet
- hdc – half double crochet
- dc – double crochet
- sk – skip
- sp(s) – space(s)
- RS / WS – right side / wrong side
- C / Y – cream / yellow
Puff stitch (puff): (Yarn over, insert hook in the stitch or space, yarn over, pull up a loop to about 0.5 in / 1.3 cm) 4 times, yarn over and pull through all 9 loops, ch 1 to close. The closing ch 1 is not counted as a stitch or a space.
Fan: 9 dc worked in the same ch-5 arch.
Gauge and Checkpoints
Lace gauge: 1 pattern repeat (12 foundation chains) = 3 in (7.6 cm) wide. One 6-row repeat (Rows 2–7) = 3 in (7.6 cm) tall.
Border gauge: about 4 sc per 1 in (2.5 cm), or 16 sc = 4 in (10.2 cm). Top band: 16 rows of hdc = 5 in (12.7 cm).
Test swatch first. Ch 38 and work Row 1, then Rows 2–7 twice (3 repeats wide). Block it lightly. It should measure 9 in x 6.5 in (22.9 cm x 16.5 cm). Measure your swatch after blocking, because cotton lace opens up when it’s damp.
Checkpoints for the full panel:
- After Row 1, laid flat without stretching: 39 in (99.1 cm) wide
- After Row 61 (10 repeats): 30.5 in (77.5 cm) tall
- After Row 157 (body done): 39 in x 78.5 in (99.1 cm x 199.4 cm)
- After border Rounds 1–2: 40 in x 79.5 in (101.6 cm x 201.9 cm)
- After the bottom scallop: 40 in x 81.5 in (101.6 cm x 207.0 cm)
- After the top band is folded: 40 in x 84 in (101.6 cm x 213.4 cm)
If your swatch is too big, go down 0.25 mm. If it is too small, go up 0.25 mm. Don’t add or remove repeats across the width unless you also redo the border counts. If your swatch is only off in height, you can add or remove whole 6-row repeats to change the length. Each one is worth 3 in (7.6 cm).
Lace Body (Make 2)
Make each panel 13 pattern repeats wide. The foundation chain is 12 x 13 + 2 = 158 chains.
Foundation: With C, ch 158.
Row 1 (RS, C): Sc in 2nd ch from hook, ch 5, sk 3 ch, sc in next ch; repeat from * across. Turn. (40 sc, 39 ch-5 arches; 157 stitch positions)*
Row 2 (WS, C): Ch 5 (counts as dc + ch 2), sc in first arch, ch 5, sc in next arch; repeat from * across, ch 2, dc in last sc. Turn. (39 sc, 38 full arches, 2 ch-2 half arches at the edges)*
Row 3 (RS, C): Ch 1, sc in first dc, ch 5, sc in next full ch-5 arch; repeat from * across to the last arch, ch 5, sc in 3rd ch of turning ch-5. Turn. (40 sc, 39 arches)*
Row 4 (WS, C) – fan row: Ch 5 (counts as dc + ch 2), sc in first arch, ch 2, 9 dc in next arch, ch 2, sc in next arch, ch 2, puff in next sc, ch 2, sc in next arch, ch 2, 9 dc in next arch, ch 2, sc in next arch; repeat from * 11 more times, ch 2, dc in last sc. Turn. Drop C at this edge without cutting it. (13 fans of 9 dc = 117 dc, 26 sc, 12 cream puffs, 2 edge dc)*
Row 5 (RS, Y) – blossom row: On the first repeat, join Y in the first dc. On later repeats, pick up the Y you carried. Ch 1, sc in the same dc, ch 3, puff in 1st dc of next fan, (ch 1, sk 1 dc, puff in next dc) 4 times, ch 3, sc in next cream puff; repeat from * 11 more times, ch 3, puff in 1st dc of last fan, (ch 1, sk 1 dc, puff in next dc) 4 times, ch 3, sc in 3rd ch of turning ch-5. Turn. (65 yellow puffs, 5 per fan; 14 sc)*
Row 6 (WS, Y): Ch 1, sc in first sc, ch 4, sc in next ch-1 sp, (ch 3, sc in next ch-1 sp) 3 times, ch 4, sc in next sc; repeat from * across. Turn. Drop Y at this edge. (66 sc; 26 ch-4 sps and 39 ch-3 sps, for 65 sps total)*
Row 7 (RS, C): Pick up C. Ch 1, sc in first sc, ch 5, sc in 1st ch-3 sp of the repeat, ch 5, sc in 3rd ch-3 sp, ch 5, sc in next sc; repeat from * across. Turn. (40 sc, 39 arches; the same count as Row 1)*
Rows 2–7 make up the pattern repeat. Because Row 7 has the same structure as Row 1, you can work Row 2 directly into it.
Rows 8–157: Repeat Rows 2–7 another 25 times, for 26 repeats in all. End after a Row 7. Fasten off Y. Don’t fasten off C.
That gives 1 + (26 x 6) = 157 rows. Each repeat is 3 in (7.6 cm) tall, so the body measures 0.5 in + 78 in = 78.5 in (199.4 cm).
Carrying yarn: Each color stripe has an even number of rows, so both colors always end up at the right-hand edge. Twist the unused yarn around the working yarn once at the start of each stripe so the carry stays flat.
Make the Second Panel
Repeat the Lace Body for the second panel, using the same yarn dye lots if you can.
Per panel: about 575 g (1,783 m) of C and 150 g (465 m) of Y.
Layout on the rod (front view):
[ Panel A ][ Panel B ]
 40 in       40 in
The panels are not joined. They hang separately, so there’s no joining step. Together they cover 80 in (203.2 cm) when flat. On a narrower window they gather into soft folds.
Border
Border gauge: about 4 sc per 1 in (2.5 cm).
Corner rule: Each corner is a group of 3 sc. In these counts, the corner groups belong to the top and bottom edges. Side counts are the stitches between the corner groups.
Round 1 (RS, C): Continue with C and work along the top edge: 3 sc in the first sc (corner), 3 sc in each arch and 1 sc in each sc across, and 3 sc in the last sc (corner). Work down the side with 2 sc in each row-end. Along the bottom, work into the free loops of the foundation chain: 3 sc in the first ch, 1 sc in each ch across, and 3 sc in the last ch. Work 2 sc in each row-end up the second side. Join with a sl st to the first sc.
- Top: (39 x 3) + 40 = 157 positions worked once, plus 4 extra at the corners = 161 sc
- Bottom: 157 chains worked once, plus 4 extra at the corners = 161 sc
- Each side: 157 rows x 2 = 314 sc
- Total: 161 + 161 + 314 + 314 = 950 sc
Round 2 (C): Ch 1, sc in each sc around, putting 3 sc in the center sc of each corner group. Join.
- Top and bottom: 161 worked once + 4 extra = 165 sc each
- Each side: 314 sc
- Total: 958 sc. Fasten off.
Why the math works: The 157 foundation chains span 39 in (99.1 cm), which is about 4 per inch. On the sides, 6 rows measure 3 in (7.6 cm) and get 12 sc, which is exactly 4 per inch. Because the border has the same density as the lace, the edges lie flat without ruffling or cupping. The two rounds add 0.5 in (1.3 cm) per side, so 39 + 0.5 + 0.5 = 40 in (101.6 cm).
Bottom Scallop (worked in rows across the 165 bottom sts): With RS facing, join C in the center sc of the bottom-right corner group.
- Row A: Ch 1, sc in same st, ch 5, sk 3 sc, sc in next sc; repeat from * across. Turn. (164 ÷ 4 = 41 arches, 42 sc)*
- Row B: Ch 1, sc in first sc, 7 dc in next arch, sc in next sc; repeat from * across. Turn. (41 shells, 42 sc)*
- Row C: Ch 1, sl st in first sc, sc in next 3 dc, (sc, ch 3, sc) in next dc, sc in next 3 dc, sl st in next sc; repeat from * across. Fasten off. (41 picot scallops)*
The scallop adds 2 in (5.1 cm): 0.5 in for Row A, 1 in for Row B, and 0.5 in for Row C.
Top Band and Rod Pocket (worked in rows across the 165 top sts): With RS facing, join C in the center sc of the top-right corner group.
- Row 1: Ch 2 (does not count as a stitch), hdc in each sc across. Turn. (165 hdc)
- Rows 2–16: Ch 2, hdc in each hdc across. Turn. (165 hdc)
The band is 5 in (12.7 cm) tall. Fold it in half to the WS and whipstitch the last row to the base of Row 1 of the band. The pocket is 2.5 in (6.4 cm) deep and fits rods up to about 1.25 in (3.2 cm) across.
Final Blocking
- Weave in all ends along the solid stitches, not through the open mesh.
- Soak the panel in cool water for 15 minutes, then press the water out. Don’t wring it.
- Roll it in towels to remove more water.
- Lay it flat on a clean sheet or blocking mats.
- Pin the side edges straight to 40 in (101.6 cm) wide, measuring every 12 in (30.5 cm).
- Pin out each of the 41 bottom picots so the scallops open evenly.
- Gently open each fan and spread the yellow puffs.
- Let it dry completely, then hang it right away so gravity helps finish the drape.
Final Quality-Control Checklist
- 13 fans across every fan row, each with 5 yellow puffs
- 26 fan rows from bottom to top
- Side edges straight, with no cupping or ruffling
- Panel measures 40 in x 84 in (101.6 cm x 213.4 cm) after blocking
- Both panels the same length, within 0.5 in (1.3 cm) of each other
- Carried yarns hidden inside the side border
- Rod slides easily through the pocket
Troubleshooting
- Fans lean to one side: You probably put a fan in an end arch. Count 3 arches per repeat and work the fan in the middle one.
- Fewer than 65 yellow puffs: You skipped a dc in the wrong place. Puffs go in dc 1, 3, 5, 7 and 9 of each fan.
- Edges pull in: Your border is too tight. Make sure you’re working 2 sc per row-end, or go up a hook size for the border only.
- Edges ripple: Your border is too loose. Go down a hook size for the border only.
- Panel is getting too long: Leave out a 6-row repeat. Each one removes 3 in (7.6 cm).
- Puffs look flat: Pull every loop up to the same 0.5 in (1.3 cm) height.
Care
Hand wash in cool water with a mild detergent and dry flat, then rehang while slightly damp. Keep the panels out of the dryer, which can shrink cotton and distort the lace.
Final Notes
The measurements build on each other. Each 12-chain repeat is 3 in (7.6 cm) wide, so 13 repeats give a 39 in (99.1 cm) body. Each 6-row repeat is 3 in (7.6 cm) tall, so Row 1 plus 26 repeats gives 78.5 in (199.4 cm). The border at 4 sc per inch adds 0.5 in (1.3 cm) per side to reach 40 in (101.6 cm). The bottom scallop adds 2.5 in (6.4 cm) and the top pocket adds 3 in (7.6 cm), both including the border rounds, for 84 in (213.4 cm) total. If your swatch matches the gauge, the full panels will measure as planned.
Happy crocheting!