

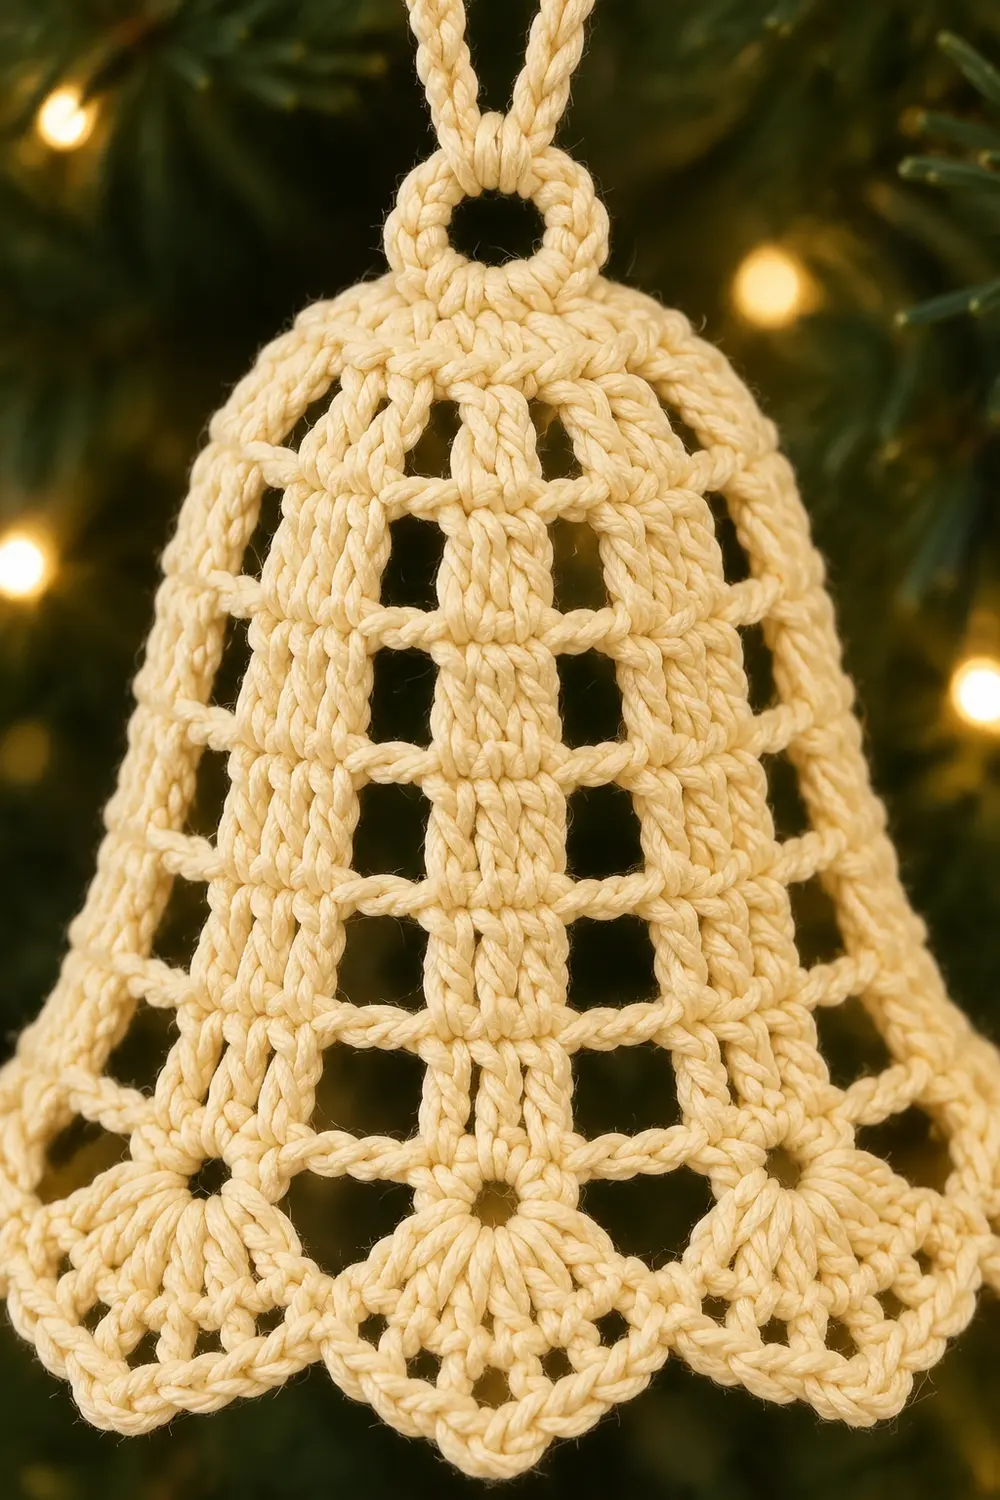
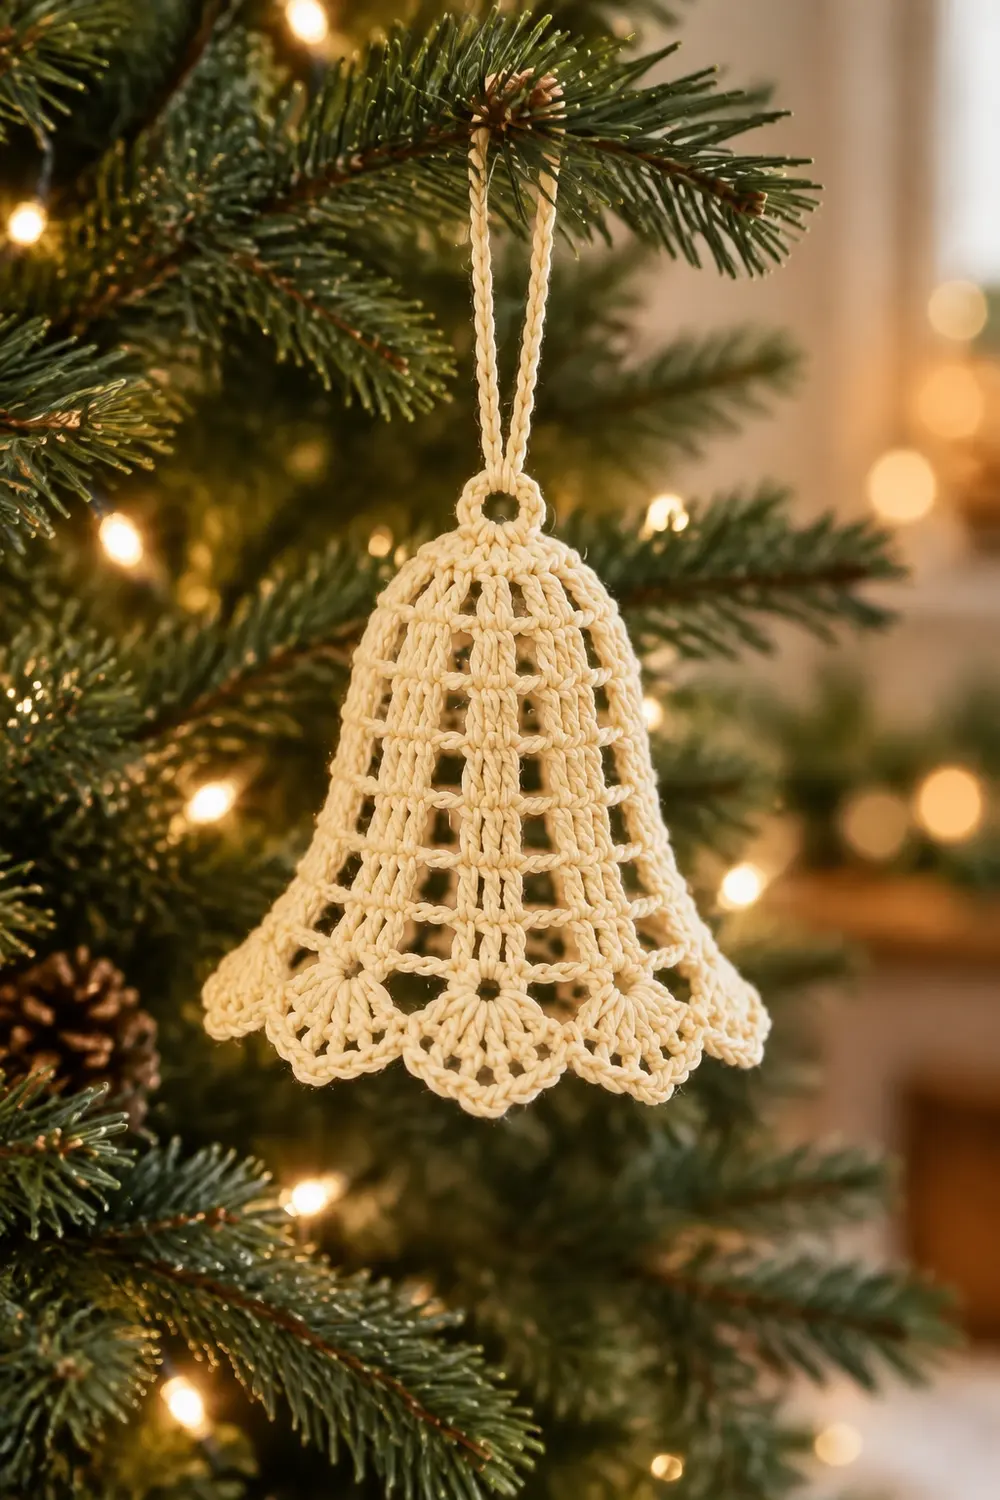
This little bell is a classic Christmas tree ornament. It is worked in soft cream cotton with an airy, see-through body. Vertical columns of double crochet and horizontal chain bars form a neat grid of square openings. The openings grow larger as the bell flares toward its hem, and tree lights glow through them beautifully.
The bottom edge has a pointed scalloped trim made of shells, and each shell ends in a small picot point. A twisted cream cord passes through a tiny hole at the top of the bell to form the hanging loop.
The pattern uses US crochet terms. The finished bell measures about 3.5 in (8.9 cm) tall from crown to scallop point, not counting the loop. Laid flat, it measures about 4.5 in (11.4 cm) across the scallop points.
Construction is simple. You work the bell as one seamless piece in joined rounds from the top down. You start with a small sc crown, then work seven mesh rounds that widen by lengthening the chain bars. Finish with a shell round and a picot edging round. Then stiffen the bell over a form and add a twisted cord loop.
Finished Size and Construction
- Finished size: 3.5 in (8.9 cm) tall; 4.5 in (11.4 cm) across the scallop points when laid flat
- Skill level: Advanced beginner
- Terminology: US crochet terms
- Yarn weight: Fine (weight 2 / sport) mercerized cotton
- Hook: 2.75 mm (US C/2)
- Number of pieces: 1 bell, plus 1 twisted cord
- Layout: Single seamless piece worked top-down in joined rounds
- Piece size: 3.5 in (8.9 cm) tall
- Size before border (after Rnd 11): 2.75 in (7.0 cm) tall; 8 in (20.3 cm) around the hem; 4 in (10.2 cm) wide laid flat
- Border depth (Rnds 12–13): 0.75 in (1.9 cm)
Materials
Choose a smooth mercerized cotton in sport weight. Cotton holds crisp stitch definition, takes stiffener well, and keeps the square openings sharp. Avoid fuzzy or very stretchy yarns, because they blur the grid and sag on the tree.
- Cream / off-white: 10 g, about 32 m (35 yd)
This amount covers the bell, the twisted cord, and a margin of roughly 25% for a gauge swatch or a restart.
Tools:
- 2.75 mm (US C/2) crochet hook
- Tapestry needle
- Scissors
- Stitch marker
- Fabric stiffener, or a strong starch solution
- Blocking form: a small cone, a plastic cup, or a rolled cardstock cone wrapped in plastic wrap
- Rustproof pins
- Ruler or tape measure
Abbreviations (US Terms)
- ch – chain
- sl st – slip stitch
- sc – single crochet
- sc2tog – single crochet 2 together
- dc – double crochet
- sk – skip
- sp(s) – space(s)
- st(s) – stitch(es)
- rnd – round
- rep – repeat
Special stitches:
- Shell: (3 dc, ch 2, 3 dc) worked in the same space.
- Picot point: (sc, ch 3, sc) worked in the same space.
Note: In the mesh rounds, the beginning ch 3 counts as the first dc. For the stitch totals, each chain is counted as one stitch-width, because at this gauge a chain is about as wide as a dc.
Gauge and Checkpoints
Gauge:
- 12 dc = 2 in (5.1 cm)
- 6 dc rounds = 2 in (5.1 cm)
- 12 sc = 2 in (5.1 cm)
The bell is small, so the bell itself is your swatch. Work Rnds 1–8, then measure before you continue.
Checkpoints:
- After Rnd 3: The flat sc disc is 1.25 in (3.2 cm) across.
- After Rnd 4: The edge turns downward and the crown forms a shallow dome.
- After Rnd 8: Height from the crown is about 1.75 in (4.4 cm).
- After Rnd 11: Height is 2.75 in (7.0 cm). The hem measures 8 in (20.3 cm) around, or 4 in (10.2 cm) laid flat.
- After Rnd 13: Height is 3.5 in (8.9 cm). Width is 4.5 in (11.4 cm) across the points, laid flat.
If your bell is too big: Go down to a 2.5 mm hook, or tighten your chains.
If your bell is too small: Go up to a 3 mm hook. Also check that your chain bars are not pulled tight, since short chains shrink the hem.
A difference of 0.25 in (0.6 cm) in height is fine. Blocking will even it out.
Bell Crown
Rnd 1: Ch 5, then sl st to the first ch to form a ring. Ch 1 and work 8 sc in the ring. Sl st to the first sc. (8 sc)
The ring leaves a small hole, about 0.25 in (0.6 cm) across. The hanging cord will pass through this hole later.
Rnd 2: Ch 1. Work 2 sc in each sc around. Sl st to the first sc. (16 sc)
Rnd 3: Ch 1. Sc in the next sc, then 2 sc in the next sc. Rep from * around. Sl st to the first sc. (24 sc)
Rnd 4: Ch 1. Sc in each sc around. Sl st to the first sc. (24 sc)
This even round has no increases, so the edge curls downward and the flat disc becomes a rounded crown.
Mesh Body
Each mesh round has 8 columns of 2 dc each. The columns stack directly on top of the previous round’s columns. The chain bars between them form the horizontal lines of the grid.
The bell widens because the chain bars get longer every two rounds. The number of dc stays at 16 the whole time.
Rnd 5 (set-up round): Ch 3 (counts as dc). Dc in the next sc, ch 1, sk the next sc. Dc in each of the next 2 sc, ch 1, sk the next sc. Rep from * 6 more times. Sl st to the top of the beg ch-3.
(16 dc + 8 ch-1 sps = 24 sts)
This round uses all 24 crown stitches: 8 repeats × 3 sts = 24.
Rnd 6: Ch 3. Dc in the next dc, ch 1, sk the ch-1 sp. Dc in each of the next 2 dc, ch 1, sk the ch-sp. Rep from * 6 more times. Sl st to the top of the beg ch-3.
(16 dc + 8 ch-1 sps = 24 sts)
Rnd 7: Work as Rnd 6, but ch 2 instead of ch 1 between columns.
(16 dc + 8 ch-2 sps = 32 sts)
Rnd 8: Rep Rnd 7.
(32 sts)
Stop here and measure. The height from the crown should be about 1.75 in (4.4 cm).
Rnd 9: Work as Rnd 6, but ch 3 between columns.
(16 dc + 8 ch-3 sps = 40 sts)
Rnd 10: Rep Rnd 9.
(40 sts)
Rnd 11: Work as Rnd 6, but ch 4 between columns.
(16 dc + 8 ch-4 sps = 48 sts)
Each growth round has its own total: 24, 32, 40, then 48. At 6 sts per inch, 48 sts gives a hem of 48 ÷ 6 = 8 in (20.3 cm) around, or 4 in (10.2 cm) laid flat.
The grid openings grow from narrow slots near the crown to wide squares at the hem. This gradual widening creates the bell flare.
Border: Scalloped Shell Trim
Border gauge: The border uses the same 2.75 mm hook and the same tension as the body. There are 8 scallops in total, one for each ch-4 space. When the bell hangs, 4 scallops show on the front.
Rnd 12 (shell round): Ch 1. Sc in the same st as the join, then sc in the next dc. Work a shell in the next ch-4 sp. Sc in each of the next 2 dc, then work a shell in the next ch-4 sp. Rep from * 6 more times. Sl st to the first sc.
(16 sc + 48 dc + 8 ch-2 sps)
Each repeat contains 2 sc + 6 dc + 1 ch-2 sp.
Rnd 13 (picot edging round): This round converts every stitch into sc and adds the picot points. Ch 1. Sc2tog over the first 2 sc. Sc in each of the next 3 dc. Work a picot point in the ch-2 sp. Sc in each of the next 3 dc. Sc2tog over the next 2 sc, sc in each of the next 3 dc, picot point in the ch-2 sp, sc in each of the next 3 dc. Rep from * 6 more times. Sl st to the first sc2tog. Fasten off.
Counts for Rnd 13:
- Per scallop: 1 sc2tog + 6 sc worked one into each dc + 2 sc from the picot point = 9 sts, plus 1 ch-3 picot.
- Total: 9 × 8 = 72 sts + 8 ch-3 picots
Why the math works:
- The 8 scallops match the 8 columns and the 8 ch-4 spaces exactly, with no leftover stitches.
- The 2 sc in Rnd 12 sit on top of each dc column, so the column lines continue straight down into the valleys between scallops.
- In Rnd 13, the sc2tog pulls each valley inward. The ch-2 point plus the ch-3 picot pushes each tip outward. Together they create the pointed scallop shape.
- The edge is longer than the 8 in (20.3 cm) hem because it follows the curves of the scallops. That extra length is what lets each scallop fan open instead of lying straight.
Hanging Loop
- Cut a strand 16 in (40.6 cm) long.
- Twist it tightly until it starts to kink.
- Fold it in half and let it ply back on itself. This makes a two-strand twisted cord about 7 in (17.8 cm) long.
- Knot the open end of the cord.
- Fold the cord in half to form the loop.
- Push both cord ends down through the apex hole from the outside. Use your hook to pull them through.
- Inside the crown, hold both ends together and tie one overhand knot. Make sure the knot is larger than the hole so it cannot pull back through.
- Trim the tails.
The finished loop stands about 3 in (7.6 cm) above the bell.
Final Blocking
- Weave in all ends along the dc columns so they stay hidden.
- Soak the bell in fabric stiffener, or in a strong starch solution. Gently squeeze out the excess.
- Slide the bell over the form. The base of the form should be about 2.5 in (6.4 cm) in diameter.
- Straighten the columns so each one runs vertically from the crown to a valley between scallops.
- Square up the chain bars so all 8 openings in each round look the same.
- Pin each picot point outward, spacing the scallops evenly around the hem.
- Let it dry completely for at least 12 hours. Then remove the pins and slip the bell off the form.
- Measure the bell: it should be 3.5 in (8.9 cm) tall and about 3 in (7.6 cm) in diameter at the points.
Final Quality-Control Checklist
- The apex hole is open and centered, and the loop knot sits inside the crown.
- There are exactly 8 dc columns, and all of them are vertical.
- The chain bars increase in steps: ch 1, 1, 2, 2, 3, 3, 4.
- There are 8 even scallops, each with a crisp picot point.
- The bell is 3.5 in (8.9 cm) tall.
- The flat width across the points is 4.5 in (11.4 cm).
- No ends are visible through the openings.
- The bell hangs straight without tilting.
Troubleshooting
Columns spiral around the bell.
You are probably starting each round in the wrong place. Begin each round in the same st as the join, and sk only the ch-sp.
The crown is flat instead of domed.
Check that Rnd 4 has no increases. If the crown is still too flat, work Rnd 4 again.
The hem flares too little.
Your chains may be too tight. Loosen them, or make the chains on Rnds 9–11 with a 3 mm hook.
The scallops look wavy or floppy.
Re-stiffen the bell and pin every picot point while it dries.
The stitch count is off.
Count the columns, not the stitches. You should always have 8 columns. Every ch-sp must sit between two columns.
The cord pulls through the hole.
Retie it with a double overhand knot inside the crown.
Care
Spot clean only with cool water. To refresh the shape, re-stiffen the bell and dry it over the form again. Store it flat in a box with tissue.
Final Notes
Here is the measurement chain from start to finish:
- Crown (Rnds 1–4): 24 sc, about 1.25 in (3.2 cm) across.
- Mesh body (Rnds 5–11): 8 columns of 2 dc each. The round totals grow from 24 to 32, 40, and 48 sts, reaching 2.75 in (7.0 cm) tall and 8 in (20.3 cm) around the hem.
- Border (Rnds 12–13): Adds 0.75 in (1.9 cm) of depth. Each of the 8 scallops ends with 9 sts plus a picot, for 72 sts in total.
- Finished bell: 3.5 in (8.9 cm) tall and 4.5 in (11.4 cm) wide laid flat, hung from a twisted cord that stands 3 in (7.6 cm) above the bell.
Optional: If you want a matching set, simply repeat the pattern for several bells and hang them at different heights on the tree.
Happy crocheting!