

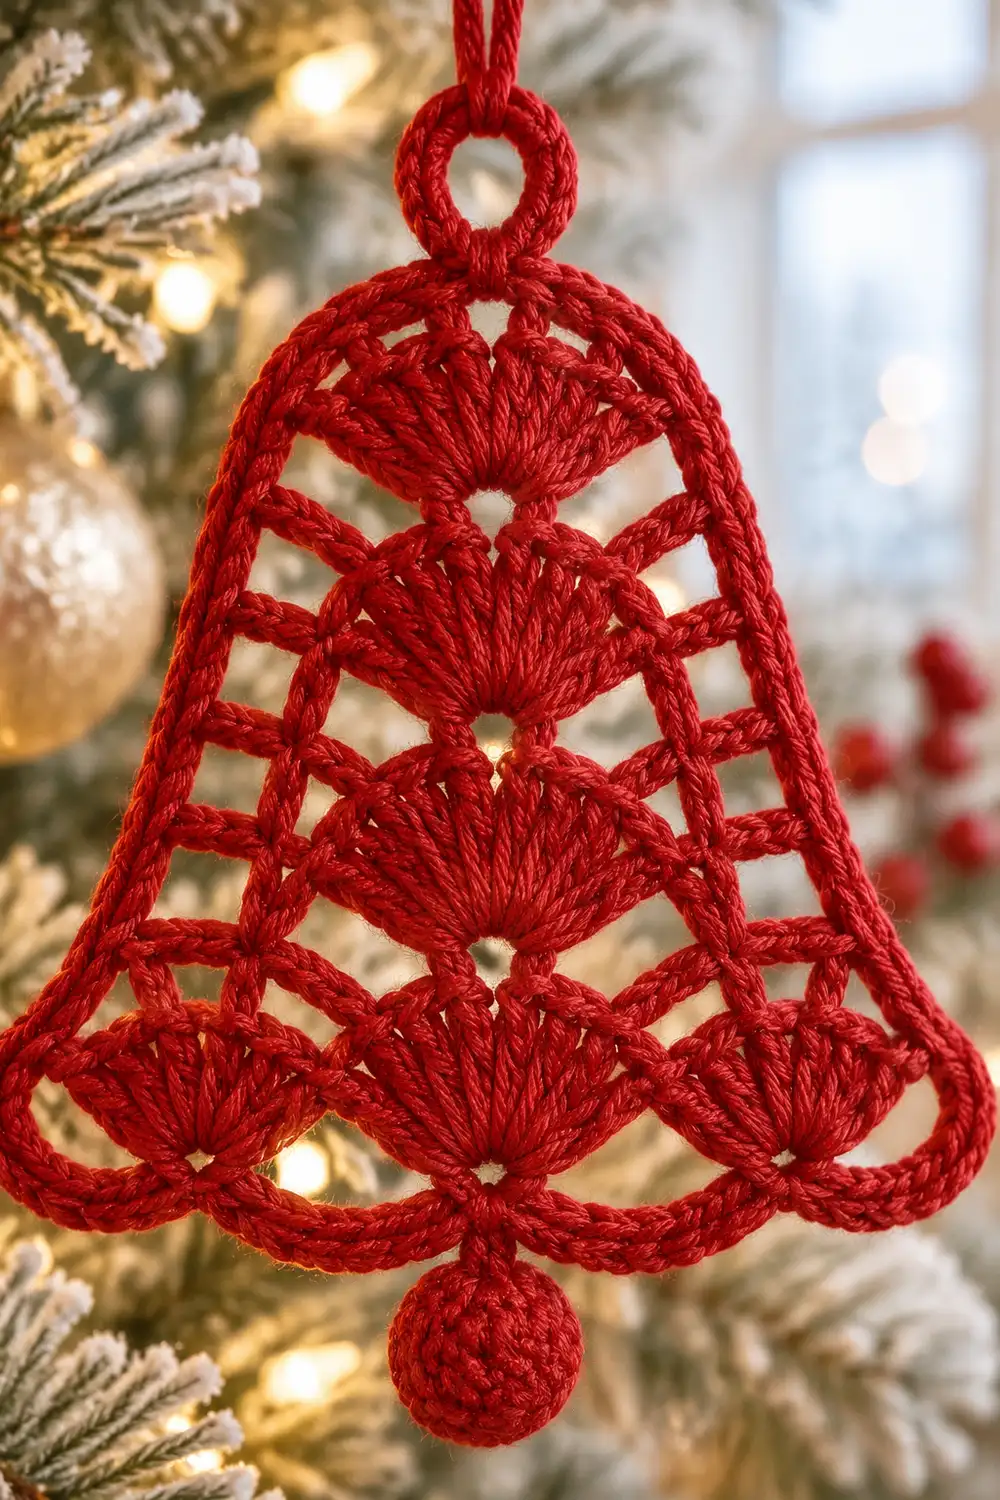
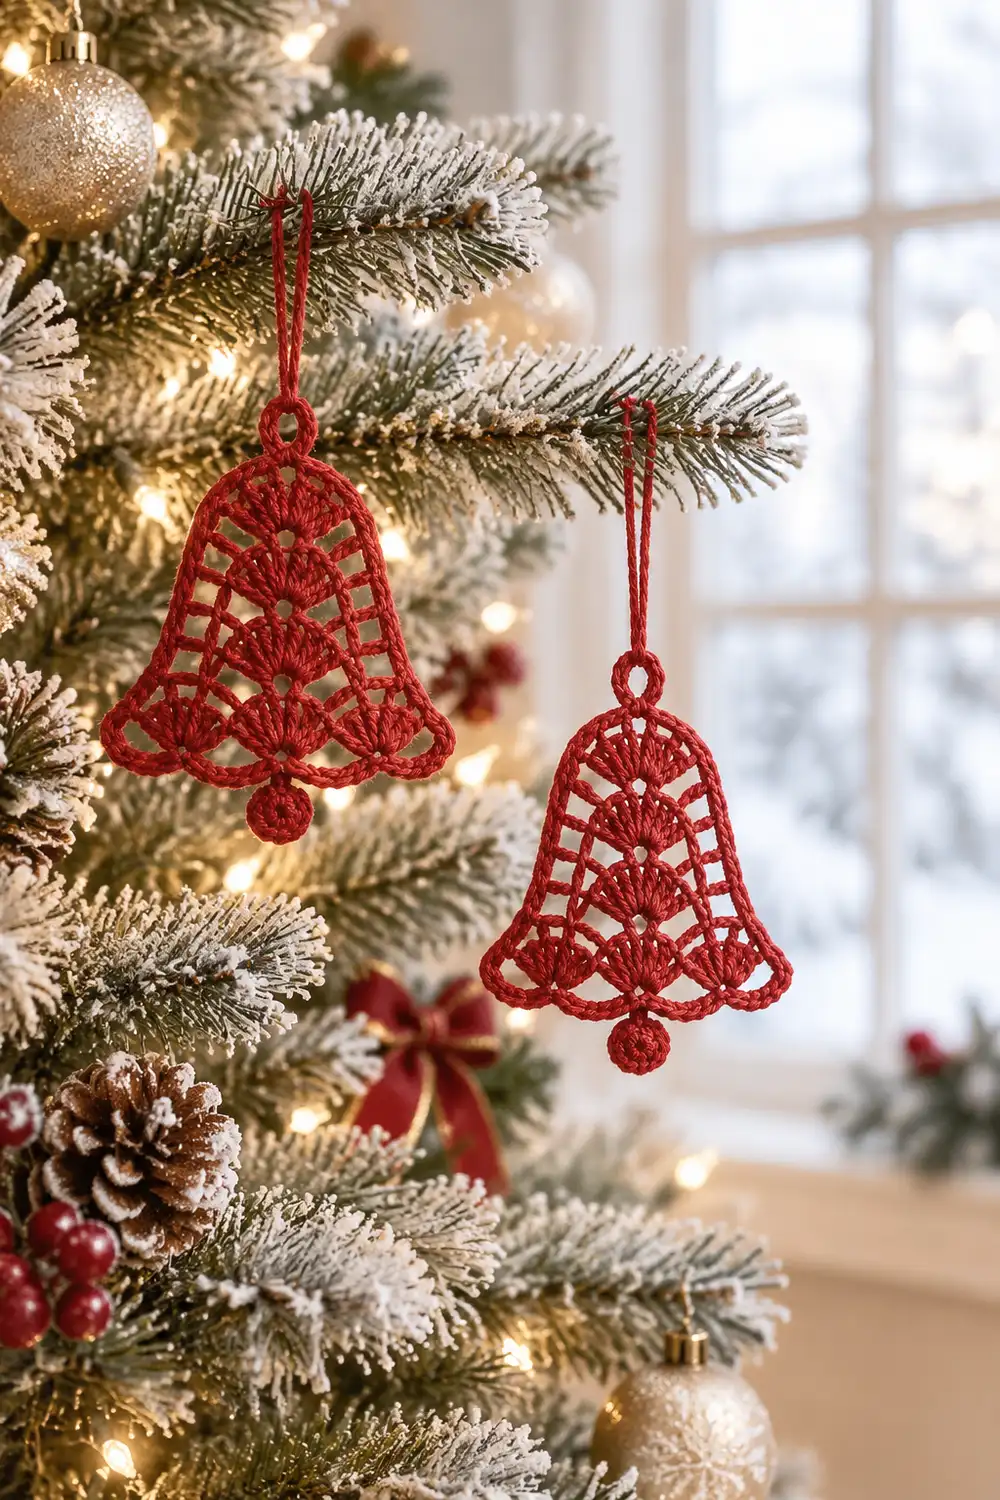
This little bell is the kind of ornament that looks delicate on the tree but works up quickly. It is worked in deep red mercerized cotton. Tiers of scallop fans stack from the flared lip up to a rounded dome, with open mesh rows between them so the tree lights glow through.
Each ornament has a small crocheted ball, or knob, at the center bottom like a clapper. A firm crocheted ring at the top holds a red yarn hanger. The style is classic and lacy, a nod to vintage thread-crochet ornaments, but sized up for sport-weight cotton so it is easier to handle.
This pattern uses US crochet terms. Each bell measures 3.5 in (8.9 cm) wide and 4 in (10.2 cm) tall including the knob, not counting the hanging ring. The pattern makes the pair shown, two identical bells that hang separately.
The bell body is worked flat in rows from the bottom up. It starts with a straight foundation, then alternates fan tiers and mesh rows. The piece narrows at the waist and finishes with a single large top fan. A one-piece border smooths the outline and forms the hanging ring. A tiny ball is then crocheted and sewn to the bottom center.
Finished Size and Construction
- Finished size (each bell): 3.5 in (8.9 cm) wide x 4 in (10.2 cm) tall including knob
- Skill level: Easy-Intermediate
- Terminology: US crochet terms
- Yarn weight: Sport (2), mercerized cotton
- Hook: 2.75 mm (C-2)
- Number of pieces: 2 per bell (body + knob); 2 bells total
- Layout: Each bell hangs on its own; nothing is joined between bells
- Bell body after border: 3.5 in (8.9 cm) wide x 3.5 in (8.9 cm) tall
- Size before border: 3 in (7.6 cm) wide x 3 in (7.6 cm) tall
- Border depth: about 0.25 in (0.6 cm) on each edge
- Knob: about 0.5 in (1.3 cm) across
Materials
Yarn: Choose a smooth, mercerized sport-weight cotton in a true deep red. Mercerized cotton gives crisp fan definition and holds starch well. Avoid fuzzy acrylics, because they blur the lace.
- Deep Red: 15 g, about 46 m (50 yd), for both bells. This includes the knobs and two 7 in (17.8 cm) hanger strands.
Quantities include a margin of roughly 20% for gauge swatching and weaving in. One bell uses about 6 g (about 18 m).
Tools:
- 2.75 mm (C-2) crochet hook
- Tapestry needle
- Small scissors
- 2 stitch markers
- A pinch of fiberfill or red yarn scraps (for the knobs)
- Rust-proof pins and a foam blocking board
- Spray starch or fabric stiffener (optional but recommended)
Abbreviations (US Terms)
- ch – chain
- sl st – slip stitch
- sc – single crochet
- dc – double crochet
- sc2tog – single crochet 2 together
- MR – magic ring
- st(s) – stitch(es)
- sp(s) – space(s)
- [ ] – repeat the instructions inside brackets as directed
Special stitches:
- Shell: 5 dc in the same stitch.
- Top Fan: 7 dc in the same stitch.
Gauge and Checkpoints
Gauge: 19 sc = 3 in (7.6 cm) across Row 1. Rows 1–9 = 3 in (7.6 cm) tall at the center.
Make one bell body first and check it before making the second. Measure lightly, without stretching:
- After Row 1: 3 in (7.6 cm) wide.
- After Row 4: waist about 2 in (5.1 cm) wide; total height about 1.25 in (3.2 cm).
- After Row 7: about 2.25 in (5.7 cm) tall.
- After Row 9: 3 in (7.6 cm) wide at the lip and 3 in (7.6 cm) tall at the center.
- After border: 3.5 in (8.9 cm) x 3.5 in (8.9 cm).
- With knob: 4 in (10.2 cm) tall.
Too big? Go down to a 2.5 mm hook. Too small? Go up to a 3 mm hook. Change the hook, not the stitch counts. The stitch counts control the shape.
Bell Body
Each Shell and Top Fan counts as its listed number of stitches. The ch-5 at the start of mesh rows counts as 1 dc + ch-2 sp.
Foundation: Ch 20.
Row 1 (RS): Sc in 2nd ch from hook and in each ch across. Turn. (19 sc)
This is the bottom edge of the bell.
Row 2 (first fan tier, 3 fans): Ch 1, sc in first sc, [skip 2 sc, Shell in next sc, skip 2 sc, sc in next sc] 3 times. Turn. (3 Shells + 4 sc = 19 sts)
Check the math: 1 + (3 x 6) = 19 stitches used, so the row ends exactly in the last sc.
Row 3 (mesh): Ch 5, sc in center (3rd) dc of first Shell, ch 2, dc in next sc. Ch 2, sc in center dc of next Shell, ch 2, dc in next sc. Ch 2, sc in center dc of last Shell, ch 2, dc in last sc. Turn. (4 dc, 3 sc, 6 ch-2 sps)
The width stays the same, 19 sts including chains.
Row 4 (second fan tier, 2 fans; waist): Sl st in first dc, 2 sl st in next ch-2 sp, sl st in next sc. Ch 1, sc in same sc, [Shell in next dc, sc in next sc] 2 times, skipping the ch-2 sps. Leave the last ch-2 sp and dc unworked. Turn. (2 Shells + 3 sc = 13 sts)
Starting and stopping one mesh space in on each side narrows the bell from 19 sts to 13 sts. The two new fans sit centered between the three fans below.
Row 5 (mesh): Ch 5, sc in center dc of first Shell, ch 2, dc in next sc. Ch 2, sc in center dc of next Shell, ch 2, dc in last sc. Turn. (3 dc, 2 sc, 4 ch-2 sps = 13 sts)
Row 6 (third fan tier, 2 fans): Ch 1, sc in first dc, [Shell in next sc, sc in next dc] 2 times, skipping ch-2 sps. The last dc is the 3rd ch of the turning ch-5. Turn. (2 Shells + 3 sc = 13 sts)
These fans stack directly above the Row 4 fans, forming the straight walls of the bell.
Row 7 (mesh): Work as Row 5. (3 dc, 2 sc, 4 ch-2 sps = 13 sts)
Row 8 (top tier, 1 fan): Sl st in first dc, 2 sl st in next ch-2 sp, sl st in next sc. Ch 1, sc in same sc, Top Fan in next dc, sc in next sc. Leave the rest unworked. Turn. (7 dc + 2 sc = 9 sts)
The single Top Fan is centered and begins the dome.
Row 9 (crown): Ch 1, sc in each st across. (9 sc)
Do not turn and do not fasten off. Continue straight into the border.
The Row 9 sc follow the curve of the Top Fan, which rounds off the dome. Check your size against the Row 9 checkpoint before moving on.
Border
Border gauge: The border is worked at the same gauge as the body, 19 sc = 3 in (7.6 cm). It is not tighter or looser.
In this pattern, the side counts do not include corner stitches. The bottom corner groups belong to the bottom count only, so nothing is counted twice.
Round 1 (sc outline): Ch 1. Work down the first side, from top to bottom:
- 1 sc in end of Row 9
- 2 sc in end of Row 8
- 2 sc in the Row 7 ch-2 sp ledge
- 2 sc in end of each of Rows 7, 6, 5, and 4 (8 sc)
- 2 sc in the Row 3 ch-2 sp ledge
- 2 sc in end of Row 3
- 2 sc in end of Row 2
- 1 sc in end of Row 1
First side: 20 sc.
Bottom: Work into the free loops of the foundation chain. Work 3 sc in the first loop, 1 sc in each of the next 17 loops, and 3 sc in the last loop. Bottom: 19 worked 1-per-loop + 4 extra at corners = 23 sc.
Second side: Work bottom to top, mirroring the first side:
- 1 sc in end of Row 1
- 2 sc in end of each of Rows 2 and 3
- 2 sc in the Row 3 ledge
- 2 sc in end of each of Rows 4–7
- 2 sc in the Row 7 ledge
- 2 sc in end of Row 8
- 1 sc in end of Row 9
Second side: 20 sc.
Top: Sc in each of the first 4 sts of Row 9. In the 5th st, work (sc, ch 8, sc). Sc in each of the last 4 sts. Sl st to the first sc of the round. Top: 9 worked 1-per-stitch + 1 extra = 10 sc, plus a ch-8 loop.
Round 1 total: 20 + 23 + 20 + 10 = 73 sc + ch-8 loop.
Round 2 (crisp edge and ring): Sl st in each sc around. When you reach the ch-8 loop, work 12 sc into it, then continue with sl sts. Join and fasten off. (73 sl st + 12 sc in the loop)
Per side, this is 20 sl st on each side, 23 along the bottom, and 10 across the top plus the 12-sc ring.
Why the math works: The bottom has one sc per foundation chain, which matches Row 1’s 19 sc at body gauge. The 4 corner extras turn each corner without cupping.
Each side follows a stepped path, including two ledges, that is about 3.2 in (8.1 cm) long. That length holds 20 sc at body gauge. Two sc per dc-row end matches the height of a dc row, and one sc per sc-row end matches an sc row.
The top uses one sc per Row 9 stitch, so the dome stays smooth. Packing 12 sc into the ch-8 loop makes the firm, rounded ring shown in the photo.
Knob
Rnd 1: 6 sc in MR. (6)
Rnd 2: 2 sc in each st around. (12)
Rnd 3: Sc in each st around. (12)
Stuff lightly with a pinch of fiberfill or red scraps.
Rnd 4: Sc2tog 6 times. (6)
Fasten off with a 6 in (15.2 cm) tail. Thread the tail through the front loops of the last 6 sts and pull closed.
The knob should measure about 0.5 in (1.3 cm) across.
Attach: Find the center stitch of the 23-st bottom edge, which is the 12th stitch. Use the tail to sew the knob just below it, so the knob hangs centered beneath the lip. Weave in all ends on the WS.
Second Bell
Make a second bell body, border, and knob exactly as above. Match all checkpoints to the first bell so the pair hangs evenly.
Final Blocking
- Soak both bells in cool water for 5 minutes, then press out the water in a towel. Do not wring.
- Pin each bell to a foam board, RS up. Set the lip at 3.5 in (8.9 cm) wide and the height at 3.5 in (8.9 cm), not counting the knob.
- Pin each fan tip outward so the scallops open evenly. Pin each mesh space square.
- Round the dome by pinning along the Row 9 curve. Keep the waist about 2.5 in (6.4 cm) wide including the border.
- If stiffening, spray starch generously or brush on diluted fabric stiffener.
- Let dry completely, at least 12 hours, before unpinning.
- Cut two 7 in (17.8 cm) strands of red yarn. Thread one through each ring and knot the ends to make a hanging loop about 3 in (7.6 cm) long.
Final Quality-Control Checklist
- Each bell body measures 3.5 in (8.9 cm) x 3.5 in (8.9 cm).
- Each bell is 4 in (10.2 cm) tall with the knob.
- The fan tiers read 3, 2, 2, 1 from bottom to top.
- The mesh spaces are open and evenly sized.
- The border lies flat with no rippling at the lip.
- The hanging ring is centered over the Top Fan.
- The knob is firmly sewn at the bottom center.
- All ends are woven in invisibly.
- Both bells match in size and shape.
Troubleshooting
Lip ruffles or flares too much: The shells are too loose. Go down a hook size, or tighten your dc.
Waist looks off-center: Check your Row 4 and Row 8 slip stitches. You should have exactly 1 sl st in the dc, 2 in the ch-2 sp, and 1 in the sc.
Dome looks pointed: Make sure Row 8 uses 7 dc, not 5. Also pin the Row 9 curve during blocking.
Sides pull inward: You have skipped a ledge. Work 2 sc into each ch-2 sp ledge for a total of 20 sc per side.
Bottom edge cups: You may be missing the 3-sc corner groups. Recount to make sure you have 23 sc.
Knob is floppy: Stuff it a little more firmly, or add a second anchoring stitch.
Fans look flat: Block again, pinning each fan tip outward.
Care
Hand wash in cool water and lay flat to dry, reshaping while damp. Re-starch after washing if you want a crisp finish, and store flat between seasons.
Final Notes
The measurement chain is simple. Row 1 sets 19 sc = 3 in (7.6 cm). Row 9 brings the body to 3 in (7.6 cm) x 3 in (7.6 cm). The border adds 0.25 in (0.6 cm) per edge for 3.5 in (8.9 cm) x 3.5 in (8.9 cm). The knob takes the total height to 4 in (10.2 cm).
Hit each checkpoint, block the fans open, and your pair of scarlet bells will glow beautifully against the tree lights.
Optional: To make a matching set, simply repeat the same bell as many times as you like.
Happy crocheting!