

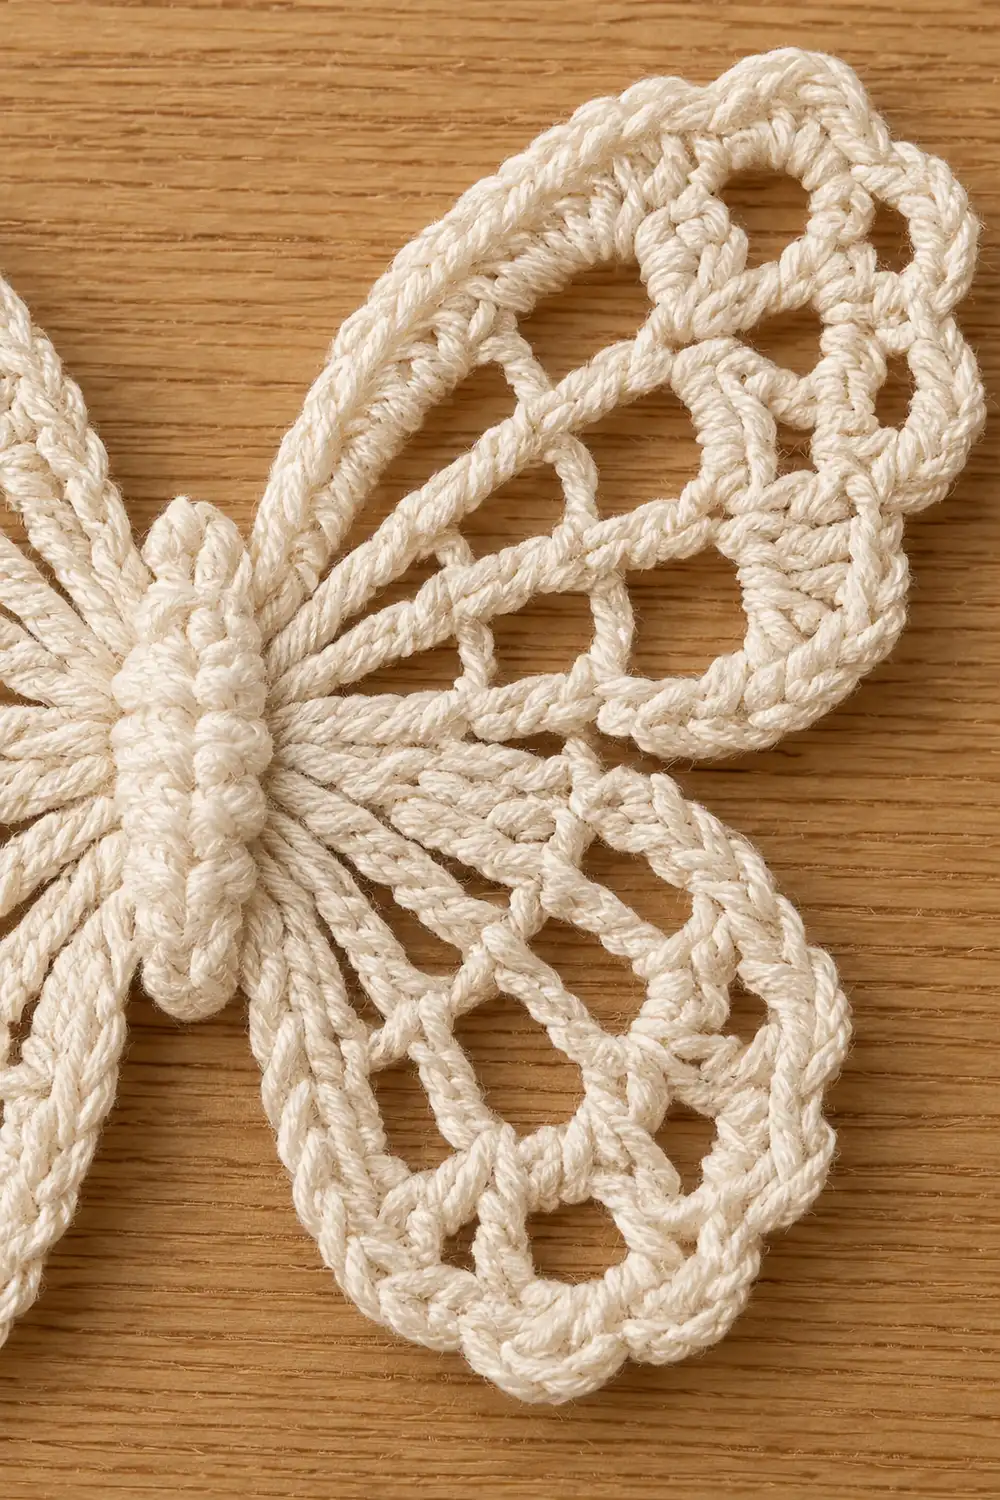
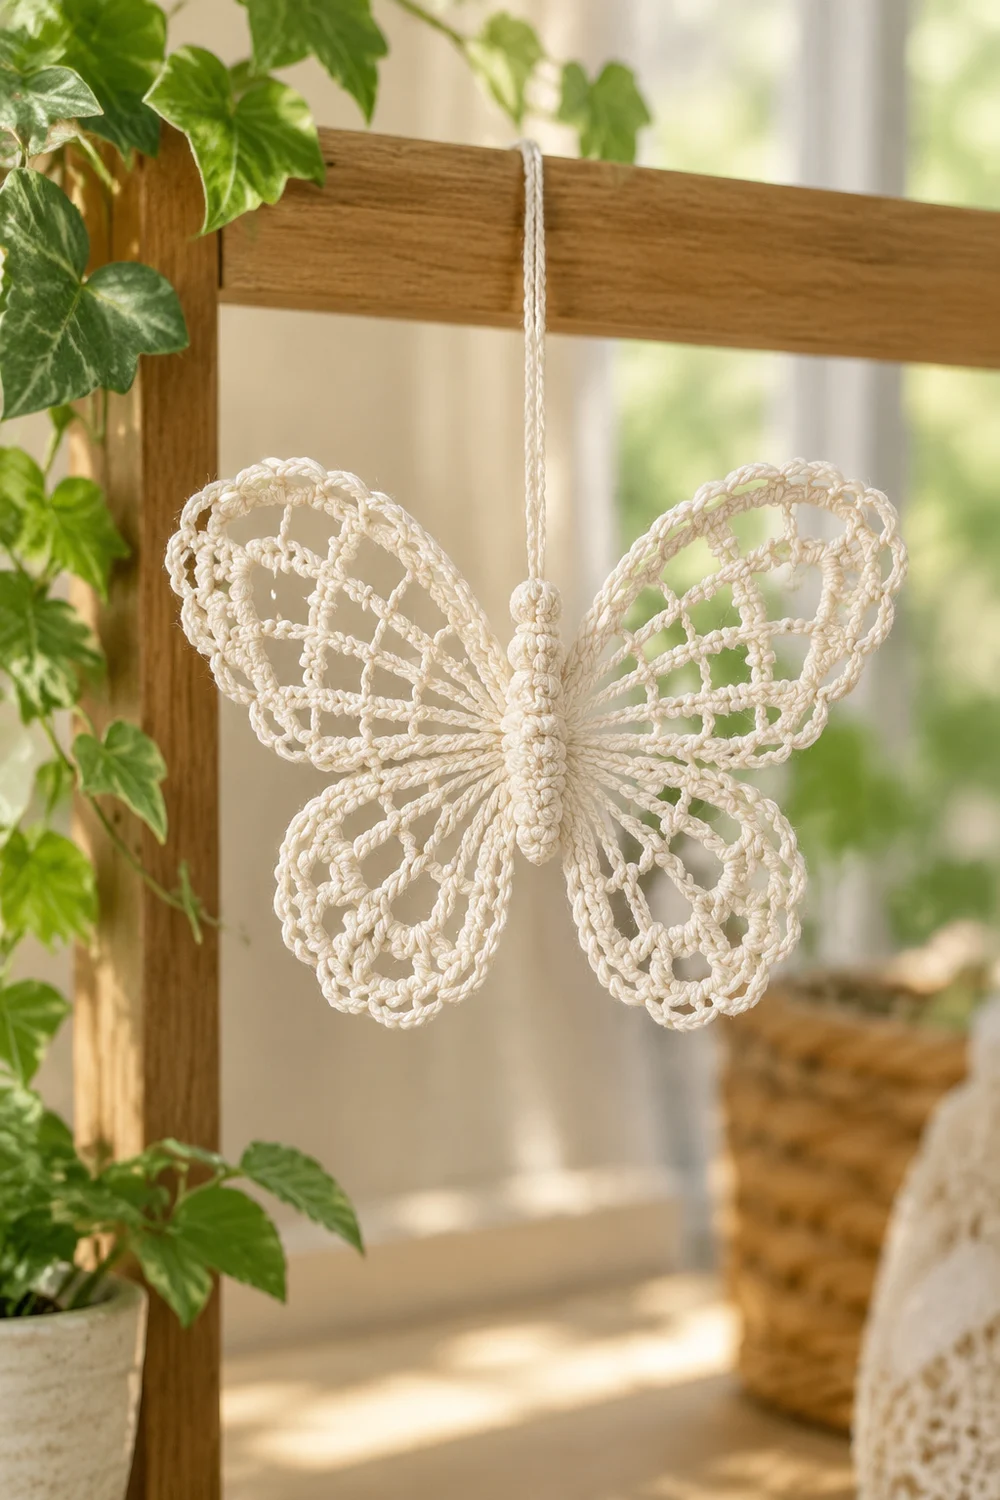
This delicate butterfly is a single lace motif worked in cream cotton. Four open wings fan out from a small center ring. Each wing is built from long radiating stitches and chain spaces that form a see-through geometric mesh, with a rounded triangular outline.
A scalloped shell trim runs around the outer edges of all four wings. A solid body made of four stacked bobbles sits over the center. The cream yarn keeps the look soft and vintage, and the long open stitches give the piece its filigree character.
The pattern uses US crochet terms. The finished butterfly measures about 4.5 in (11.4 cm) from wingtip to wingtip and 3.5 in (8.9 cm) tall, which sits in the 4–5 in (10.2–12.7 cm) range.
Construction is continuous. You start with a center ring, work each wing in short turned rows off the ring, add one shell border round around the whole outline, and then finish the bobble body with the same yarn before tacking it down.
Finished Size and Construction
- Finished size: 4.5 in (11.4 cm) wingtip to wingtip × 3.5 in (8.9 cm) tall
- Skill level: Advanced (filigree lace, tension control)
- Terminology: US crochet terms
- Yarn weight: Sport weight (2, fine) mercerized cotton
- Hook: 2.75 mm (US C-2)
- Number of pieces: 1 (no sewn parts; the body is worked on with the same yarn)
- Layout: 4 wings radiating from a 20-stitch center ring, with a vertical bobble body on top
- Piece size: Same as finished size
- Size before border: 4 in (10.2 cm) × 3 in (7.6 cm)
- Border depth: 0.25 in (0.6 cm) on every edge
Materials
Yarn: Use a smooth, tightly plied mercerized cotton. It gives crisp stitch definition and holds the open mesh after blocking. Avoid fuzzy or loosely spun yarns, because the chain spaces will blur.
- Cream / off-white: 10 g (about 30 m / 33 yd)
The quantity includes a margin for a gauge test and for weaving in ends. The motif itself uses about 6 g.
Tools:
- 2.75 mm (US C-2) crochet hook
- Tapestry needle
- Small sharp scissors
- 4 stitch markers
- Rust-proof pins and a blocking mat
- Spray bottle
- Optional: light spray starch
Abbreviations (US Terms)
- ch – chain
- sl st – slip stitch
- sc – single crochet
- hdc – half double crochet
- dc – double crochet
- tr – treble crochet
- sp – space
- st(s) – stitch(es)
- RS / WS – right side / wrong side
- rep – repeat
Special stitches:
- Large shell: (sc, hdc, 3 dc, hdc, sc) in the same ch-sp. This is 7 sts.
- Small shell: (sc, hdc, dc, hdc, sc) in the same ch-sp. This is 5 sts.
- Bobble: *Yo, insert hook in st, yo and pull up a loop, yo and pull through 2 loops; rep from * 4 more times in the same st (6 loops on hook), yo and pull through all 6 loops. This is 1 st.
Gauge and Checkpoints
Gauge: 6 sc and 7 sc rows = 1 in (2.5 cm). With your tension, 1 tr stands about 0.5 in (1.3 cm) tall and 1 dc about 0.35 in (0.9 cm) tall.
The motif is small, so test one wing first. Work the center ring and Wing A, then measure before you continue.
Checkpoints:
- After Rnd 2: The ring measures 0.8 in (2.0 cm) across and lies flat.
- After Wing A, Row 1: The tr spokes reach 0.5 in (1.3 cm) beyond the ring edge.
- After Wing A, Row 4: The wing extends 1.6 in (4.1 cm) from the ring edge.
- After Wing B, Row 3: The wing extends 1.1 in (2.8 cm) from the ring edge.
- After all wings: The width is 4 in (10.2 cm) and the height is 3 in (7.6 cm).
- After the border: The width is 4.5 in (11.4 cm) and the height is 3.5 in (8.9 cm).
If the motif is too big: Go down to a 2.5 mm hook, or keep your chains snugger. Loose chains are the most common cause of oversizing in lace.
If the motif is too small: Go up to a 3 mm hook, and fully lift each tr and dc before you complete it.
Center Ring
Rnd 1: Make a magic ring. Ch 1, work 10 sc in the ring, then sl st to the first sc. Pull the ring fully closed. (10 sc)
Rnd 2: Ch 1, work 2 sc in each st around, then sl st to the first sc. (20 sc)
Fasten off and weave in the ring tail.
Stitch allocation: Number the 20 sts in your working direction, starting at the top center:
- Sts 1–2: top body point (left unworked)
- Sts 3–6: Wing A (upper)
- Sts 7–10: Wing B (lower)
- Sts 11–12: bottom body point (left unworked)
- Sts 13–16: Wing C (lower)
- Sts 17–20: Wing D (upper)
Place markers in sts 3, 7, 13, and 17.
Upper Wings (Make Wings A and D Alike)
Wing A is worked on sts 3–6. Wing D is worked on sts 17–20.
Row 1 (RS): Join yarn in the first wing st. Ch 4 (counts as tr), ch 2, tr in the same st, ch 2. (Tr, ch 2, tr) in the next st, ch 2; rep from * once more. Work (tr, ch 2, tr) in the last st. Turn. (8 tr, 7 ch-2 sps)*
The pairs of tr fan out into spokes, and this fan sets the triangular base of the wing.
Row 2 (WS): Ch 3 (counts as dc). Ch 3, dc in the next tr; rep from * 6 more times, working the last dc in the top of the turning ch. Turn. (8 dc, 7 ch-3 sps)*
Row 3 (RS): Ch 3 (counts as dc). Ch 4, dc in the next dc; rep from * 6 more times. Turn. (8 dc, 7 ch-4 sps)*
The spokes now continue in straight lines, and the widening chains open the mesh windows toward the outer edge.
Row 4 (WS): Ch 1, sc in the first dc. Ch 5, sc in the next dc; rep from * 6 more times. (8 sc, 7 ch-5 sps)*
Fasten off.
Checkpoint: The wing should extend 1.6 in (4.1 cm) from the ring edge.
Lower Wings (Make Wings B and C Alike)
Wing B is worked on sts 7–10. Wing C is worked on sts 13–16.
The lower wings use shorter stitches and one fewer row, which makes them smaller and rounder than the upper wings.
Row 1 (RS): Join yarn in the first wing st. Ch 3 (counts as dc), ch 2, dc in the same st, ch 2. (Dc, ch 2, dc) in the next st, ch 2; rep from * once more. Work (dc, ch 2, dc) in the last st. Turn. (8 dc, 7 ch-2 sps)*
Row 2 (WS): Ch 3 (counts as dc). Ch 3, dc in the next dc; rep from * 6 more times. Turn. (8 dc, 7 ch-3 sps)*
Row 3 (RS): Ch 1, sc in the first dc. Ch 4, sc in the next dc; rep from * 6 more times. (8 sc, 7 ch-4 sps)*
Fasten off.
Checkpoint: The wing should extend 1.1 in (2.8 cm) from the ring edge. The full motif should now measure 4 in (10.2 cm) × 3 in (7.6 cm).
Weave in all wing ends before you start the border. They are hard to hide once the shells are in place.
Border
Border gauge: The side edges are worked at the same 6 sc per 1 in (2.5 cm) as the main gauge.
- A tr row end is 0.5 in (1.3 cm) tall, so it takes 3 sc.
- A dc row end is 0.35 in (0.9 cm) tall, so it takes 2 sc.
- An sc row end takes 1 sc.
This keeps the side edges flat, without ruffling or cupping.
Border Rnd (RS): Join yarn with a sl st in st 1 of the ring, then sl st in st 2.
Wing A:
- Side edge going out: 8 sc along the row ends (3 + 2 + 2 + 1). Work the last sc into the corner sc of Row 4.
- Outer edge: Work 1 large shell in each of the 7 ch-5 sps.
- Side edge going back: 8 sc along the row ends (1 + 2 + 2 + 3). Work the first sc into the corner sc of Row 4.
Wing A total: 8 + (7 × 7) + 8 = 65 sts.
Junction: Sl st into the ring between sts 6 and 7. This sl st is not counted.
Wing B:
- Side edge: 5 sc along the row ends (2 + 2 + 1). Work the last sc into the corner sc of Row 3.
- Outer edge: Work 1 small shell in each of the 7 ch-4 sps.
- Side edge: 5 sc along the row ends (1 + 2 + 2).
Wing B total: 5 + (7 × 5) + 5 = 45 sts.
Bottom: Sl st in st 11 and in st 12.
Wing C: Work as for Wing B. (45 sts)
Junction: Sl st into the ring between sts 16 and 17.
Wing D: Work as for Wing A. (65 sts)
Sl st to the first sl st of the round. Do not fasten off.
Total: 65 + 45 + 45 + 65 = 220 border sts, plus 6 uncounted sl sts (2 at the top, 2 at the bottom, and 1 at each junction).
Why the math works:
- Every wing ends with exactly 7 arcs, and each arc gets exactly one shell. The scallop count always matches the spoke spaces.
- Shells are 0.25 in (0.6 cm) deep. They add 0.25 in (0.6 cm) at each wingtip and at the top and bottom edges.
- The width therefore grows from 4 in (10.2 cm) to 4.5 in (11.4 cm), and the height from 3 in (7.6 cm) to 3.5 in (8.9 cm).
Body
The body is worked straight off the border with the same yarn, so it stays part of the single motif.
Body chain: From the top joining sl st, ch 10.
Body row: Bobble in the 3rd ch from the hook (this is the head). Sl st in the next ch, bobble in the next ch; rep from * twice more. Sl st in the last ch, which is at the base of the chain. (4 bobbles, 4 sl sts)*
The stack of bobbles measures about 1.25 in (3.2 cm) long and 0.5 in (1.3 cm) wide.
Attaching the body:
- Fold the bobble strip down over the center ring so the head sits just above the top body point.
- Cut the yarn, leaving a 10 in (25.4 cm) tail.
- With a tapestry needle, tack the base of each bobble through the ring and the bottom body sl sts.
- Pull the stitches snug so the bobbles sit as stacked, solid balls.
- Fasten off on the WS.
Final Blocking
- Wet the motif fully in cool water, then press out the excess in a towel. Do not wring it.
- Lay it RS up on the blocking mat.
- Pin the body straight first. This is your center line.
- Pin each wingtip so the width is 4.5 in (11.4 cm). Check that the motif is symmetrical across the body.
- Pin the top of the upper wings and the bottom of the lower wings so the height is 3.5 in (8.9 cm).
- Pin the tip of every shell outward to open the scallops.
- Open each mesh window with a pin, and straighten every spoke.
- Mist lightly with starch if you want firmer wings.
- Let it dry completely before unpinning, usually about 4–6 hours.
Final Quality-Control Checklist
- [ ] The center ring has 20 sc and lies flat at 0.8 in (2.0 cm).
- [ ] Each wing has 8 spokes and 7 open spaces in every row.
- [ ] Upper wings have 4 rows and lower wings have 3 rows.
- [ ] The border has 65 sts on each upper wing and 45 sts on each lower wing (220 total).
- [ ] Every wing shows exactly 7 scallops.
- [ ] The body has 4 bobbles, is centered, and is tacked securely.
- [ ] The motif measures 4.5 in (11.4 cm) × 3.5 in (8.9 cm) after blocking.
- [ ] All ends are woven in invisibly on the WS.
Troubleshooting
The ring cups or ruffles: Make sure Rnd 1 has exactly 10 sc and is fully closed. Ruffling usually means extra sts in Rnd 2.
Wings curl upward: Your chains are too tight compared with your tall stitches. Loosen the chains slightly, or go up 0.25 mm.
Wings look floppy and stretched: Your chains are too loose. Go down a hook size for the chain spaces only.
Shells crowd or ruffle: Check the arc length. The ch-5 arcs take large shells and the ch-4 arcs take small shells. Do not swap them.
Side edges pucker: Recount the row-end sc. Upper wings take 8 per side and lower wings take 5 per side.
Bobbles look flat: Pull up taller loops before closing each bobble, and tack each one at its base, not across its middle.
The motif is lopsided: Recheck the stitch allocation. Each wing must start exactly on its marked stitch (3, 7, 13, or 17).
Care
Hand wash in cool water with mild soap, then reshape and pin flat to dry. Re-starch after washing if you want stiffer wings.
Final Notes
The measurement chain is short and easy to check:
- The ring measures 0.8 in (2.0 cm).
- Upper wings reach 1.6 in (4.1 cm) beyond the ring and lower wings reach 1.1 in (2.8 cm).
- Together they give 4 in (10.2 cm) × 3 in (7.6 cm) before the border.
- The 0.25 in (0.6 cm) shell border brings the motif to 4.5 in (11.4 cm) × 3.5 in (8.9 cm).
If each checkpoint matches, the finished butterfly will too. Keep your chains even, block it carefully, and the filigree wings will open beautifully.
Happy crocheting!