

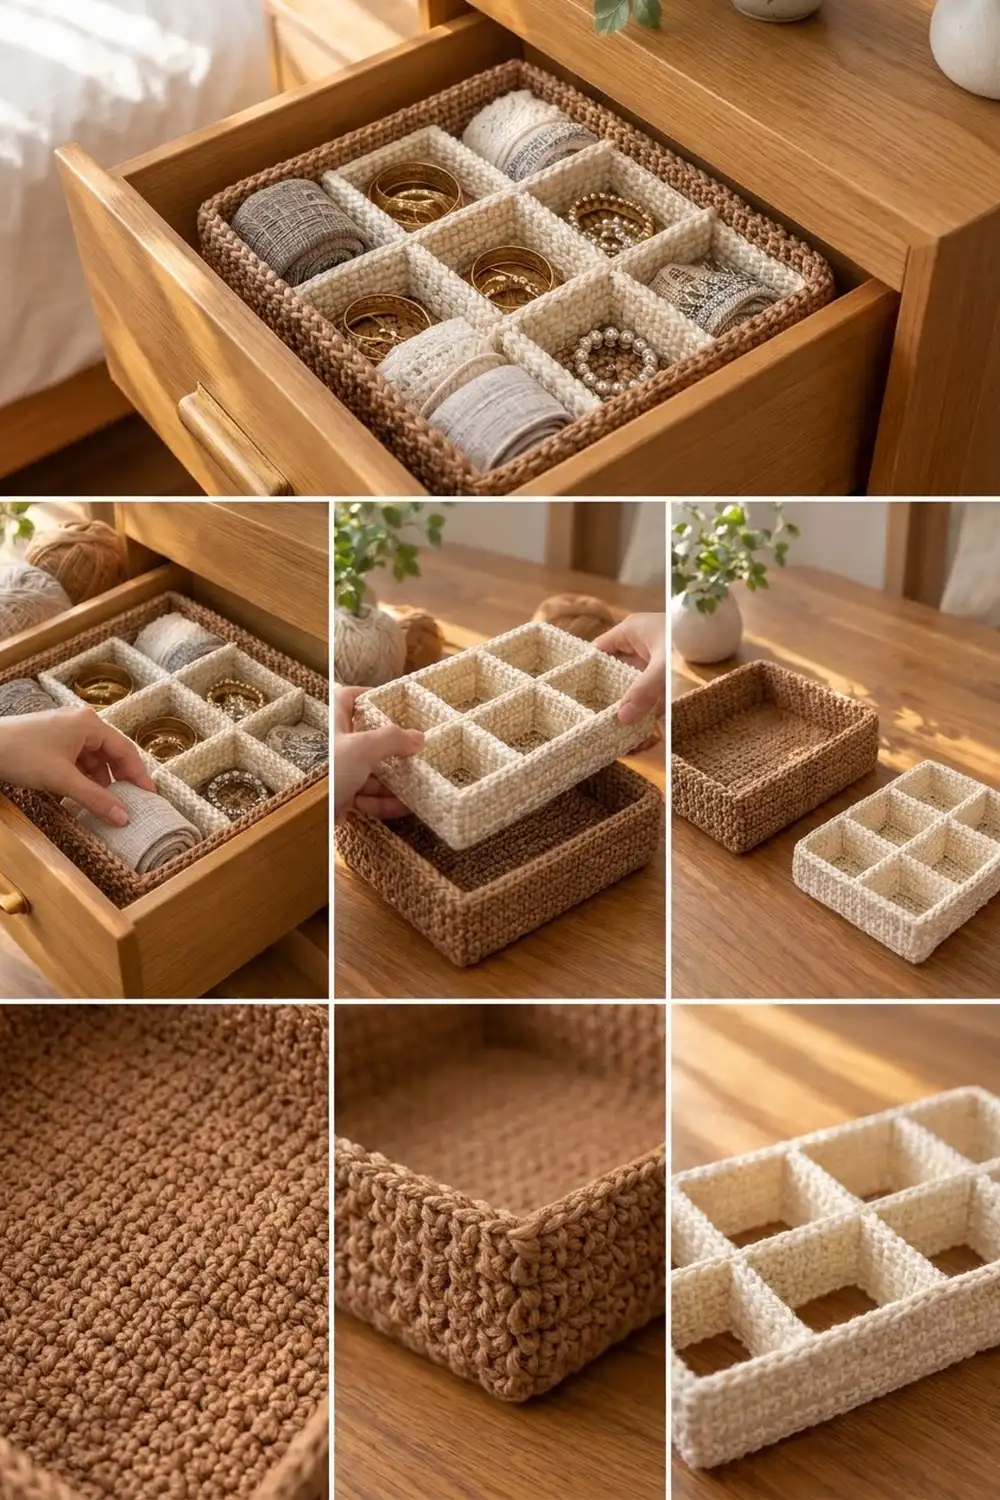
This drawer organizer has two parts that work together. The first is a sturdy caramel basket with straight walls and a rounded rope-like rim. The second is a cream grid insert that lifts out and splits the basket into six neat compartments. It holds bangles, rings, rolled scarves, and ribbon, and it looks warm and calm in a wooden drawer.
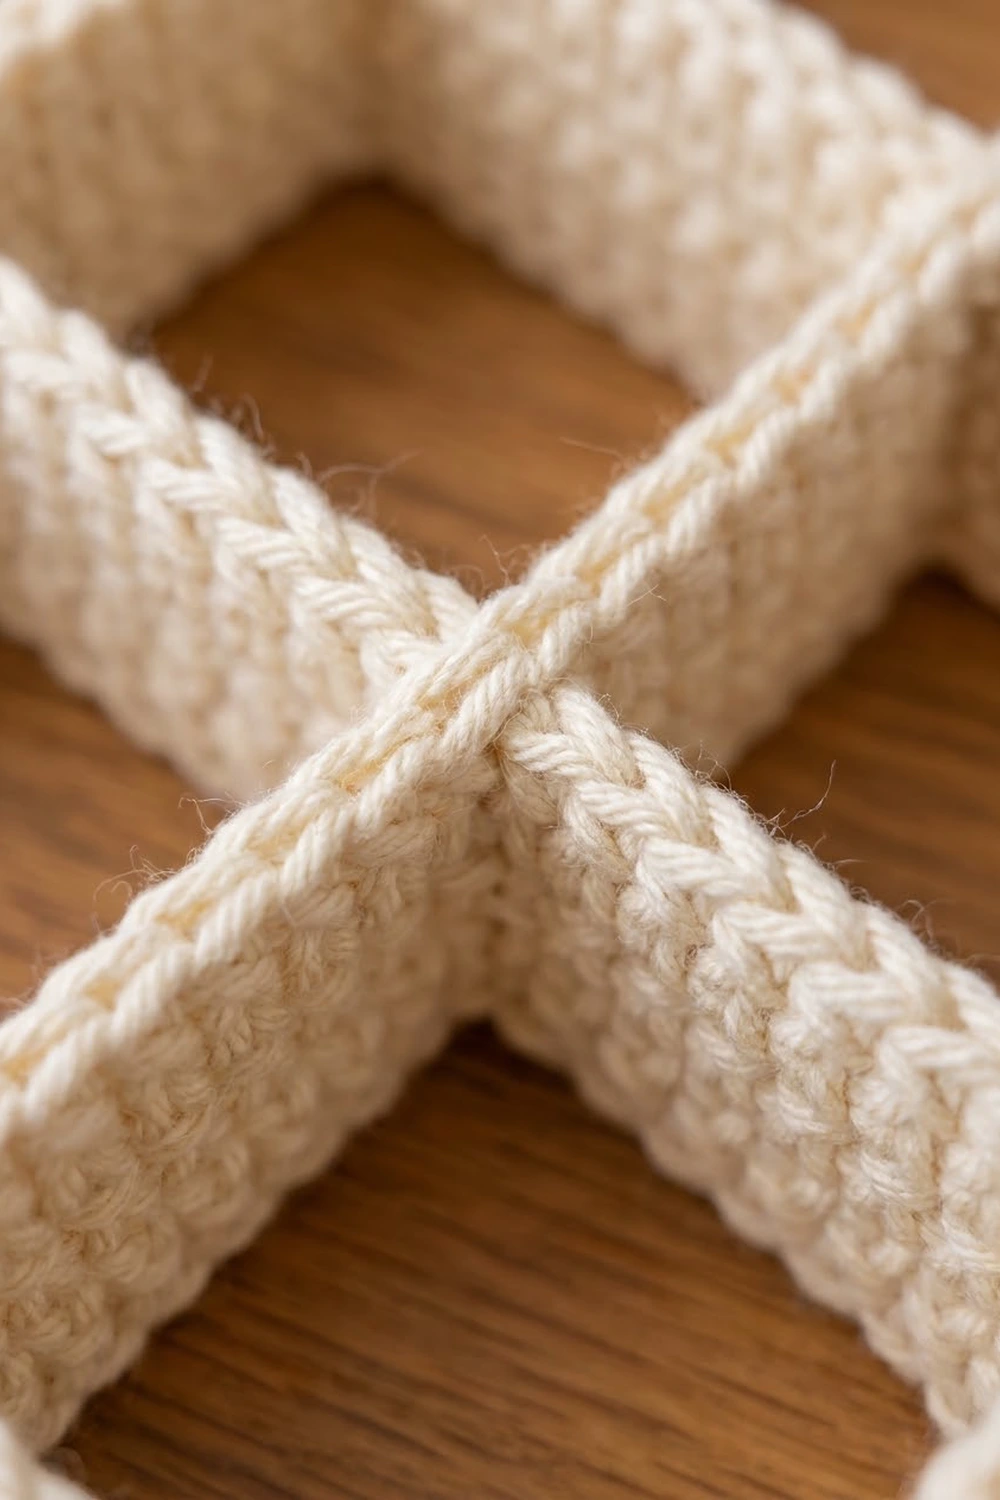
The basket is caramel/tan. The insert is cream. Both use dense single crochet in worsted-weight cotton, so the walls stand up on their own and the texture is pebbly. The style is simple and natural, and it suits a bedroom dresser or a craft table.
This pattern uses US crochet terms. The finished basket measures about 12.5 x 8.5 in (31.8 x 21.6 cm) and is 3.2 in (8.1 cm) tall. The insert measures 11.5 x 7.5 in (29.2 x 19.1 cm) and is 2.8 in (7.1 cm) tall.
Here is the construction in short. You work the basket base flat in rows. Next you crochet the walls in joined rounds, starting with a back-loop round that makes a crisp fold. A two-round rim finishes the top. For the insert you crochet flat strips, sew one into a loop to make the frame, and sew the dividers inside.
Finished Size and Construction
- Finished basket size: 12.5 x 8.5 in (31.8 x 21.6 cm), 3.2 in (8.1 cm) tall
- Finished insert size: 11.5 x 7.5 in (29.2 x 19.1 cm), 2.8 in (7.1 cm) tall
- Skill level: Easy to intermediate
- Terminology: US
- Yarn weight: Worsted (#4) cotton
- Hook: 4.0 mm (G-6)
- Number of pieces: 6 (1 basket, 1 frame strip, 1 long divider, 4 short half-dividers)
- Layout: 3 compartments across x 2 deep
- Compartment size: about 3.75 in (9.5 cm) square
- Basket base: 12 x 8 in (30.5 x 20.3 cm)
- Basket height before border: 2.8 in (7.1 cm)
- Border depth: 2 rounds, about 0.4 in (1.0 cm)
Materials
Use a smooth, firm cotton or cotton blend in worsted weight. Choose one with roughly 190 m per 100 g (about 208 yd per 3.5 oz). Cotton holds its shape much better than acrylic, and that matters for walls that need to stand up.
- Caramel/tan (Color A, basket): 200 g, about 380 m (416 yd)
- Cream (Color B, insert): 150 g, about 285 m (312 yd)
These quantities include a margin of about 20%. That covers your gauge swatch, sewing tails, and small differences in tension.
Tools:
– 4.0 mm (G-6) crochet hook
– Tapestry needle
– 8–10 locking stitch markers
– Measuring tape or ruler
– Scissors
– Spray bottle, plus spray starch if you want it
– A box or a stack of books about 12 x 8 in (30.5 x 20.3 cm) to use as a blocking form
Abbreviations (US Terms)
- ch – chain
- sc – single crochet
- sl st – slip stitch
- BLO – back loop only
- st(s) – stitch(es)
- rnd – round
- rev sc – reverse single crochet (crab stitch)
Special stitch: Reverse single crochet (rev sc). Work from left to right if you crochet right-handed. Insert the hook into the next stitch to the right, yarn over, and pull up a loop. Yarn over again and pull through both loops. This makes the twisted, rope-like rim you see in the photo.
Gauge and Checkpoints
Gauge: 18 sc x 20 rows = 4 in (10.2 cm) in sc worked in rows. That is 4.5 sts and 5 rows per 1 in (2.5 cm).
Crochet a swatch before you start. If your gauge is close, test it on one real piece: crochet one short half-divider (17 sts x 14 rows). It should measure 3.75 x 2.8 in (9.5 x 7.1 cm).
Checkpoints:
– Base after Row 10: 12 in (30.5 cm) wide, 2 in (5.1 cm) tall
– Base after Row 40: 12 x 8 in (30.5 x 20.3 cm)
– Walls after Rnd 15: 2.8 in (7.1 cm) tall above the fold
– Frame strip: 38.2 in (97.0 cm) long, 2.8 in (7.1 cm) tall
Too big? Go down 0.5 mm in hook size. Too small? Go up 0.5 mm. Get the stitch gauge right first. If your row gauge is still off after that, add or remove rows instead of changing hooks again. Keep the fabric firm: you should not be able to see through it when you hold it up to light.
Basket Base (Color A)
The base is worked flat in rows.
Row 1: Ch 55. Sc in 2nd ch from hook and in each ch across. Turn. (54 sc)
Rows 2–40: Ch 1 (does not count as a st). Sc in each st across. Turn. (54 sc per row)
Do not fasten off.
Checkpoint: the base measures 12 x 8 in (30.5 x 20.3 cm).
Basket Walls (Color A)
Now you work around the base in joined rounds. Don’t turn at the end of each round.
Rnd 1 (conversion round, edging the base): Ch 1. Work 54 sc across the top of Row 40 (54 worked 1 per existing st + 0 added).
Rotate the piece. Work 36 sc evenly along the row ends. There are 40 row ends, so skip 1 row end after every 9 sc, 4 times in total (40 row ends − 4 skipped = 36 sc).
Work 54 sc across the opposite side of the foundation chain (54 worked 1 per existing ch + 0 added).
Work 36 sc evenly along the second set of row ends, the same way as before.
Join with sl st to the first sc. (180 sc: 54 + 36 + 54 + 36)
Place a marker in the first and last stitch of each side. These 8 marked stitches are corner stitches, and they are already counted inside each side’s total.
Why 36? Short sides are 8 in (20.3 cm) at 4.5 sts per inch, and 8 x 4.5 = 36. Long sides are 12 in (30.5 cm) at 4.5 sts per inch, and 12 x 4.5 = 54. So the edge stitches match the base exactly and the fabric stays flat.
Rnd 2 (fold round): Ch 1. Sc in BLO of each st around. Join. (180 sc)
The front loops left unworked form a ridge, and the wall turns upward along it.
Rnds 3–15: Ch 1. Sc in both loops of each st around. Join. (180 sc per rnd: 54 + 36 + 54 + 36)
Do not increase at the corners. The fold and the matching stitch counts keep the walls vertical.
Checkpoint: Rnds 2–15 make 14 wall rounds. At 5 rounds per inch, that is 2.8 in (7.1 cm). The walls should stand up without support.
Continue to the border without fastening off.
Insert Pieces (Color B)
Every insert piece is a flat sc strip, 14 rows tall. Leave a 12 in (30.5 cm) tail at the end of each piece for sewing.
Frame Strip (make 1)
Row 1: Ch 173. Sc in 2nd ch from hook and in each ch across. Turn. (172 sc)
Rows 2–14: Ch 1. Sc in each st across. Turn. (172 sc per row)
Fasten off. The strip measures about 38.2 x 2.8 in (97.0 x 7.1 cm).
Place markers on Row 14 to divide the strip into walls:
– Wall 1 (long): sts 1–52
– Wall 2 (short): sts 53–86
– Wall 3 (long): sts 87–138
– Wall 4 (short): sts 139–172
Check: 52 + 34 + 52 + 34 = 172. Each long wall is 52 sts, or 11.5 in (29.2 cm). Each short wall is 34 sts, or 7.5 in (19.1 cm).
Long Divider (make 1)
Row 1: Ch 53. Sc in 2nd ch from hook and in each ch across. Turn. (52 sc)
Rows 2–14: Ch 1. Sc in each st across. Turn. (52 sc per row)
Short Half-Dividers (make 4)
Row 1: Ch 18. Sc in 2nd ch from hook and in each ch across. Turn. (17 sc)
Rows 2–14: Ch 1. Sc in each st across. Turn. (17 sc per row)
Each half-divider measures 3.75 x 2.8 in (9.5 x 7.1 cm).
Make All Pieces
- Color A: 1 basket (180 sts around)
- Color B: 1 frame strip (172 sts), 1 long divider (52 sts), 4 short half-dividers (17 sts each)
Layout grid (view from above, insert inside the frame):
+-------+-------+-------+
|  17   |  18   |  17   |   <- Wall 1 (52 sts)
|       |       |       |
+=======+=======+=======+   <- long divider (52 sts)
|       |       |       |
|  17   |  18   |  17   |   <- Wall 3 (52 sts)
+-------+-------+-------+
 Short walls: 17 + 17 = 34 sts
Each | inside the grid is one short half-divider. The = line is the long divider.
Joining
Method: Whipstitch with Color B tails through both loops, or through the matching row ends.
1. Close the frame. Bring the two short ends of the frame strip together, matching the strip’s first and last stitches. Whipstitch the 14 row ends to the 14 row ends, one to one. This seam is the corner between Wall 4 and Wall 1.
2. Mark the divider positions.
– On Wall 1 and Wall 3, place a marker 17 sts in from each corner. On Wall 1 that is between sts 17/18 and between sts 35/36. Check: 17 + 18 + 17 = 52.
– On Wall 2 and Wall 4, place a marker at the center, 17 sts from each corner. Check: 17 + 17 = 34.
– On the long divider, place markers 17 sts in from each end, which is the same as Wall 1.
3. Attach the long divider. Whipstitch its 14 row ends at one end to the inside of Wall 2 at the center marker, working row to row. Repeat at the other end on Wall 4.
4. Attach the half-dividers. Each half-divider is 14 rows tall and fits between the frame and the long divider:
– Sew one 14-row end to a long wall marker, row to row.
– Sew the other 14-row end to the matching marker on the long divider.
– Do this for all 4 halves. Pairs that face each other across the long divider make the plus-shaped crossings.
Tension: Pull each whipstitch snug but not tight. If you pull too hard, the walls will pucker and the insert will lean.
Size checkpoint: The insert should measure 11.5 x 7.5 in (29.2 x 19.1 cm) and every cell should be about 3.75 in (9.5 cm) square. The basket’s inside is about 12 x 8 in (30.5 x 20.3 cm), so you get about 0.25 in (0.6 cm) of clearance on each side and the insert lifts out easily.
Border (Basket Rim, Color A)
Border gauge: Same as the walls: 4.5 sts per inch, with each round about 0.2 in (0.5 cm) tall.
Rnd 16: Ch 1. Sc in each st around. Join. (180 sc: 54 per long side, 36 per short side)
Rnd 17: Ch 1. Rev sc in each st around, working left to right. Join with sl st to the first rev sc. (180 rev sc: 54 + 36 + 54 + 36)
Fasten off and weave in the ends.
Why the math works: Each side of the rim has the same count as the matching edge of the base: 54 sts for 12 in (30.5 cm) and 36 sts for 8 in (20.3 cm). The corner stitches are already inside those totals, and no stitches are added. Because nothing increases, the rim won’t flare or ripple. Reverse sc is a little shorter and firmer than regular sc, so the top edge pulls in slightly and holds the basket square.
The rim adds about 0.4 in (1.0 cm), which brings the total basket height to 3.2 in (8.1 cm). The insert is 2.8 in (7.1 cm) tall, so it sits just below the rope edge.
Final Blocking
- Lightly mist the basket until it is damp but not wet.
- Slide the basket over a box or stack of books about 12 x 8 in (30.5 x 20.3 cm).
- Press the corners square and straighten the walls with your fingers. Roll the rim gently so the twist sits evenly.
- Mist the insert. Pin it flat or stand it on a flat surface, and square up each cell.
- For extra stiffness, spray starch on the insert walls.
- Let both pieces dry completely, for 12–24 hours.
- Set the insert into the basket.
Final Quality-Control Checklist
- Base measures 12 x 8 in (30.5 x 20.3 cm)
- Every wall round has 180 sts (54 + 36 + 54 + 36)
- Fold ridge from the BLO round runs evenly all around
- Walls are 2.8 in (7.1 cm) before the rim
- Rim has 180 rev sc and no gaps
- Frame strip has 172 sts and the seam is invisible at the corner
- Long divider (52 sts) and 4 half-dividers (17 sts each) are sewn row to row
- All 6 cells are about 3.75 in (9.5 cm) square
- Insert lifts out without catching
- All ends are woven in securely
Troubleshooting
Walls flare outward: Your wall stitch counts may have crept up. Recount, and confirm 180 sts in every round.
Walls lean inward: You may be crocheting tighter as you go. Relax your tension, or go up a hook size for the walls only.
Short sides look ruffled after Rnd 1: You probably worked too many stitches into the row ends. Redo the round with exactly 36 sc per short side.
Insert is too tight to lift out: Remove 1 st from each wall (frame 168 sts, long divider 50 sts, half-dividers 16 sts), or block the insert slightly smaller.
Insert walls are floppy: Use a smaller hook, starch the insert, or work the cream pieces with yarn held double.
Rev sc rim twists unevenly: Keep the loops a consistent size and do not skip stitches.
Cells are not square: Check that the markers sit exactly 17 sts from each corner and that each seam is matched row to row.
Care
Hand wash in cool water with mild soap. Press out the water gently and dry flat over the same blocking form so the basket stays square.
Final Notes
Everything in this pattern follows one measurement chain. A gauge of 4.5 sts and 5 rows per inch gives a base of 54 sts by 40 rows, which is 12 x 8 in (30.5 x 20.3 cm). The edge round carries 54 + 36 + 54 + 36 = 180 sts into the walls, and the walls rise 2.8 in (7.1 cm) without changing that count. The rim adds 0.4 in (1.0 cm) with the same 180 sts. Inside, the 172-st frame splits into walls of 52 and 34 sts, and those split again into 17-st sections that give six 3.75 in (9.5 cm) square cells. If your gauge matches, every piece fits the next one.
Happy crocheting!