

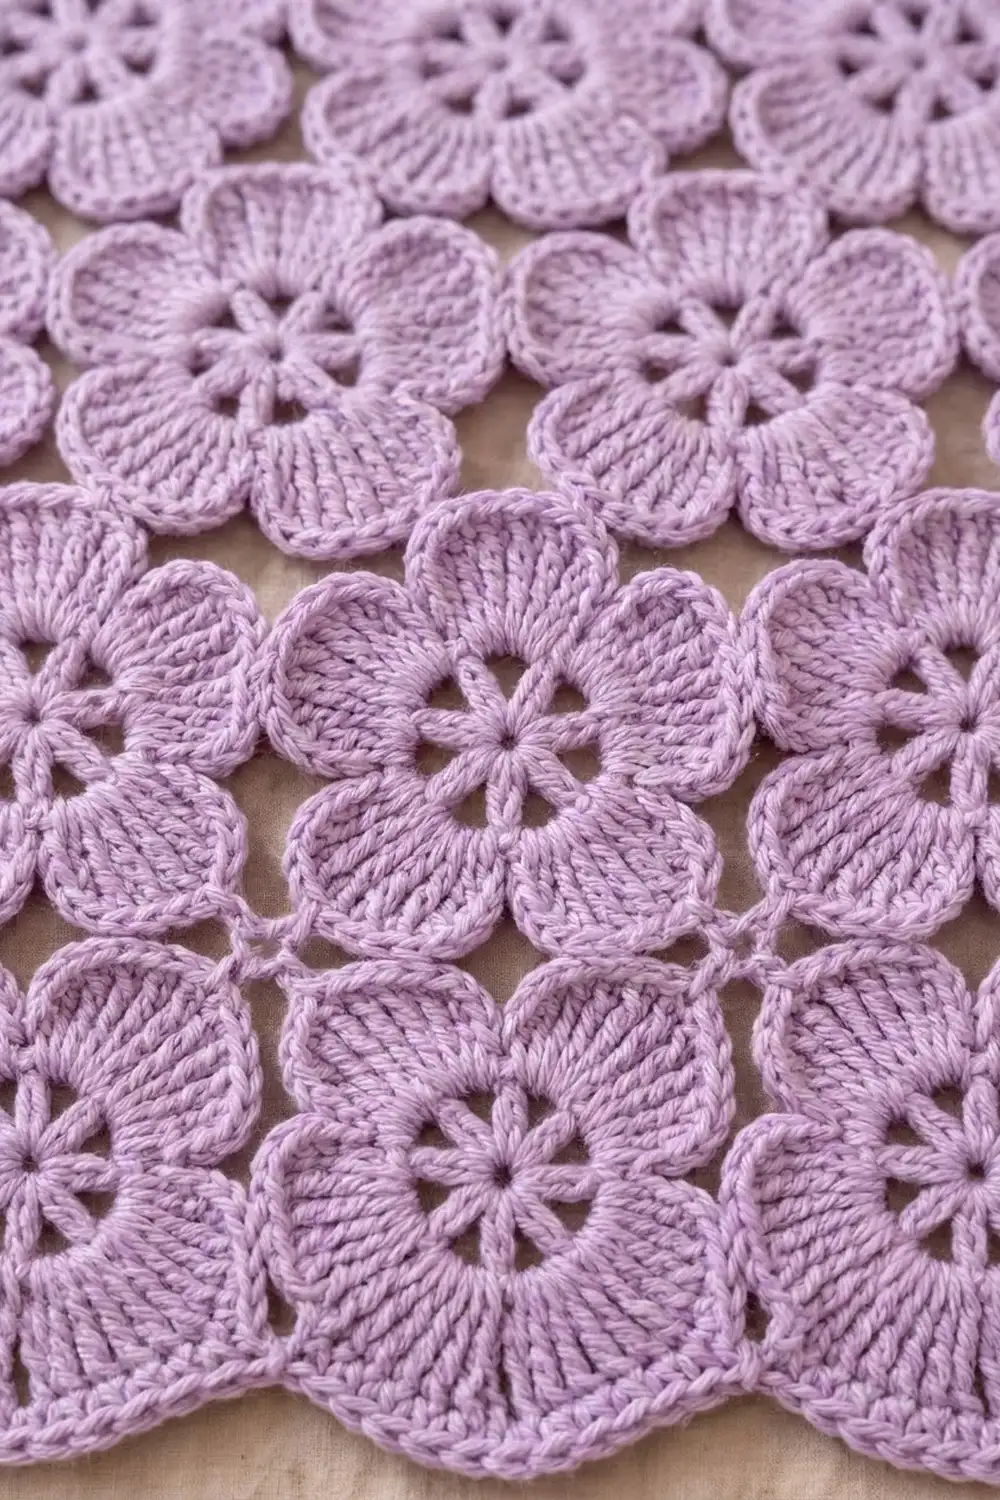
The Lavender Bloom Bedspread is a soft, romantic bed cover made from five-petal flower motifs worked in one lavender shade. Each flower has a lacy spoked center, broad ribbed petals, and a raised rope edge that makes every bloom stand out on the bed.
Because the bedspread uses only one color, the texture does the decorating. The open windows around each center let a little of the sheet show through, and the scalloped outer edge hangs over the sides of the mattress with no extra border needed.
This pattern uses US crochet terms. The finished bedspread measures about 76.25 in x 85.75 in (193.7 cm x 217.8 cm), with each flower measuring 5 in (12.7 cm) from tip to tip.
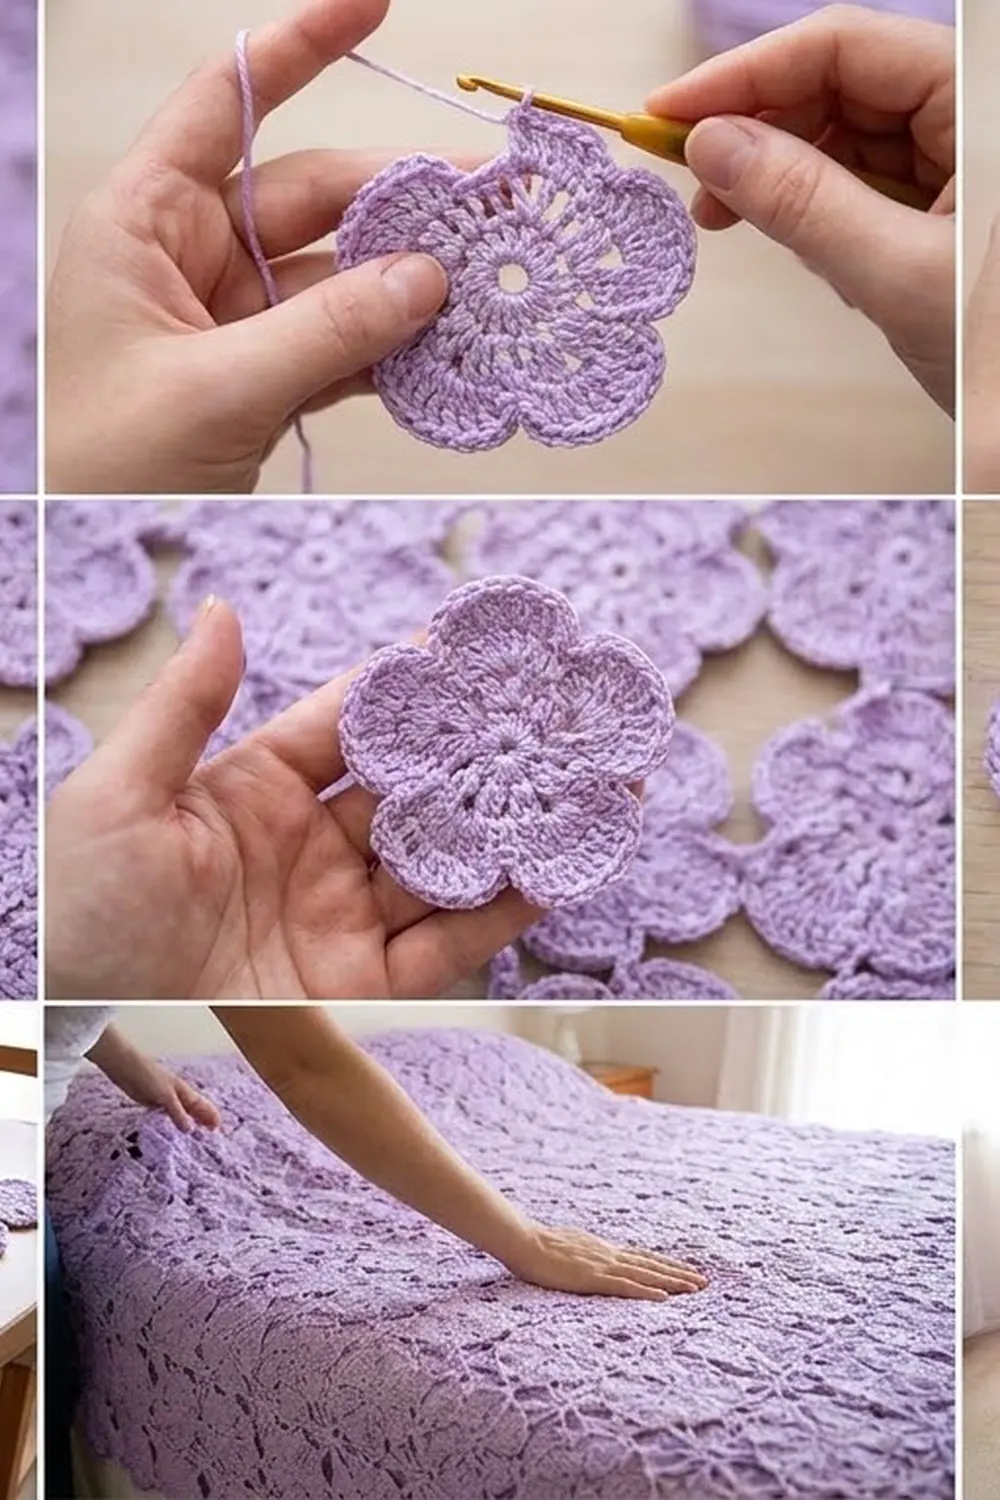
You make 320 identical flowers in 6 rounds. Then you tack them together where the petals touch, in 20 rows of 16 flowers. The rope edge from Round 6 of every flower becomes the finished edge of the bedspread.
Finished Size and Construction
- Finished size: 76.25 in x 85.75 in (193.7 cm x 217.8 cm)
- Skill level: Intermediate
- Terminology: US crochet terms
- Yarn weight: Worsted (weight 4)
- Hook: 5.0 mm (H-8)
- Number of pieces: 320 flower motifs
- Layout: 16 flowers across x 20 rows, one petal pointing up on every flower
- Piece size: 5 in (12.7 cm) tip to tip
- Center-to-center spacing: 4.75 in (12.1 cm) across, 4.25 in (10.8 cm) down
- Size before border: 76.25 in x 85.75 in (193.7 cm x 217.8 cm)
- Border depth: 0 in (0 cm). The scalloped rope edge from each flower is the border.
Materials
Choose a smooth worsted yarn with good stitch definition. Cotton blends and soft acrylics both show the ribbed petals and rope edge clearly. Avoid fuzzy or very splitty yarn, because the crab-stitch edge needs clean, round loops.
Yarn:
– Lavender: about 2,800 g / 5,600 m (6,124 yd), or 28 skeins of 100 g / 200 m (219 yd)
Each flower uses about 16 m (17.5 yd), or about 8 g. Quantities include roughly a 10% margin for gauge swatches, tails, and joining.
Tools:
– 5.0 mm (H-8) crochet hook
– Tapestry needle
– Stitch markers
– Scissors
– Measuring tape
– Blocking mats and rust-proof pins
– Spray bottle
Abbreviations (US Terms)
- ch – chain
- sl st – slip stitch
- sc – single crochet
- hdc – half double crochet
- dc – double crochet
- tr – treble crochet
- BLO – back loop only
- sp – space
- st(s) – stitch(es)
- rev sc – reverse single crochet
Special stitch – Reverse single crochet (crab stitch): Working from left to right (right-handers), insert the hook into the next stitch to the right, yarn over, pull up a loop, yarn over, and pull through both loops. This makes the raised, rope-like edge.
Gauge and Checkpoints
Gauge: 16 sc x 18 rows = 4 in (10.2 cm) with a 5.0 mm hook.
Make one full flower and block it before you start production. Measure it after each round:
- After Round 1: 1.25 in (3.2 cm) across
- After Round 2: 2.25 in (5.7 cm) across
- After Round 3: 2.75 in (7.0 cm) across
- After Round 4: 4 in (10.2 cm) tip to tip
- After Round 5: 4.75 in (12.1 cm) tip to tip
- After Round 6: 5 in (12.7 cm) tip to tip
If your flower is too big: go down to a 4.5 mm (7) hook, or tighten the tr in Round 2.
If your flower is too small: go up to a 5.5 mm (I-9) hook.
A difference of 0.25 in (0.6 cm) per flower adds up to 4 in (10.2 cm) across 16 flowers, so get your test flower right before going on.
Flower Motif
Work in joined rounds with the right side facing. Do not turn.
Round 1 (center): Make a magic ring. Ch 3 (counts as dc), 9 dc in ring. Pull the ring closed. Sl st to the top of the beginning ch-3.
Count: 10 dc.
Round 2 (spokes): Ch 4 (counts as tr), ch 2. Tr in next st, ch 2; repeat from * 8 more times. Sl st to the 4th ch of the beginning ch-4.
Count: 10 tr and 10 ch-2 sps.*
These ten tall spokes and the ch-2 spaces between them form the open windows around the center.
Round 3 (solid ring): Ch 1. Sc in next tr, 2 sc in next ch-2 sp; repeat from * around. Sl st to the first sc.
Count: 30 sc (10 sc worked into the tr + 20 sc worked into the spaces).*
Place a marker in the first sc. Each petal in the next round is built on 6 sts.
Round 4 (petal base): Ch 1. Sc in next st, (hdc, dc) in next st, 2 tr in each of next 2 sts, (dc, hdc) in next st, sc in next st; repeat from * 4 more times. Sl st to the first sc.
Count: 50 sts, 10 per petal (1 sc, 1 hdc, 1 dc, 4 tr, 1 dc, 1 hdc, 1 sc).*
You now have 5 small petals. Number them for joining later: Petal 1 points up, then Petals 2, 3, 4, and 5 go clockwise.
Round 5 (full petals, BLO): Work this whole round in back loops only. Ch 1. Sl st in next sc, sc in next hdc, 2 hdc in next dc, 2 dc in each of next 4 tr, 2 hdc in next dc, sc in next hdc, sl st in next sc; repeat from * 4 more times. Sl st to the first sl st.
Count: 80 sts, 16 per petal (1 sl st, 1 sc, 2 hdc, 8 dc, 2 hdc, 1 sc, 1 sl st).*
The unused front loops of Round 4 form the ridge line at the base of each petal. Placing the 8 dc side by side gives the radiating ribbed look. The two sl sts that sit next to each other between petals form a deep valley.
Round 6 (rope edge): Ch 1. Working left to right, rev sc in each st around. Sl st to the first rev sc.
Count: 80 rev sc, 16 per petal.
Fasten off, leaving a 12 in (30.5 cm) tail on flowers you plan to use for joining. Weave in the starting tail.
Petal edge stitch map (Round 6): On each petal, sts 1 and 16 sit in the valleys, and sts 7–10 are the 4 center stitches at the petal tip. You will use these numbers for joining.
Make All Pieces
Make 320 flowers in Lavender, about 2,560 g / 5,120 m (5,599 yd) before the margin.
Block flowers in batches of 20 so you can check that they are all the same size.
Layout grid (F = one flower, Petal 1 pointing up, 16 across x 20 rows):
Row 1:  F F F F F F F F F F F F F F F F
Row 2:  F F F F F F F F F F F F F F F F
Row 3:  F F F F F F F F F F F F F F F F
  ...   (repeat for every row)
Row 20: F F F F F F F F F F F F F F F F
Rows sit directly under each other with no offset.
Joining
Use the tails and a tapestry needle to whipstitch the flowers together through both loops of the Round 6 rev sc. Every join is 4 stitches to 4 stitches.
Side-to-side joins (within a row): Hold two flowers side by side. Petal 2 (upper right) of the left flower meets Petal 5 (upper left) of the right flower. Whipstitch sts 7–10 of Petal 2 to sts 10–7 of Petal 5, one stitch to one stitch.
Row-to-row joins: Petal 1 of the lower flower nests into the valley between Petals 3 and 4 of the flower above it. Whipstitch sts 7–10 of Petal 1 to the 4 valley stitches of the upper flower: st 15 and st 16 of Petal 3, plus st 1 and st 2 of Petal 4.
Each inside flower has 4 joins: 2 side joins and 2 row joins. Edge flowers have fewer joins.
Tension: Pull each whipstitch just snug enough to close the gap, with no puckering. The rope edges should touch and stay round, not flatten. Secure each join with a small knot and weave the tail into the petal ribs.
Size checkpoints:
– After Row 1: 15 x 4.75 in + 5 in = 76.25 in (193.7 cm) wide
– After Row 10: 9 x 4.25 in + 5 in = 43.25 in (109.9 cm) long
– After Row 20: 19 x 4.25 in + 5 in = 85.75 in (217.8 cm) long
If a row comes out more than 0.5 in (1.3 cm) off, check the widths of the flowers in that row before going on.
Border
There is no separate border round. Round 6 of each flower already gives a firm rope edge, and the petals along the outside form a scalloped edge.
Border gauge: 16 rev sc per petal scallop. Each scallop measures about 1.75 in (4.4 cm) along the curve.
Edge counts per side:
– Top edge: 16 flowers x 1 free scallop (Petal 1) = 16 scallops, 16 x 16 = 256 rev sc
– Bottom edge: 16 flowers x 2 free scallops (Petals 3 and 4) = 32 scallops, 32 x 16 = 512 rev sc
– Left side: 20 flowers x 1 free side scallop (Petal 5) = 20 scallops, 20 x 16 = 320 rev sc
– Right side: 20 flowers x 1 free side scallop (Petal 2) = 20 scallops, 20 x 16 = 320 rev sc
These counts are the outer rope edge already present on the flowers. Nothing is added.
Why the math works: Every scallop has the same 16 stitches on the same curve, so the edge cannot ruffle or cup. Adding a straight border would pull the scallops in, and this design does not need one. Because no stitches are added, the finished size is the same as the joined size.
Final Blocking
- Lay the bedspread on a clean floor or a bed covered with blocking mats and towels.
- Spray it evenly until it is damp, not soaked.
- Pin the four corner flowers first, keeping the size at 76.25 in x 85.75 in (193.7 cm x 217.8 cm).
- Pin the outer scallops one at a time, one pin at each petal tip (st 8 or 9).
- Gently open each center window with your fingertips so the spokes lie straight.
- Smooth the petal ribs outward from the center.
- Let it dry completely, usually 24–48 hours, before unpinning.
Final Quality-Control Checklist
- Every flower has exactly 80 rev sc in Round 6.
- Every flower measures 5 in (12.7 cm) tip to tip, give or take 0.125 in (0.3 cm).
- Petal 1 points up on every flower.
- All joins are 4 sts to 4 sts, in the correct petal positions.
- The bedspread measures 76.25 in x 85.75 in (193.7 cm x 217.8 cm).
- All tails are woven in through the petal ribs and do not show on the right side.
- The scallops lie flat with no curling.
Troubleshooting
Petals cup or curl forward: Round 5 is too tight. Loosen your dc, or go up 0.5 mm for Round 5 only.
Petals ruffle: Too many stitches. Count 16 per petal in Round 5.
Center windows close up: The tr in Round 2 are too short. Pull up a taller first loop on each tr.
Rope edge looks flat: Twist the hook slightly as you work each rev sc, and don’t skip stitches.
Joined rows drift sideways: One flower is rotated. Check that Petal 1 points up before joining.
Joins pucker: Your whipstitches are too tight. Redo them with a looser pull.
Care
Machine wash cold on a gentle cycle in a large laundry bag, or hand wash, then lay flat to dry. Reshape the petals while damp. Do not hang a wet bedspread, because the weight will stretch the joins.
Final Notes
The measurement chain is simple: gauge of 16 sc = 4 in (10.2 cm) gives a 5 in (12.7 cm) flower. The flowers space at 4.75 in (12.1 cm) across and 4.25 in (10.8 cm) down. Sixteen flowers across makes 76.25 in (193.7 cm), and twenty rows down makes 85.75 in (217.8 cm). Check your first flower carefully, keep each petal at 16 stitches, and the whole bedspread will come out right.
Happy crocheting!