

The Cinnamon Snowfall Tree is a small, flat Christmas tree ornament. The rust-red body is scattered with cream spots that look like snow on spiced cookie dough. A crisp cream border traces every step of the outline and finishes in a sturdy hanging loop at the tip.
The style is cozy and Scandinavian. Warm rust, soft cream and simple geometry make it look good on a tree, a gift tag, a garland hook or a rearview mirror. Only two colors are used, and the spots come from single tapestry stitches. You never work more than one cream stitch in a row.
This pattern uses US crochet terms. The finished ornament measures 4.2 in (10.7 cm) wide by 4.65 in (11.8 cm) tall without the loop. The loop adds about 1.25 in (3.2 cm), for a total hanging height of about 5.9 in (15.0 cm).
The tree is worked flat in rows from the base up to the tip. The sides step in by one stitch at each end every other row. Next you work the trunk into the underside of the foundation chain. One cream round of single crochet then outlines the whole shape and makes the hanging loop.
Finished Size and Construction
- Finished size: 4.2 in (10.7 cm) wide x 4.65 in (11.8 cm) tall, plus a 1.25 in (3.2 cm) loop
- Skill level: Easy-intermediate (basic tapestry color changes)
- Terminology: US crochet terms
- Yarn weight: DK / light worsted (#3), cotton or cotton blend
- Hook: 3.5 mm (E-4)
- Number of pieces: 1
- Layout: Single flat motif: triangle tree on a centered rectangular trunk
- Piece size before border: 3.8 in (9.7 cm) wide x 4.25 in (10.8 cm) tall
- Border depth: 1 round of sc, about 0.2 in (0.5 cm) on every edge
Materials
Use a smooth, tightly plied cotton in DK weight. Cotton gives crisp stitch definition, so the cream spots stay sharp and the stepped edges hold their shape. Avoid fuzzy or brushed yarns, which blur the tapestry pattern.
- Color A – Rust/Terracotta: 7 g, about 16 m (17.5 yd)
- Color B – Cream: 5 g, about 12 m (13 yd)
These quantities include a safety margin for carrying the cream yarn, for the border, and for weaving in ends. One 50 g ball of each color makes many ornaments.
Tools:
– 3.5 mm (E-4) crochet hook
– Tapestry needle
– Scissors
– Stitch marker (optional, for marking row 1’s right side)
– Ruler or tape measure
– Blocking mat and rust-proof pins
– Spray bottle with water
Abbreviations (US Terms)
- ch – chain
- sc – single crochet
- sl st – slip stitch
- st(s) – stitch(es)
- sk – skip
- RS / WS – right side / wrong side
- A – Rust (main color)
- B – Cream (contrast color)
Special technique – Tapestry color change: Work the stitch before the color change until 2 loops remain on the hook. Drop the current color, yarn over with the new color and pull through both loops. Keep working over the unused color, laying it along the tops of the stitches so it is hidden inside each new sc.
Special technique – Step decrease: Ch 1 and turn. Skip the first stitch and work across to the last stitch. Leave the last stitch unworked. This removes 2 stitches per row (1 at each end) and makes a small square “ledge” at both edges, which gives the tree its stepped outline.
Gauge and Checkpoints
Gauge: 20 sc x 22 rows = 4 in (10.2 cm) in tapestry sc, worked while carrying the second color.
That works out to 5 sts and 5.5 rows per inch. Each stitch is about 0.2 in (0.5 cm) wide, and each row is a little under 0.2 in tall.
The ornament is small, so it is its own gauge swatch. Make one tree, check it at each stage below, and adjust before you make a batch.
- After Row 1: Width is 3.8 in (9.7 cm).
- After Row 10: Row 10 is 11 sts and about 2.2 in (5.6 cm) wide. The piece is about 1.8 in (4.6 cm) tall.
- After Row 19: The tree body is about 3.5 in (8.9 cm) tall.
- After the trunk: The trunk is 1 in (2.5 cm) wide and about 0.75 in (1.9 cm) tall. The total height is about 4.25 in (10.8 cm).
- After the border: 4.2 in (10.7 cm) x 4.65 in (11.8 cm).
If your piece is too big: Go down to a 3.25 mm (D-3) hook or tighten your carried strand slightly. If it is too small or stiff: Go up to a 3.75 mm (F-5) hook. A difference of ±0.1 in (0.3 cm) is fine. If you are off by ±0.25 in (0.6 cm) or more, change hooks.
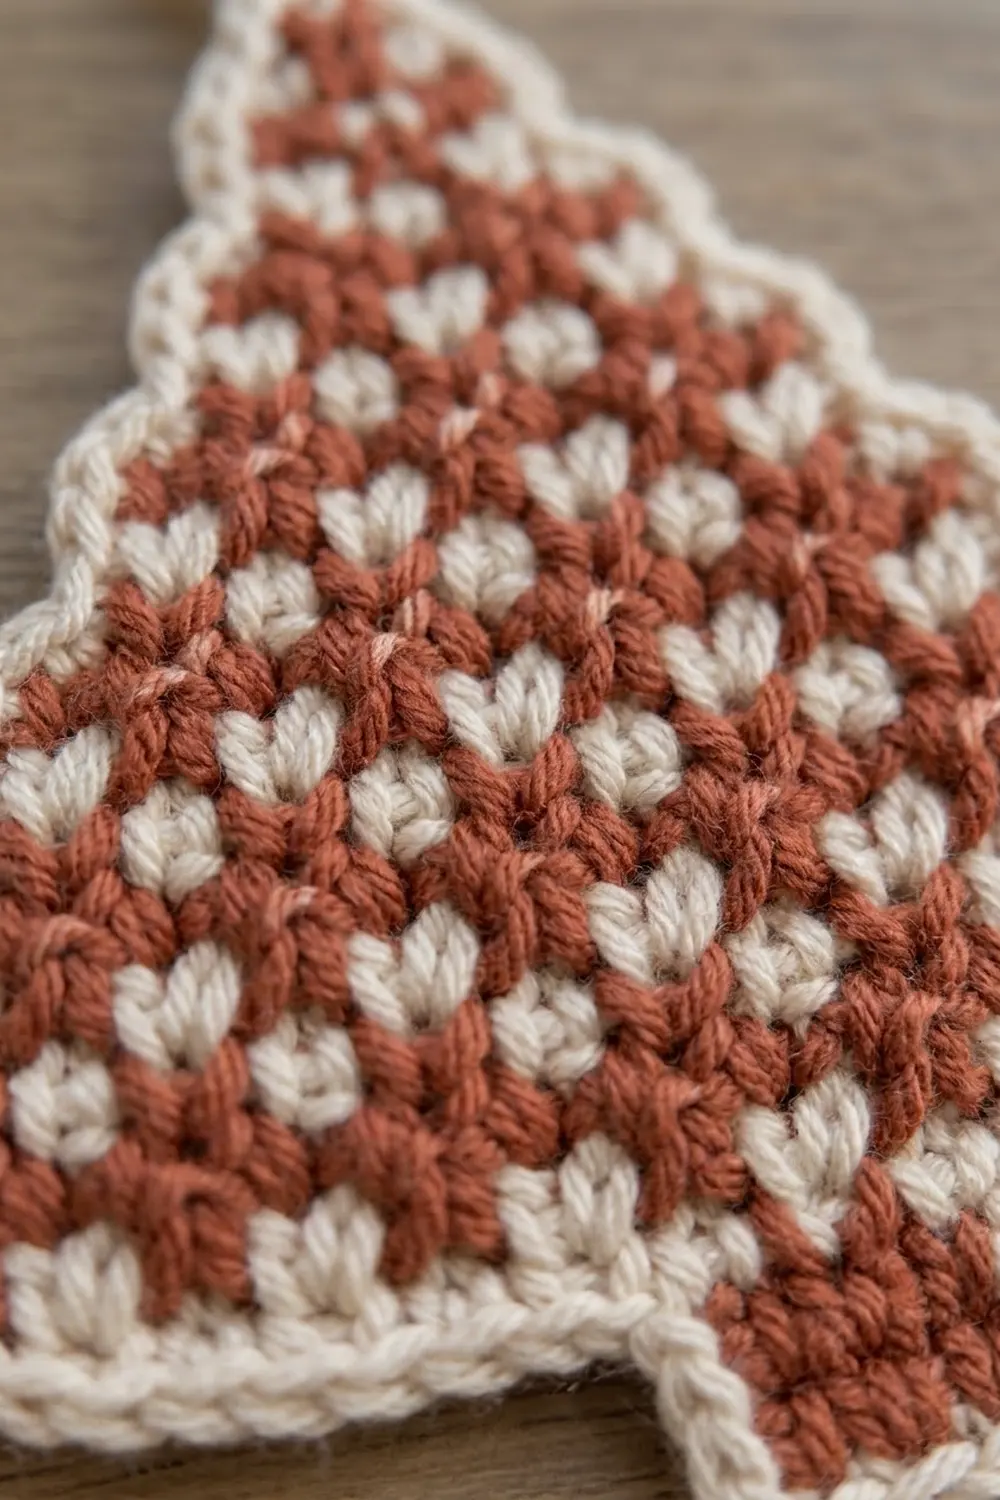
Tree Body
The body is worked in rows. Carry B through every row of the tree, including the plain rows, so it is always at hand for the next dot row. On the plain rows you simply sc over it.
Odd rows are plain A rows (Row 1 and the decrease rows). Even rows are dot rows, and they keep the same stitch count as the row before them.
Foundation: With A, ch 20.
Row 1 (RS): Lay B along the top of the chain. Working over B, sc in 2nd ch from hook and in each ch across. (19 sts)
Row 2 (dot row): Ch 1 and turn. 1 A, [1 B, 3 A] 4 times, 1 B, 1 A. (19 sts: 14 A, 5 B)
Row 3: Step decrease in A. (17 sts)
Row 4 (dot row): Ch 1 and turn. 2 A, [1 B, 3 A] 3 times, 1 B, 2 A. (17 sts: 13 A, 4 B)
Row 5: Step decrease in A. (15 sts)
Row 6 (dot row): Ch 1 and turn. 3 A, [1 B, 3 A] twice, 1 B, 3 A. (15 sts: 12 A, 3 B)
Row 7: Step decrease in A. (13 sts)
Row 8 (dot row): Ch 1 and turn. 4 A, 1 B, 3 A, 1 B, 4 A. (13 sts: 11 A, 2 B)
Row 9: Step decrease in A. (11 sts)
Row 10 (dot row): Ch 1 and turn. 1 A, [1 B, 3 A] twice, 1 B, 1 A. (11 sts: 8 A, 3 B)
Checkpoint: Row 10 is about 2.2 in (5.6 cm) wide, and the piece is about 1.8 in (4.6 cm) tall.
Row 11: Step decrease in A. (9 sts)
Row 12 (dot row): Ch 1 and turn. 2 A, 1 B, 3 A, 1 B, 2 A. (9 sts: 7 A, 2 B)
Row 13: Step decrease in A. (7 sts)
Row 14 (dot row): Ch 1 and turn. 3 A, 1 B, 3 A. (7 sts: 6 A, 1 B)
Row 15: Step decrease in A. (5 sts)
Row 16: Ch 1 and turn. 5 A. This row has no dot, because the offset position would land on the edge stitches. (5 sts)
Row 17: Step decrease in A. (3 sts)
Row 18 (dot row): Ch 1 and turn. 1 A, 1 B, 1 A. (3 sts: 2 A, 1 B)
Row 19: Step decrease in A. (1 st) Fasten off A and B, leaving 4 in (10.2 cm) tails.
Why the dots stagger: Each step decrease shifts the row by one stitch. The dot rows alternate between two sets of positions 4 stitches apart, so the dots line up in a diagonal lattice and every dot row stays mirror-symmetric around the center stitch. The first and last stitch of every row is always A, so no cream spot touches the cream border.
The tree body is now 3.8 in (9.7 cm) wide at the base and about 3.5 in (8.9 cm) tall. There are 9 ledges on each side. Each ledge is 0.2 in (0.5 cm) wide and about 0.35 in (0.9 cm) tall.
Trunk
Turn the tree upside down so the foundation chain is on top. Count the 19 underside loops: the trunk uses the center 5 loops, sts 8–12, leaving 7 sts free on each side.
Row 1: With RS facing, join A in the underside loop of st 8. Ch 1, then sc in the same st and in each of the next 4 sts. (5 sts)
Rows 2–4: Ch 1 and turn. Sc in each st across. (5 sts)
Fasten off. The trunk is plain A, so you don’t carry B here. It measures 1 in (2.5 cm) wide and about 0.75 in (1.9 cm) tall.
Checkpoint before border: The piece is 3.8 in (9.7 cm) wide x 4.25 in (10.8 cm) tall. Weave in all A and B tails now, hiding them inside stitches of the same color.
Border
Border gauge: Along the stitch tops, work 1 sc per st (5 sc per inch). Along the row ends, work 1 sc per row end. One sc row end is exactly one row tall, so the border lies flat. On each ledge, work 1 sc into the unworked stitch that forms the ledge.
Round 1: With RS facing, join B in the top of the Row 19 tip stitch.
- Tip: (Sc, ch 14, sc) in the tip st. (2 sc + ch-14 loop)
- Side B slant: Work down the stepped edge with 1 sc in each of the 19 row ends and 1 sc in each of the 9 ledge sts. (28 sc)
- Base B: 3 sc in the corner foundation st (st 19), then sc in sts 18–13. (9 sc)
- Trunk side B: 1 sc in each of the 4 trunk row ends. (4 sc)
- Trunk bottom: 3 sc in the first st, sc in the next 3 sts, 3 sc in the last st. (9 sc)
- Trunk side A: 1 sc in each of the 4 trunk row ends. (4 sc)
- Base A: Sc in sts 7–2, then 3 sc in the corner st (st 1). (9 sc)
- Side A slant: Work up the stepped edge with 1 sc in each of the 9 ledge sts and 1 sc in each of the 19 row ends. (28 sc)
Sl st to the first sc of the tip.
Round total: 2 + 28 + 9 + 4 + 9 + 4 + 9 + 28 = 93 sc, plus the ch-14 loop.
Corded loop: Sl st into the ch-14 space. Work 18 sc into the space, then sl st into the second tip sc. Fasten off and weave in.
Why the math works:
– Slants: The 19 row-end sc match the 19 rows, about 3.5 in (8.9 cm) of vertical edge. The 9 ledge sc match the 9 stitches skipped at that edge, 1.8 in (4.6 cm) of horizontal edge. The border follows every step without stretching or ruffling.
– Bottom edge: On each base section, the 7 stitches outside the trunk get 1 sc each, plus 2 extra at the outer corner, for 9. The trunk bottom’s 5 stitches get 1 sc each, plus 2 extra at each corner, for 9.
– No double counting: No extra stitches are added at the inside corners where trunk meets base.
The border adds 0.2 in (0.5 cm) on all sides. The final size is 3.8 + 0.4 = 4.2 in (10.7 cm) wide and 4.25 + 0.4 = 4.65 in (11.8 cm) tall.
Final Blocking
- Lightly mist both sides of the ornament with water until it is damp but not soaked.
- Lay it RS up on the blocking mat.
- Pin the tip and both base corners first, setting the base to 4.2 in (10.7 cm) wide.
- Pin the trunk bottom corners, setting the total height to 4.65 in (11.8 cm).
- Nudge each ledge into a crisp right angle with your fingertips, adding a pin at any step that rounds off.
- Straighten the loop and pin it upright at about 1.25 in (3.2 cm).
- Let it dry completely, usually 4–6 hours, before removing the pins.
Final Quality-Control Checklist
- Size is 4.2 in (10.7 cm) x 4.65 in (11.8 cm), within ±0.1 in (0.3 cm).
- Both slanted sides have 9 even steps and mirror each other.
- Every dot row is symmetric around the center stitch.
- Cream does not show through the rust stitches on plain rows.
- The trunk sits centered, with 7 base stitches on each side.
- The border has 93 sc, with 28 on each slant and 9 on each base section and on the trunk bottom.
- The loop is firm, upright and anchored at the tip.
- All tails are woven into stitches of the same color.
Troubleshooting
Cream peeks through the rust stitches: Keep the carried strand snug along the stitch tops, and turn your hook slightly to bury it fully. Switching to a tighter-plied cotton also helps.
The piece cups or puckers: The carried strand is too tight. Every few stitches, stretch the work gently to relax it.
The sides look smooth instead of stepped: Make sure you skip the first stitch and leave the last one unworked. Don’t use sc2tog for the decreases.
The border ruffles on the slants: You are adding sc at the ledge corners. Use exactly 1 sc per row end and 1 per ledge stitch.
The border pulls in at the base corners: Check that you worked 3 sc into each outer corner stitch.
The loop flops over: Work the 18 sc tightly over the chain, or go down half a hook size for the loop only.
The trunk is off-center: Pull it out and recount the underside loops. The trunk starts in st 8 of 19.
Care
Hand-wash in cool water with mild soap, press out the water in a towel, and lay flat to dry, reshaping the steps while damp. Do not tumble dry. Cotton holds its shape best when air-dried.
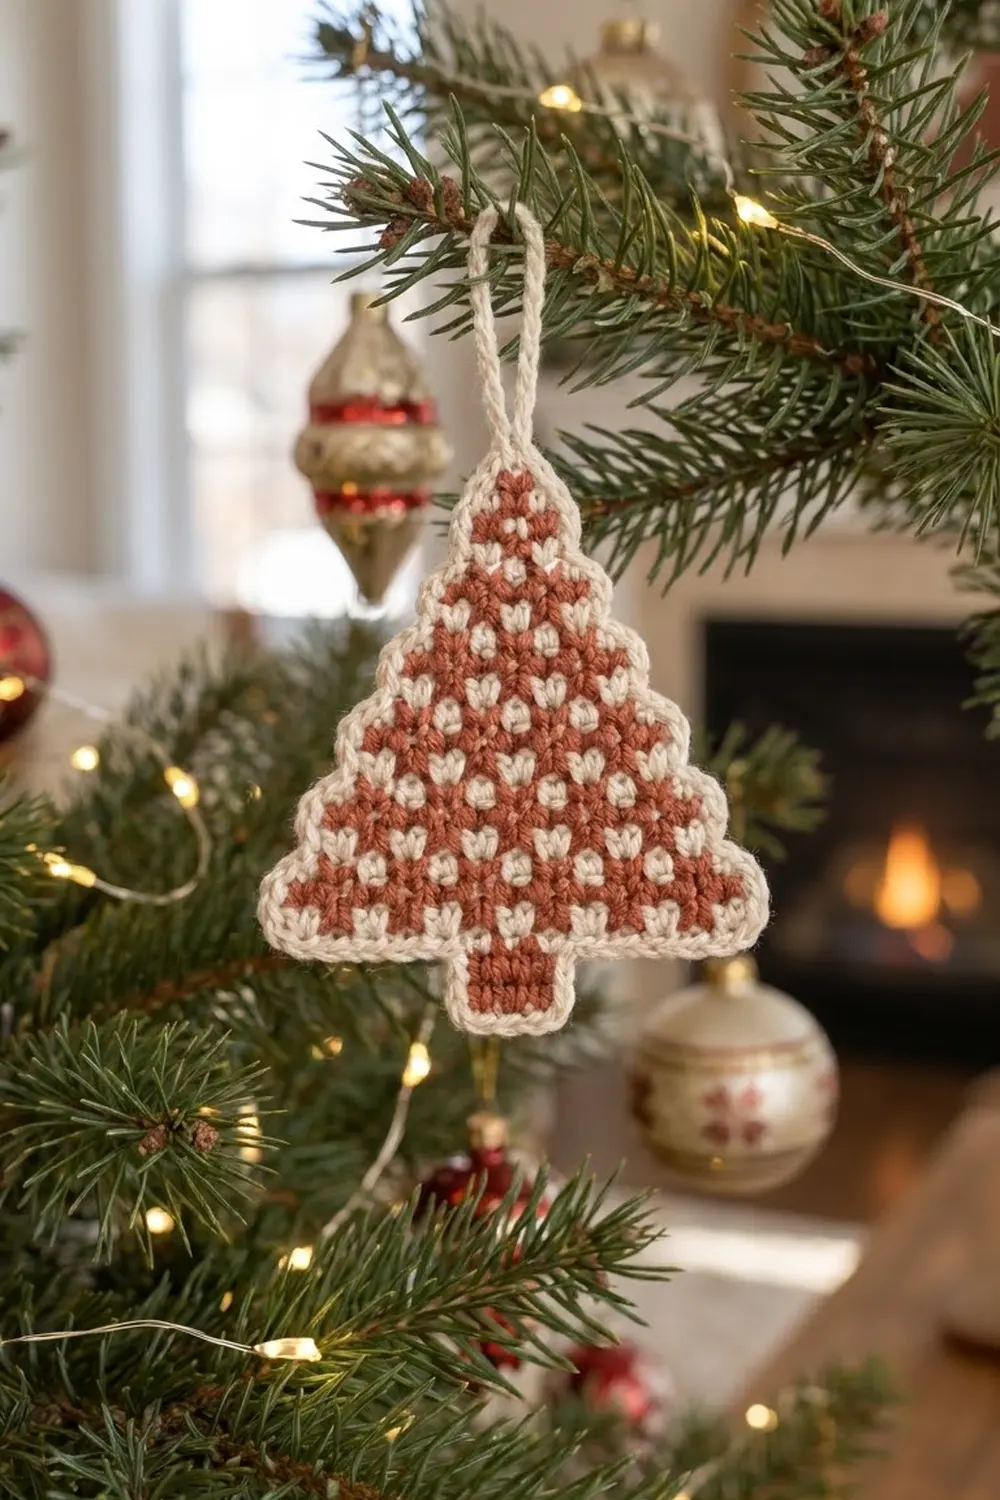
Final Notes
Here is the measurement chain to check your tree against:
- Gauge: 20 sc and 22 rows to 4 in (10.2 cm).
- Body: 19 base stitches give a 3.8 in (9.7 cm) base, and 19 rows make a body about 3.5 in (8.9 cm) tall.
- Trunk: A 5-stitch, 4-row trunk adds about 0.75 in (1.9 cm), for 4.25 in (10.8 cm) before the border.
- Border: A 93-stitch border adds 0.2 in (0.5 cm) all around, for a finished 4.2 in (10.7 cm) x 4.65 in (11.8 cm).
- Loop: The corded loop adds 1.25 in (3.2 cm) at the top.
If each checkpoint is on target, every tree in your batch will match. Make one for each branch of your own tree, tuck one into a card, or hang one from your mirror for the season.
Happy crocheting!