
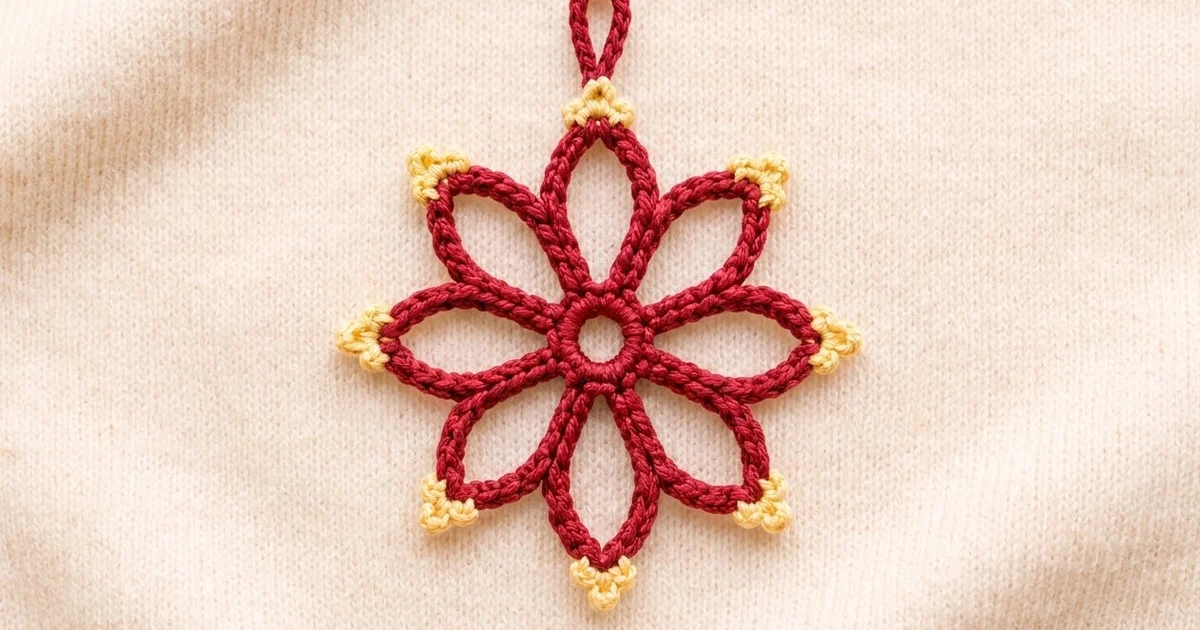
The Cranberry Frost Star is a lacy holiday ornament shaped like an eight-petal flower that is also a star. Each petal is an open, pointed loop outlined with a smooth, corded band of single crochet. A tiny cream picot cluster sits on every tip, like a little touch of frost.
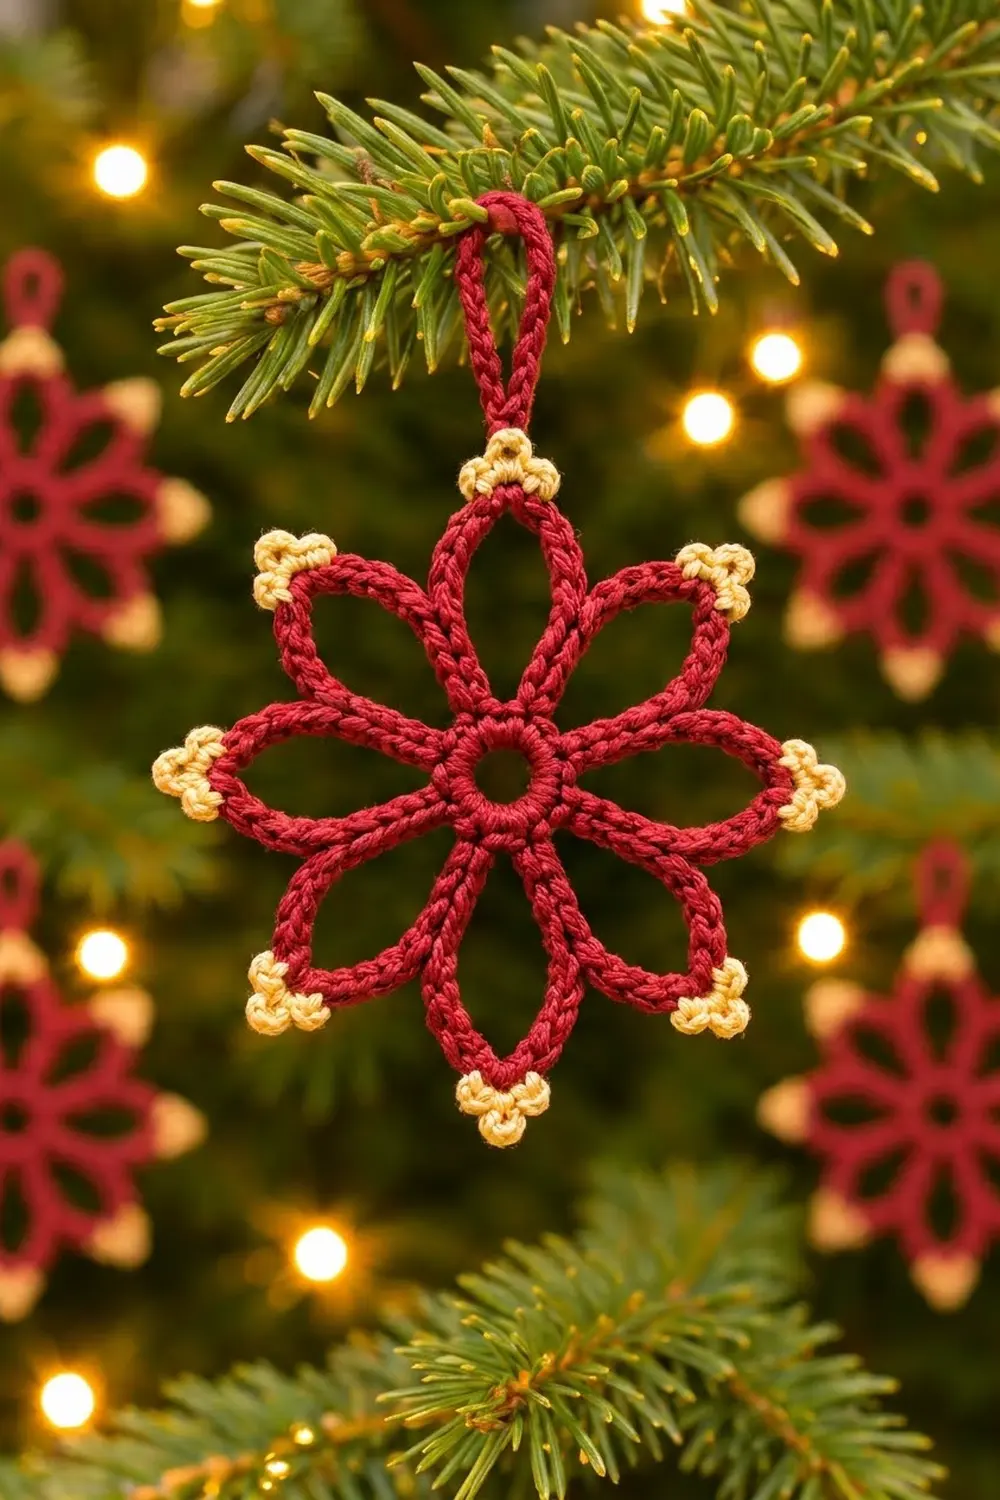
The palette is classic and warm: deep cranberry red for the center ring, the petals and the hanging loop, with soft cream at the tips. It looks traditional on a tree, and it is light enough to tie onto gifts or hang in a window.
This pattern uses US crochet terms. The finished ornament measures 4.5 in (11.4 cm) from tip to tip. The hanging loop adds about 1.25 in (3.2 cm), so the total hanging height is about 5.75 in (14.6 cm).
The ornament is worked in the round as one single piece. You make a small ring, then work long chain loops for the petals, then cover each loop with single crochet to form the corded outline. Last, you add the cream tip clusters and a red hanging loop. No sewing or joining is needed.
Finished Size and Construction
- Finished size: 4.5 in (11.4 cm) tip to tip
- Height with hanging loop: about 5.75 in (14.6 cm)
- Skill level: Easy / advanced beginner
- Terminology: US crochet terms
- Yarn weight: DK (light #3), cotton or cotton blend
- Hook: 3.5 mm (E-4)
- Number of pieces: 1 single motif
- Layout: 8 petals spaced evenly around a center ring
- Piece size before tips: 4 in (10.2 cm) tip to tip after Round 3
- Size before border: 4 in (10.2 cm)
- Border (tip cluster) depth: about 0.25 in (0.6 cm) per tip
Materials
Yarn advice: Choose a smooth, tightly plied DK cotton or cotton blend. Cotton shows the corded single crochet clearly and holds the pointed petal shape after blocking. Fuzzy or loosely spun yarns will blur the outline.
- Color A – Cranberry Red: about 5 g / 12 m (center, petals, hanging loop)
- Color B – Cream: about 2 g / 5 m (tip clusters)
These quantities include a margin for a gauge swatch and for weaving in ends. If you plan to make a set of ornaments, multiply by the number you want.
Tools:
- 3.5 mm (E-4) crochet hook
- Tapestry needle
- Scissors
- Blocking board or foam mat
- 9 rustproof pins (8 tips plus 1 for the hanging loop)
- Spray bottle with water
- Optional: light spray starch for a crisper ornament
Abbreviations (US Terms)
- ch – chain
- sl st – slip stitch
- sc – single crochet
- st(s) – stitch(es)
- sp – space
- rep – repeat
- Rnd – round
- p – picot
Special stitch – Picot (p): Ch 3, sl st in the 3rd ch from the hook. This makes one small round bump.
Gauge and Checkpoints
Gauge matters here because the petals are built from chain loops. If your chains are very loose or very tight, the petals will change length and the star will change size.
Test one piece first. Make Rounds 1–3 in Color A before you commit to a set. Check your work against these numbers:
- Chain gauge: a chain of 20 measures about 3.5 in (8.9 cm) when it lies flat and is not stretched.
- After Rnd 1: the ring measures 1 in (2.5 cm) across, with a center hole of about 0.4 in (1.0 cm).
- After Rnd 3: the star measures 4 in (10.2 cm) from tip to tip, and each petal is about 1.5 in (3.8 cm) long from the edge of the ring to the tip.
- After the tip clusters: the star measures 4.5 in (11.4 cm) from tip to tip.
If your star is too big: go down one hook size, to 3.25 mm (D-3). Or tighten your chains in Rnd 2 only.
If your star is too small: go up one hook size, to 3.75 mm (F-5). Or relax your chains in Rnd 2.
If the petals ruffle or twist: your single crochet is looser than your chains. Keep the hook size and work the Rnd 3 single crochet a little more snugly.
Center Ring and Petals
Use Color A for the whole main section.
Foundation: Ch 6, sl st in the first ch to form a ring.
Rnd 1: Ch 1 (does not count as a st), work 16 sc in the ring, sl st in the first sc to join. (16 sc)
This is the solid red ring that frames the center hole. Pull the starting tail gently to close the ring to about 0.4 in (1.0 cm).
Rnd 2 (petal loops): Ch 1, sc in next sc, ch 20, sc in next sc; rep from * 7 more times. Sl st in the first sc to join. (16 sc and 8 ch-20 loops)*
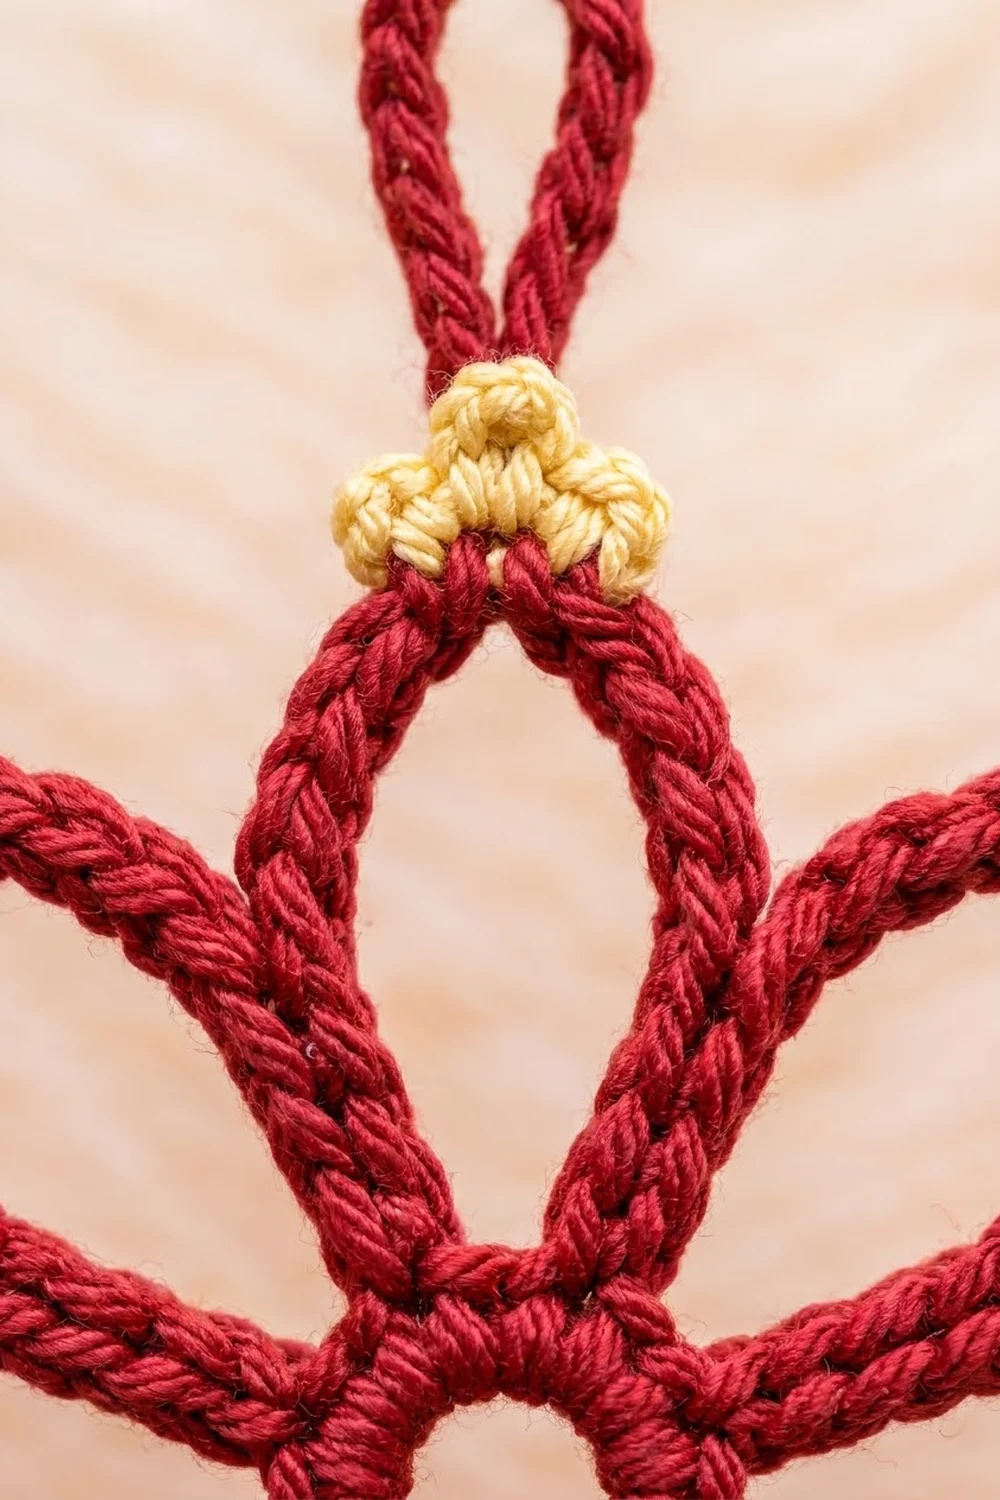
Each petal loop is anchored by two neighboring sc. The second sc of one petal sits right beside the first sc of the next petal. That is what makes the petals meet in the narrow V you see at the ring. Before you continue, check that the loops are not twisted.
Rnd 3 (corded petal outline): Do not ch 1. *Work (10 sc, ch 2, 10 sc) in the next ch-20 loop, then sl st in each of the next 2 sc of Rnd 2; rep from * 6 more times. Work (10 sc, ch 2, 10 sc) in the last ch-20 loop, sl st in the next sc, then sl st in the first sc of Rnd 2 to finish the round. Fasten off and weave in the ends.
Count for Rnd 3: 8 petals × (20 sc + 1 ch-2 tip sp) = 160 sc and 8 ch-2 tip sps, plus 16 sl sts at the ring.
Why this works: Each ch-20 loop gets exactly 20 sc, one for each chain. Ten sc go up one side, the ch-2 makes the point, and ten sc come down the other side. That 1:1 ratio keeps the outline smooth and lets the loop stay open as a pointed oval. Packing the sc tightly over the chain creates the thick, corded look.
Checkpoint: Lay the piece flat. It should measure 4 in (10.2 cm) from tip to tip, and each petal should be about 1.5 in (3.8 cm) long.
Border: Cream Tip Clusters
The “border” on this ornament is the eight small cream trefoils on the petal tips. They are worked one tip at a time and do not run around the whole outline. That way the red corded edge stays clean between the tips.
Border gauge: One finished cluster sticks out about 0.25 in (0.6 cm) past the red tip. Its three picots should sit in a small fan about 0.5 in (1.3 cm) wide.
Tip Cluster (make 8, one on each petal tip):
- With Color B, join with a sl st in the 10th sc of a petal (the last sc before the ch-2 tip).
- In the ch-2 tip sp, work (sc, p, sc, p, sc, p, sc).
- Sl st in the next sc (the first sc after the tip).
- Fasten off, leaving a 4 in (10.2 cm) tail.
Count per cluster: 4 sc + 3 picots + 2 sl sts. For all 8 clusters: 32 sc, 24 picots, 16 sl sts.
Why the math works: Every petal has exactly 10 sc on each side of a ch-2 tip. Each cluster uses only the last sc before the tip, the tip space itself and the first sc after it. That is the same three spots on every petal, so all eight clusters sit in exactly the same place and the eight-fold symmetry holds. The 0.25 in (0.6 cm) cluster on both opposite tips adds 0.5 in (1.3 cm) across. That takes the star from 4 in (10.2 cm) to 4.5 in (11.4 cm).
Weaving tip: Weave each cream tail into the red sc next to the same tip, through the back of the stitches. Keep the cream hidden inside the red cord so it does not show.
Hanging Loop
Choose the petal that will be at the top.
- With Color A, join with a sl st in the middle picot of that petal’s cream cluster.
- Ch 14.
- Sl st in the same middle picot.
- Fasten off and weave in the ends through the back of the cluster.
The loop should hang about 1.25 in (3.2 cm) above the cream cluster. If you want a ribbon or hook to pass through more easily, use ch 18 instead. That gives a loop of about 1.5 in (3.8 cm).
Final Blocking
Blocking makes the petals symmetrical and sharpens the points.
- Weave in all ends before you block. Do not trim them closely yet.
- Mist the ornament lightly with water until it is damp but not dripping.
- On your blocking board, mark a circle 4.5 in (11.4 cm) across. Grid lines make this easy.
- Lay the ornament in the center with the ring centered on the circle.
- Pin the top petal through its middle picot at the edge of the circle.
- Pin the bottom petal directly opposite it, then the left and right petals.
- Pin the four diagonal petals halfway between those, so all eight tips are 45 degrees apart.
- Pin the hanging loop straight up so it dries in shape.
- With a finger, gently round out each petal so the center opening is an even pointed oval.
- If you like, mist lightly with spray starch for a stiffer ornament.
- Let it dry completely before you unpin. This usually takes several hours.
- Trim the woven tails close to the fabric.
Final Quality-Control Checklist
- The star measures 4.5 in (11.4 cm) from tip to tip in every direction.
- The center ring is round, and its hole is about 0.4 in (1.0 cm) across.
- All 8 petals are the same length, about 1.5 in (3.8 cm) from ring to red tip.
- Each petal has 10 sc on each side of the tip.
- No petal loop is twisted.
- All 8 cream clusters have 3 round picots.
- The cream clusters are centered on the tips and lean neither left nor right.
- The hanging loop is attached to the middle picot of the top cluster and stands straight.
- No cream yarn shows through the red cord.
- All ends are secure and trimmed.
Troubleshooting
The petals are different lengths. Your ch-20 loops were uneven. Count each chain carefully. If it is only slightly off, blocking can even it out. If the difference is big, rework Rnd 2.
A petal is twisted. You worked a loop over a twisted chain. Undo Rnd 3 back to that petal, untwist the chain and rework it.
The petals ruffle or cup. Your single crochet is too loose compared with the chain. Work Rnd 3 more snugly, or use a slightly smaller hook just for Rnd 3.
The petals pucker or curl inward. Your single crochet is too tight. Relax your tension, or use a hook one size larger for Rnd 3 only.
The center hole is too big. Pull the starting tail of the ring firmly before weaving it in.
The tip clusters are lopsided. Make sure you joined in the 10th sc and finished in the first sc after the tip, with all four sc of the cluster worked into the ch-2 tip space.
The picots are flat. Pull each sl st snug, and pin through the picots when you block.
The ornament feels floppy. Use spray starch when blocking, or block it again with a slightly stronger starch solution.
Care
Hand wash in cool water with mild soap, press out the water in a towel, and reshape and pin it flat to dry. Store the ornament flat in a box between sheets of tissue paper to keep the petals and picots crisp.
Final Notes
The whole ornament depends on a short measurement chain. A 20-chain length of 3.5 in (8.9 cm) gives petal loops that become 1.5 in (3.8 cm) petals once they are covered with 20 sc each. That makes a 4 in (10.2 cm) star after Rnd 3. The eight cream clusters each add 0.25 in (0.6 cm), so the star blocks to 4.5 in (11.4 cm), and the 14-chain hanging loop brings the total height to about 5.75 in (14.6 cm). If your checkpoints match at each stage, your Cranberry Frost Star will come out just like the original.
Happy crocheting!