

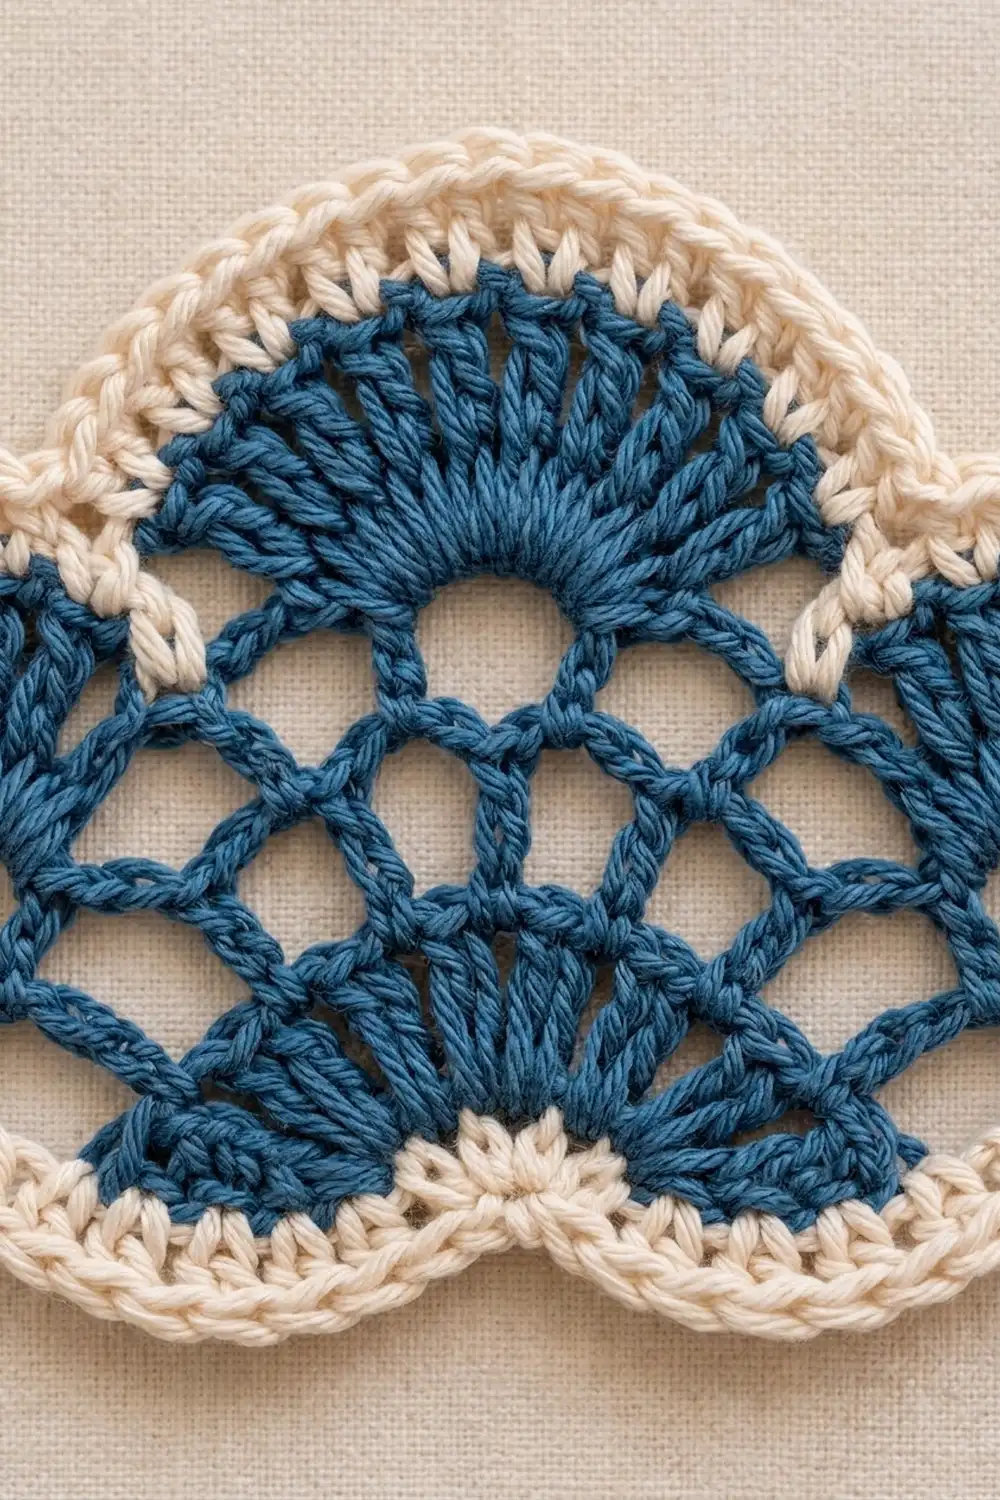
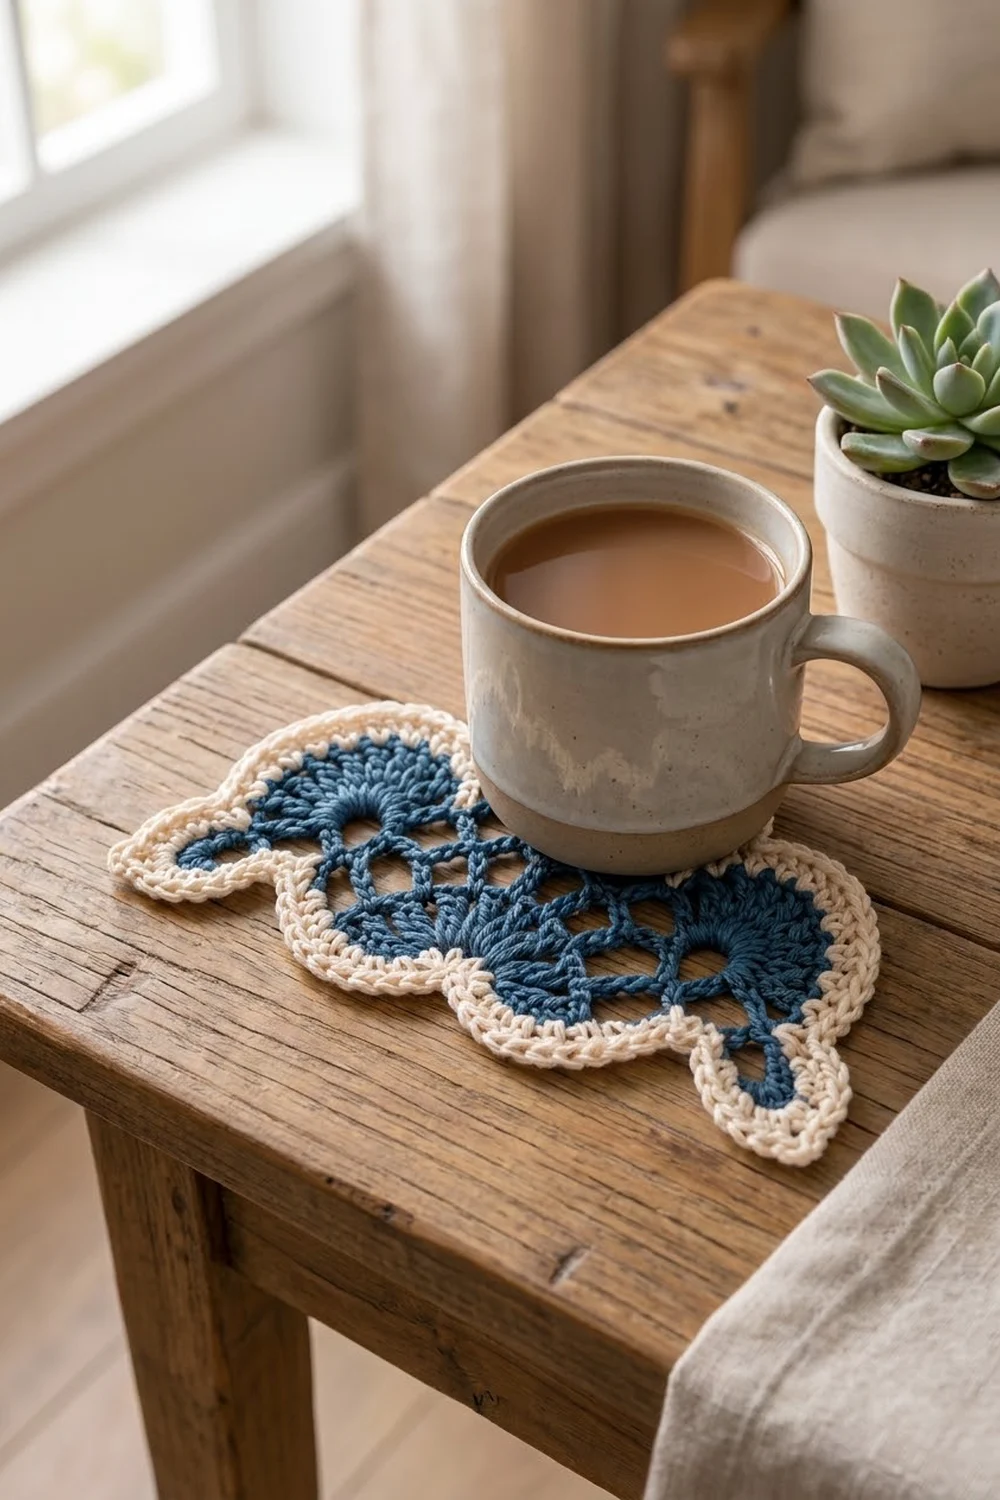
The Delft Fan Shell Motif is a single scalloped lace piece in denim blue and soft cream. Three dense fans sit along the top: one large fan in the center and a smaller fan on each side. Below them is an open chain net, and a small ring sits at the bottom center under a tiny half-fan.
A cream border goes all the way around. Along the curved top it is a smooth, slightly raised edge. Along the bottom it becomes a row of shell scallops, so the motif ends in two little points at the lower corners. The blue-and-cream contrast gives it a classic delftware look.
The pattern uses US crochet terms. The finished motif is 8 in (20.3 cm) wide and 4.5 in (11.4 cm) tall, including the border.
The motif is worked flat in rows as a half circle. You start from a ring at the bottom center and work outward: a dc half-fan, four rows of chain net with loops that grow longer each row, and then a fan row. The two-round cream border is added last.
Finished Size and Construction
- Finished size: 8 in (20.3 cm) wide x 4.5 in (11.4 cm) tall
- Skill level: Intermediate (easy chain-net rows, but you need to keep careful loop counts)
- Terminology: US crochet terms
- Yarn weight: DK (#3 light) cotton
- Hook: 3.5 mm (US E/4)
- Number of pieces: 1 single motif
- Layout: Half circle with a scalloped top (three fans) and a straight, shell-edged bottom
- Piece size before border: 7 in (17.8 cm) wide x 3.5 in (8.9 cm) tall
- Border depth: About 1/2 in (1.3 cm) on every edge, measured to the scallop tips along the bottom
Materials
Yarn: Use a smooth mercerized or combed cotton in DK weight, about 115 m per 50 g. Cotton shows off the fan stitches clearly and blocks crisply. Soft acrylic will also work, but the net will be less defined.
For the delftware look, choose a medium denim or cobalt blue and a warm cream rather than a bright white. Strong contrast makes the net and the scallops easy to see.
- Color A, denim blue: 12 g (28 m)
- Color B, cream: 6 g (14 m)
These quantities include a margin of about 20 percent for your swatch and a little frogging.
Tools:
- 3.5 mm (US E/4) crochet hook
- Tapestry needle
- Scissors
- Rust-proof pins
- Blocking mat or folded towel
- Spray bottle with water
- Ruler or tape measure
Abbreviations (US Terms)
- ch – chain
- sl st – slip stitch
- sc – single crochet
- dc – double crochet
- tr – treble crochet
- sp – space
- st(s) – stitch(es)
- RS – right side
- rep – repeat
Special stitch – Shell: Work 5 dc in the same stitch.
Fan: Work a group of dc or tr into a single chain loop, as stated in the row. The stitches fan out over the loop, and the loop leaves a small opening at the base of the fan.
Gauge and Checkpoints
Border gauge: 20 sc = 4 in (10.2 cm) with Color B and a 3.5 mm hook.
Make the whole motif once as your test piece before you commit to more yarn. A half-circle net is easy to measure as you go. Lay the piece flat without stretching it, then check:
- After Row 1: 1.5 in (3.8 cm) wide x 0.75 in (1.9 cm) tall
- After Row 3: 3.5 in (8.9 cm) wide x 1.75 in (4.4 cm) tall
- After Row 5: 5.5 in (14.0 cm) wide x 2.75 in (7.0 cm) tall
- After Row 6: 7 in (17.8 cm) wide x 3.5 in (8.9 cm) tall
- After the border, blocked: 8 in (20.3 cm) wide x 4.5 in (11.4 cm) tall
Width means the straight bottom edge. Height runs from the center of that edge to the top of the center fan.
If your motif is too big: Go down to a 3.25 mm or 3 mm hook, or pull the net chains a little snugger.
If your motif is too small: Go up to a 3.75 mm or 4 mm hook.
If only the net is off: If the net is the wrong size but the dc row matches, change only the chain tension. Don’t change the stitch counts, because the border math depends on them.
Motif (Color A, denim blue)
The motif is worked in rows, turning at the end of each row. Each row’s two ends land on the straight bottom edge.
Ring: With Color A, ch 6 and sl st in the first ch to form a ring.
Row 1 (RS): Ch 3 (counts as dc), 12 dc in the ring. Turn. (13 dc)
The dc sit on the top half of the ring as a small half-fan. The bottom half of the ring stays exposed. This is the small ring you see at the bottom center.
Row 2: Ch 7 (counts as tr + ch 3). Skip the next dc and sc in the next dc. Ch 5, skip 1 dc, sc in the next dc; rep from * 3 more times. Ch 3, then tr in the top of the turning ch-3. Turn.
(2 tr, 5 sc, 4 ch-5 loops, 2 ch-3 edge sps)
Row 3: Ch 7 (counts as tr + ch 3) and sc in the first ch-3 sp. Ch 5, sc in the next ch-5 loop; rep from * 3 more times. Ch 5, sc in the last ch-3 sp, ch 3, then tr in the 4th ch of the turning ch. Turn.
(2 tr, 6 sc, 5 ch-5 loops, 2 ch-3 edge sps)
Row 4: Ch 7 (counts as tr + ch 3) and sc in the first ch-3 sp. Ch 6, sc in the next ch-5 loop; rep from * 4 more times. Ch 6, sc in the last ch-3 sp, ch 3, then tr in the 4th ch of the turning ch. Turn.
(2 tr, 7 sc, 6 ch-6 loops, 2 ch-3 edge sps)
Row 5: Ch 7 (counts as tr + ch 3) and sc in the first ch-3 sp. Ch 7, sc in the next ch-6 loop; rep from * 5 more times. Ch 7, sc in the last ch-3 sp, ch 3, then tr in the 4th ch of the turning ch. Turn.
(2 tr, 8 sc, 7 ch-7 loops, 2 ch-3 edge sps)
Each net row adds one loop, because you place an sc in every loop and both edge sps. The loops also get longer (ch 5, then 6, then 7), so the outer arc can grow and the half circle lies flat instead of cupping.
Tip: Before you start Row 6, count the loops in Row 5. There should be exactly 7 long loops between the two short edge sps. A stitch marker in the center loop (L4) makes Row 6 much easier to place.
Number the seven ch-7 loops L1 to L7, from the start of the next row.
Row 6 (fan row):
- Ch 1, sc in the first tr, ch 3, sc in the first ch-3 sp.
- Ch 3, sc in L1, ch 3, 9 dc in L2 (side fan).
- Ch 3, sc in L3, ch 3, 13 tr in L4 (center fan).
- Ch 3, sc in L5, ch 3, 9 dc in L6 (side fan).
- Ch 3, sc in L7, ch 3, sc in the last ch-3 sp, ch 3, then sc in the 4th ch of the turning ch.
Fasten off. (8 sc, 18 dc, 13 tr, 10 ch-3 sps)
The center fan is made of tr, so it stands taller than the two dc side fans. This gives the motif its three-lobed top. The first and last sc of Row 6 are the two lower corners.
Weave in the ends on the wrong side.
Border (Color B, cream)
Border gauge reminder: 20 sc = 4 in (10.2 cm). The bottom edge before the border is 7 in (17.8 cm), which would take about 35 sc at full gauge. The border uses 31 sc there, so the edge stays slightly relaxed and the shells can flare. Along the top, the fans make a lobed edge that is longer than a smooth arc. It measures about 12.5 in (31.8 cm) and takes 63 sc.
Round 1 (sc)
With the RS facing, join Color B with a sl st in the last sc of Row 6 (Corner A).
Corner A: Ch 1, then work 3 sc in this sc.
Arc: Work along the top, in this order:
- 2 sc in each ch-3 sp
- 1 sc in each sc
- 1 sc in each dc and each tr of the fans
Corner B: Work 3 sc in the first sc of Row 6.
Arc count, corners included:
- 6 corner sc (3 per corner)
- 6 sc in the inner sc of Row 6
- 31 sc across the fans
- 20 sc in the ch-3 sps (10 sps x 2 sc)
That makes 63 sts.
Bottom edge: Work down the first half of the bottom:
- 3 sc around the post of each edge tr of Rows 5, 4, 3 and 2 (12 sc)
- 2 sc around the Row 1 end st (14 sc for this half)
Next, work 3 sc around the exposed lower half of the ring. Then work the second half to match:
- 2 sc around the other Row 1 end st
- 3 sc around each edge tr of Rows 2, 3, 4 and 5
Bottom count: 14 + 3 + 14 = 31 sts.
Sl st in the first sc to join. (94 sts: 63 arc + 31 bottom)
Round 2 (sc arc and shell scallops)
Ch 1. Start in the same st and work across the arc as follows:
- 1 sc in each of the 63 arc sts
- 3 sc in the center sc of each corner group, which adds 2 extra sts per corner
Arc count: 63 sts worked 1 per st + 4 extra = 67 sc.
Bottom: Sc in the first bottom st. Skip 2 sts, 1 shell (5 dc) in the next st, skip 2 sts, sc in the next st; rep from * 4 more times.
Bottom count: 1 + (5 x 6) = 31 sts used. This makes 5 shells and 6 sc.
Sl st in the first sc to join. Fasten off and weave in the ends.
(Round 2 total: 73 sc + 25 dc = 98 sts)
Why the math works:
- Arc: The 3-sc corner groups turn the corner neatly, so the corners stay pointed instead of rounding off.
- Bottom: Each shell repeat uses exactly 6 sts (skip 2, shell, skip 2, sc). With 31 sts, 1 opening sc plus 5 full repeats fit with nothing left over, and both ends land on an sc next to a corner.
- Ring: The 3 sc around the ring fall inside the center repeat, so the middle shell sits right under the ring.
Final Blocking
- Weave in all ends securely along chain loops or inside fan stitches, so the ends don’t show through the net.
- Mist the motif evenly until it is damp but not dripping. For a firmer finish, soak it in cool water and roll it in a towel.
- Pin the straight bottom edge first, setting the corners 8 in (20.3 cm) apart.
- Pin the top of the center fan so the motif is 4.5 in (11.4 cm) tall at the center.
- Open each net loop with a pin so the openings look even and diamond-like.
- Pin each fan into a smooth half circle, with one pin at the top of each lobe and one in the dip between lobes.
- Pin the tip of each bottom shell so the scallops look even.
- Let the motif dry completely, at least 4 hours, before you remove the pins.
Final Quality-Control Checklist
- The motif measures 8 in (20.3 cm) x 4.5 in (11.4 cm).
- The center fan has 13 tr and each side fan has 9 dc.
- The net has 7 loops in Row 5, and the loops are evenly open.
- The ring at the bottom center is visible, with a neat half-fan above it.
- Border Round 1 has 94 sts and Round 2 has 98 sts.
- There are 5 even shells along the bottom, with the center shell under the ring.
- Both lower corners are pointed and the same shape.
- No yarn tails show on the right side.
Troubleshooting
The motif cups or curls upward. The net chains are too tight. Rework Rows 4 and 5 with looser chains, or add 1 ch to each loop in Row 5.
The motif ruffles. The chains are too loose, or you worked too many border sts. Count the arc again: it should have exactly 63 sts.
The fans lean to one side. Check that each fan is in the correct loop: L2, L4 and L6.
There is a gap at the base of a fan. This opening is part of the design. If it looks too large, work the fan stitches closer together inside the loop.
The net loops look uneven. Chain at a steady, relaxed tension. Blocking will even out small differences.
The shells don’t line up. Your bottom count isn’t 31. Fix Round 1 before you work Round 2.
The lower corners look rounded. Make sure Round 2 has 3 sc in the center sc of each corner group.
The ring closes up or puckers. Work the 3 border sc around the ring loosely.
Care
Hand wash in cool water with a mild detergent and press out the water with a towel. Dry flat, reshaping and re-pinning if needed.
Final Notes
The measurement chain:
- Row 1 measures 1.5 in (3.8 cm) wide.
- Row 3 measures 3.5 in (8.9 cm) wide.
- Row 5 measures 5.5 in (14.0 cm) wide.
- After the fan row, the motif is 7 in (17.8 cm) x 3.5 in (8.9 cm).
- The 1/2 in (1.3 cm) cream border brings it to 8 in (20.3 cm) x 4.5 in (11.4 cm).
If each checkpoint matches, the 94-st and 98-st border counts will lie flat. Take your time with the loop counts and enjoy watching the fans open up.
Happy crocheting!