
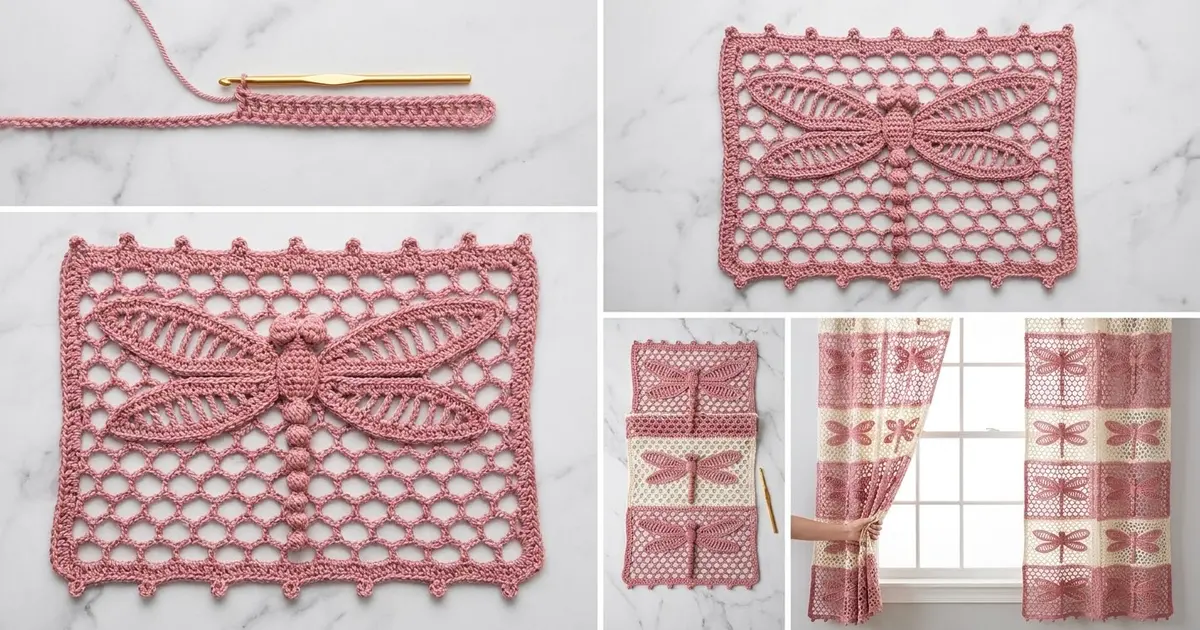
This panel pairs an open honeycomb net with a single dragonfly across its center. The net is made of chain loops held in place by small “nodes,” so each cell looks like a soft hexagon once blocked. The dragonfly has a segmented body, two round bobble eyes, and four lens-shaped wings filled with open ladder ribs.
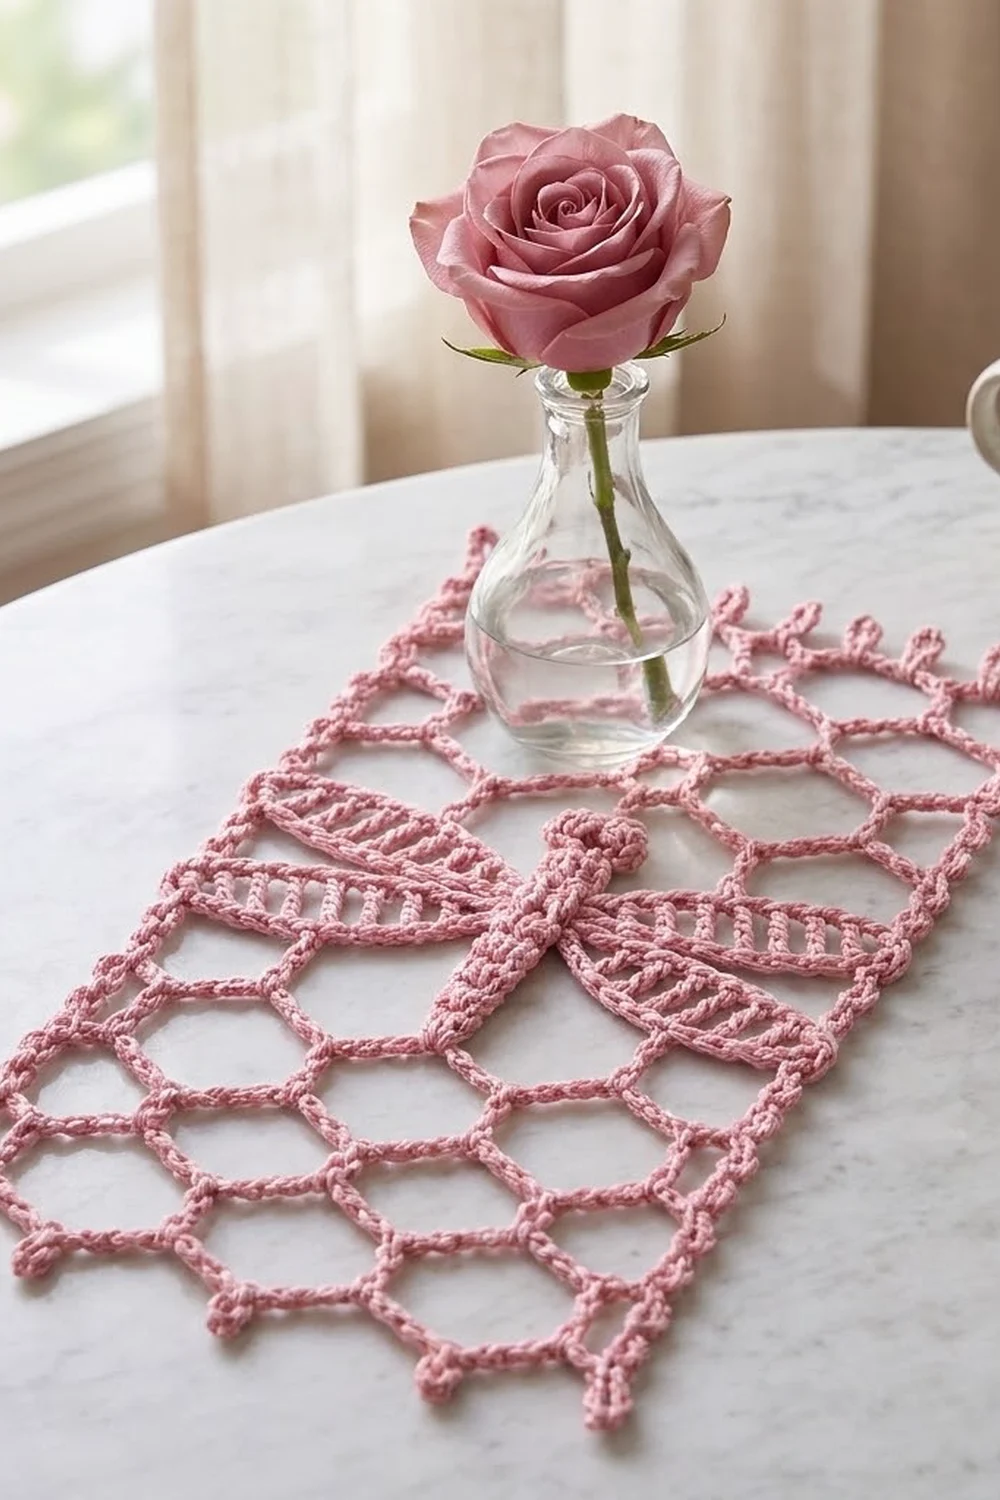
The sample uses one color, a dusty rose pink cotton, which keeps it light and airy. The style is delicate and lacy. It works well as a wall piece, a small window hanging, or a tray mat. All instructions use US crochet terms.
The finished panel measures 7.5 in wide x 10 in tall (19.1 cm x 25.4 cm), including the picot loops along the bottom edge.
Construction is simple. You crochet the honeycomb mesh flat in rows, then make the dragonfly body and four wings separately and sew them on. One round of single crochet frames the panel, and a slip-stitch round adds the small picot loops along the bottom.
Finished Size and Construction
- Finished size: 7.5 in x 10 in (19.1 cm x 25.4 cm)
- Skill level: Intermediate
- Terminology: US crochet terms
- Yarn weight: DK (#3) cotton or cotton blend
- Hook: 4.0 mm (US G-6)
- Number of pieces: 1 finished panel (a mesh base plus a sewn-on dragonfly made of 1 body and 4 wings)
- Layout: single panel, dragonfly centered, wings spanning the full mesh width
- Mesh size before border: 7 in x 9 in (17.8 cm x 22.9 cm)
- Border depth: 0.25 in (0.6 cm) on every side, plus 0.5 in (1.3 cm) of picot loops along the bottom
Materials
Choose a smooth, tightly plied DK cotton. Cotton gives crisp chain lines and holds a blocked shape, so the hexagons stay open. Fuzzy yarn blurs the mesh.
- Dusty rose pink: 40 g, approx. 100 m (109 yd)
- Mesh: about 22 g
- Dragonfly: about 8 g
- Border: about 4 g
Tools:
– 4.0 mm (US G-6) crochet hook
– Tapestry needle
– 4 locking stitch markers
– Rust-proof pins and a blocking mat
– Spray bottle with cool water
– Ruler or tape measure
These quantities include a margin of about 15% for your gauge test and sewing tails.
Abbreviations (US Terms)
- ch – chain
- sl st – slip stitch
- sc – single crochet
- hdc – half double crochet
- dc – double crochet
- tr – treble crochet
- sk – skip
- sp(s) – space(s)
- st(s) – stitch(es)
- RS / WS – right side / wrong side
Special stitches:
- Node: Work (sc, ch 2, sc) in the stated space. The ch-2 forms the short vertical bar of each hexagon.
- Bobble (4-dc bobble): Yarn over, insert your hook in the stitch, pull up a loop, yarn over, and pull through 2 loops. Repeat from * 3 more times in the same stitch. You now have 5 loops on the hook. Yarn over and pull through all 5.
- Picot: Ch 3, then sl st in the same stitch.
Gauge and Checkpoints
Mesh gauge (blocked): One repeat (a node plus a ch-4) = 1.4 in (3.6 cm). 12 rows = 9 in (22.9 cm), which averages 0.75 in (1.9 cm) per row.
Border gauge: 4 sc = 1 in (2.5 cm).
Use the first four mesh rows as your test. Pin them out lightly and measure before you continue. Chain mesh shrinks when it isn’t pinned, so always measure it pinned flat without stretching.
Checkpoints:
– After Row 1: 7 in (17.8 cm) wide when lightly stretched.
– After Row 4: 3 in (7.6 cm) tall.
– After Row 8: 6 in (15.2 cm) tall.
– After Row 12: 7 in x 9 in (17.8 cm x 22.9 cm).
– Body without eyes: 3.25 in (8.3 cm) long.
– Each wing: 3.25 in x 1.5 in (8.3 cm x 3.8 cm).
Too big: Change to a 3.5 mm hook and keep your chains snug and even.
Too small: Change to a 4.5 mm hook, or loosen your chains slightly.
A difference of up to 0.25 in (0.6 cm) is fine. If you’re off by more, the border counts won’t fit, so change your hook before continuing.
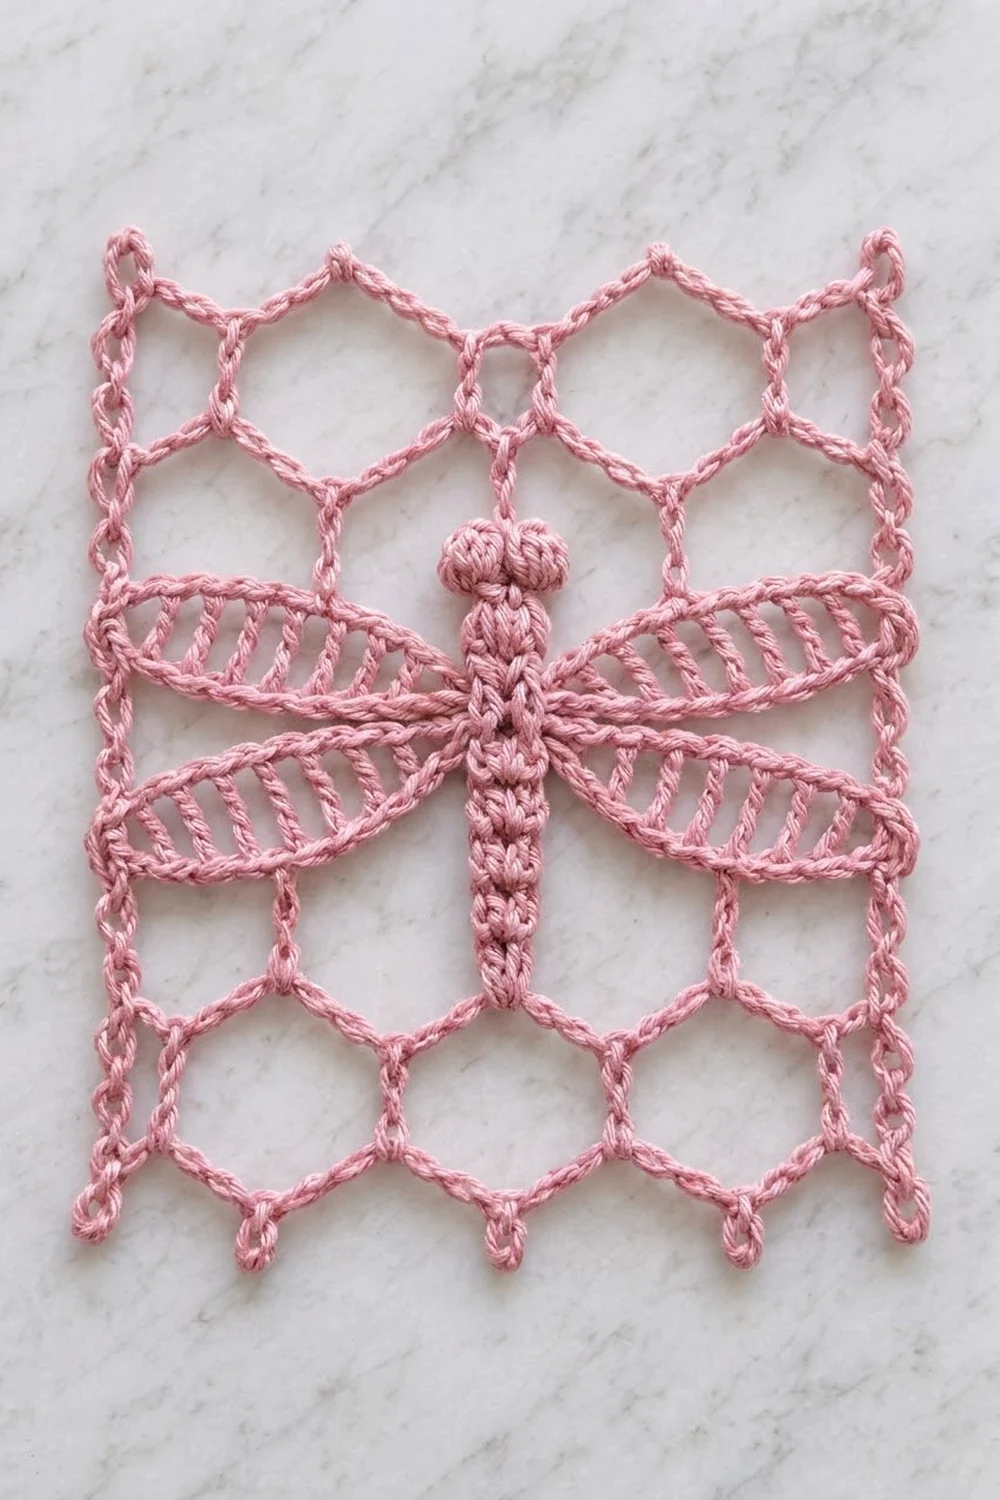
Honeycomb Mesh
Foundation: Ch 27.
Row 1 (RS): Sc in 2nd ch from hook, ch 4, sk 4 ch, sc in next ch; repeat from * 4 more times. Turn. (6 sc, 5 ch-4 sps)
The 6 chains holding these sc are the anchor chains. Mark the first and last anchor chain for the border.
Row 2 (WS): Ch 5 (counts as dc and ch 2 throughout). Node in first ch-4 sp, ch 4, node in next ch-4 sp; repeat from * 3 more times. Ch 2, dc in last sc. Turn. (5 nodes, 4 ch-4 sps, 2 edge ch-2 sps, 2 edge dc)
Row 3: Ch 1, sc in first dc, ch 4, node in next ch-4 sp; repeat from * 3 more times. Ch 4, sc in 3rd ch of turning ch-5. Turn. (2 edge sc, 4 nodes, 5 ch-4 sps)
In Row 3, the first ch-4 passes over the edge ch-2 sp and the first node. The last ch-4 passes over the last node and the other edge ch-2 sp. This offset is what turns the loops into hexagons.
Rows 4–12: Repeat Rows 2 and 3 alternately. Rows 4, 6, 8, 10, and 12 follow Row 2, and Rows 5, 7, 9, and 11 follow Row 3. (Row 12: 5 nodes, 4 ch-4 sps, 2 edge ch-2 sps, 2 edge dc)
The 5 nodes in Row 12 form the small points along the top edge.
Fasten off and weave in the ends. Pin the mesh to 7 in x 9 in (17.8 cm x 22.9 cm), mist it, and let it dry before adding the dragonfly.
Dragonfly Body
Foundation: Ch 14.
Rnd 1: Sc in 2nd ch from hook and in each of the next 11 ch, then 3 sc in the last ch (this is the head end). Working along the opposite side of the foundation, sc in each of the next 11 ch, then 2 sc in the last ch (the same ch as the first sc). Join with a sl st to the first sc. (28 sc: 12 + 3 + 11 + 2)
Eyes: Don’t fasten off. Sl st across to the first sc of the 3-sc head group. Work (ch 2, bobble, ch 2, sl st) in that sc. Sl st in the center sc. Work (ch 2, bobble, ch 2, sl st) in the third sc. Fasten off, leaving a 12 in (30.5 cm) tail. (2 bobble eyes)
Segments: Thread the tail onto the needle. Just below the eyes, wrap the tail tightly around the body twice and secure it with a small stitch through the center. Make 5 wraps in total, spaced 0.5 in (1.3 cm) apart and working toward the tail. They pull the body into 6 rounded, bead-like segments.
The finished body is 3.25 in (8.3 cm) long without the eyes, 3.5 in (8.9 cm) long with them, and about 0.5 in (1.3 cm) wide.
Wings (Make 4)
Foundation: Ch 14.
Rnd 1, side one: Sc in 2nd ch from hook, [ch 1, sk 1 ch, hdc in next ch], [ch 1, sk 1 ch, dc in next ch], [ch 1, sk 1 ch, tr in next ch], [ch 1, sk 1 ch, dc in next ch], [ch 1, sk 1 ch, hdc in next ch], ch 1, sk 1 ch, sc in last ch. (7 ribs, 6 ch-1 sps)
Rnd 1, side two: Ch 1 to make the first tip. Work along the opposite side of the foundation, using the same chains as side one. Sc in the last ch, ch 1, hdc, ch 1, dc, ch 1, tr, ch 1, dc, ch 1, hdc, ch 1, sc in the first ch used. Ch 1 to make the second tip, then join with a sl st to the first sc. (14 ribs, 14 ch-1 sps: 6 + 6 along the sides + 2 at the tips)
The foundation chain becomes the center vein. The ribs grow from sc up to tr and back down, which gives the wing its lens shape.
Rnd 2 (outline): Ch 1. Sc in each rib, 1 sc in each of the 12 side ch-1 sps, and 3 sc in each of the 2 tip ch-1 sps. Join with a sl st to the first sc. (32 sc: 14 + 12 + 6)
Fasten off, leaving a 12 in (30.5 cm) tail for sewing. Each wing is 3.25 in x 1.5 in (8.3 cm x 3.8 cm).
Attaching the Dragonfly
- Lay the blocked mesh RS up. Center the body so the top of the eyes sits 2 in (5.1 cm) below the top edge. The tail then sits 3.5 in (8.9 cm) above the bottom edge: 2 in + 3.5 in + 3.5 in = 9 in (22.9 cm).
- Pin the front wings out horizontally, one on each side, with their inner tips against the body. The wing centers sit 1 in (2.5 cm) below the top of the eyes.
- Pin the back wings directly below the front wings so the outlines touch. The wingspan is 3.25 in + 0.5 in + 3.25 in = 7 in (17.8 cm), so the outer tips meet the side edges of the mesh.
- Whipstitch each wing outline to the mesh wherever it crosses a chain bar or node. Stitch the inner tips firmly under the edge of the body.
- Tack down both long sides of the body every 0.5 in (1.3 cm).
- Weave in all ends behind the appliqué.
Border
Border gauge: 4 sc = 1 in (2.5 cm). Each corner is 3 sc worked in one stitch. The center sc of the three is the corner stitch, and it counts toward both sides it touches.
Rnd 1: With RS facing, join the yarn in the top of the edge dc at one top corner of Row 12, then ch 1.
- Corner: 3 sc in the same st.
- Top edge: 1 sc in the edge ch-2 sp, [2 sc in the ch-2 of the next node, 3 sc in the next ch-4 sp] 4 times, 2 sc in the ch-2 of the last node, 1 sc in the edge ch-2 sp. (24 sc between corners)
- Corner: 3 sc in the 3rd ch of the turning ch-5.
- Side: 2 sc along the post of the Row 12 edge st, then 3 sc evenly in each row end from Row 11 down to Row 2. (2 + 30 = 32 sc between corners)
- Corner: 3 sc in the first marked anchor chain.
- Bottom edge: Working in the free loops of the foundation, 1 sc in each of the 24 chains between the marked anchor chains. (24 sc between corners)
- Corner: 3 sc in the second marked anchor chain.
- Side: 3 sc evenly in each row end from Row 2 up to Row 11, then 2 sc along the post of the Row 12 edge st. (32 sc between corners)
- Join with a sl st to the first sc.
Rnd 1 counts per side (including both corner stitches):
– Top: 1 + 1 + 24 + 1 + 1 = 28 sc
– Each side: 1 + 1 + 32 + 1 + 1 = 36 sc
– Bottom: 1 + 1 + 24 + 1 + 1 = 28 sc
– Round total: 28 + 36 + 28 + 36 − 4 shared corner stitches = 124 sc
Why the math works: At 4 sc per inch, 28 sc = 7 in (17.8 cm), which matches the mesh width. 36 sc = 9 in (22.9 cm), which matches the mesh height. Because the counts match the edges, the border lies flat without ruffling or pulling in.
Rnd 2: Ch 1, then sl st in each sc around. Along the bottom edge only, number the sc from 1 to 28. After the sl st in sc 1, 7, 12, 17, 22, and 28, work a picot. These six stitches are the two corner stitches plus the 4 sc worked into the interior anchor chains. Join with a sl st to the first sl st and fasten off. (124 sl st + 6 picots)
Each picot hangs directly below a hexagon point.
Final Blocking
- Weave all remaining ends along chain bars.
- Pin the panel RS up to 7.5 in x 9.5 in (19.1 cm x 24.1 cm), measured at the sc border. The picots add 0.5 in (1.3 cm), for a total height of 10 in (25.4 cm).
- Lift each top-edge node slightly to sharpen the peaks.
- Put a pin inside each hexagon and press gently outward so all six sides sit straight.
- Pin each picot into a round loop.
- Shape each wing into a smooth lens, with the ribs fanning evenly from the vein.
- Mist until damp and leave it to dry for at least 8 hours before unpinning.
Final Quality-Control Checklist
- Even-numbered rows have 5 nodes and odd-numbered mesh rows have 4.
- All hexagons are open and evenly offset.
- The body has 6 even segments and 2 matching eyes.
- All 4 wings measure 3.25 in x 1.5 in (8.3 cm x 3.8 cm), with 14 ribs each.
- The wing tips meet the side edges, and the front and back wings touch.
- Border Rnd 1 has 124 sc: 28 along the top and bottom and 36 along each side.
- There are 6 picots along the bottom edge.
- The blocked panel measures 7.5 in x 10 in (19.1 cm x 25.4 cm).
- No ends show on the RS.
Troubleshooting
Hexagons look like diamonds: The node ch-2 is too tight. Loosen it, or block the vertical bars taller.
Mesh is narrower than 7 in (17.8 cm): Your chains are tight. Go up one hook size.
Sides ripple: Count again. There should be exactly 32 sc between the corners on each side.
Wings cup: The outline is too tight. Rework Rnd 2 more loosely.
Picots don’t line up with the hexagon points: Recount the bottom stitches. The picots go on sc 1, 7, 12, 17, 22, and 28.
Care
Hand wash in cool water with a mild soap and roll in a towel to remove the water. Dry flat, pinned to shape. Don’t wring or tumble dry.
Final Notes
Each measurement leads to the next. Five 1.4 in (3.6 cm) repeats make the 7 in (17.8 cm) width, and twelve 0.75 in (1.9 cm) rows make the 9 in (22.9 cm) height. Border Rnd 1 matches those edges with 28 and 36 sc, bringing the panel to 7.5 in x 9.5 in (19.1 cm x 24.1 cm). The picots add the final 0.5 in (1.3 cm), for a finished size of 7.5 in x 10 in (19.1 cm x 25.4 cm). The 7 in (17.8 cm) wingspan matches the mesh width exactly.
Happy crocheting!